Alongside my Meadow wildflower studies I am also studying and painting insect pollinators. Pollinating insects are crucial to the environment. Some meadow plants rely on only one type of insect for pollination and some insects need one type of plant to lay their eggs on. If these plants or insects die out, we not only lose the plant but the insect pollinators too!
This is the reason why I feel so strongly about this subject and have chosen to highlight it for my RHS project…..
Plantlife International’s ‘Save our Magnificent Meadows’ project:
“There were once natural wild flower meadows in every parish – today only 2% of the meadows that existed in the 1930’s remain. Nearly 7.5 million acres of wildflower meadow have been lost so far and they are still being destroyed……… The Save our Magnificent Meadows project will protect, conserve and restore wildflower meadows and other grasslands across the UK, and will focus on the Fermanagh grasslands of Northern Ireland, the pastures of west Wales, Scottish grasslands from Edinburgh to Aberdeenshire, the calaminarian and whin grasslands of Northumberland and traditional meadows and pastures in Southern England.”
Rosie Maple of Avon Wildlife Trust:
“The B-lines (Biodiversity lines) project’s main focus is connectivity of high quality pollinator habitat. Wildflower grasslands and meadows are one of the most biodiverse habitats you can find in the UK. We have lost over 97% of them in the UK since the 1950’s. It’s a pretty staggering figure. Part of the main problem of conserving pollinating insects is that many species are not highly mobile. Many species of bees, butterflies, flies and beetles expend huge amounts of energy on flight and need to have a very efficient foraging strategy in order to ingest enough nectar/pollen to maintain this. So in effect they need to ‘know’ that any journey they make will be rewarded by access to a food source. (I recently learned that a distance between 0.5 – 1km between habitat is about what is required for most insects to disperse). A landscape dominated by arable monocultures and human development does not give them this guarantee. So the aim of B-lines is to restore the bits in between, by connecting up our existing, high quality wildflower habitats, creating green corridors and stepping stones that allow the wildflower and associated invertebrate populations to move freely between areas.”
Studying the insects…
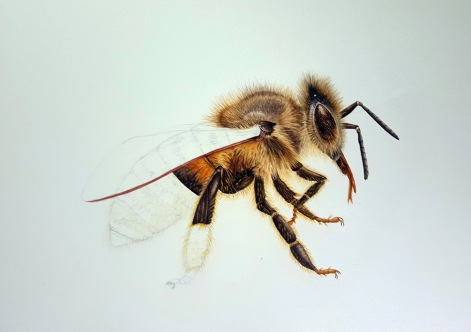
I began by going on a Honey Bee painting course with Cath Hodsman and learned a great deal about the insect, it’s behaviour and how a hive works. I also studied them under a microscope. My painting of a honey bee is unfinished as yet but here it is so far.
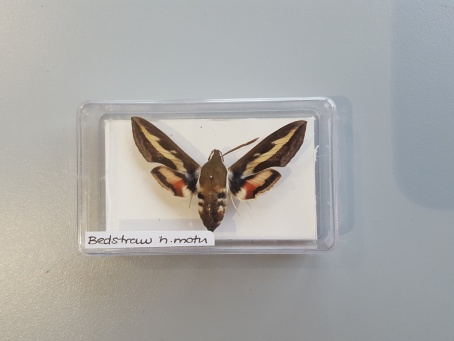
I then decided to go on Natures Details Butterfly course at the Kingcombe Centre, Dorset, run by Sarah Morrish. I chose to paint a Bedstraw Hawk Moth as it has rather beautiful colours that appeal to me. I have been asked by a couple of facebook followers to describe how I painted it. So, here goes!
I highly recommend the course to any interested in these beautiful insects. You will find details of Sarah’s courses on her website is : http://www.natures-details.com/index.html or on facebook at: https://www.facebook.com/NaturesDetailsArt/?fref=ts
Painting a Bedstraw Hawk Moth
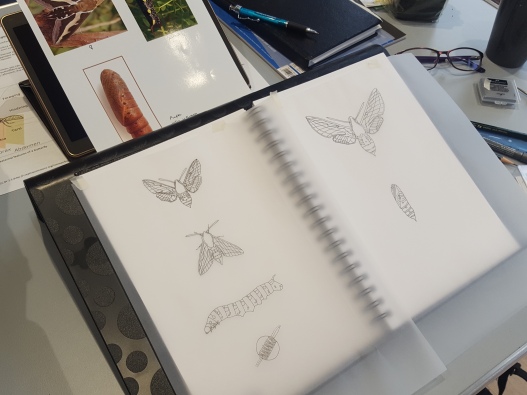
Firstly I drew up some illustrations in my sketchbook. To draw up the main moth on my composition, I drew up one half as accurately as I could with an H pencil. At this point I wanted to enlarge it slightly so I used proportional dividers to do this. My final drawing was x 1.5. I then traced this half and flipped it over to trace the other half of my moth. It’s not cheating! It just makes life easier and the drawing more accurately.


• Watch the curves, it may take a few attempts to get it just right!
• Take care to draw on details such as patterns, hairy parts, veins, eyes
• Check your drawing against the real sample regularly and adjust it as required
• Ensure both sides look as similar as you can get them, nature is not perfect but symmetry is very apparent in Moths and Butterflies
Using a microscope (x30) can help you to view moths/butterflies/bees more closely. When you look at them under a microscope it’s like another world! I saw the scales and hairs clearly and this helped me with my final paintings. I did the same on my honey bee painting above. It’s a great way to get all the information you need to make your painting more realistic. If you don’t have access to a microscope try using a very strong magnifying glass (x20)
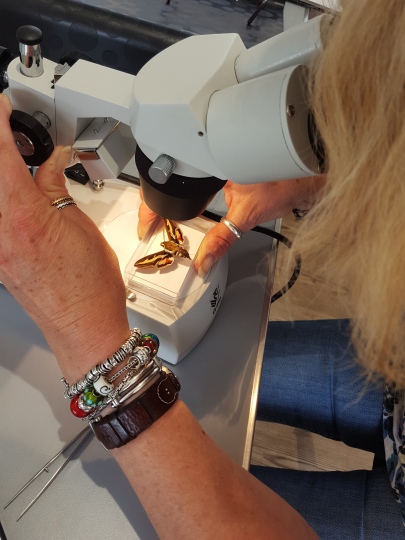
• Look all over the moth/butterfly, it’s very interesting and fascinating to see what the naked eye cannot see
• Look at the eyes and antenna, notice the way the eye is formed, the antenna can be patterned or they may have scales and hairs
I then looked at some books Sarah had left out for us and was particularly drawn to the Beatrix Potter wildlife one. She had painted small microscopic drawings of butterfly scales in her studies and this prompted me to do a series of illustrations showing the chrysalis, caterpillar, closed wing position, open (set) wing position and a microscope close up of the antenna. I took a look at the moths antenna under the microscope, it looked so interesting and completely different to what I had imagined. It reminded me of a hoover brush on one side and it was scaly on the other.
Using a light pad/box to save time with tracings
Once the drawings were completed and as perfect as I could get them, I began to trace them off carefully with tracing paper using an F pencil (it needs to be a little darker to see the image on the light pad through the watercolour paper). I then cut up the tracings and played with composition arrangements for a little while until deciding on a more scientific arrangement. The microscopic view of the antenna determined this in my mind as I felt a scientific arrangement suited it better. I then stuck the illustrations into position on the light pad with masking tape being careful to watch the size of the gaps between each one. As my illustrations were forming a line vertically I used a long ruler to mark my centre line first. The gaps need to look comfortable and almost the same in size. I then placed my watercolour paper (HP 140lb (not heavier than this) quality watercolour paper) over the tracings on the light pad. I taped the watercolour paper into position so it didn’t move around and began to draw it very carefully with a 2H pencil. It’s good to use a very light pencil as you don’t want it to spoil your painting. This is especially important if you are painting light coloured plants or insects.


Now I’m ready to start mixing my colours and start painting! I always mix up my colours and tones and do test strips, checking the colours as I go. After that I copy them into my sketchbook and make a note of how I mixed the shades. I try to mix enough paint to use for the whole painting where possible. As you paint you may discover other tones that you need and mix them, make sure you put a dab of those in your book too. If you run out then you have a good idea of what colours you used to make them in the first place.
• Mix your colours carefully, match them against your subject
• Always make a note of the colours you’ve used to mix them with
• Use professional quality water colour paints
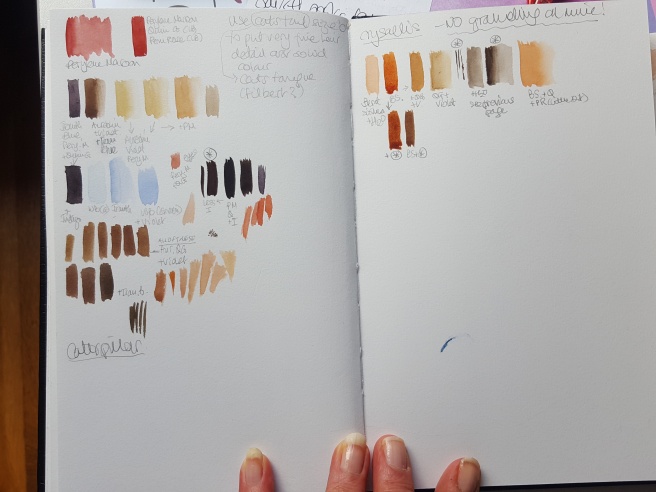
I used a mix of warm colours to make up the colours for the Bedstraw Hawk Moth. You will have heard of warm and cool hues I’m sure. You can mix everything from just 3 colours, a red, a blue and a yellow. The colours will vary between warm and cool hues. You can make colour charts too if needed to help you. Many Botanical Artists have blogs explaining how to do this. For some very good examples and help with colour see Dianne Sutherland Ball SBA blogspot at: http://diannesutherland.blogspot.co.uk/2015/06/about-watercolour-paint.html
• Try out different mixes of colours so you have a good idea of what mixes what
• These are the colours I used to create my Bedstraw Hawk Moth: French Ultramarine, Indigo, Indanthrene Blue,Alizarin Crimson, Perylene Maroon, Permanent Rose,Violet, Quinacridone Gold, Windsor Lemon Yellow, Aureolin, Burnt Sienna
So now I have all my colours mixed up and I’m ready to start painting. I chose to do the wings first. I painted one part on both sides as I went, don’t be tempted to finish one side first! A few things to remember whilst you’re painting:
• Look at the different textures, some may be dotty, some hairy, some smooth


• Use a fine brush to do the stippling of dotty areas; a cats tongue brush, a spotter brush or I use a No. ‘0’ renaissance sable rigger
• Use a medium sized brush to do the washes, I use a Billy Showell No. 2 brush (there are other types but you need one which will hold the water well and has a fine pointed tip)
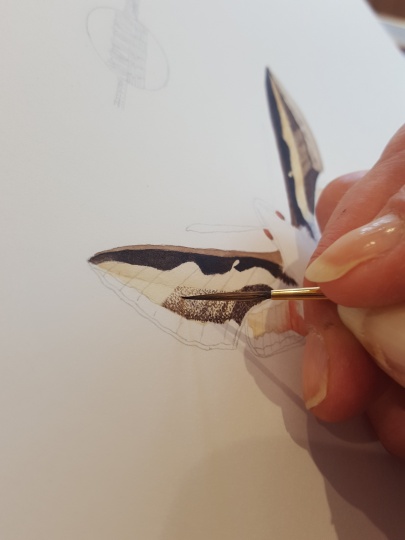
• Build your painting up in thin layers, never put thick colour on to begin with. The colour should increase in strength as you go, building it up layers. At times my brown didn’t look warm enough so I laid a very watered down layer of Quinacridone Gold on top of it to warm it up
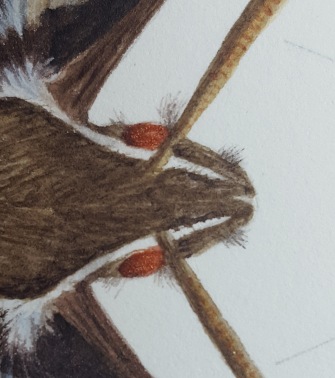
• Notice how the colours vary across the insect and try to imitate it, study it well before you start
I decided to look at the eyes more carefully towards the end of my painting and found that they were iridescent. The Bedstraw Hawk Moth has coppery iridescence in its eyes. You can use a little iridescent paint to bring this out. Daniel Smith have a number of these available. Butterflies often have an iridescence on their wings too. My moth antenna close up has iridescence in blues and greens as well as creamy golds!


• Look at the hairyness and where it features on your insect. I found some eyelashes!
Always take time to paint your Moth or Butterfly as there is so much detail within. The closer you get to the original, the more realistic your painting will look. If you need any further advice please don’t hesitate to contact me at Jackie Isard Botanicals on facebook.
Good luck and I hope this has been useful!
*All photos, content, text and videos are subject to copyright – Jackie Isard Botanicals 2017

Love this , I want to paint a moth now.
LikeLike
Thank you Sarah! I’m totally hooked on insects too right now 🙂
LikeLike
This is a wonderful blog post Jackie! I love, love, love your paintings – the detail is so incredible! 🙂 I will definitely be coming back to have a go at it as soon as time permits! Blessings, Constance
LikeLike
Thank you Constance! I really enjoyed writing it and painting the moth . Enjoy painting a moth if you do have time 🙂
LikeLike
Hi Jackie. Love your new blog and your work keeps getting better and better. Hope to see you on another of my workshops next year. I am planning something new with Freda…,maybe on dragonflies? Speak soon. Cheers, Cath xxx
LikeLike
Oh YES!!!! Dragonflies please 😊😊😊
LikeLike
Thank you so much for sharing this adventure!
LikeLike
Thank you for reading it! 😊😊
LikeLike
Wonderful post, Jackie. You’ve taken some of the mystery out of painting butterflies and moths. Thank you! 🙂
LikeLike
Thanks Linda 😊
LikeLike