Nature is painting for us, day after day, pictures of infinite beauty if only we have the eyes to see them” John Ruskin
This years journey has been full of adventure and some very hard botany learning. It became evident that it was essential for me to understand exactly what I am painting! As the weather perked up in April and was good to us during the summer months, my decision to go on a search for my chosen 6 plants in their natural habitats proved very successful. Their habitat is wet meadows, the selected subject of my RHS exhibition. I knew this was very important to ensure my drawings were as accurate as they could be to the wild plants of the field. My son also has a great interest in nature and accompanied me with his little dog, Toby, on my treks. Always great to have company!
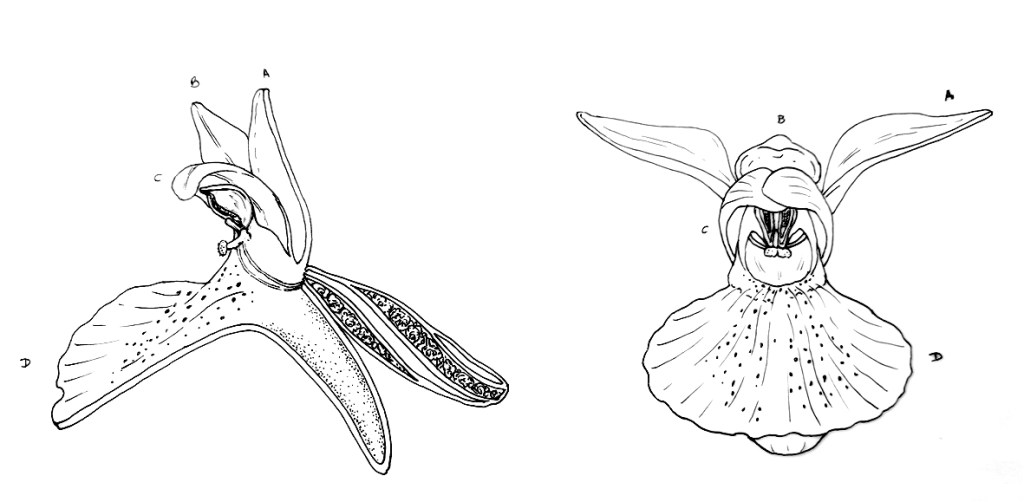
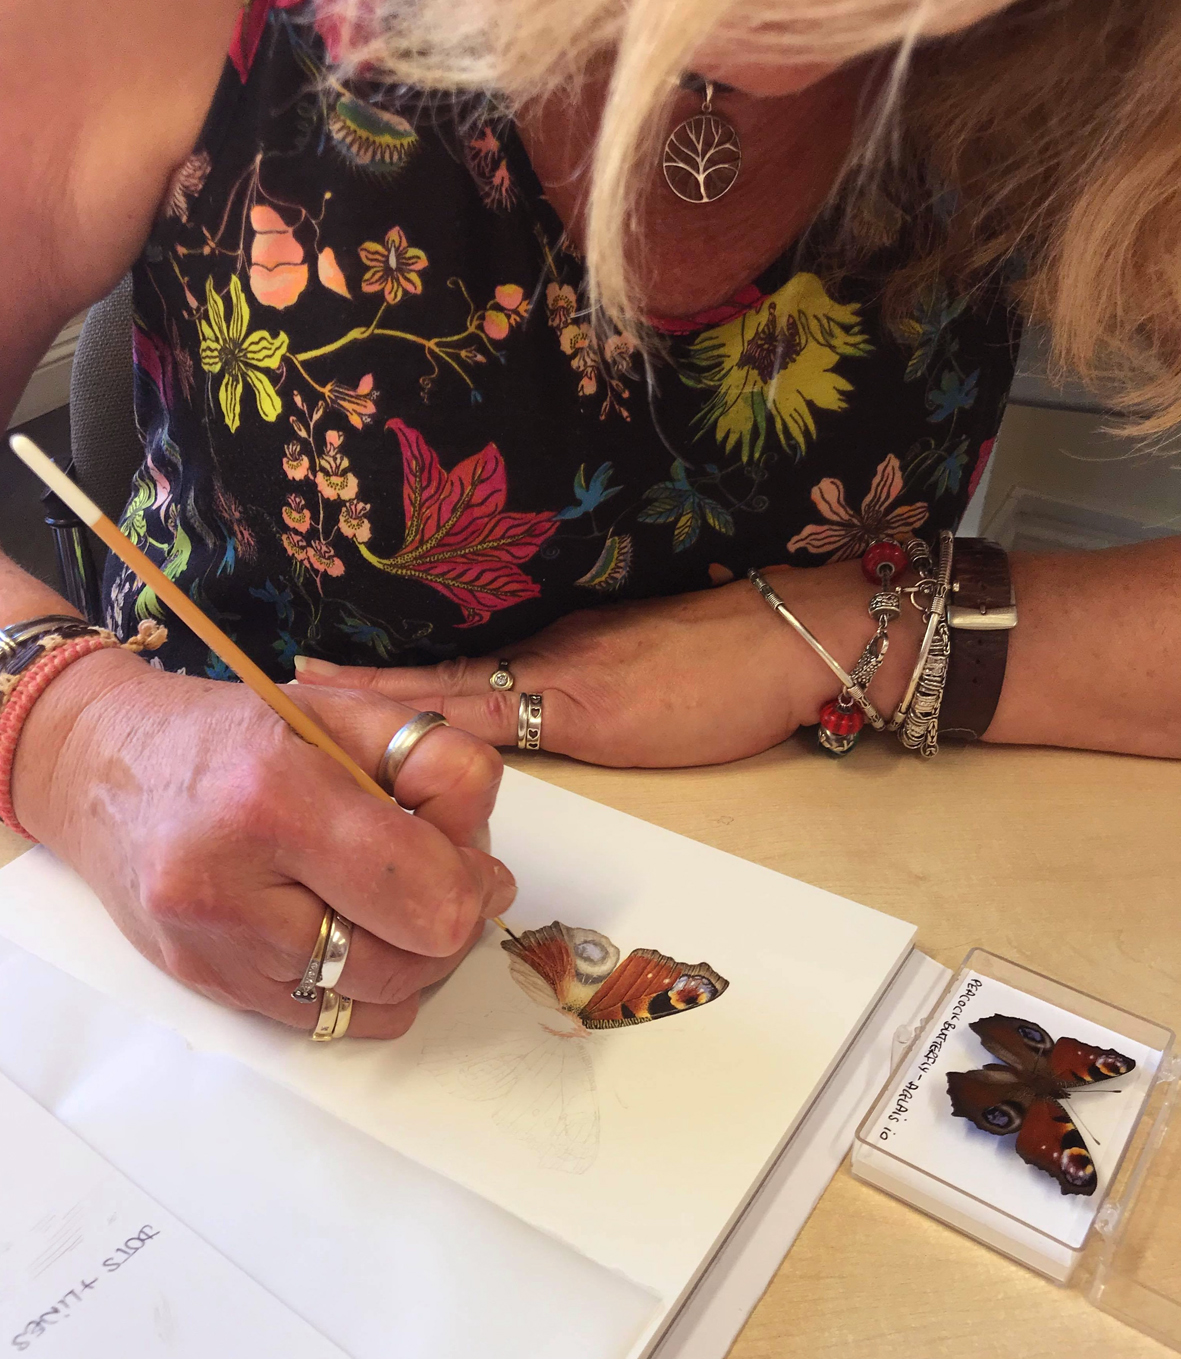
Having completed 4 plants in my Botany sketchbook, I asked a botanist to check my final drawings for me. Good job I did! Even though you think you’ve got it just right there can still be little details which need adjusting, especially with dissection drawings which I’d never attempted before. I’m so pleased I took this advice from a fellow botanical artist. I had very little knowledge of botany when I started this project and still struggle to remember all the botanical terms. My brain doesn’t have enough space left at my age! It’s been a massive learning curve.
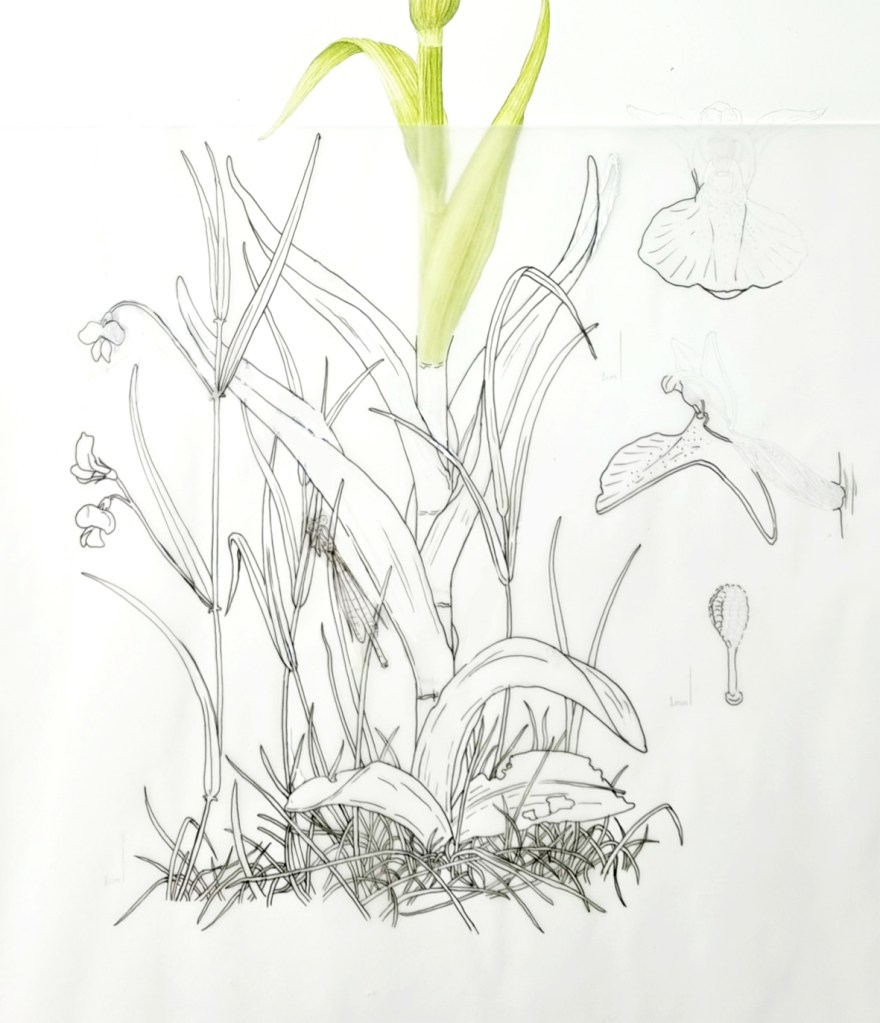
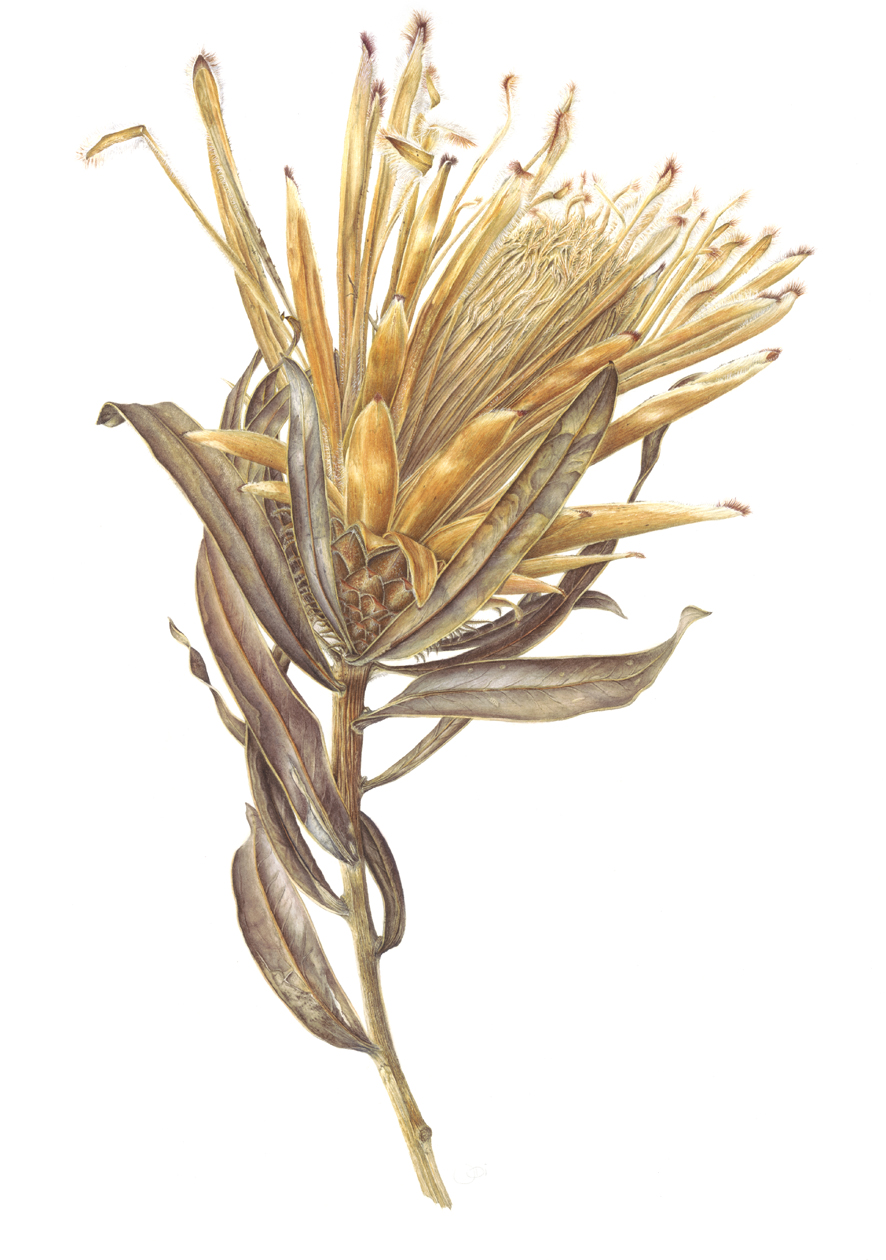
Below are my botany sketchbook pages for 4 of my chosen species. This helps me to learn about each plant before I start drawing. I measure them, study their habit, dissect them, study them under the microscope, press pieces of plant in a flower press, have a little practice run on mixing up colours and paint a few small sections of each one. The record is then referred to as I draw and paint the final compositions.

Botany Sketchbook – Water Avens

Botany Sketchbook – Devil’s bit scabious

Botany Sketchbook – Ragged Robin

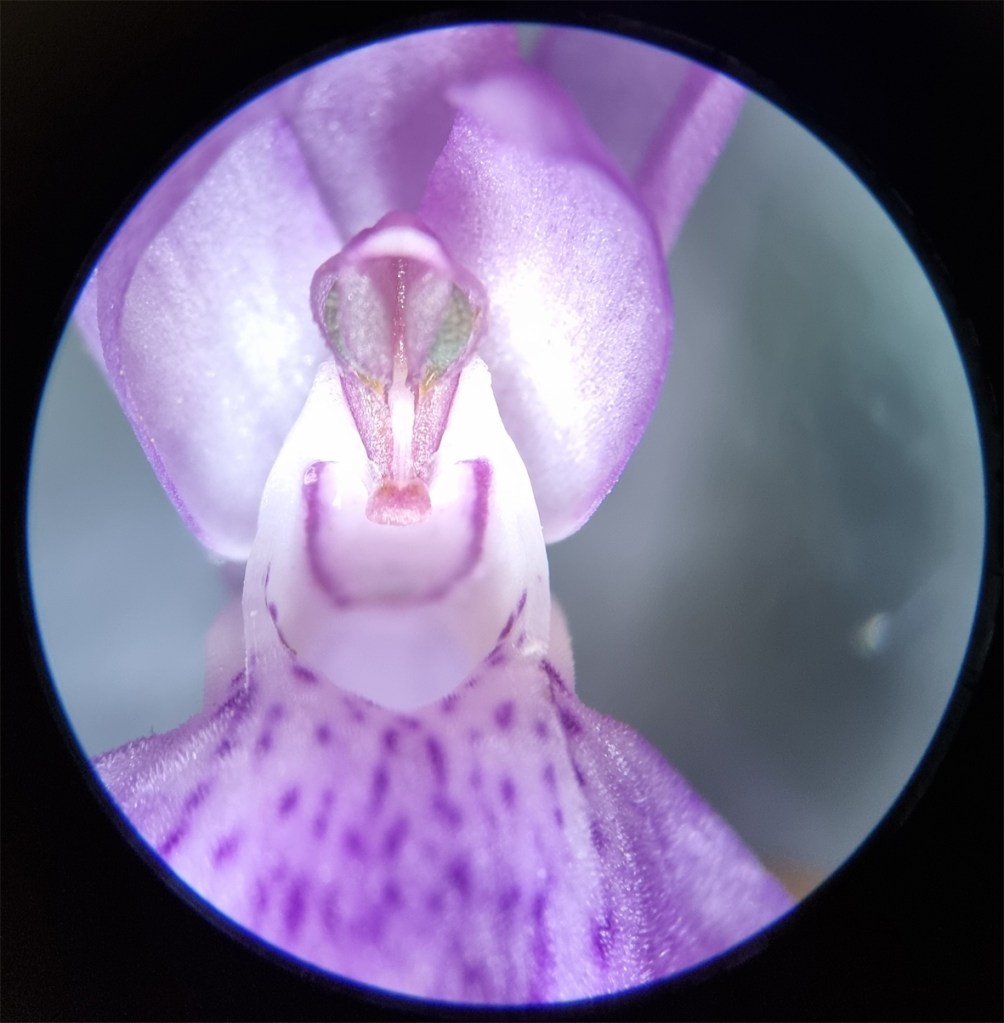
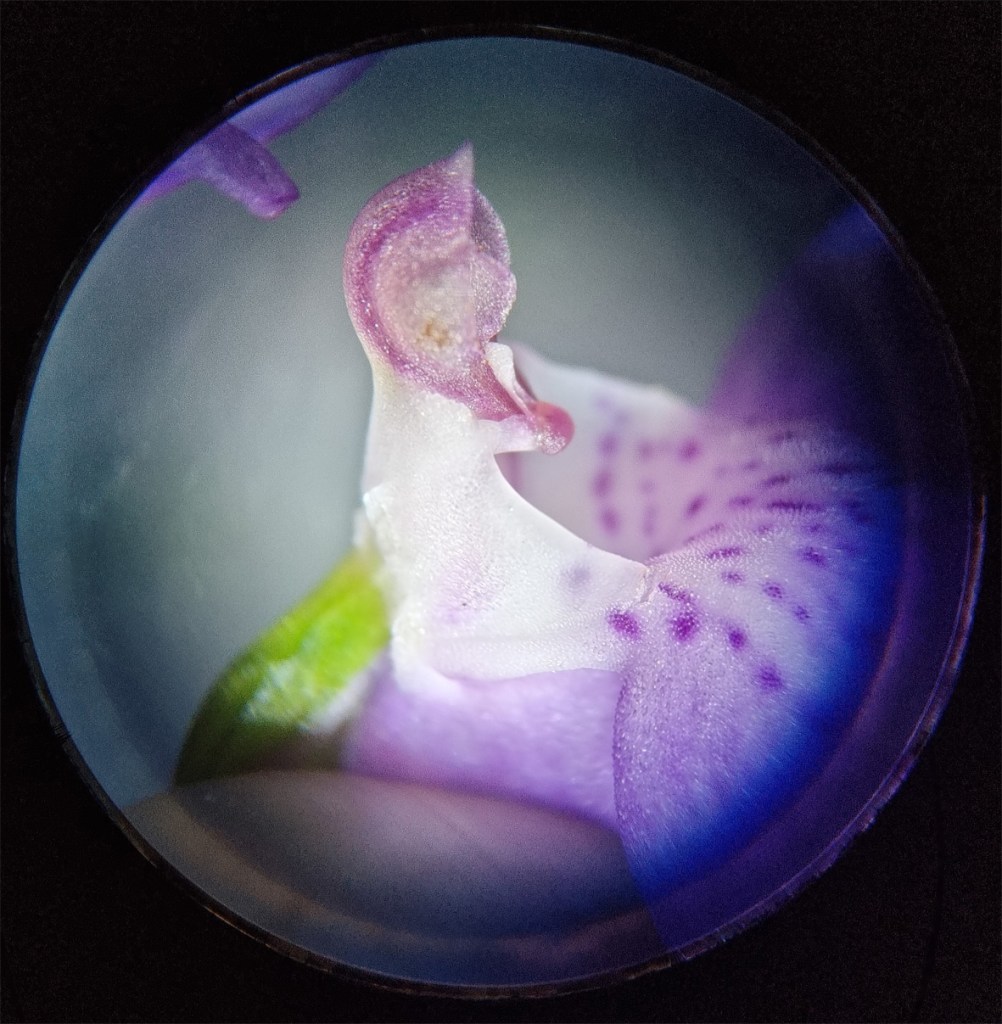
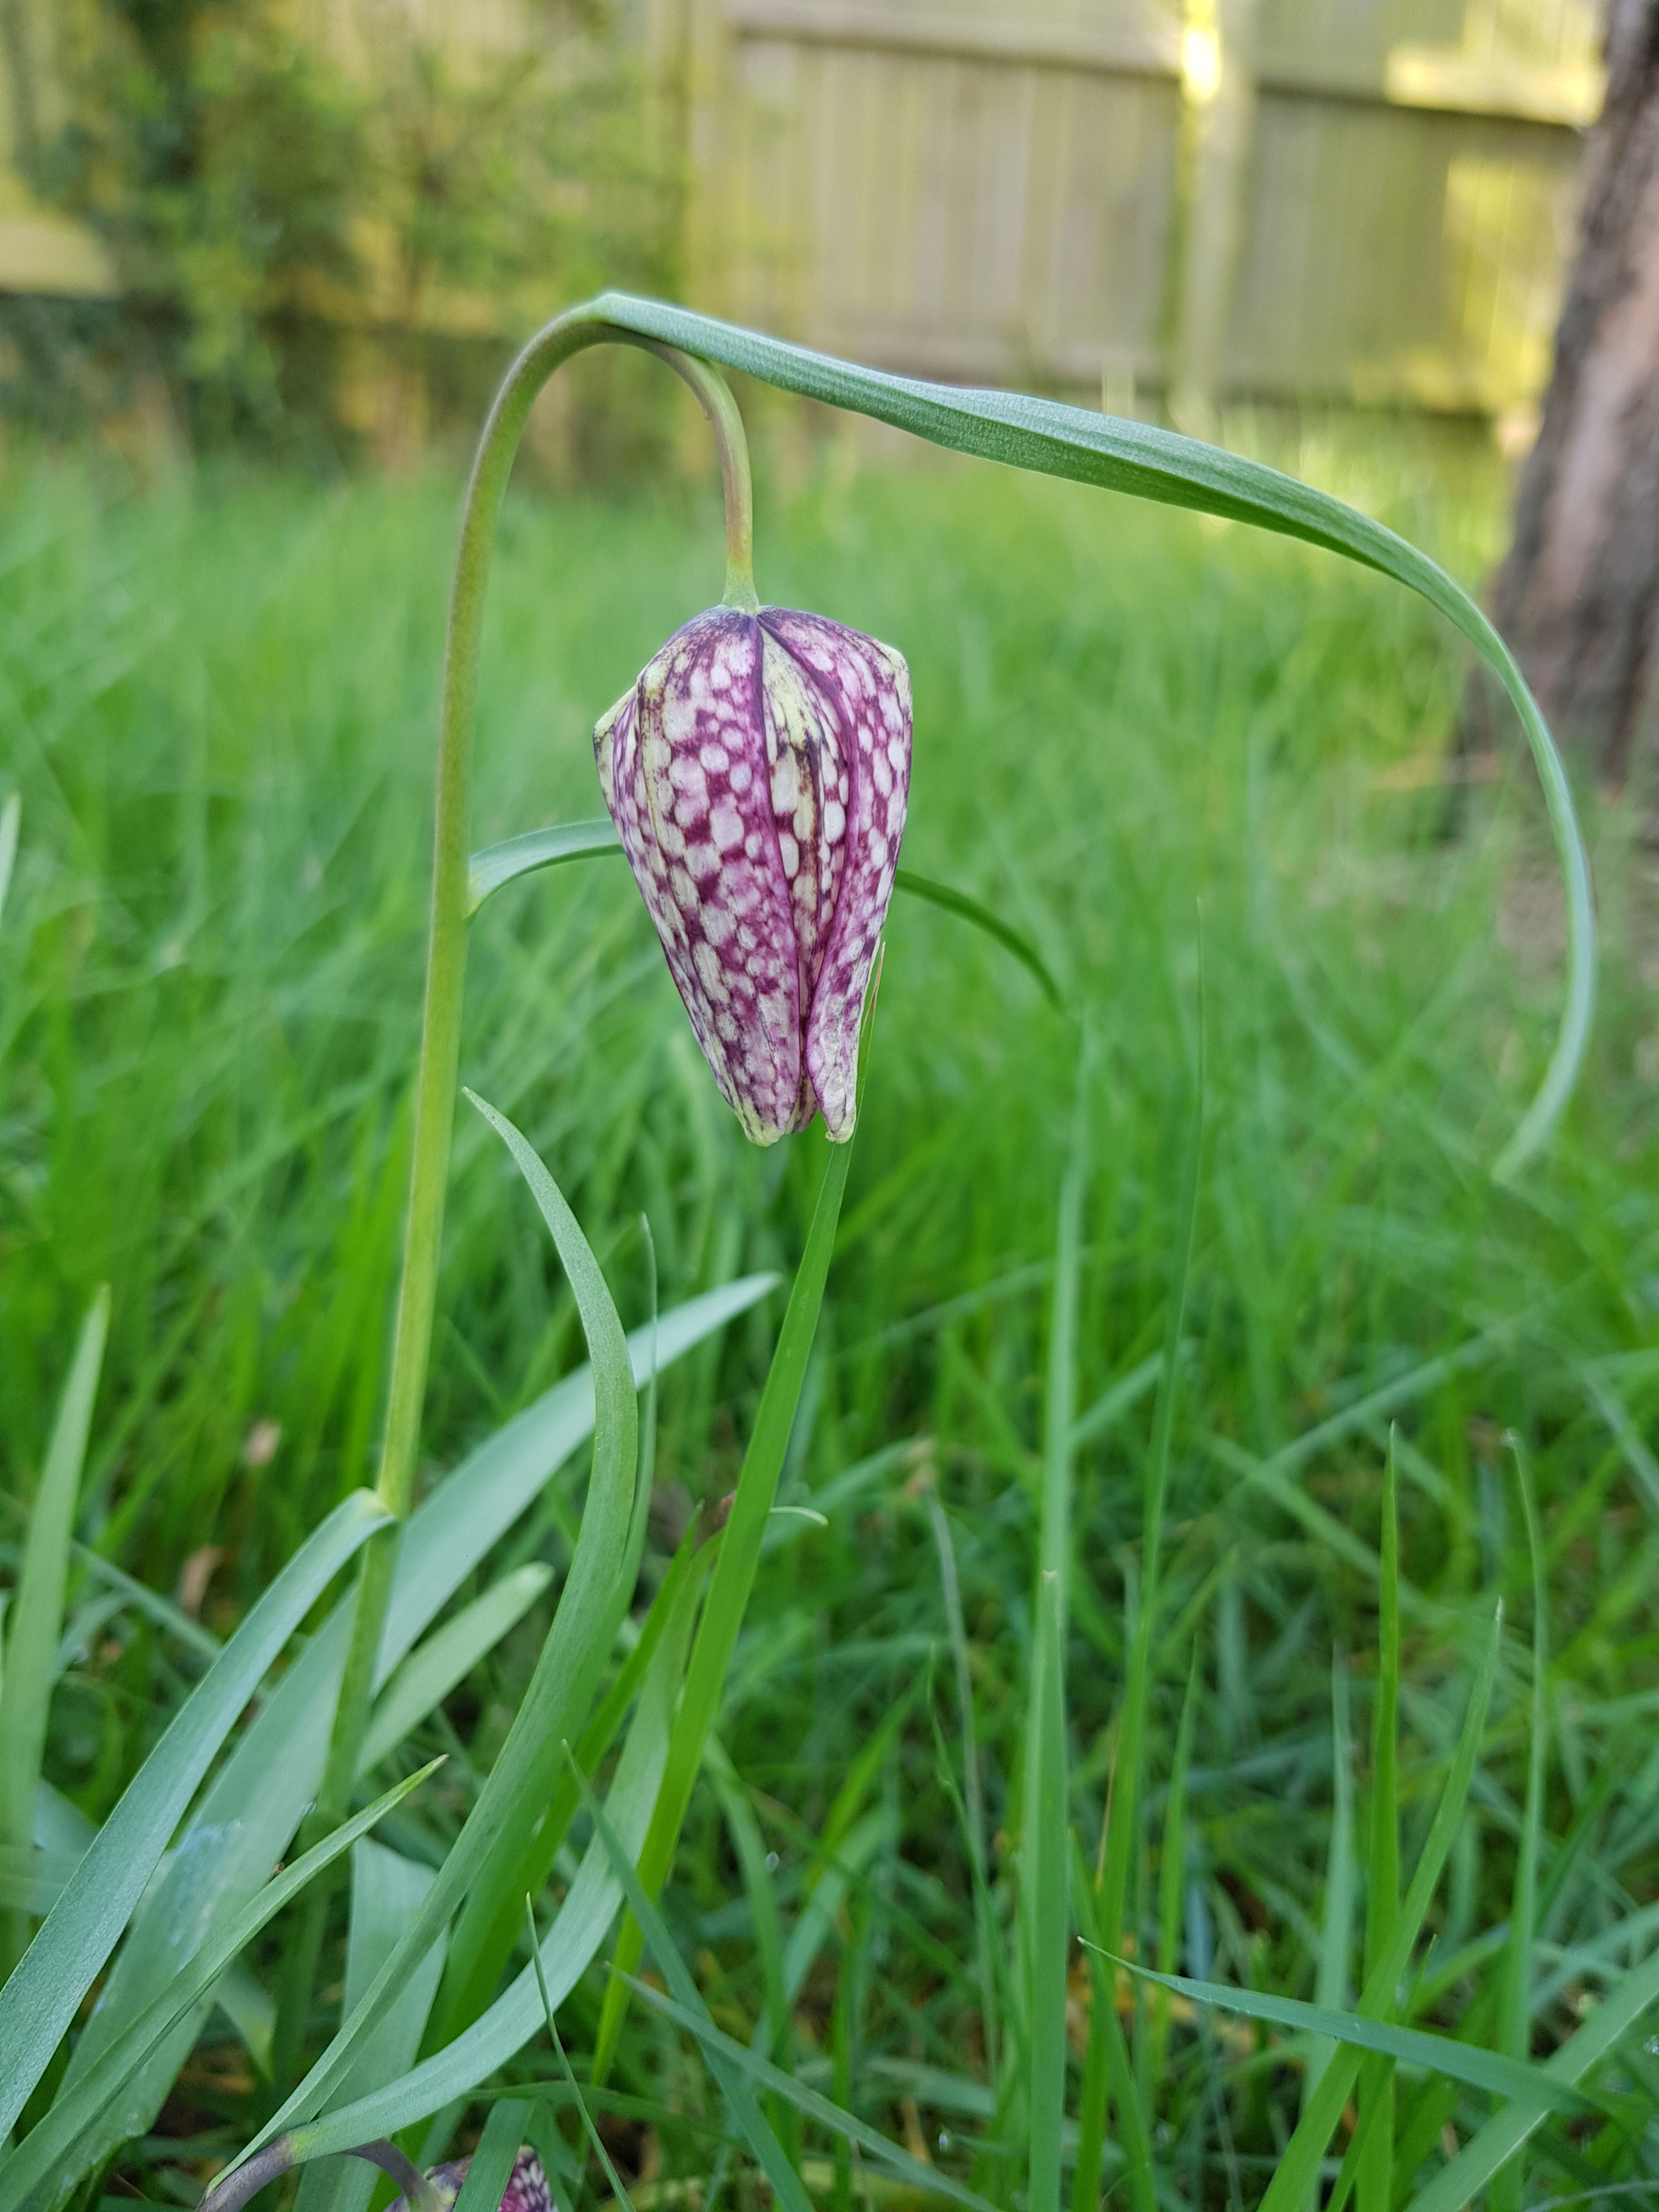
Botany Sketchbook – Cuckoo flower
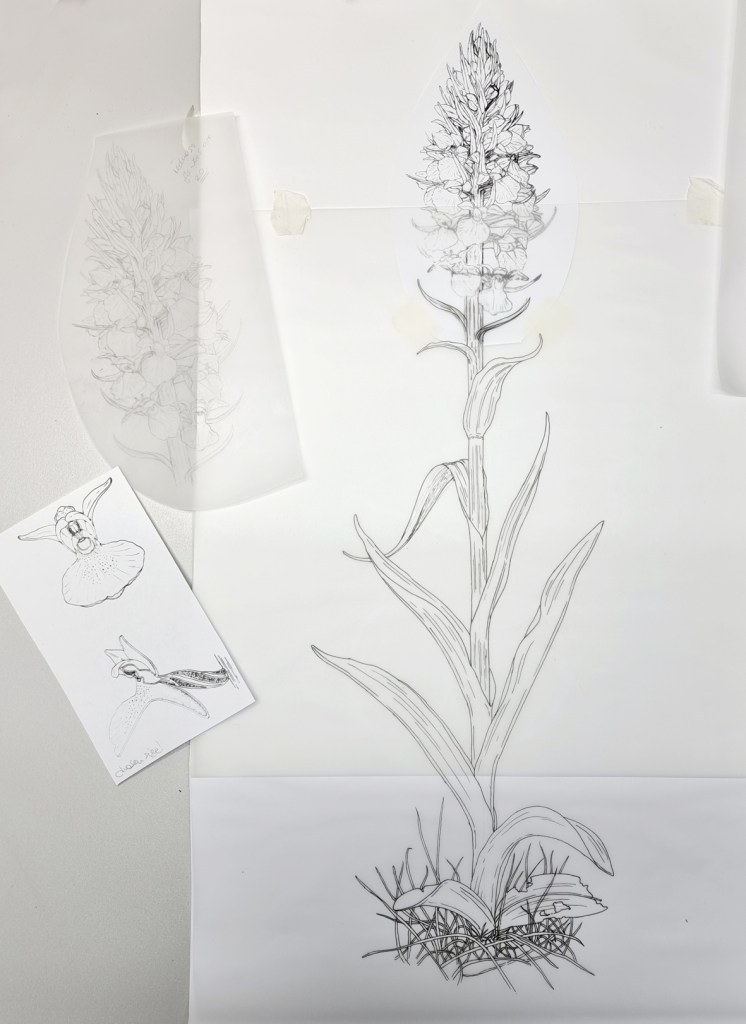
The drawings so far…
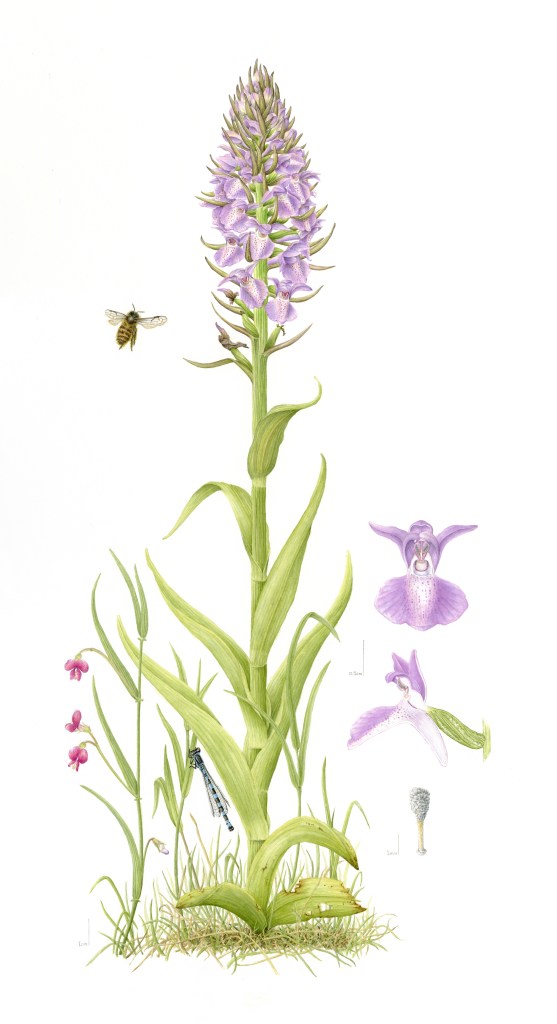
My drawings for Ragged Robin, Water Avens, Greater Bird’s foot trefoil and Cuckoo flower have now had a full botany check and are transferred to watercolour paper ready for painting. It took many, many months to get to this stage. Left to right below: Cardamine pratensis – Cuckooflower, Lotus pedunculatus – Greater Birds foot trefoil, Geum rivale – Water Avens and Silene (Lychnis) flos-cuculi – Ragged Robin. They are all life-size compositions.
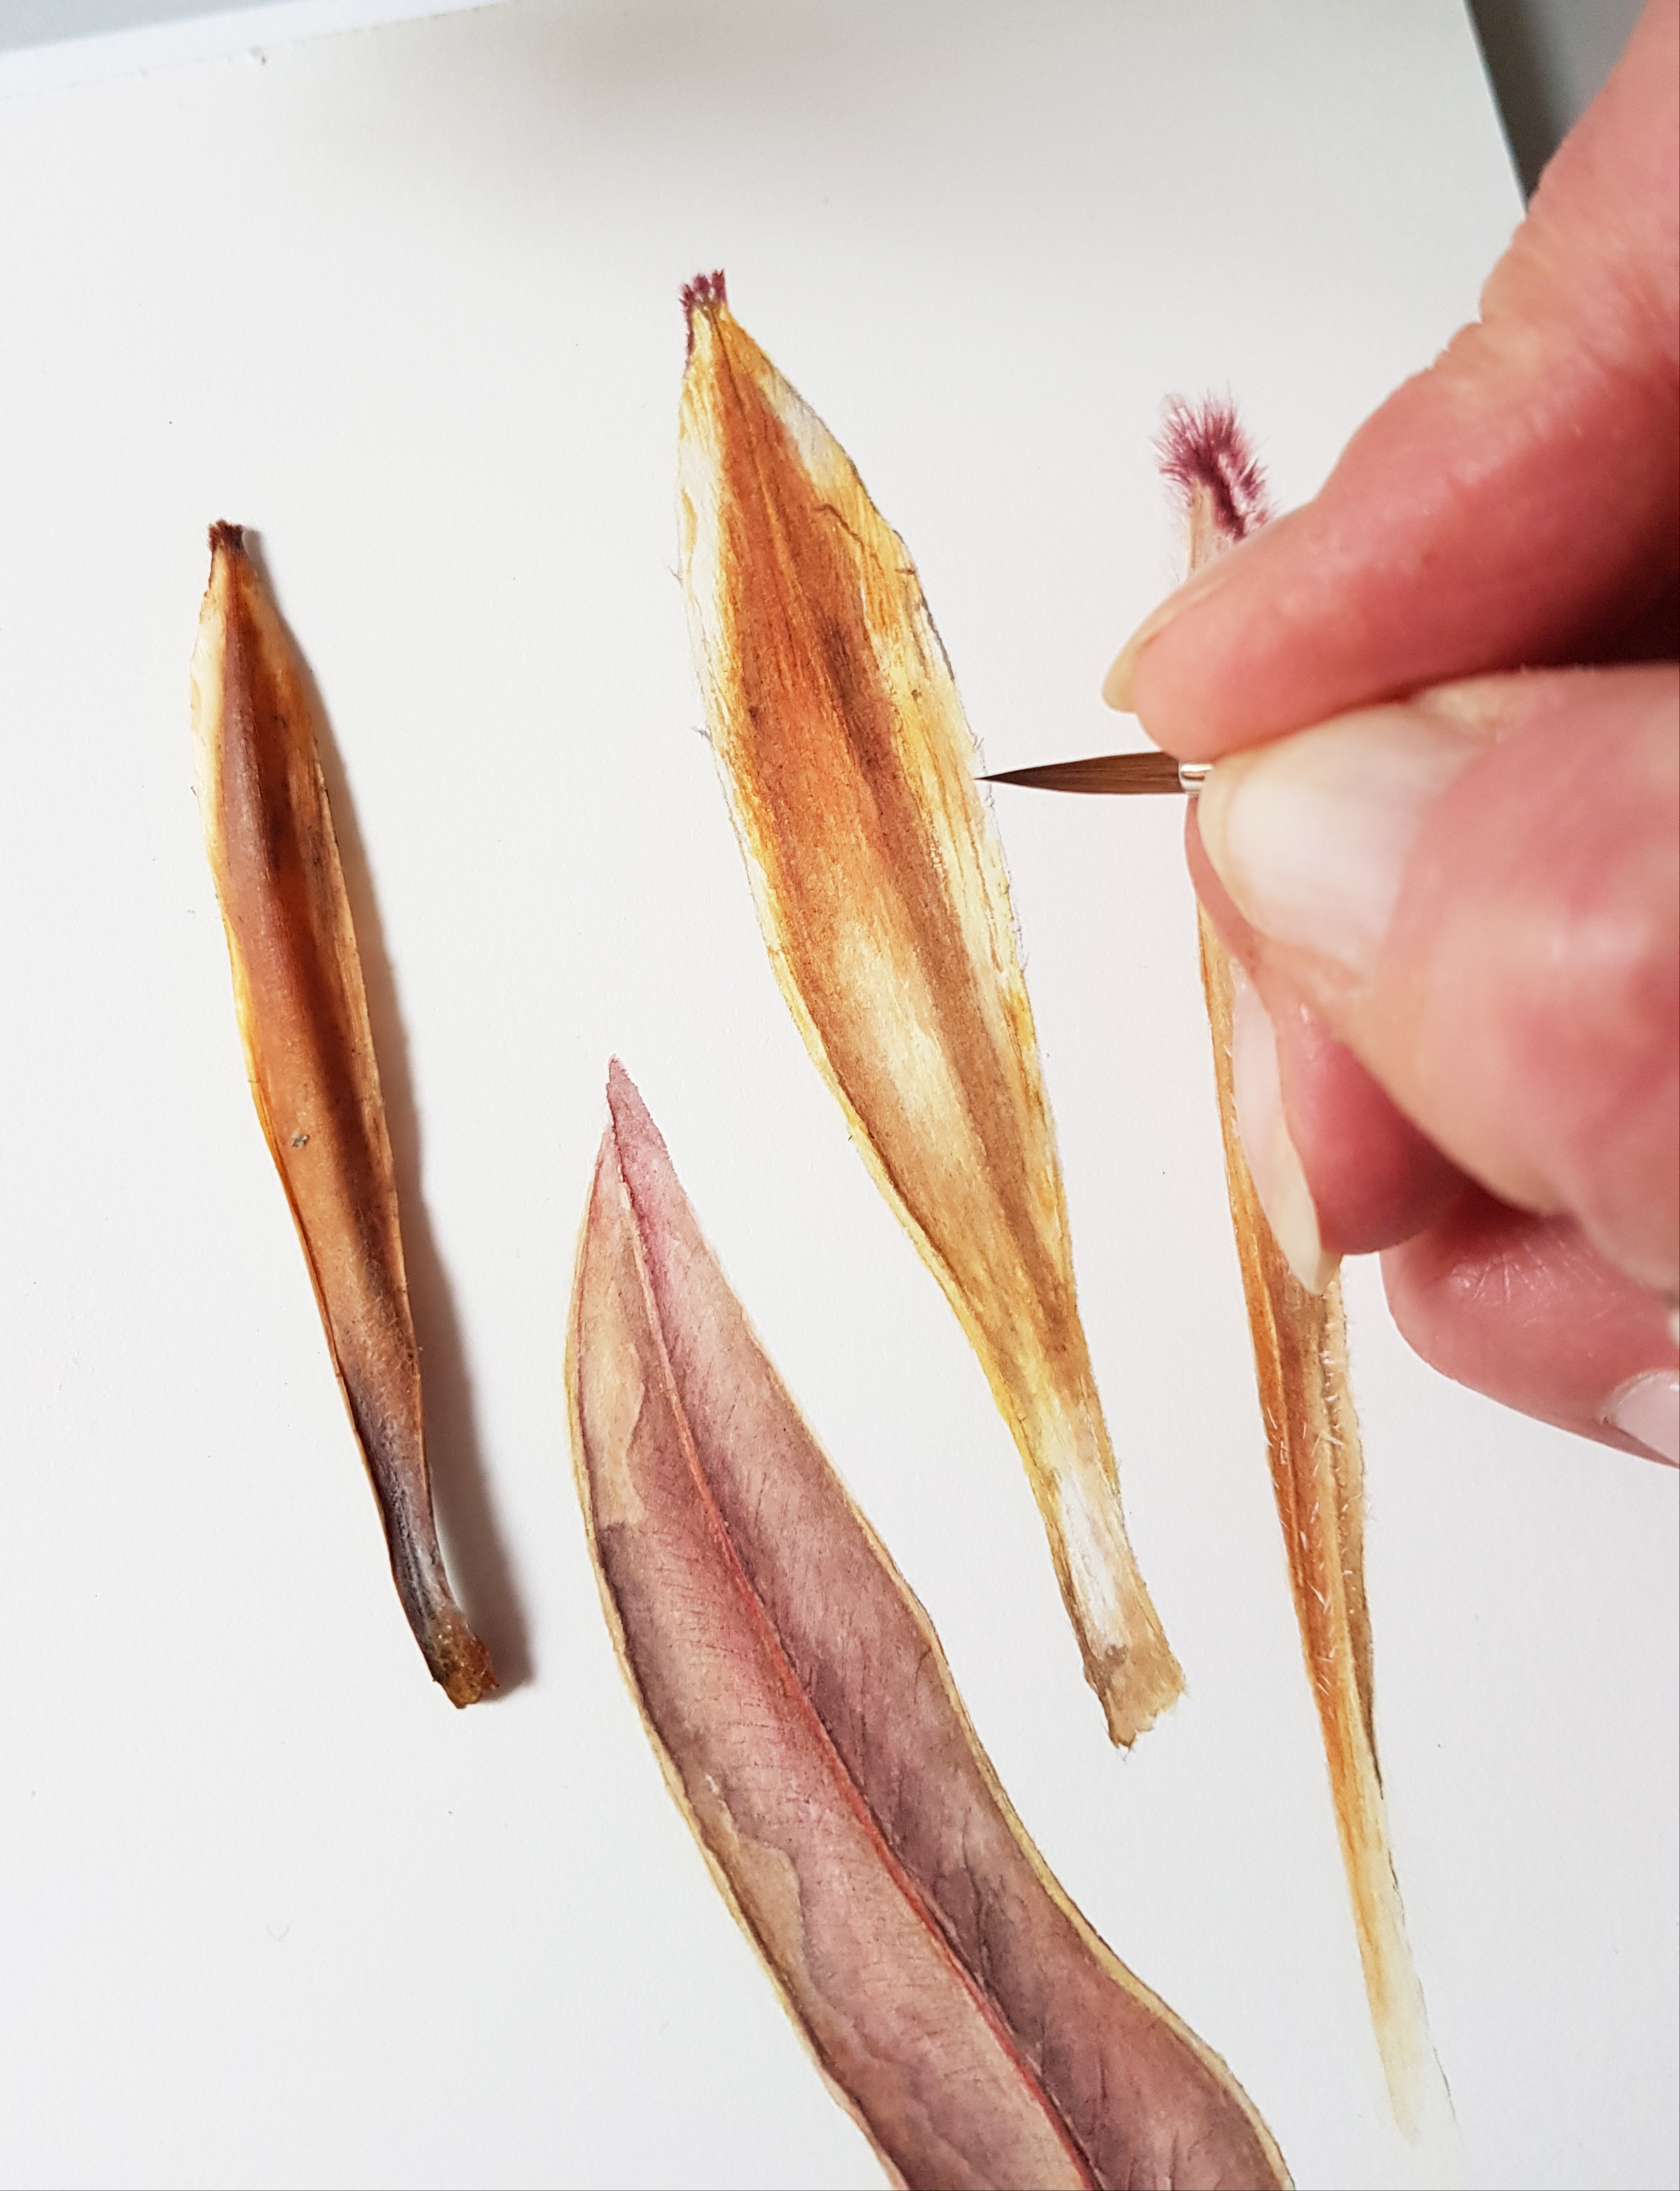
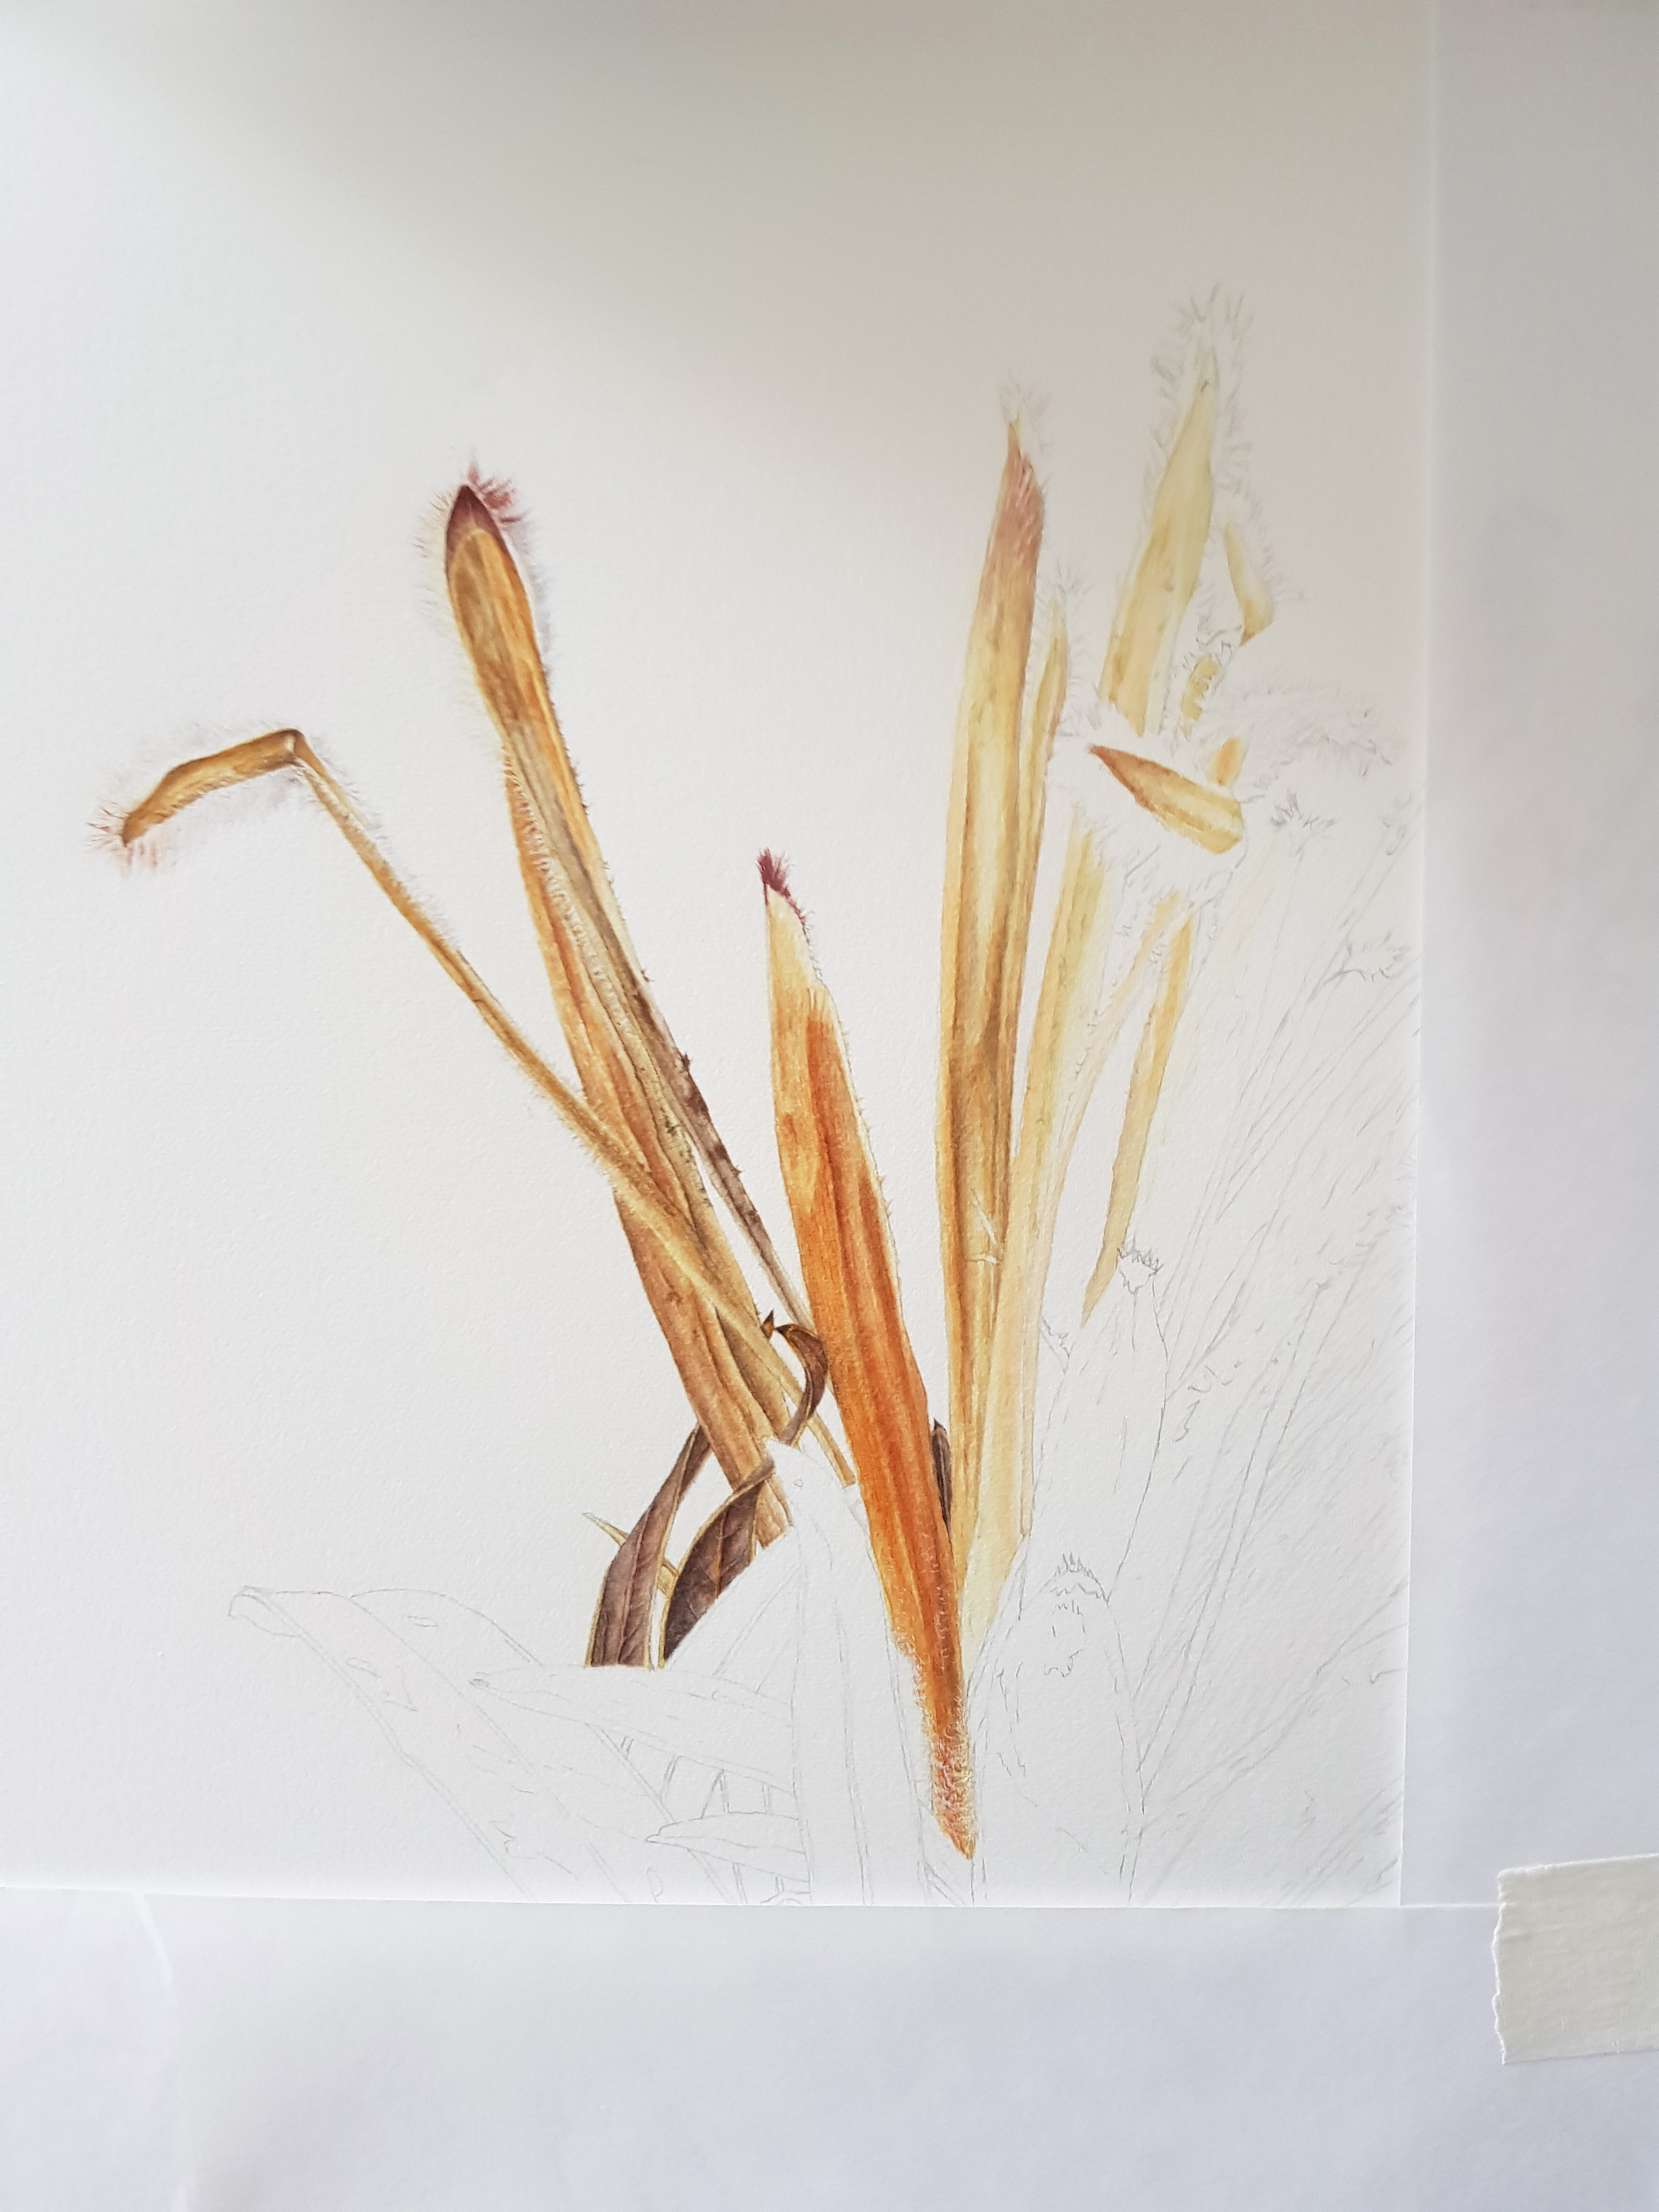
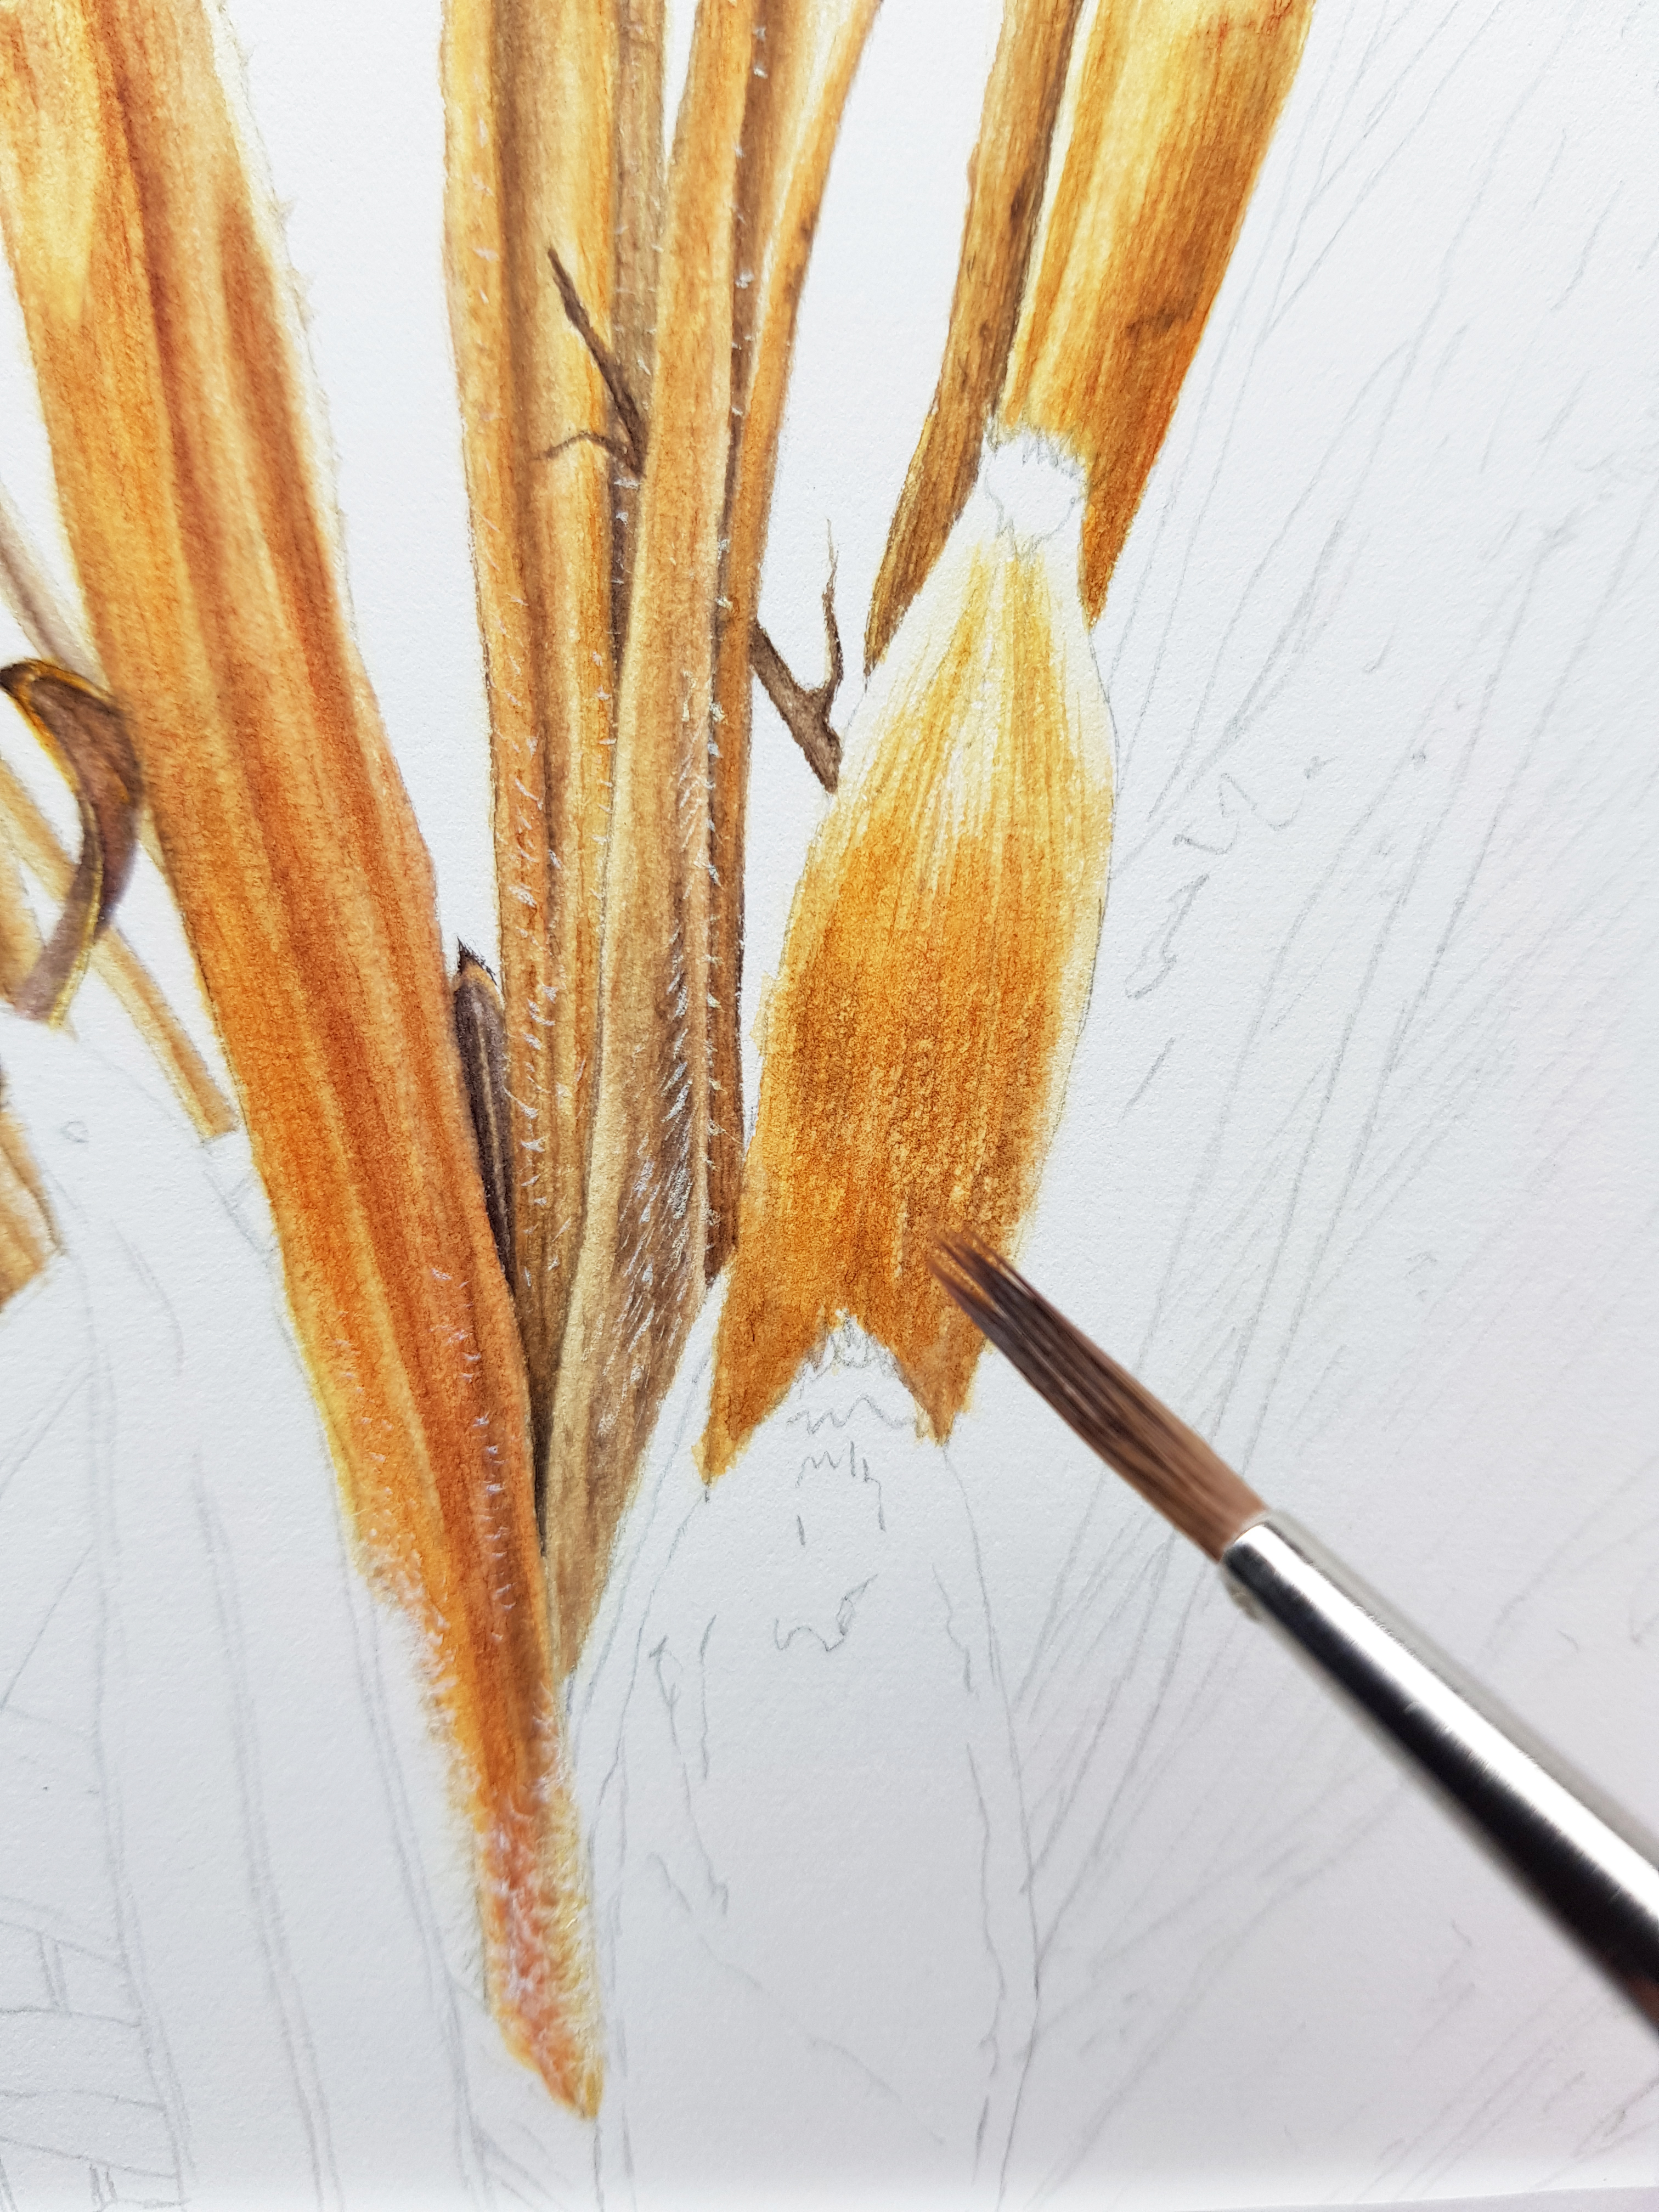
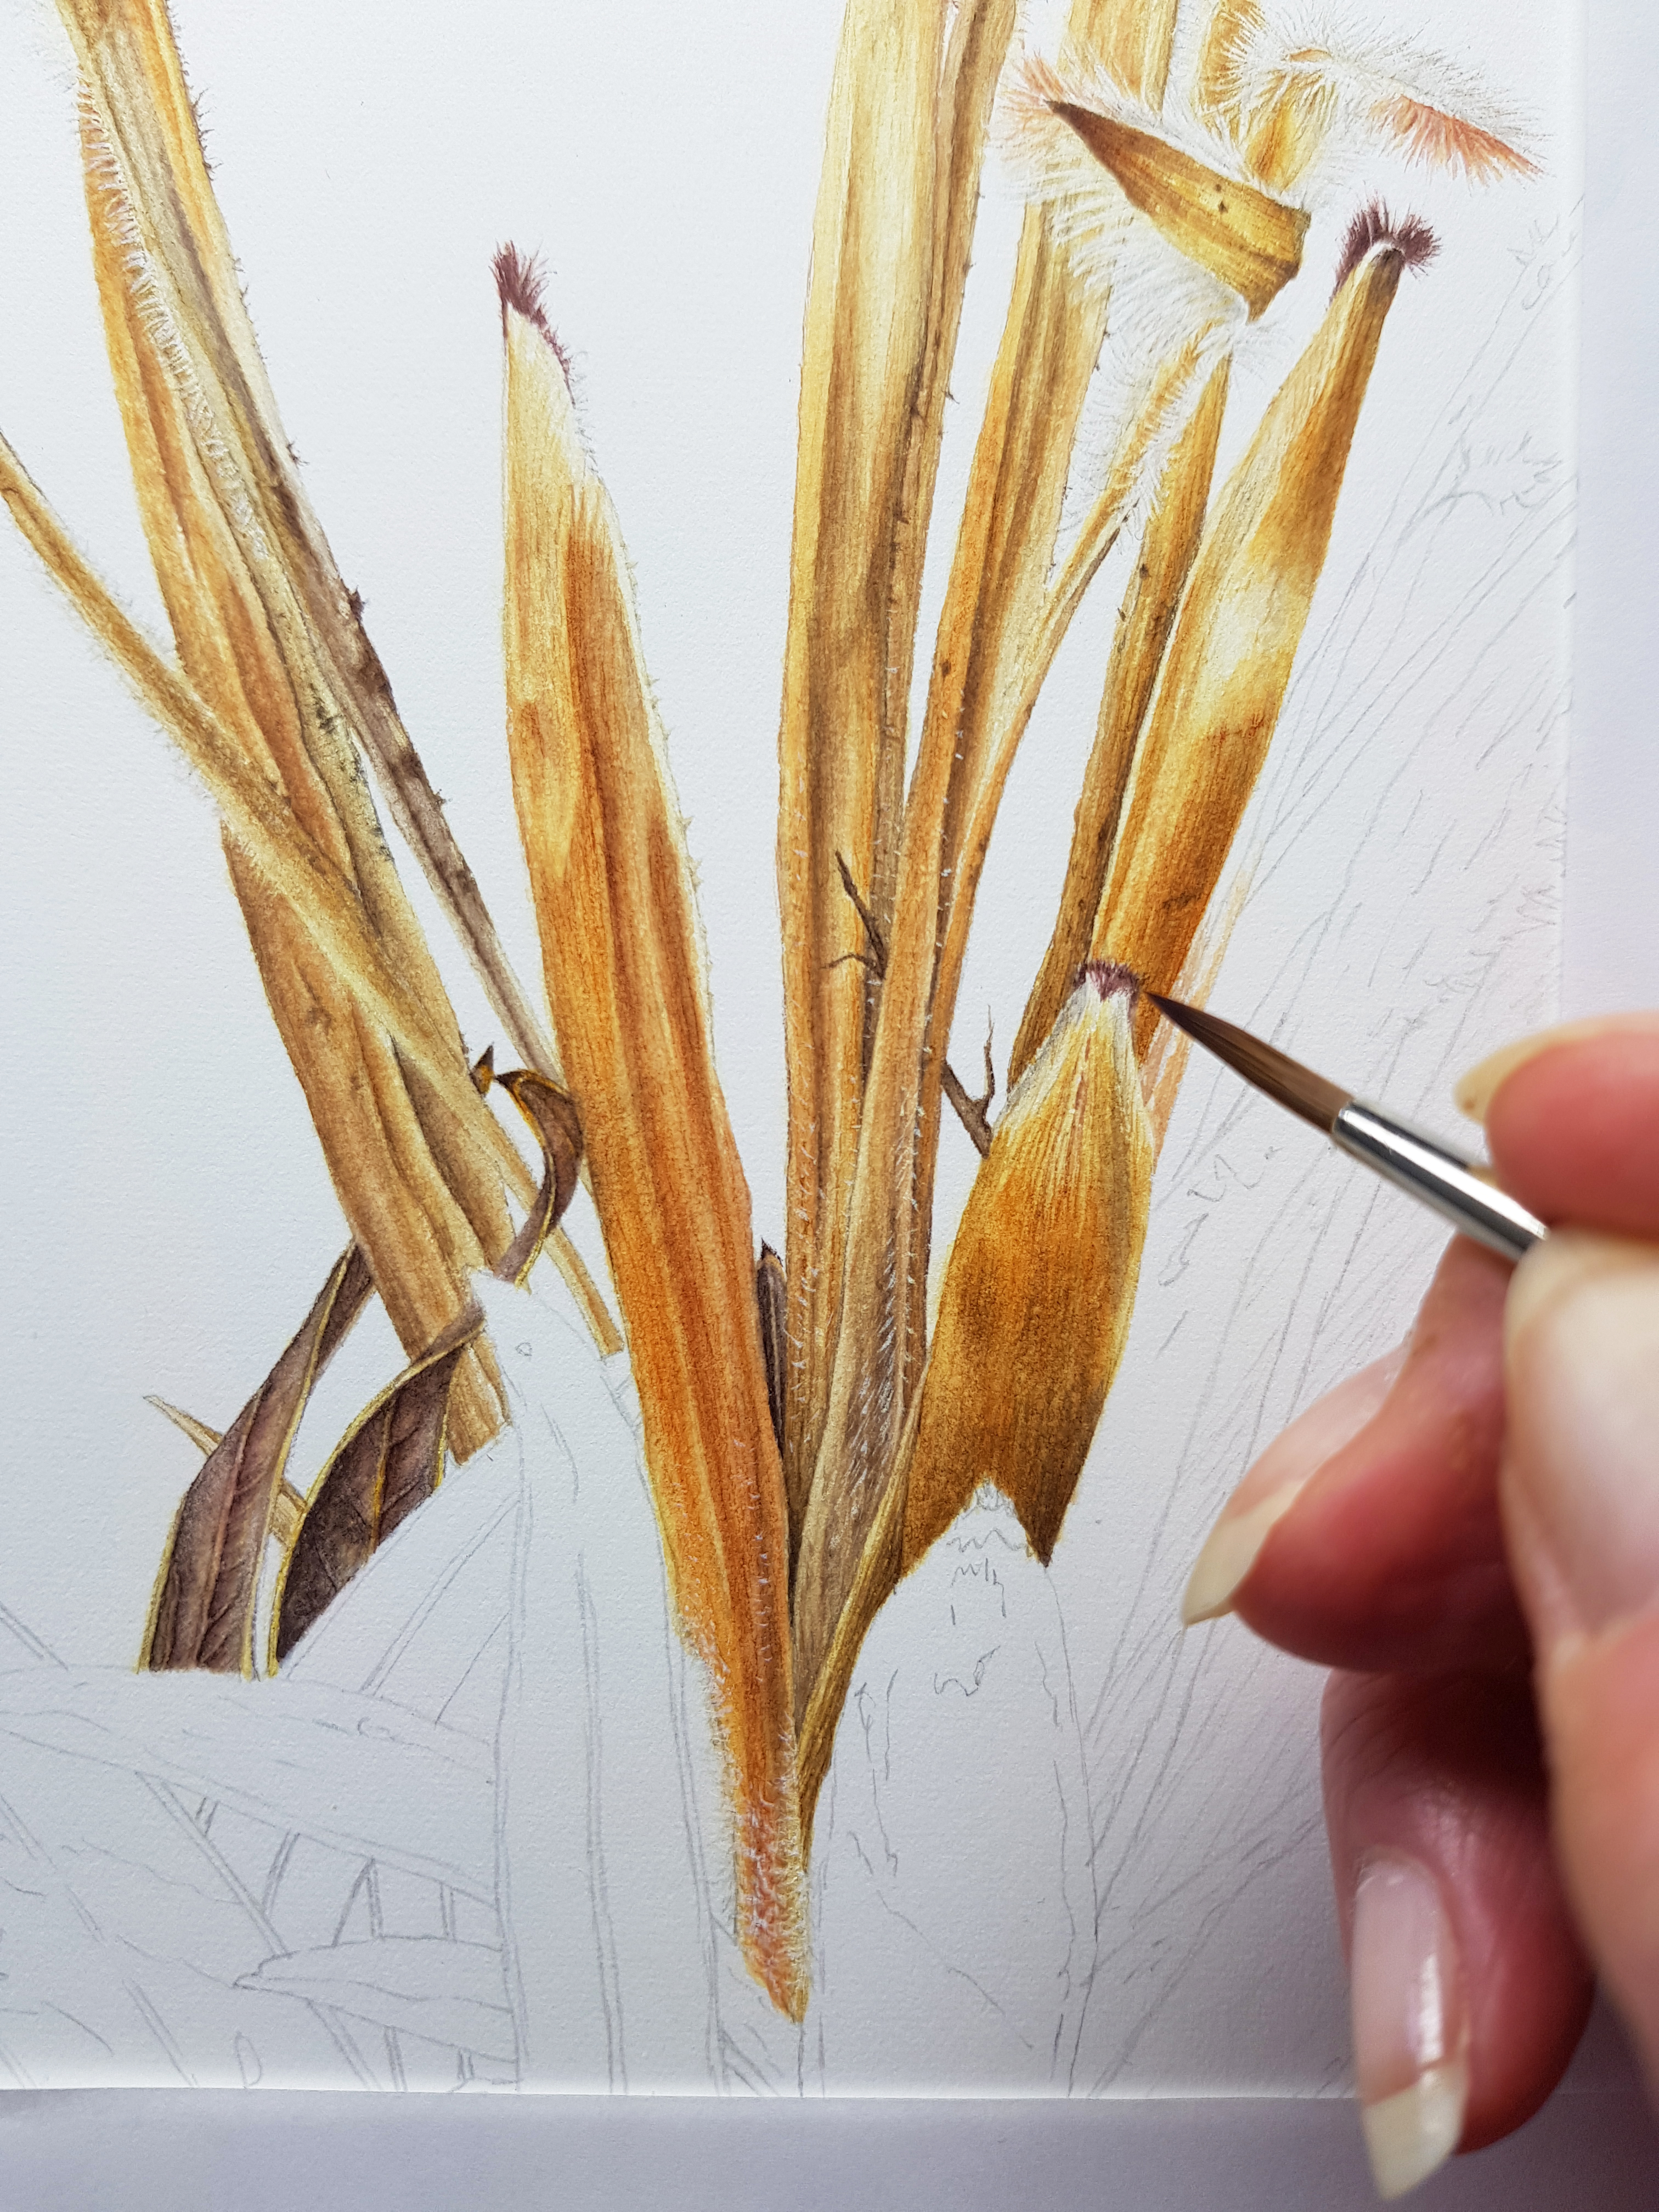
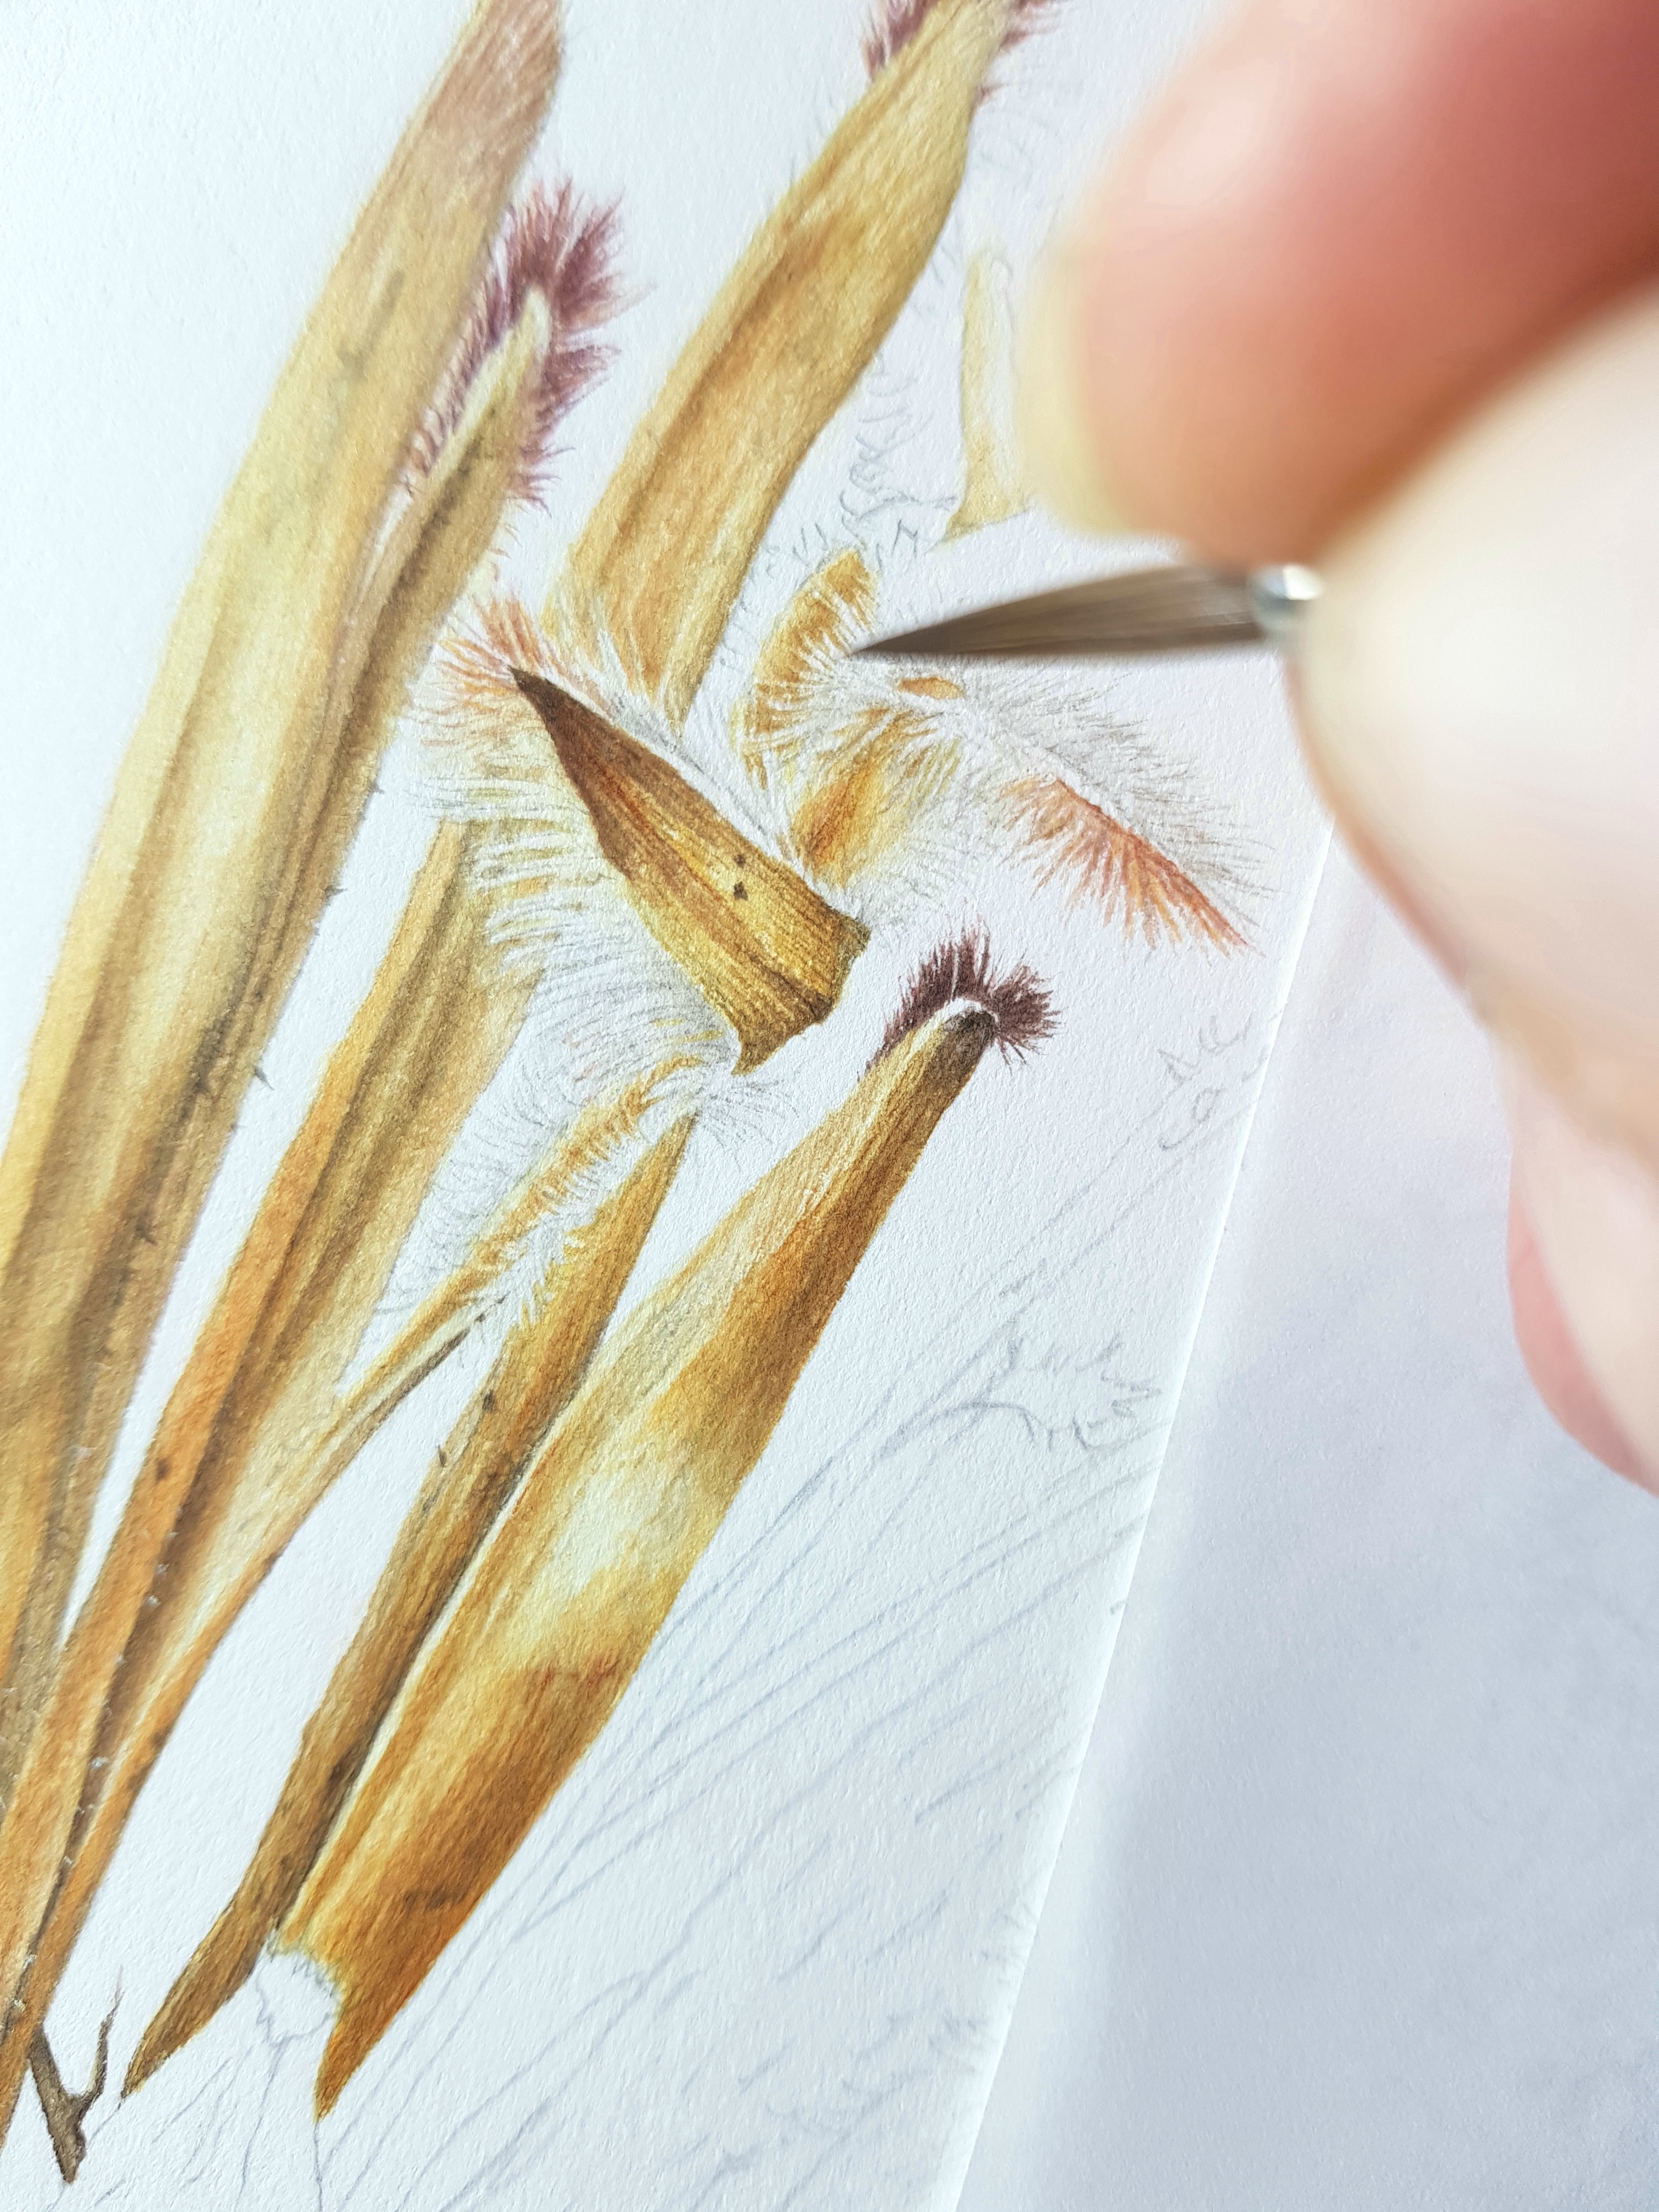
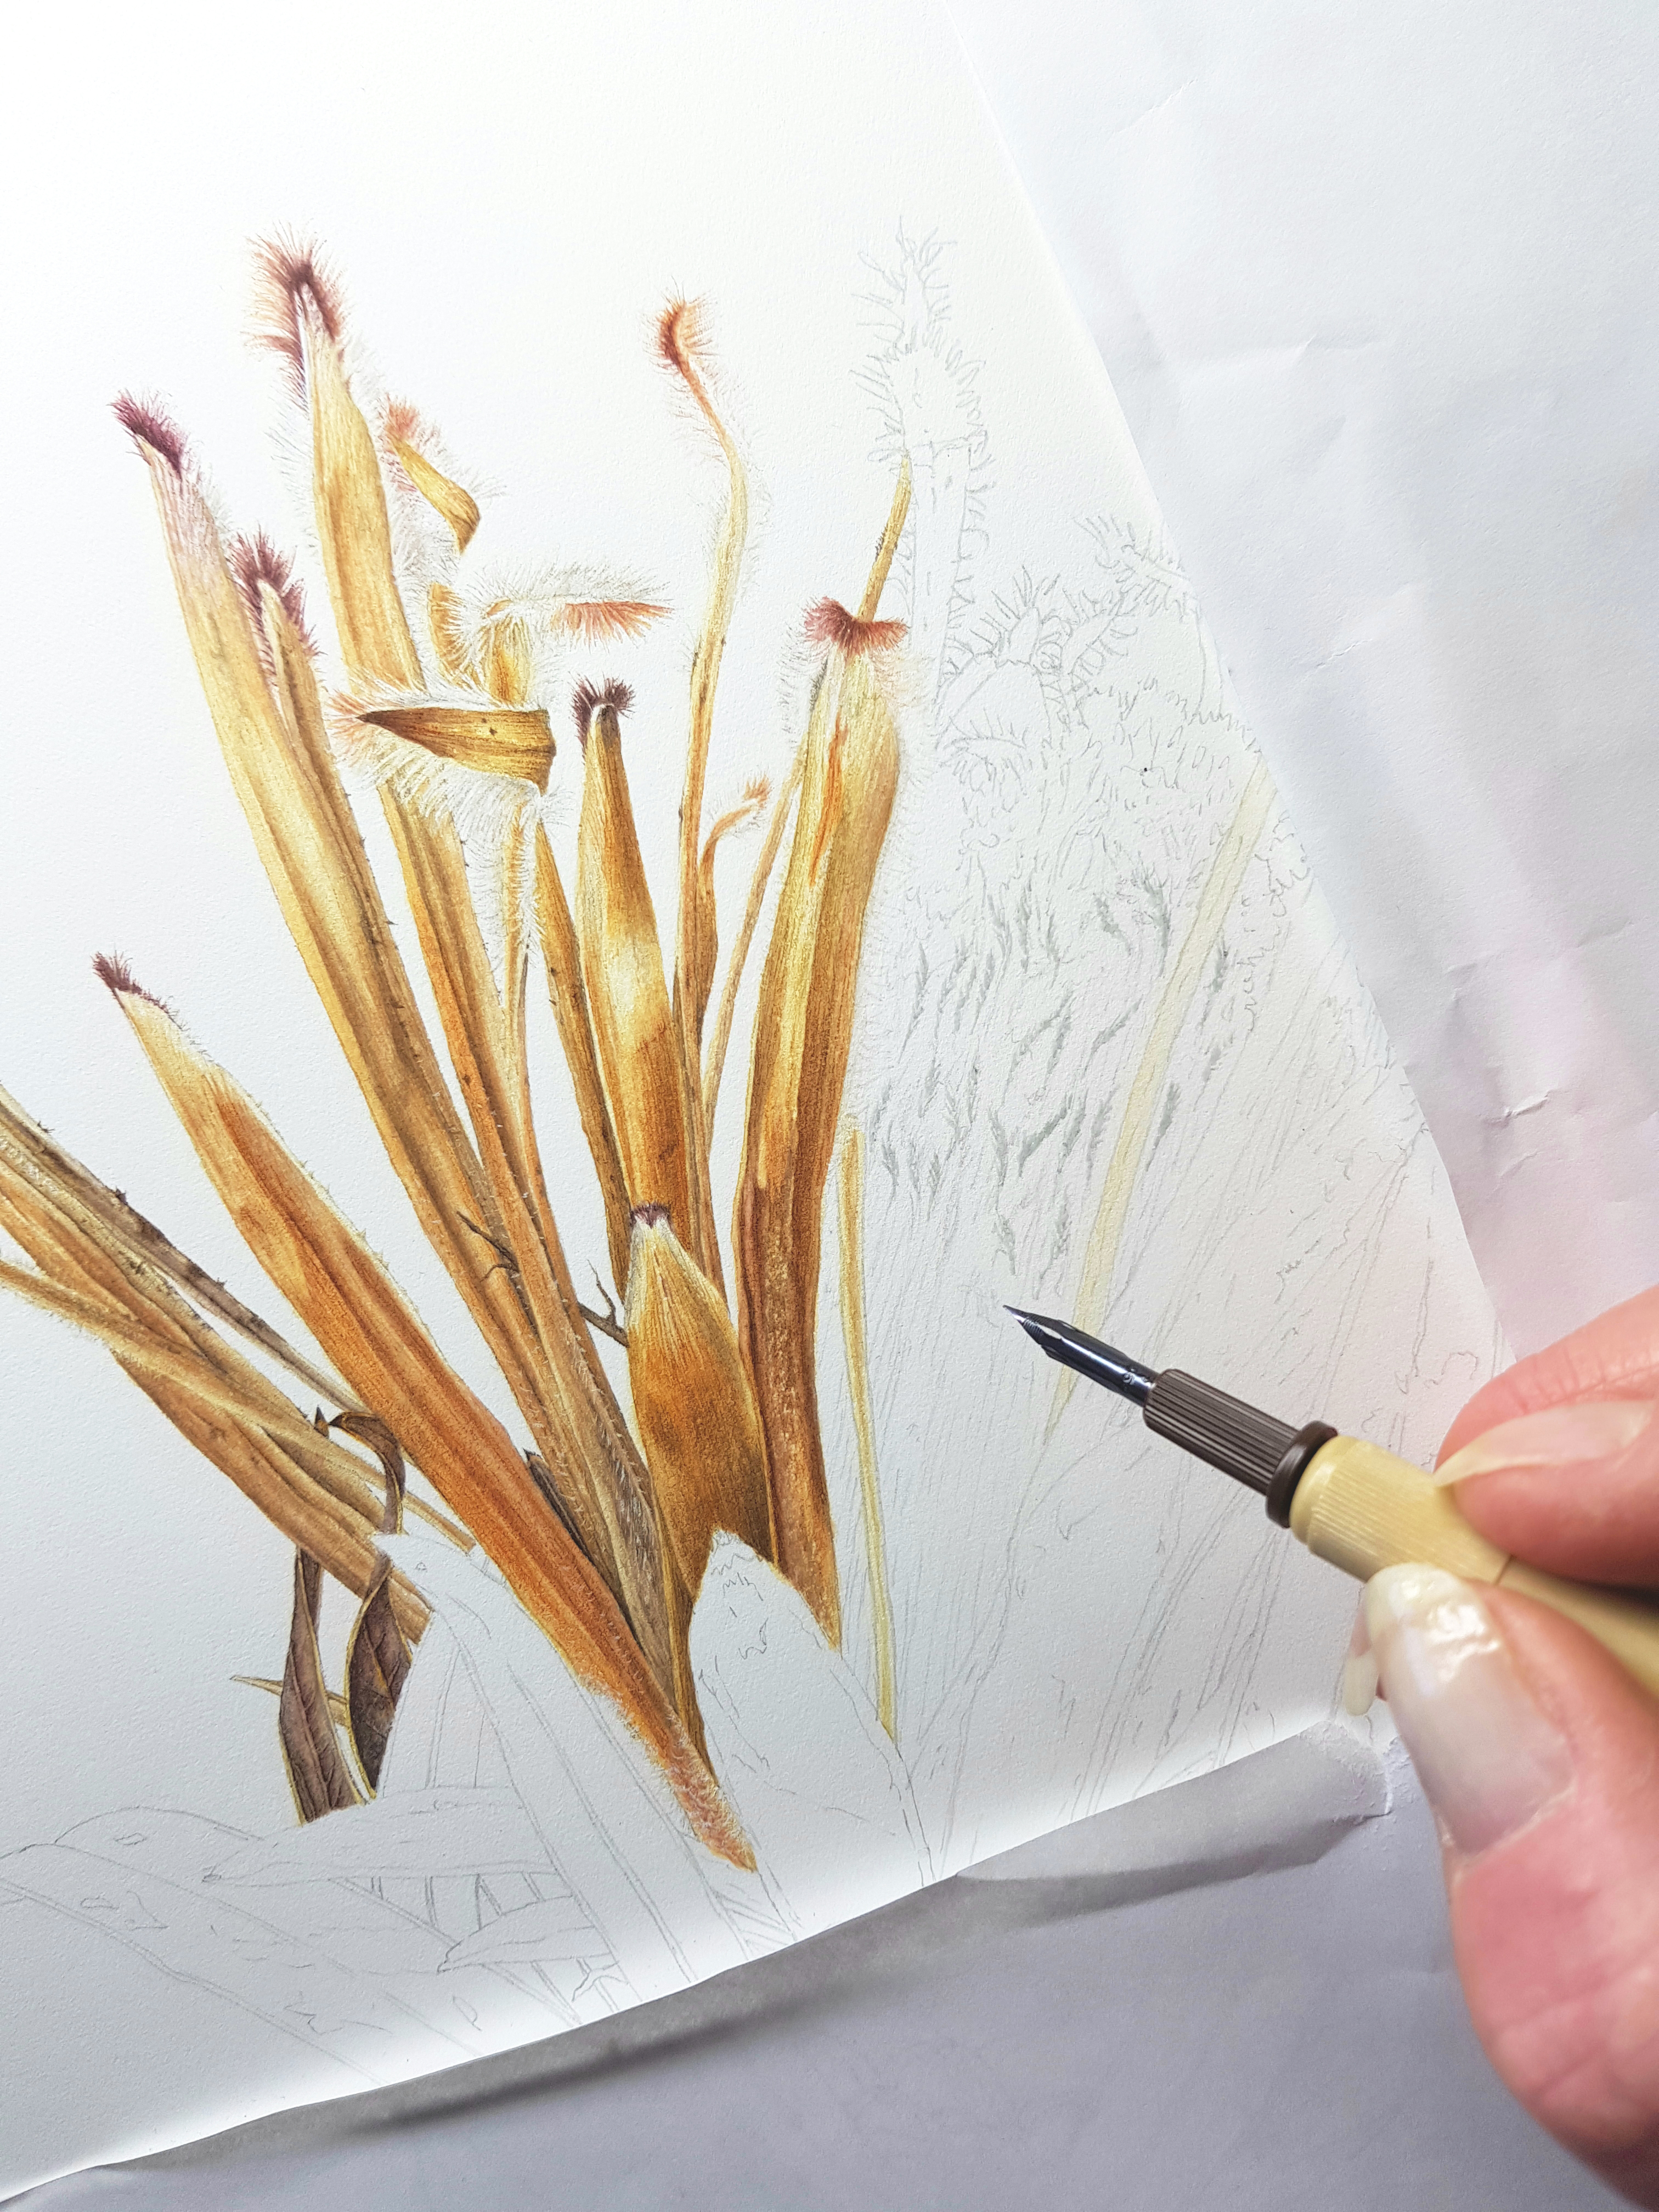
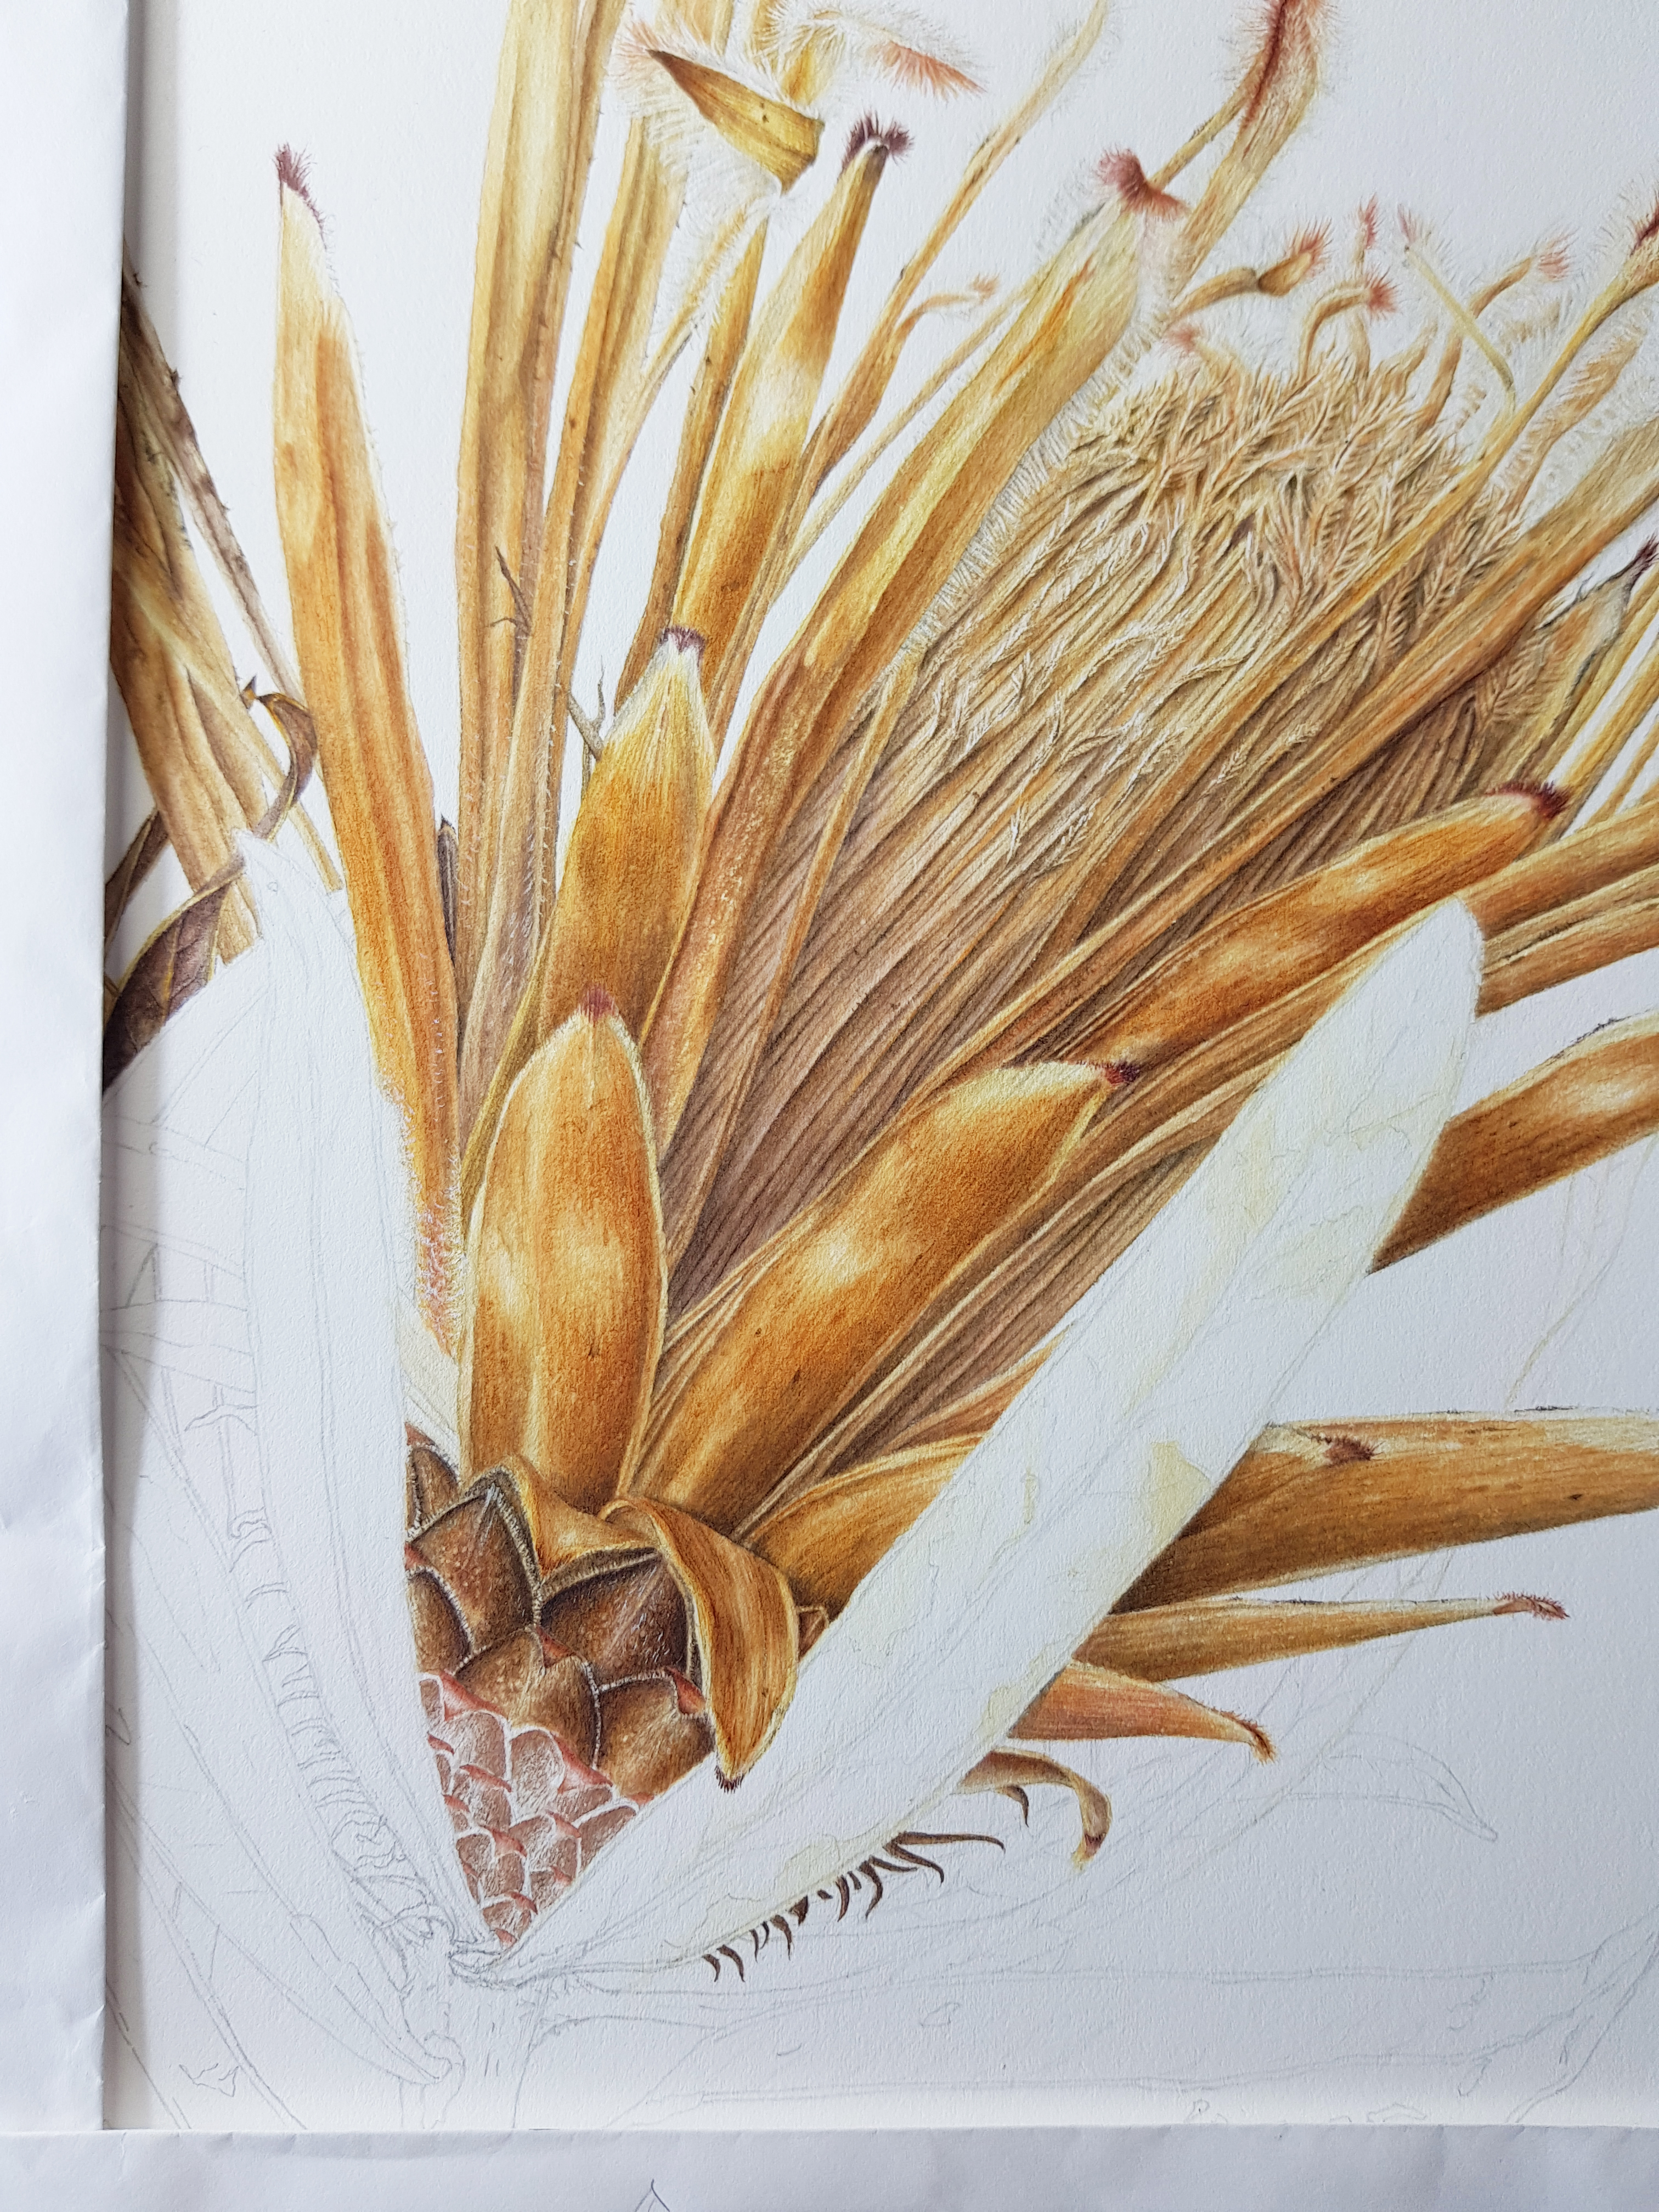
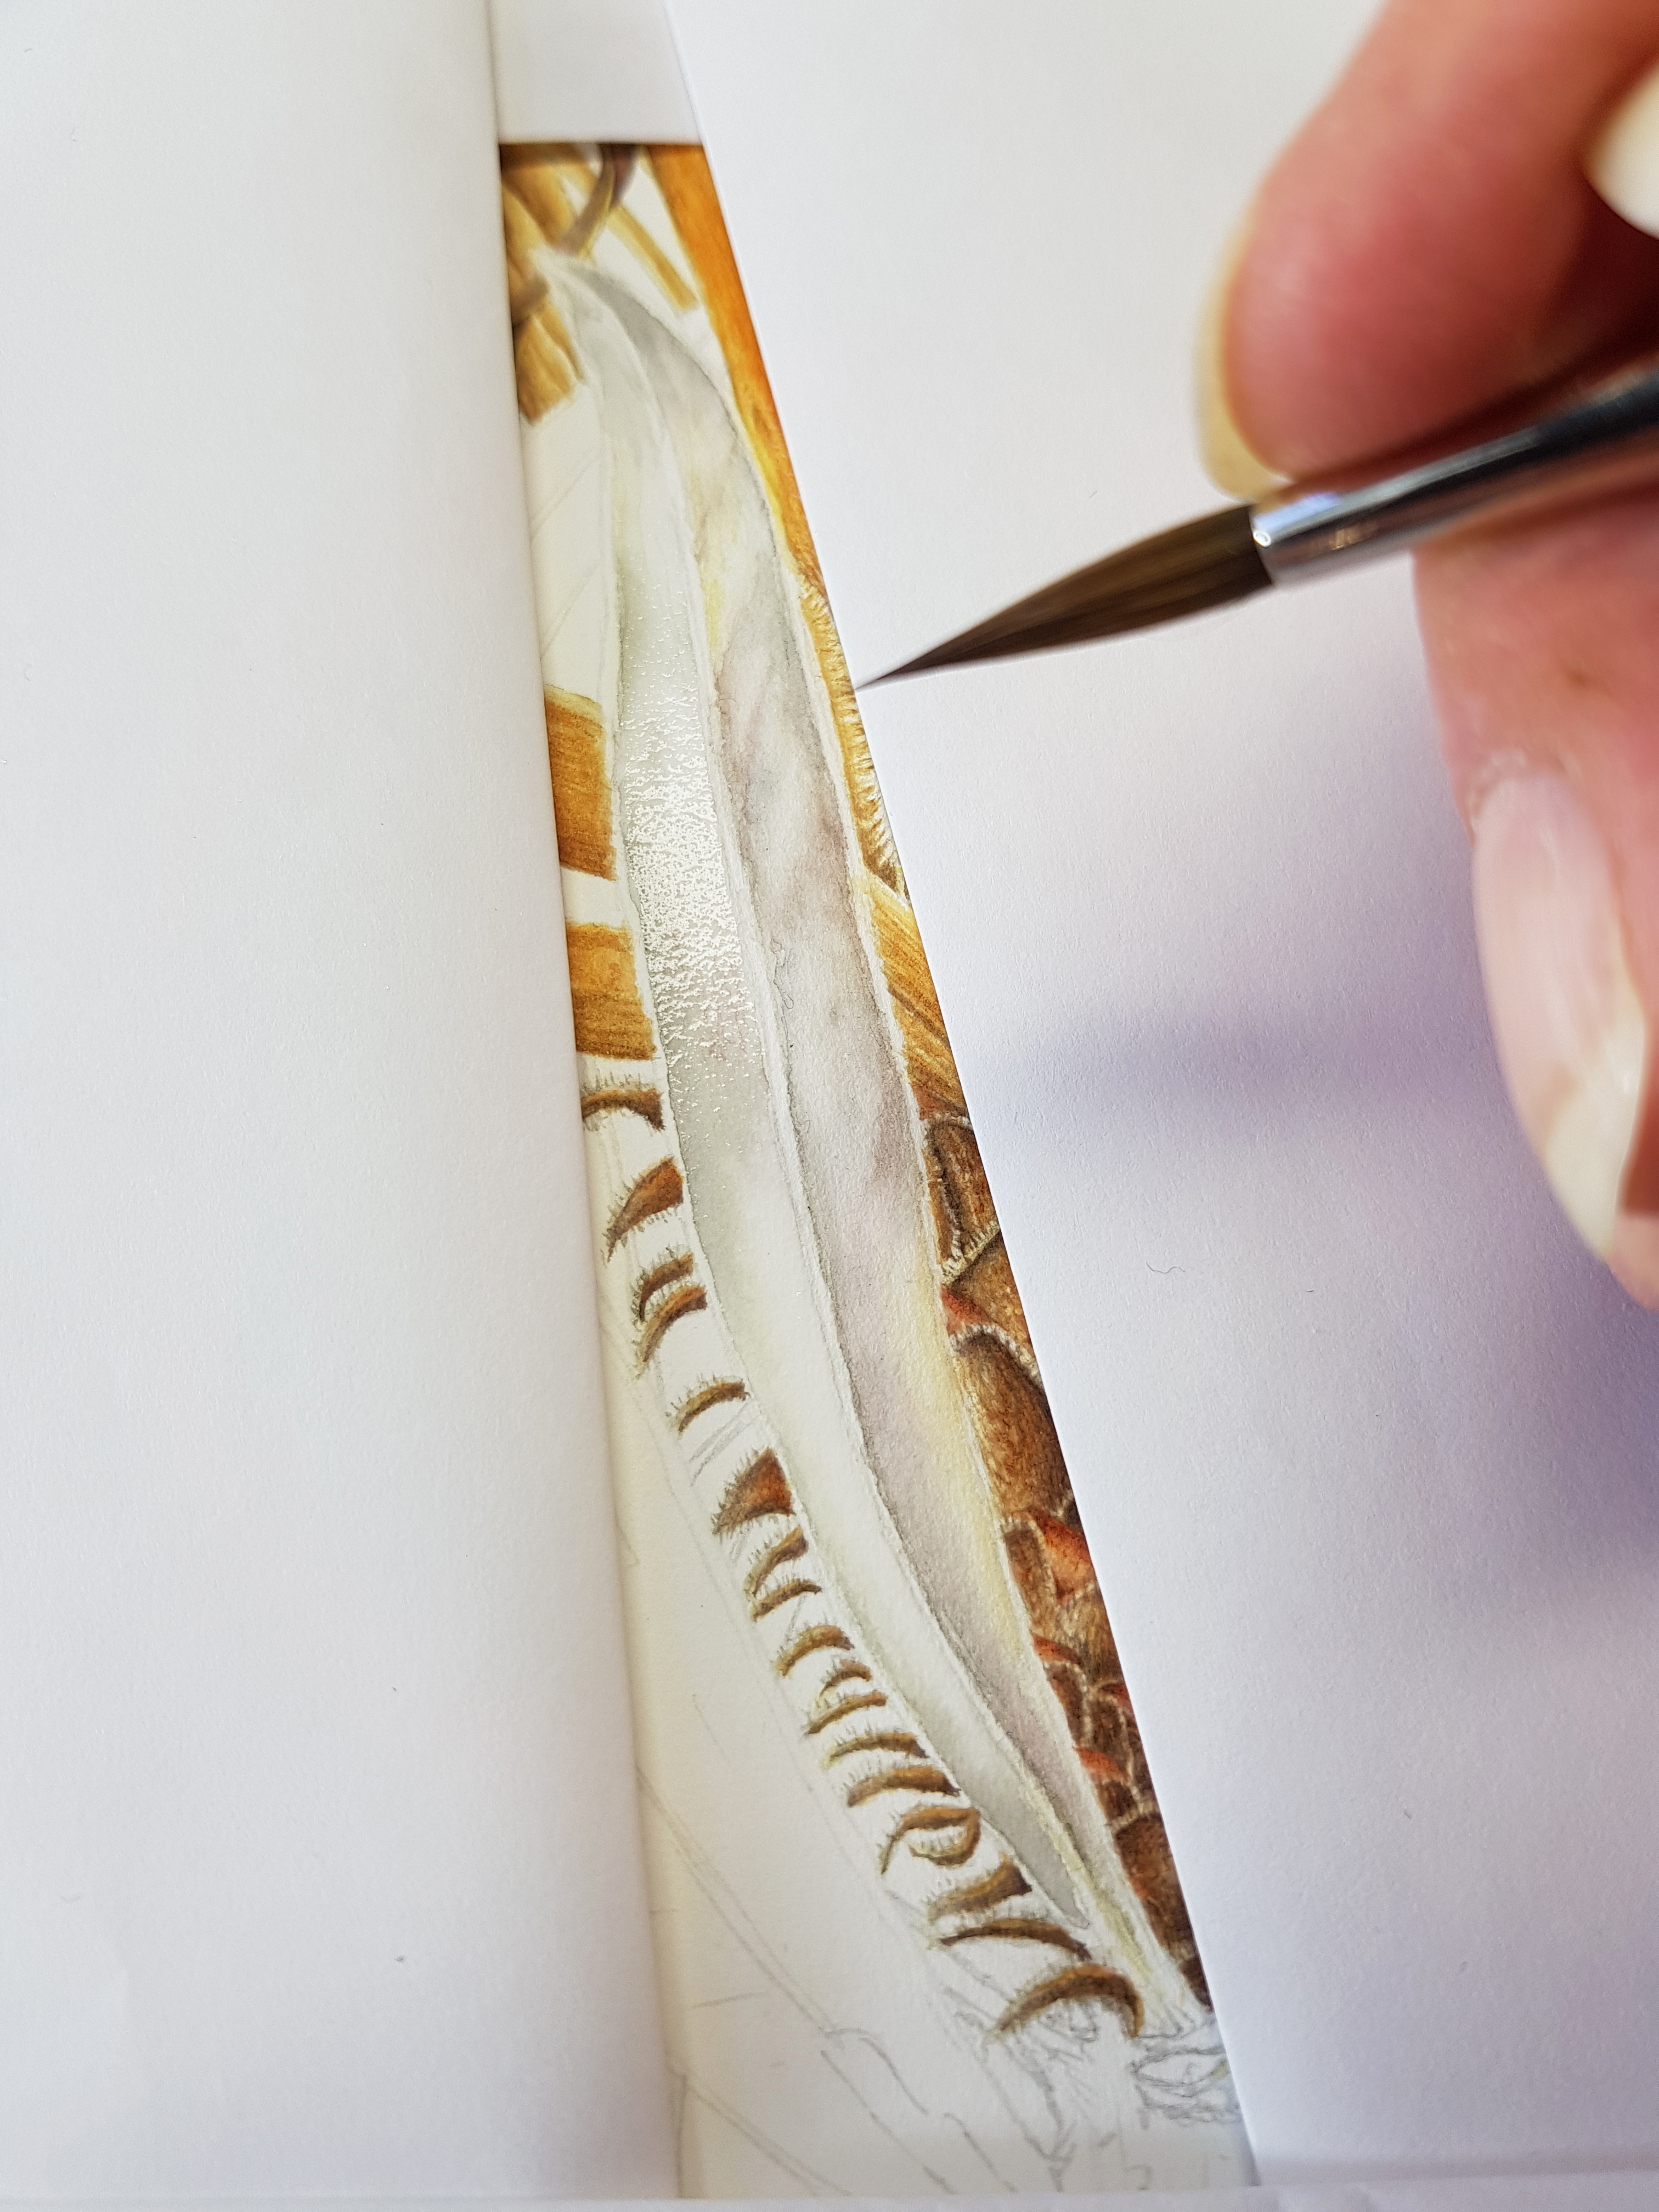
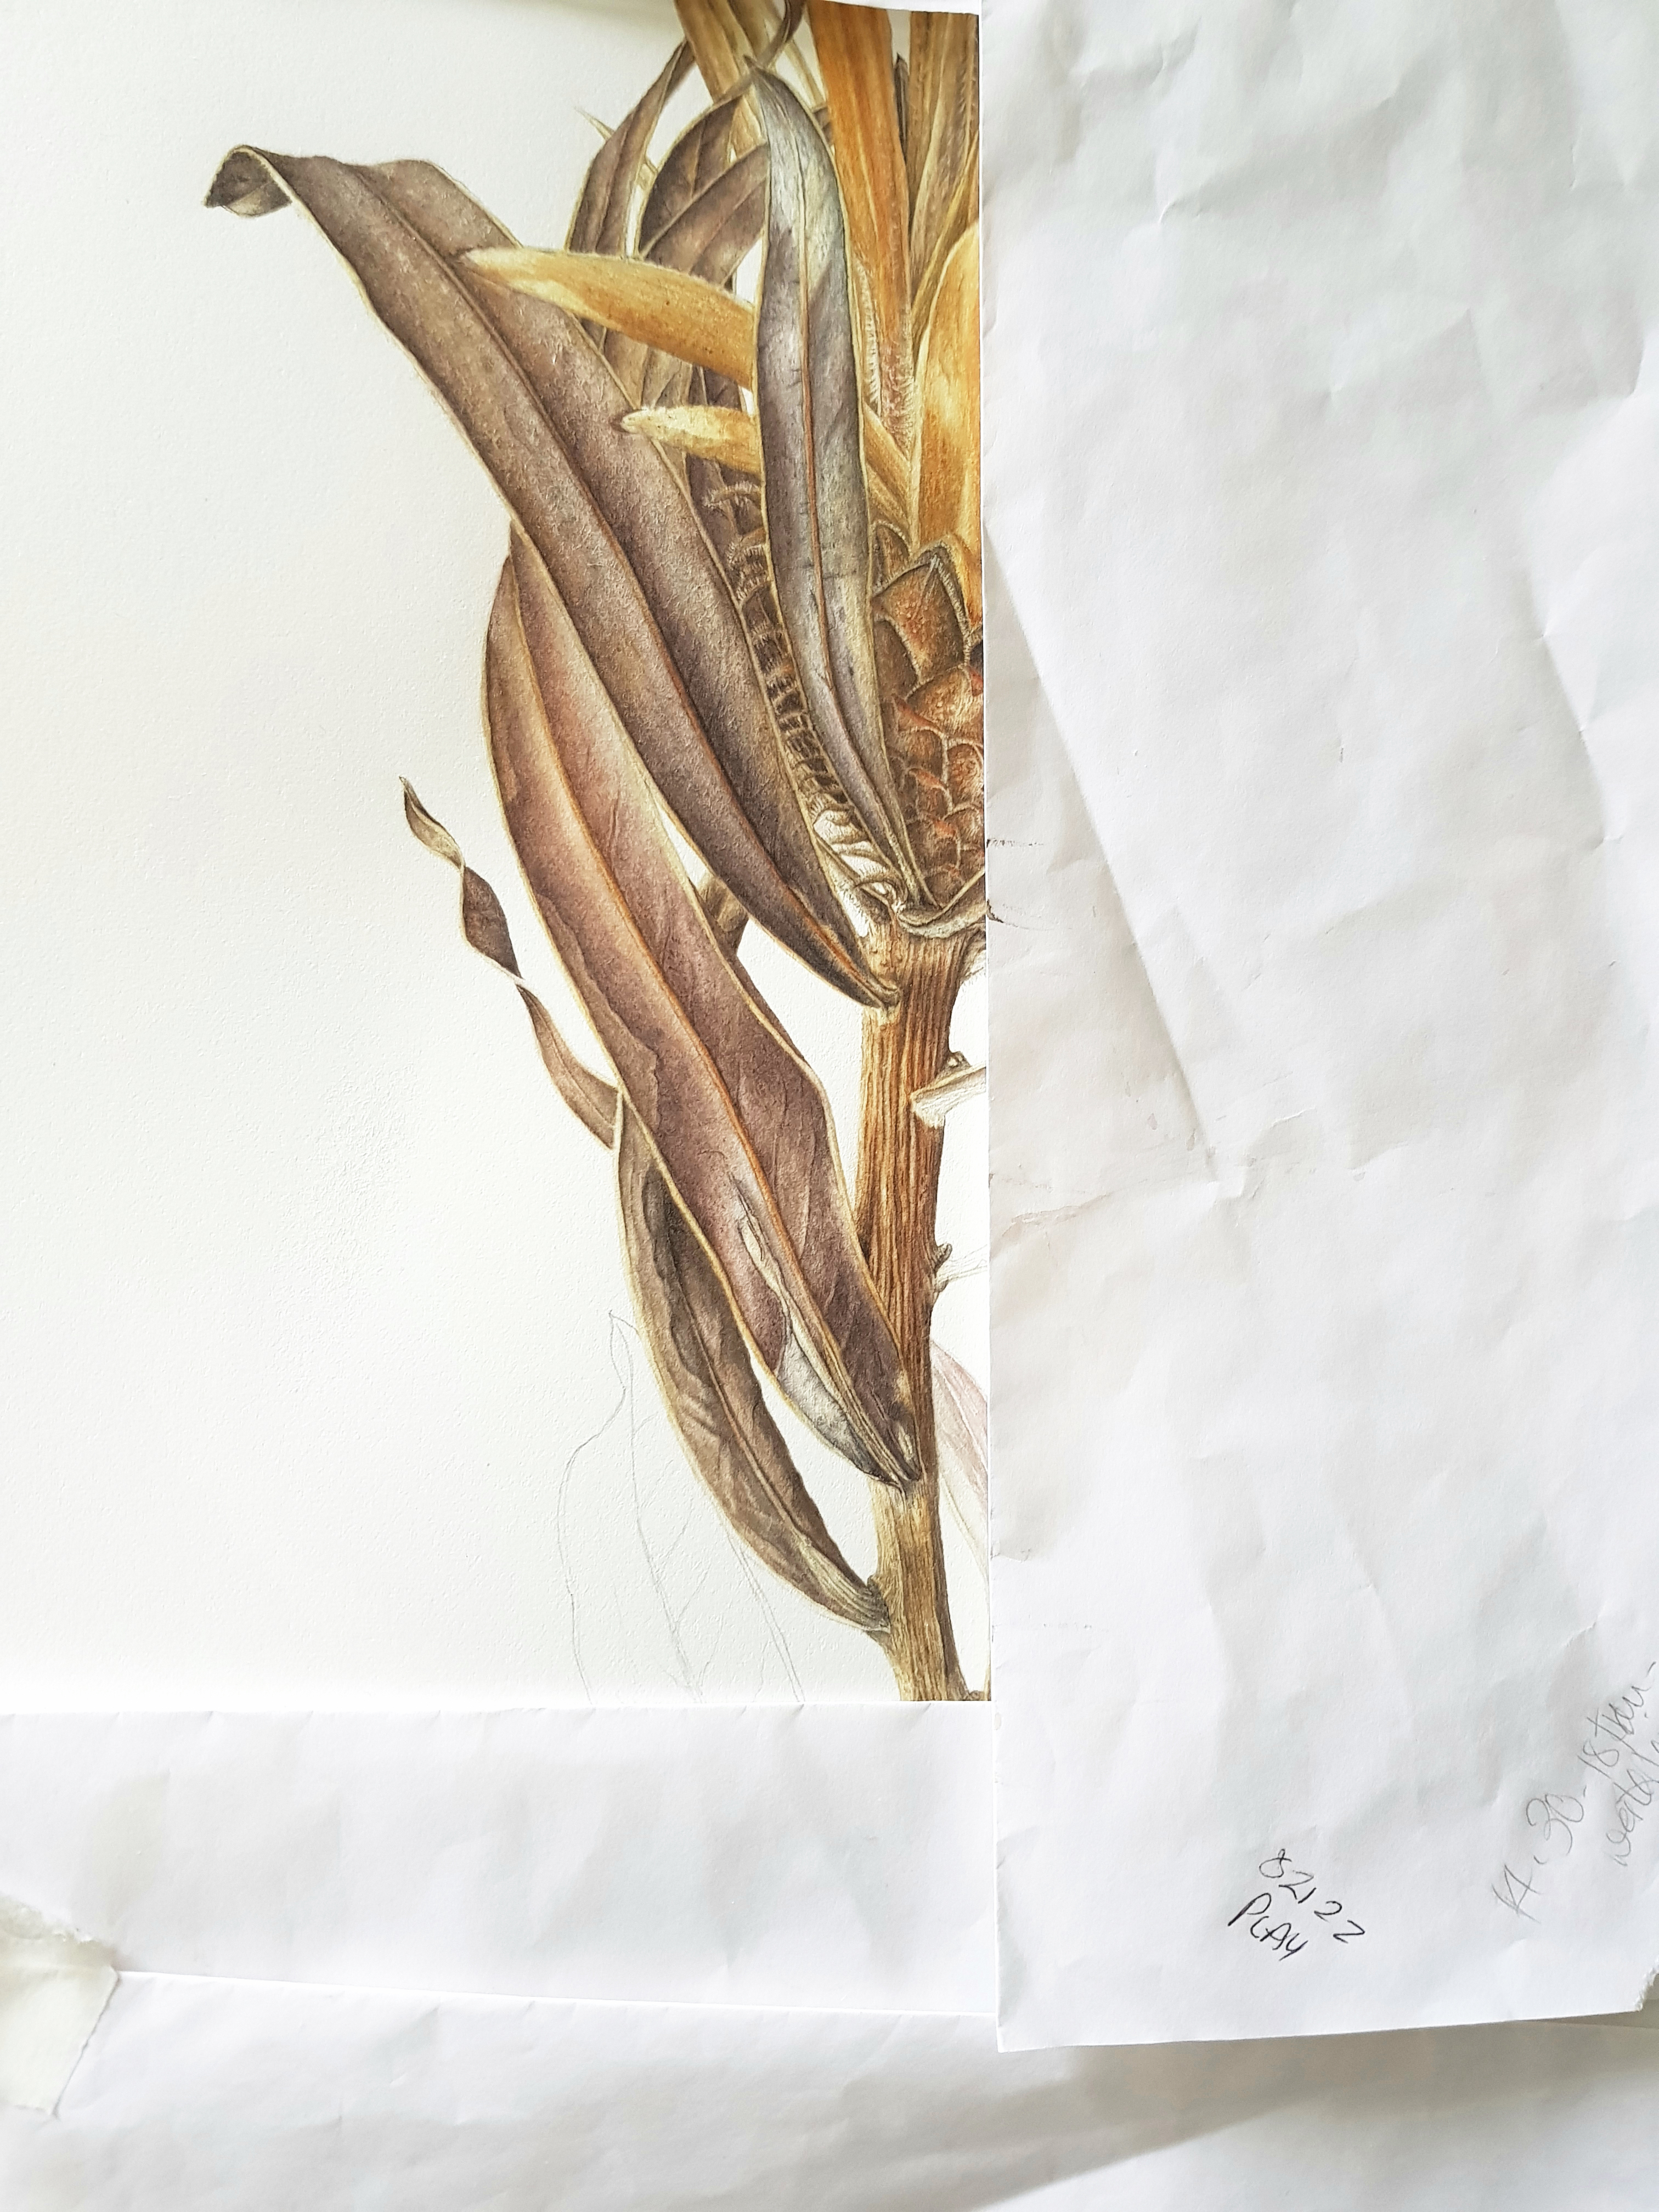
Next year, as well as painting the final pieces, I will be studying and drawing up Great Burnet (Sanguisorba officinalis) and Devil’s bit scabious (Succisa pratensis) in late summer. I have managed to get some of the painting for three of my chosen species done this year which are featured below. The sections below were painted using live plants. I have a great deal of photo reference to enable me to continue painting these three through the next few months.

Cardamine pratensis drawing

Lotus pedunculatus drawing

Geum rivale drawing

Silene (Lychnis) flos-cuculi drawing
The Journey…
My journey started locally where I live in Bristol. I have grown some of my chosen plants in my home garden which were doing well. Although these are great to refer to, they do not necessarily grow in exactly the same way as they would in their natural habitat. It’s great to have them on the doorstep though. They can be dug out and popped into a pot to use when painting! To find my chosen species in the field was really difficult but with a lot of research and walking I eventually located all of them this year.
Cuckoo flower (Cardamine pratensis) grows near my house and also on a lovely dog walk my son and I often do from Alveston to Old Down. One sunny day in May I decided my son and I should try this walk in order to find the pub at the end and have a lovely roast dinner. What a wonderful walk with yummy food half way. Essential therapy! It was full of meadow plants and pollinators. I saw my very first Green winged orchid and Musk thistles on this walk, one of which had a white flower. It became our favourite local dog walk this summer. Later in the summer I thought I had found Devil’s bit scabious (Succisa pratensis) growing there too but unfortunately it turned out to be Field scabious with a genetic fault! It looked like Devil’s bit but the leaves and height were all wrong. It’s also very important to research your wildflower keys!

Cuckoo flower

Green winged orchid

Selfheal

White Musk thistle

Comma butterfly

Not Devil’s bit… Field scabious with a genetic problem!
Two of my plants were really difficult to locate so my journey led me into Wales this year. What a beautiful country. There is so much wildlife and Wales is abundant with wildflowers. Love it!
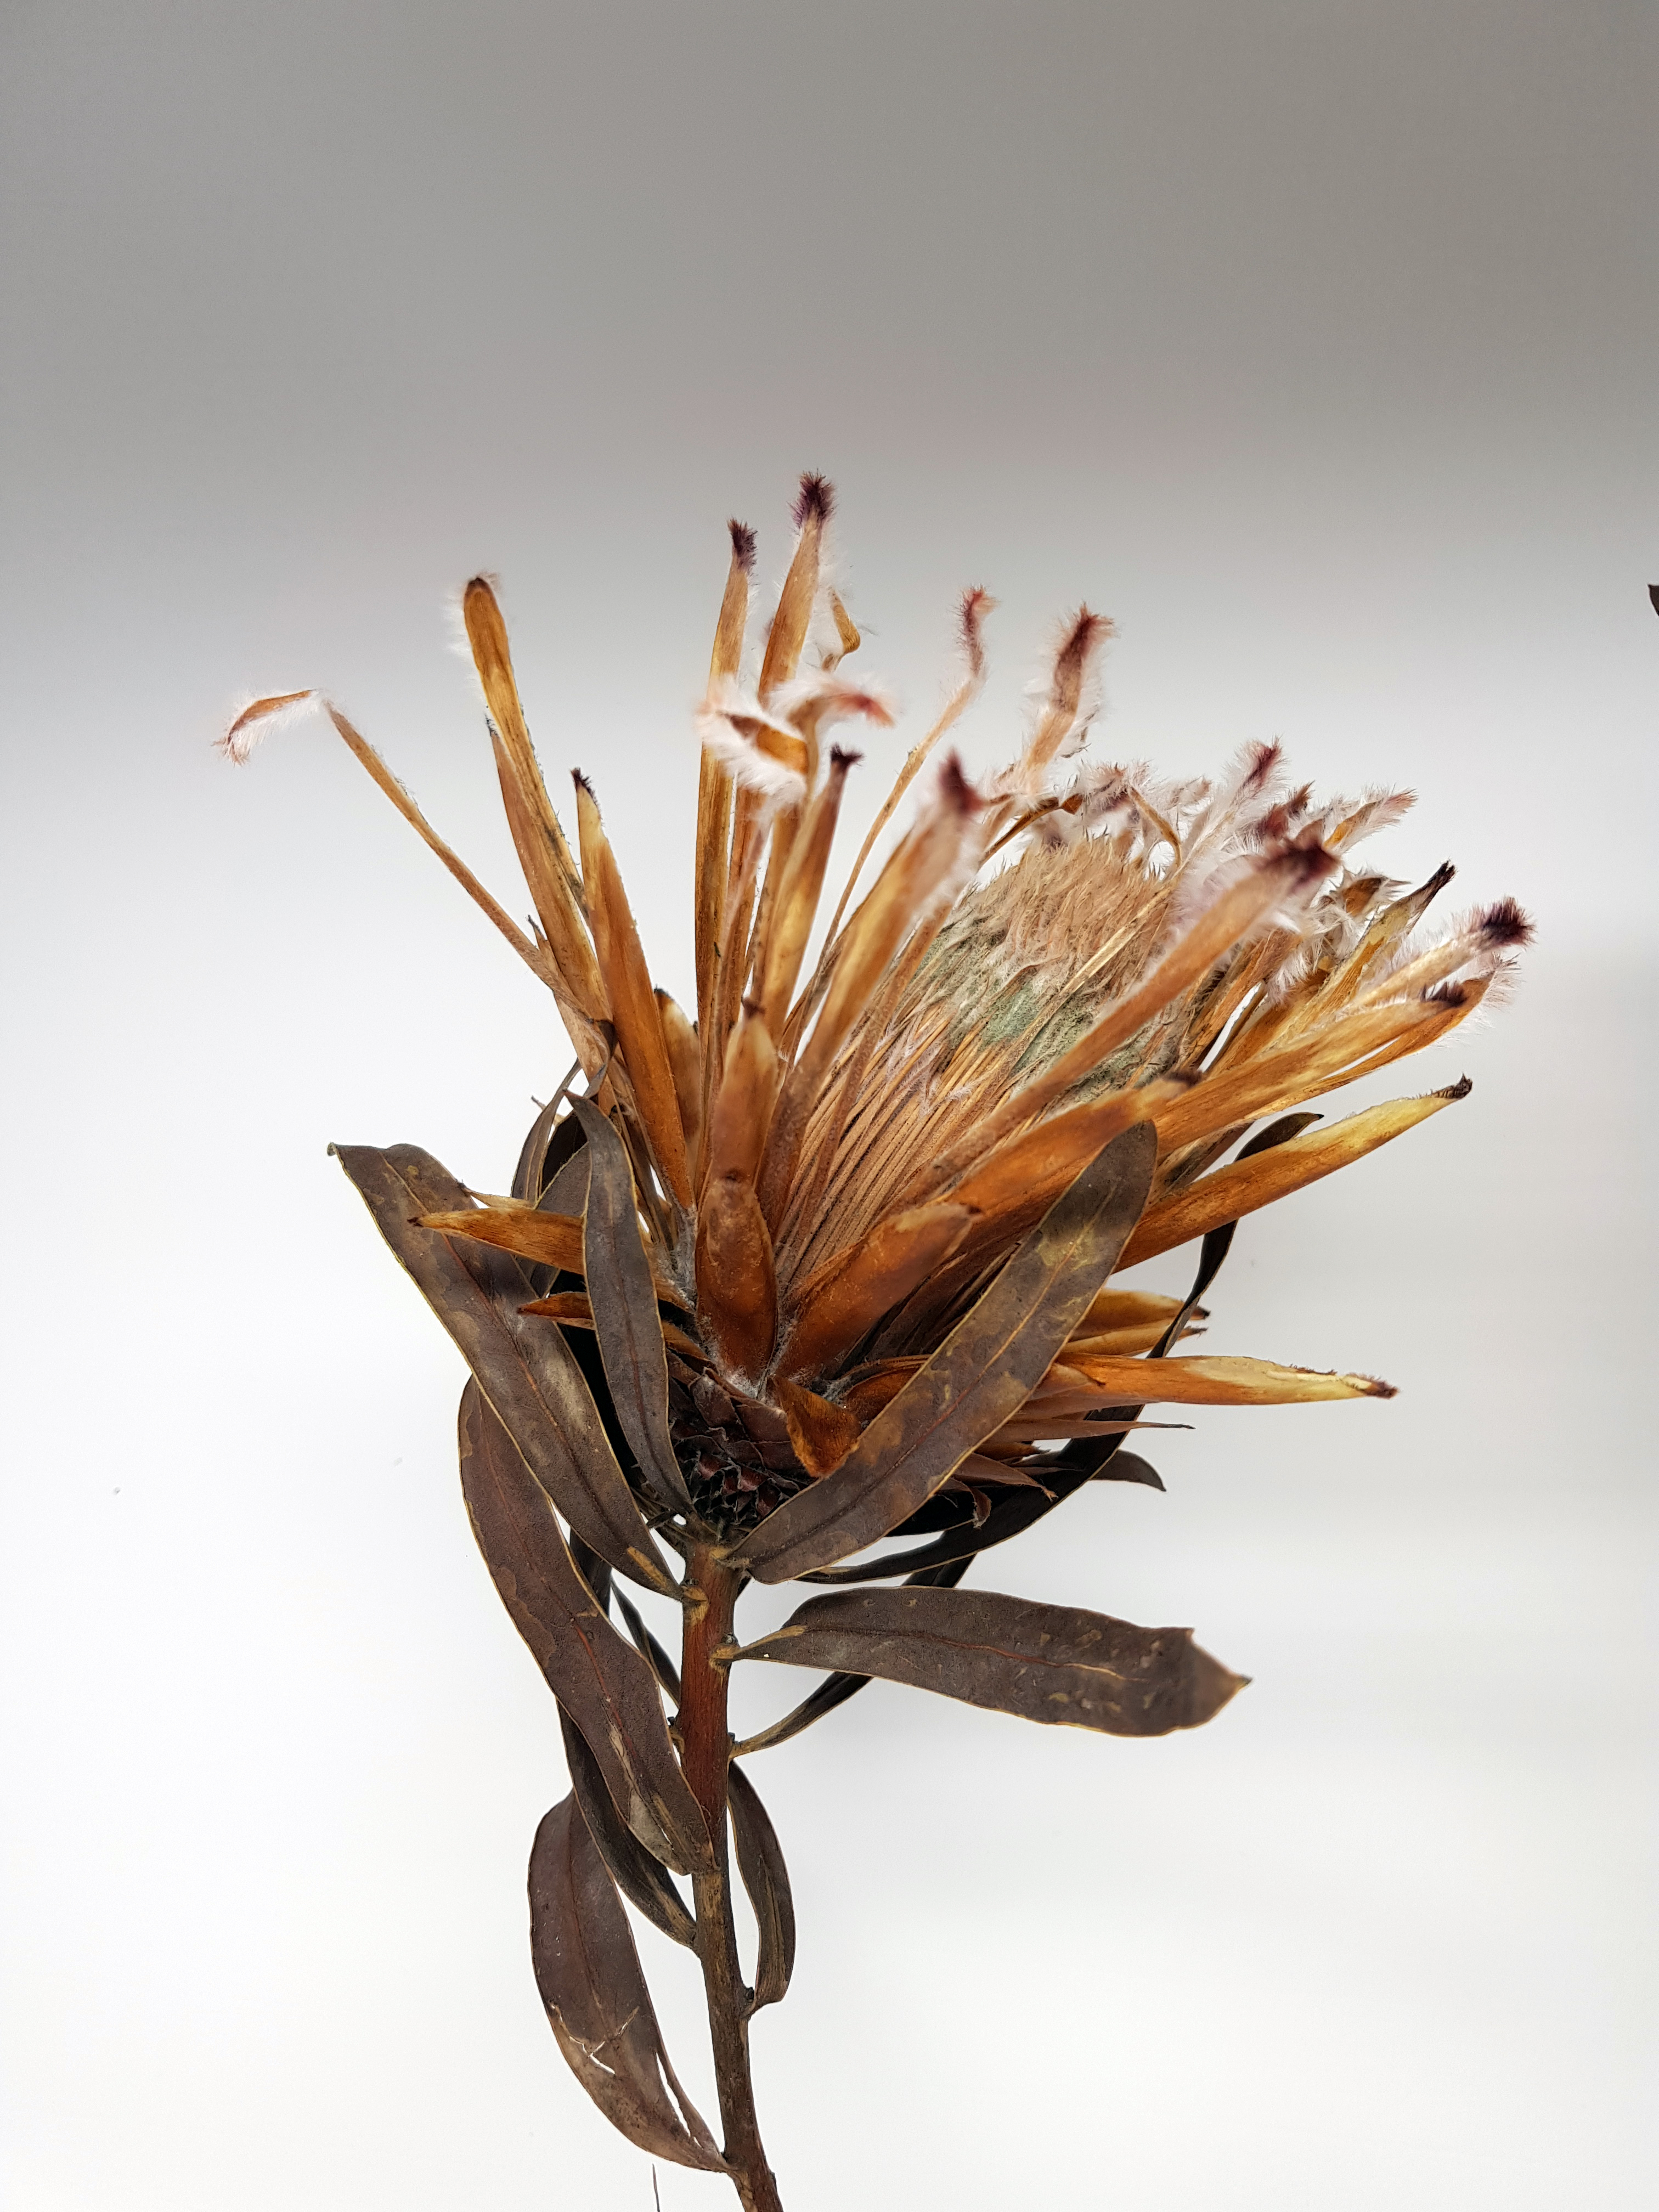
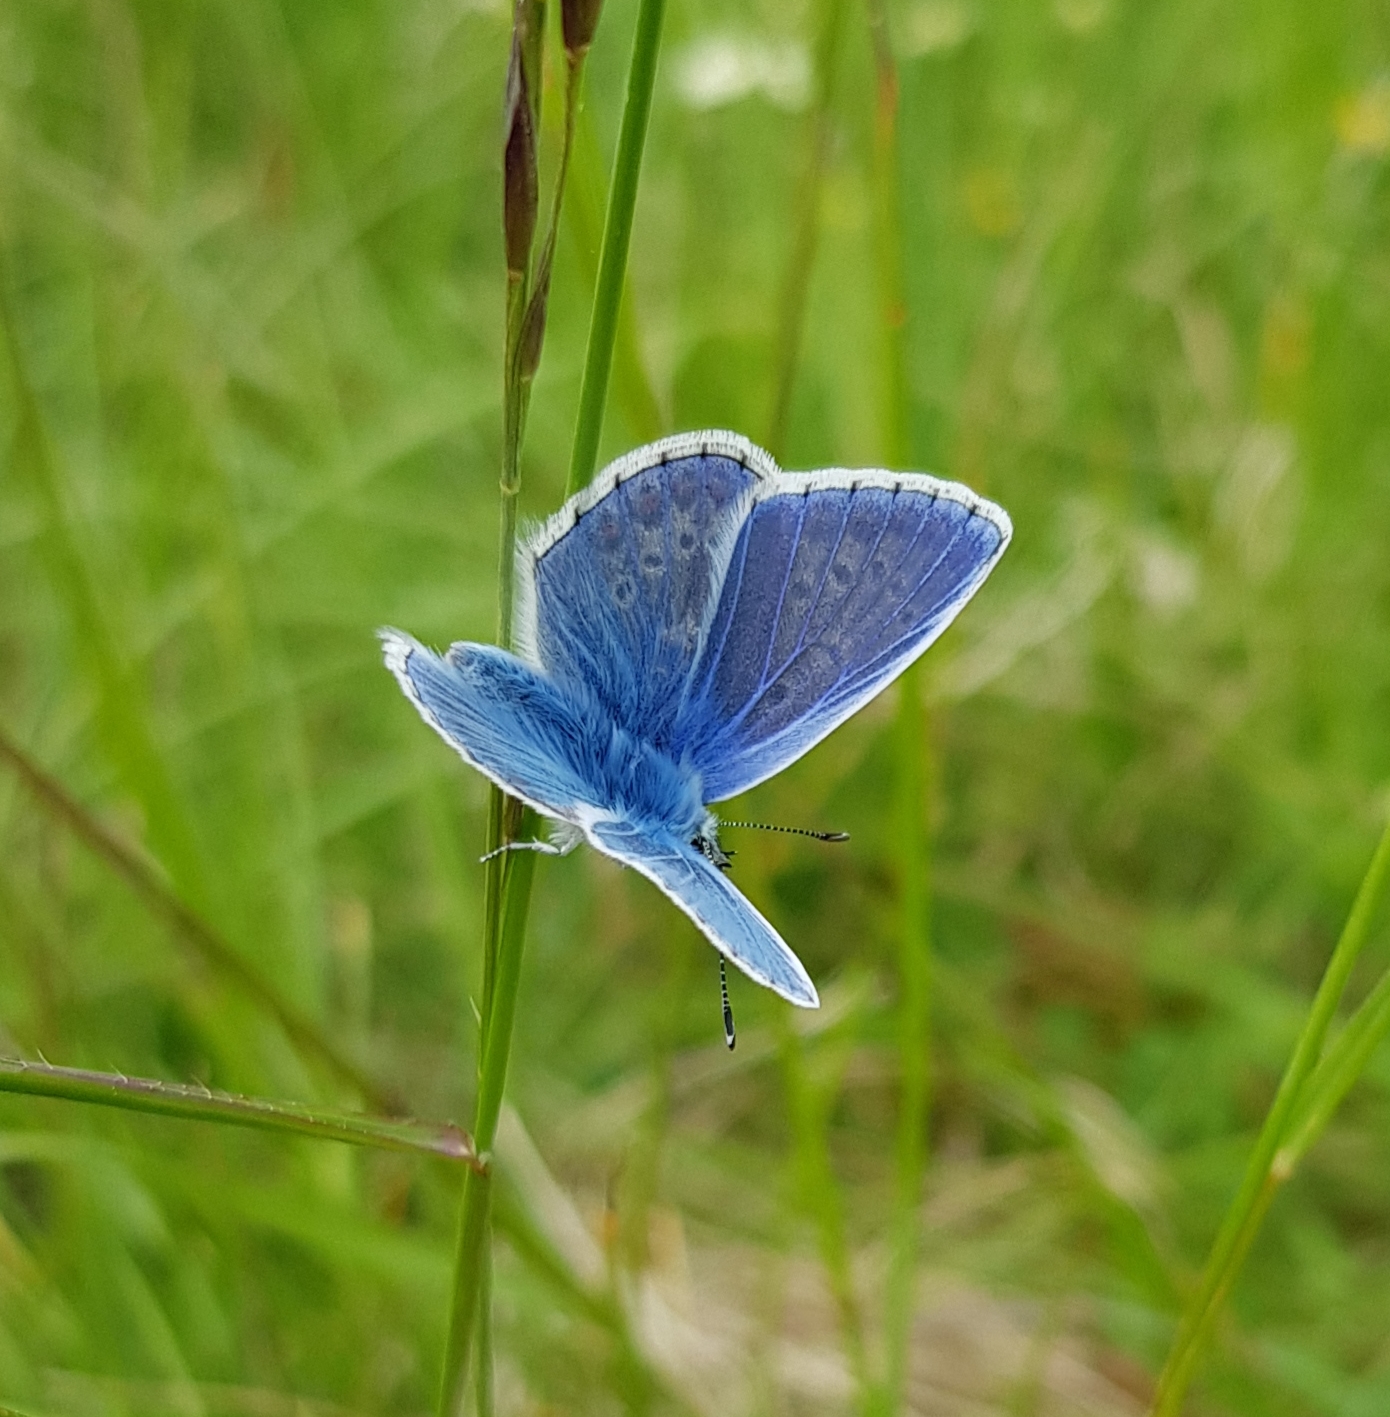
The first plant, Greater Bird’s foot trefoil (Lotus pendunculatus), I found at Great Traston meadows near Newport. Great Traston is a piece of protected land consisting of a series of wet meadow fields and teeming with insect life. We saw many dragonflies, damselflies and butterflies. We even saw a beautiful blue lacewing, many grasshoppers and later in the year a nursery-web spiders nest which was huge! This place is also home to the very rare Shrill Carder bee. Unfortunately, I didn’t see, or rather, hear one but maybe next year! There was also evidence of other wet meadow wildflower species like Marsh orchid and Marsh musk thistle. I visited three times in total. Once when Greater Bird’s foot trefoil was starting to grow, then when it was in full flower and finally when it had gone to seed. It is important for me to see the plant growth in all its stages as my drawings are intended to cover the whole aspect of each plant, telling their story.
“Hold nature in your hand and take a look at the intricate beauty within. Treasure our wildflowers and pollinators. It’s so easy to just walk by…” Jackie Isard
From here I wanted to find Great Burnet (Sanguisorba officinalis). After tons of researching, my journey took me back into Wales again to a tiny little meadow called Trewalkin on the edge of Brecon Beacons. Another naturally wet meadow. It is managed by the Wildlife Trust of South & West Wales. Unfortunately, the meadow had already been cut by the time I had found out that Great Burnet grew there. However, there was evidence of the species as some new plants were starting to grow. It has very distinctive serated leaves.

I noticed a few other wet meadow species too including Devil’s bit scabious. This was exciting news as Devil’s bit was also one I needed to locate. When I returned home I contacted the Wildlife Trust officer and asked for a species list. I was so delighted when it was sent through, every one of my chosen plants grow in this tiny meadow! This included Water Avens (Geum rivale) which was proving almost impossible to find. There will be many visits to this meadow next year.
Another place I visited earlier in the year was Crickley Hill Nature Reserve, in Gloucestershire. This is a beautiful place with lovely walks. Many wildflower species live here and the insect life is abundant. I saw many 6 spot burnet moths who were loving the Field Scabious growing near the car park. Beautiful Harebells grow everywhere too. I wasn’t expecting to find my chosen species as this is a dry limestone grassland area but I very much enjoyed the walk and the stunning views.
The last photo of trees, taken in the woodland area of Crickley Hill, I entered into the Gloucestershire Wildlife Trust photography competition. I was amazed to learn this week that it had been ‘Highly Commended’ by the judges!

6 Spot Burnet Moth

Harebells
My journey for wildflowers has ended this year as winter is now upon us. The plants will all sleep now until April/May next year when I’ll be off out with my camera and walking boots to see them again.
Until then, have a wonderful Christmas and a happy new year!