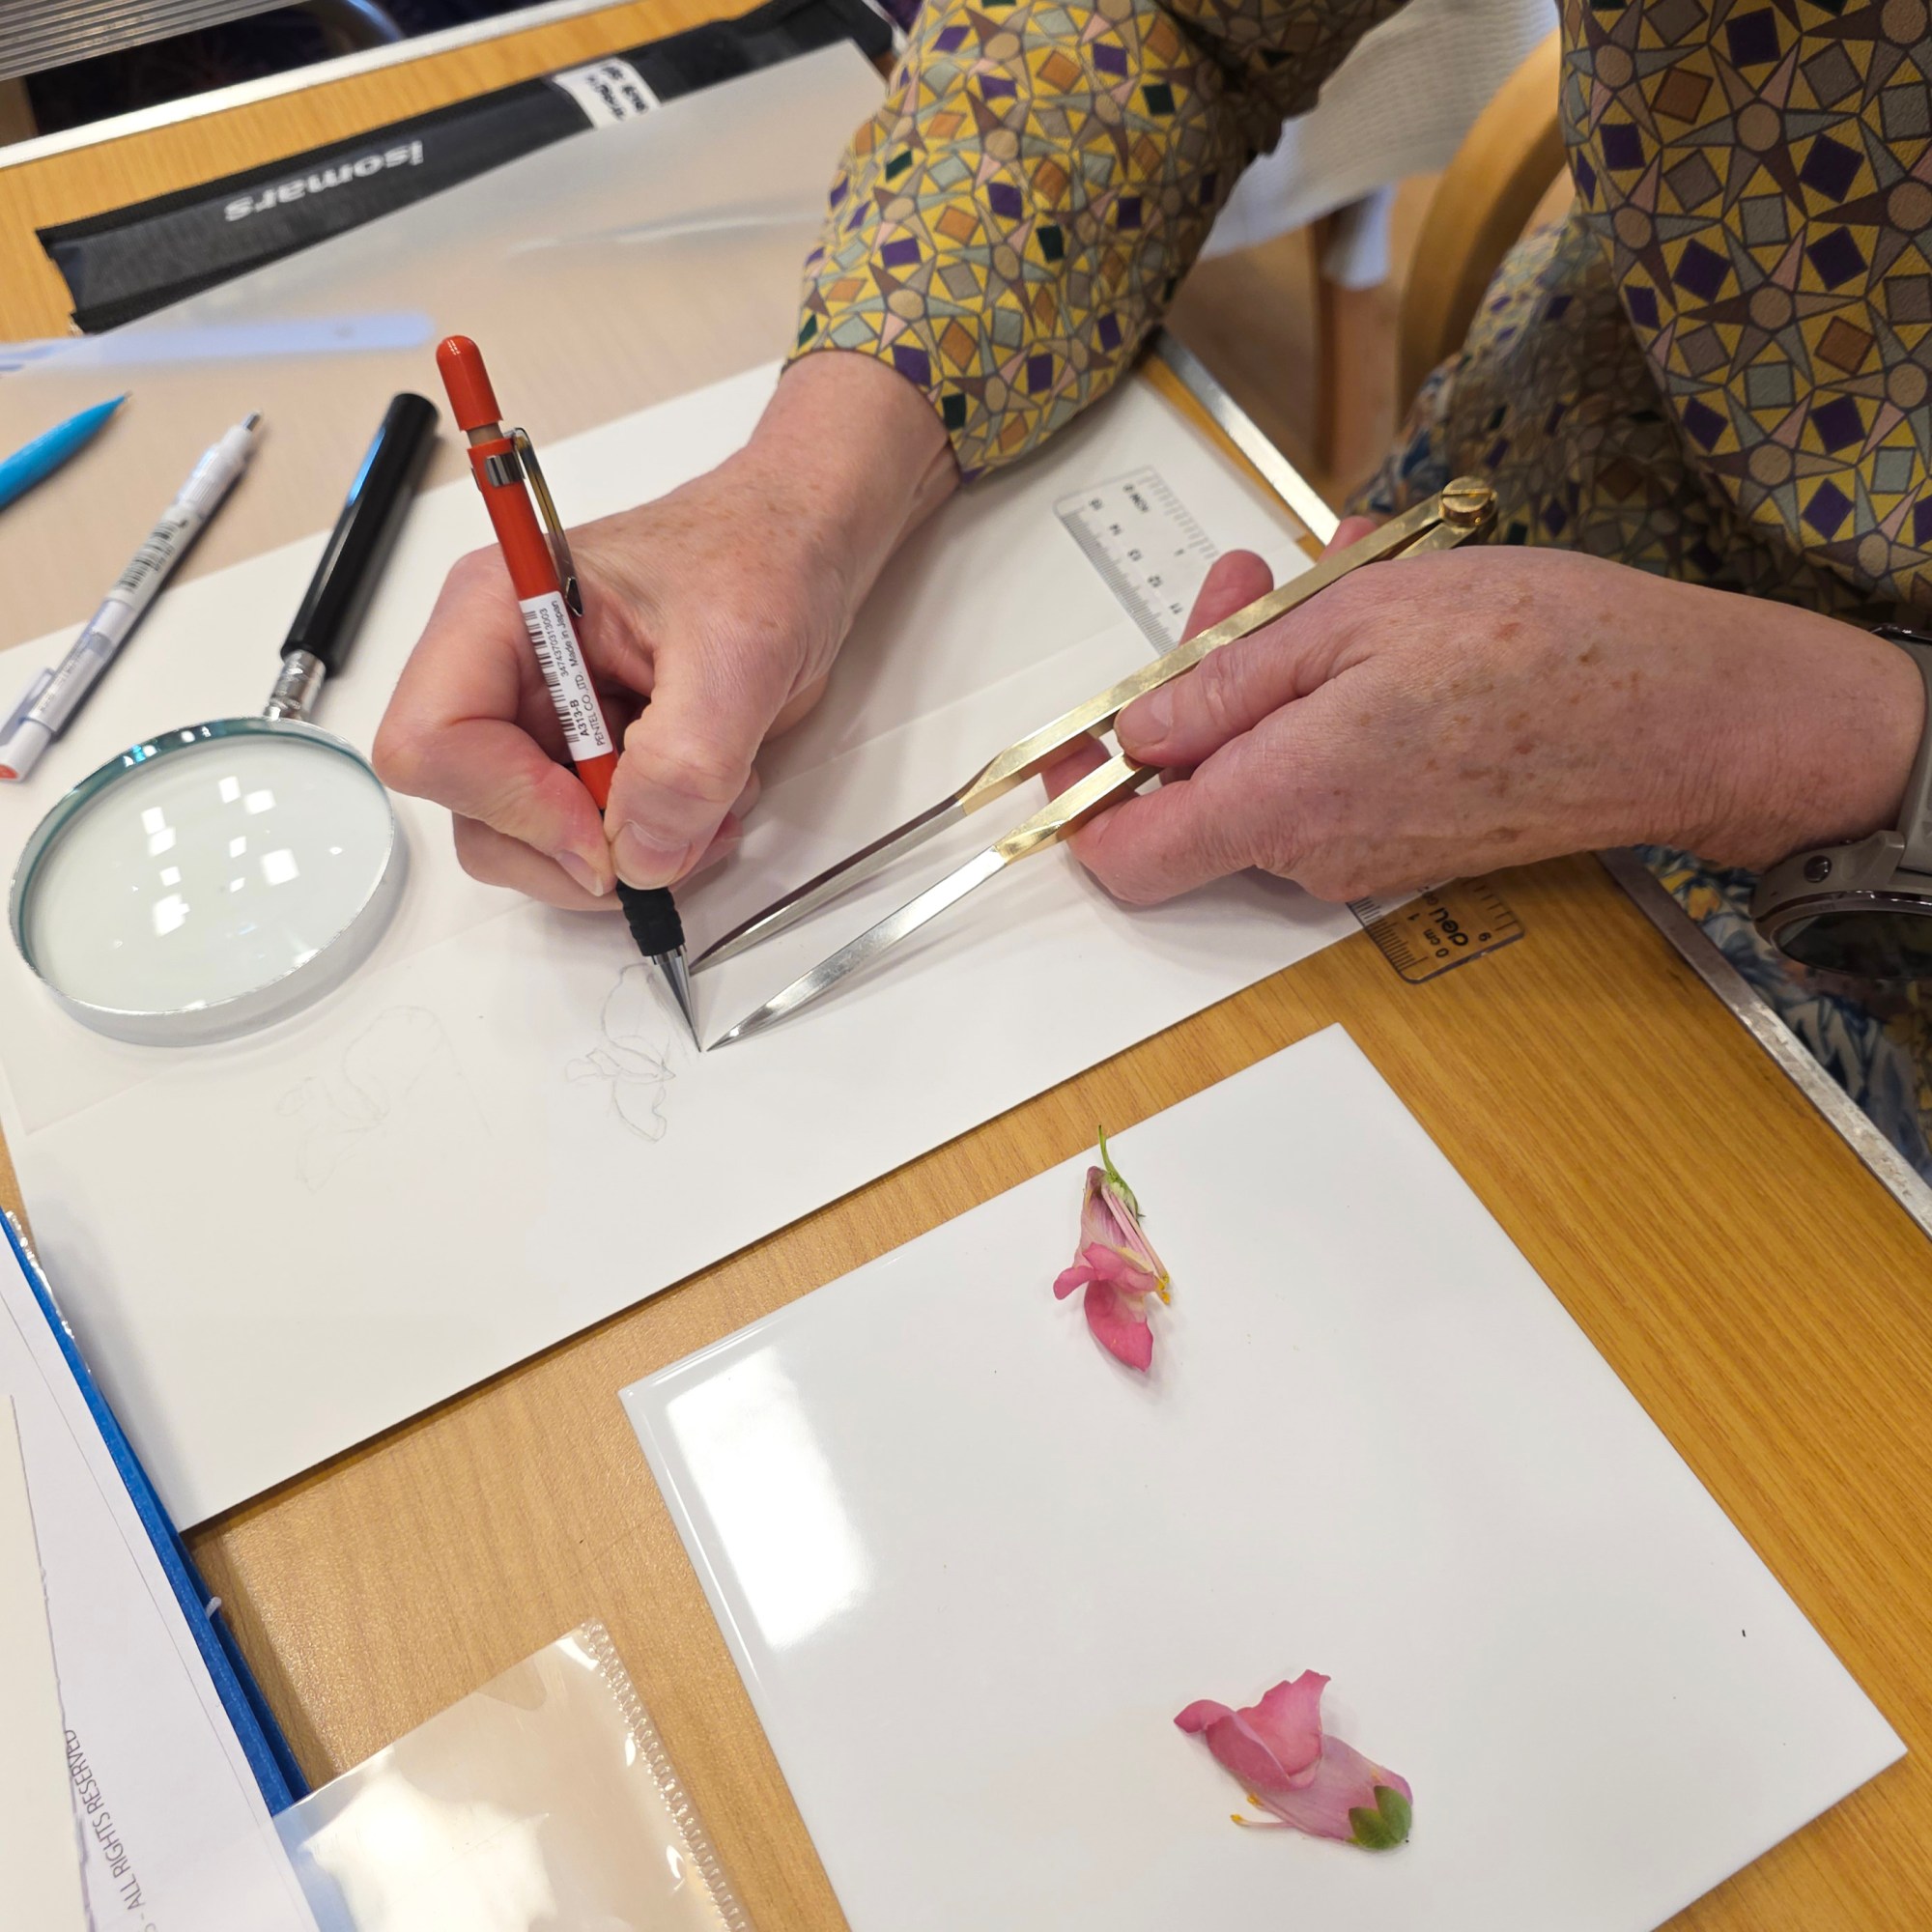
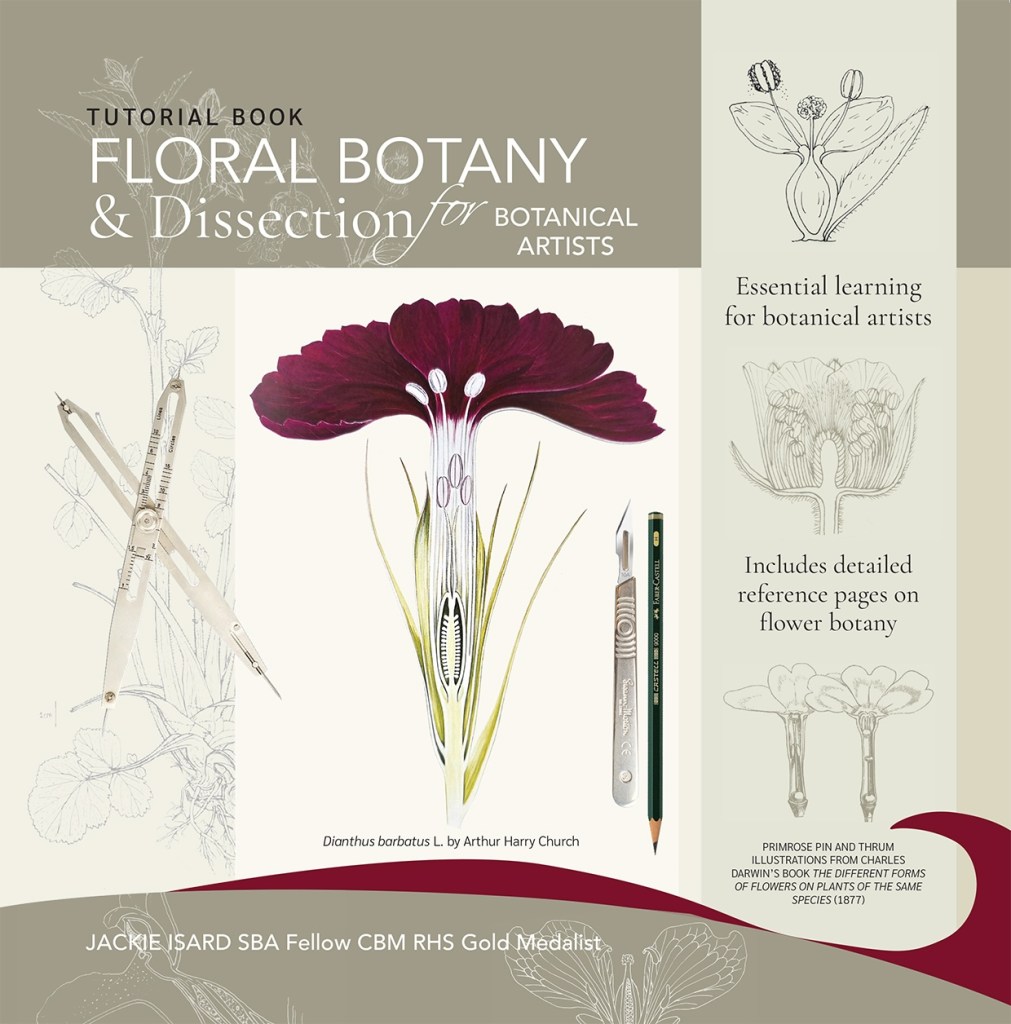
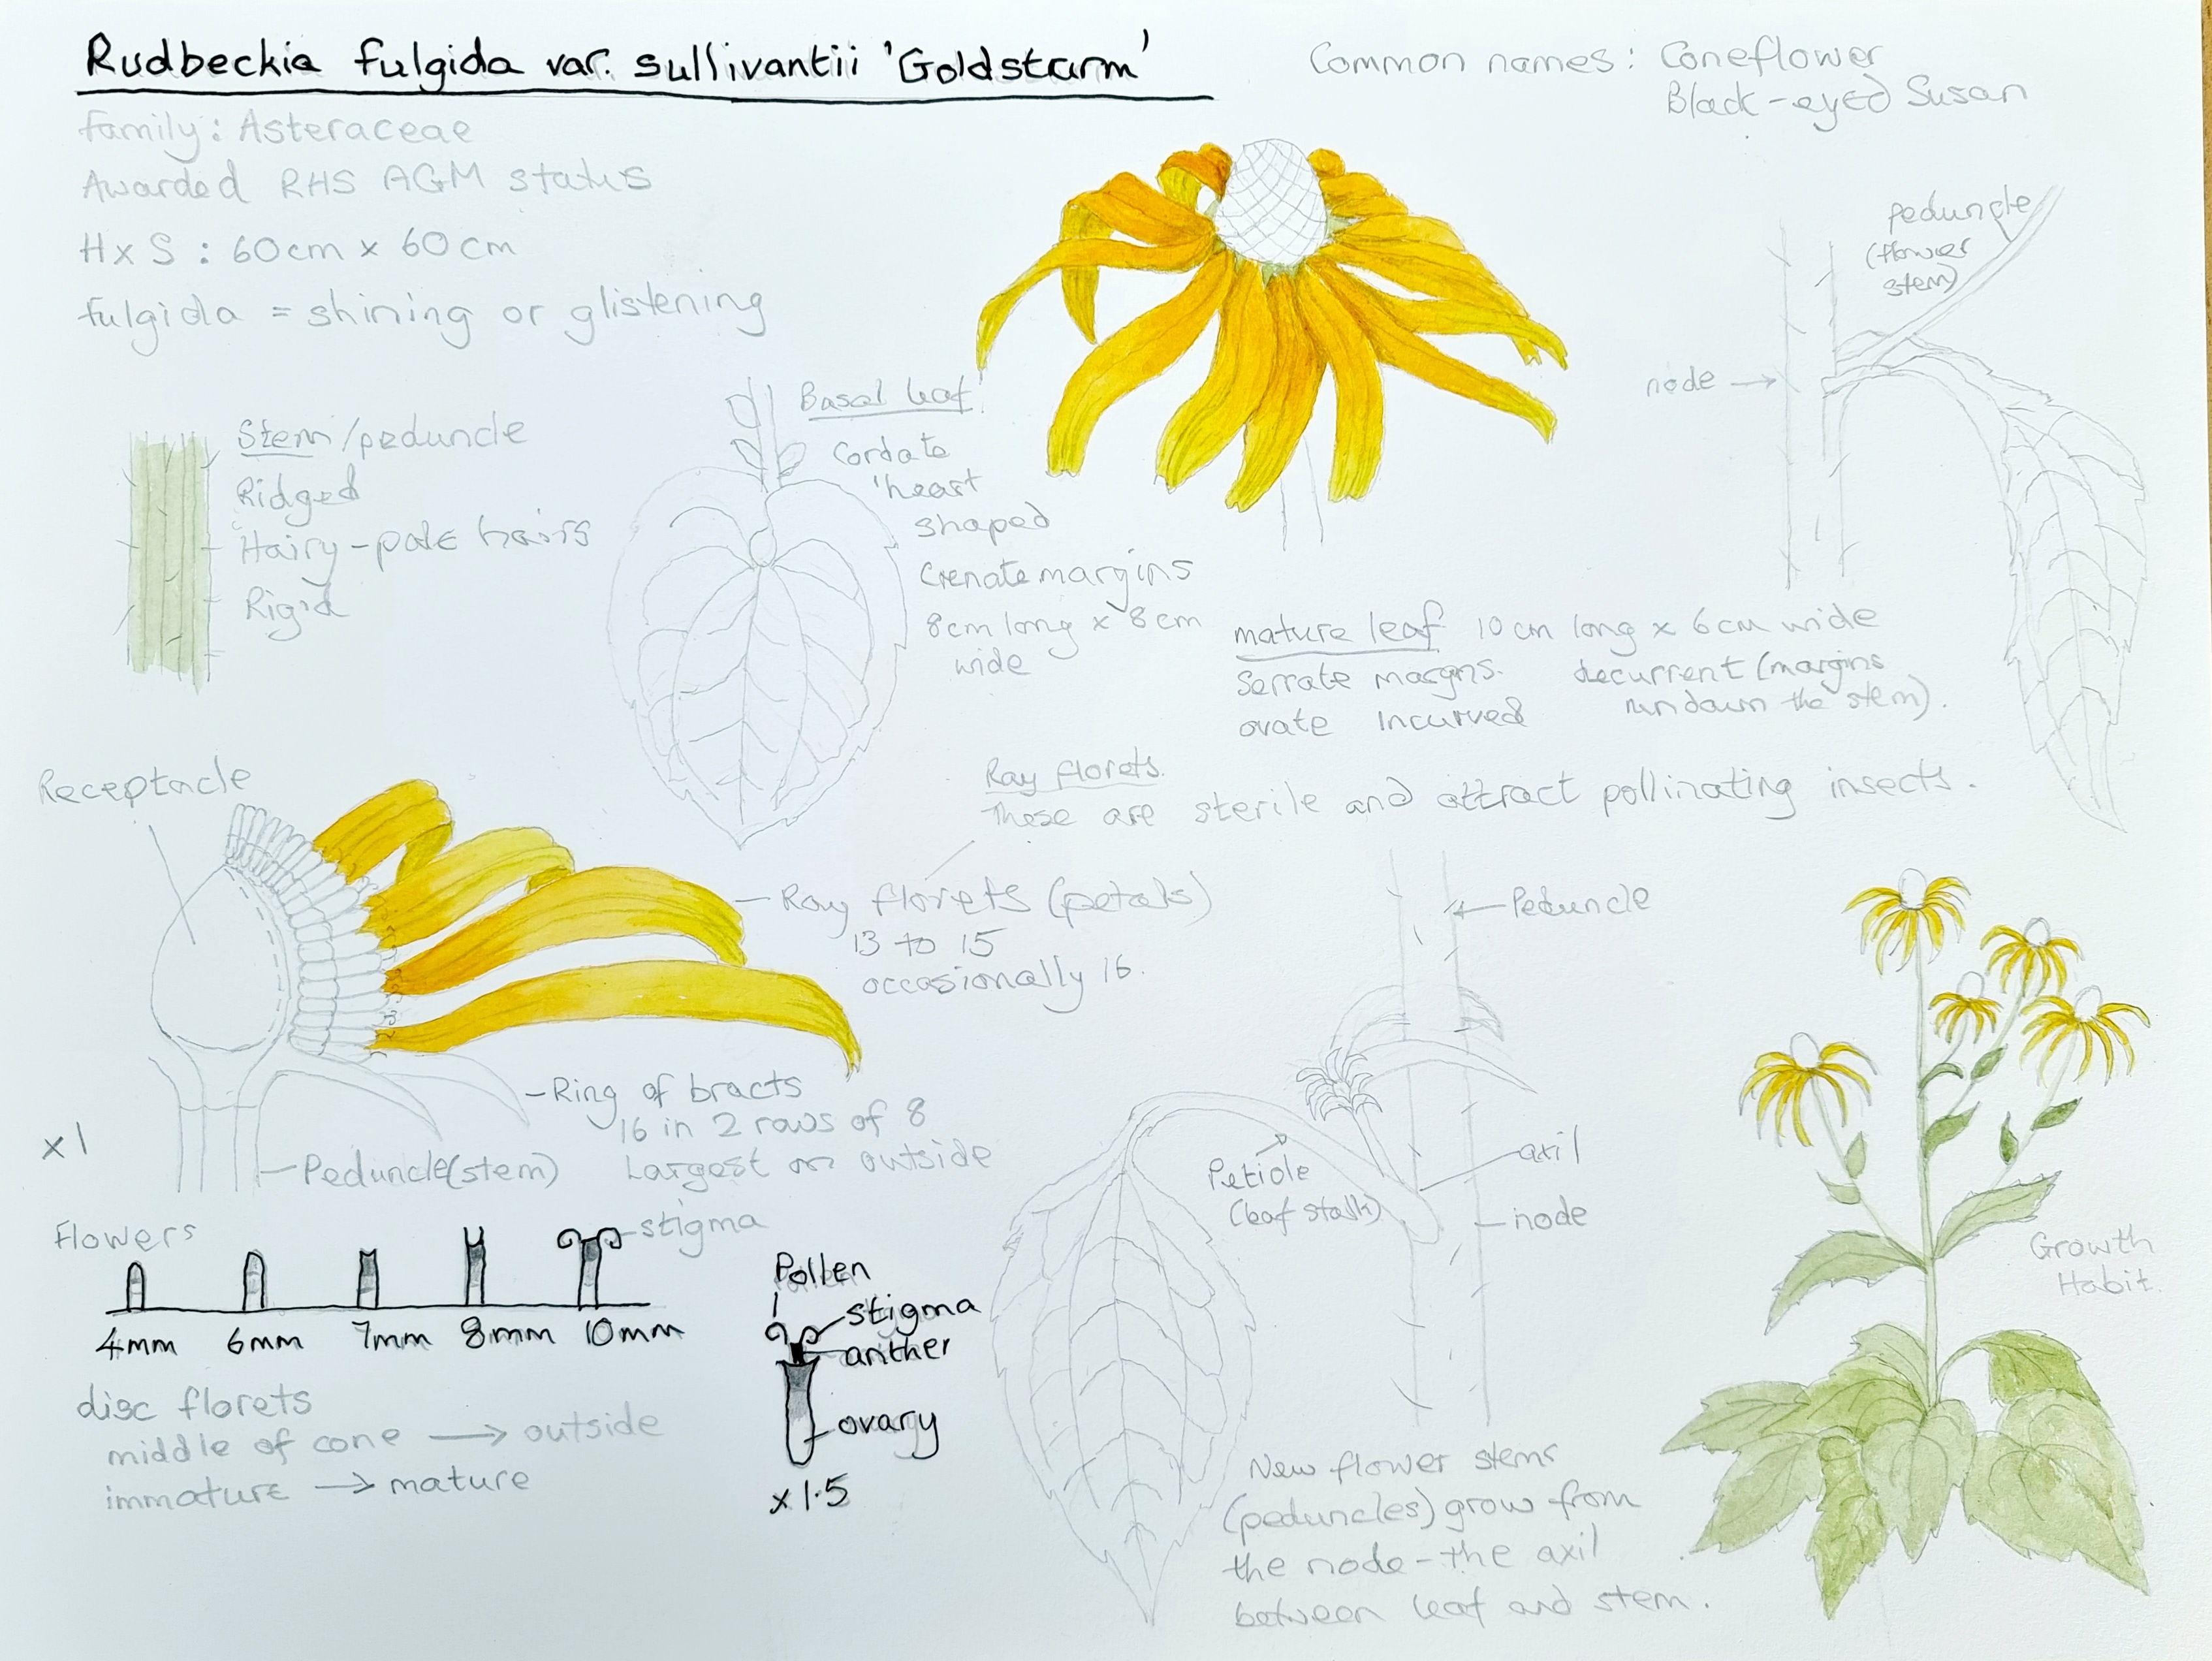
‘Floral Botany and Dissection for Botanical Artists’ Written, designed and printed by Jackie Isard.
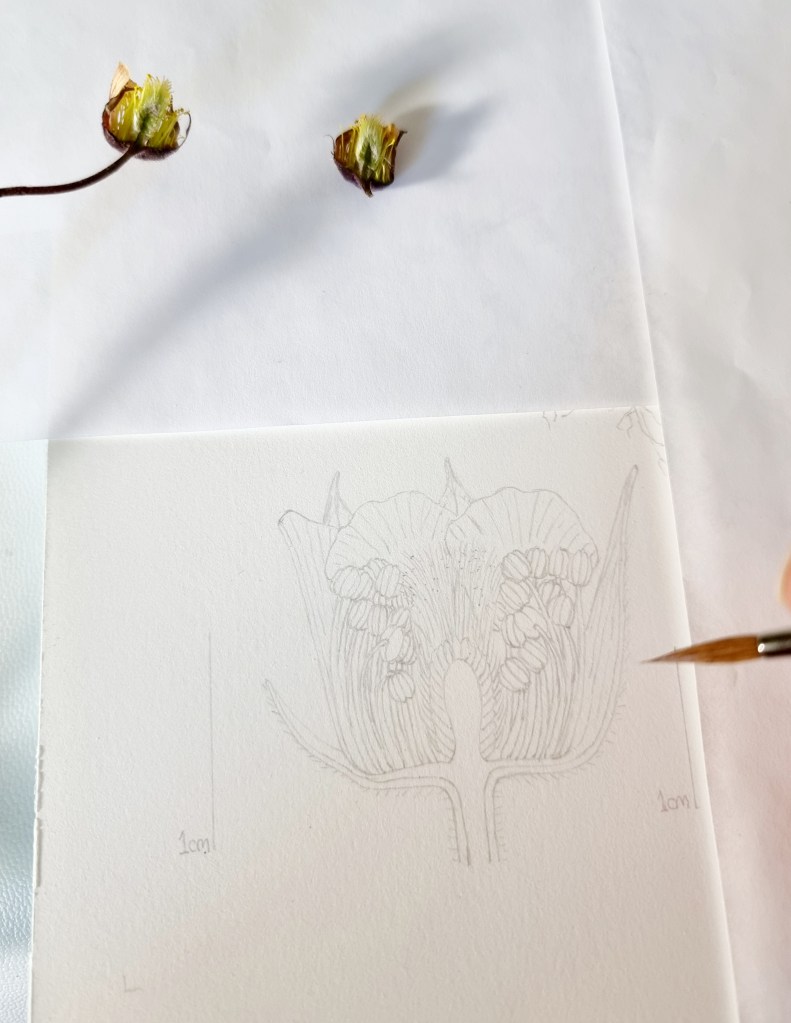
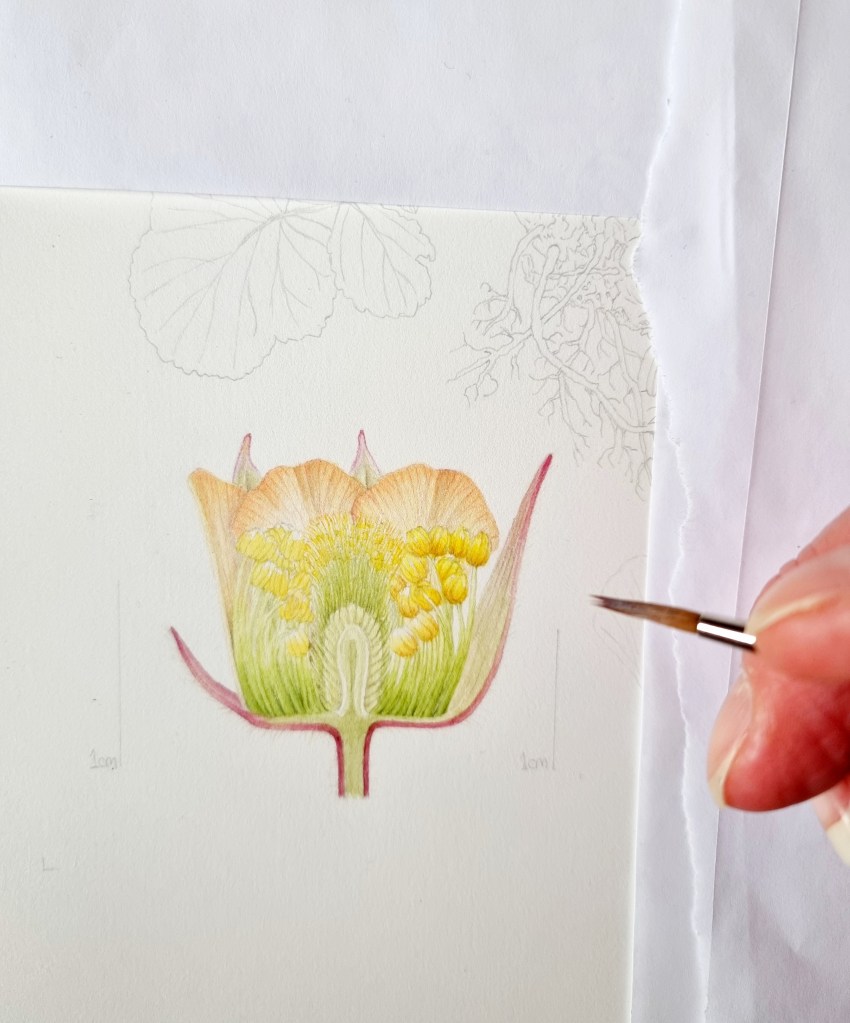
When I began my project work for the RHS botanical exhibition I became very interested in botany. It was important to me to paint a true likeness in accurate detail. I wanted my exhibit to look like a series of botanical plates in colour. Each painting included the plant’s lifecycle from bud to seed and because of this my research was done throughout the seasons. Once you start looking at plants, with botany in mind, you just want to know more. It’s very addictive!
I started to teach basic botany to botanical artist students soon after my RHS Gold medal award in 2022. Throughout my RHS studies I learned a great deal about plant botany. I couldn’t have done it without having a professional botanist to hand to check my drawings. It became clear to me that botanical artists really needed to know a little botany in order to understand the plant they were painting. This knowledge helps the artist to make a more accurate and detailed painting. At my basic botany workshops many students would tell me how much their eyes had been opened. It was enlightening for everyone. Knowing a little botany allows you to see or understand important plant details that are typically hidden, distant or unnoticed. Until you start looking more carefully, you really don’t see all the curious and interesting features of a plant!
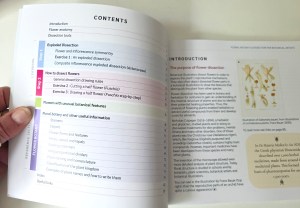
Later, whilst looking at the course notes for my basic botany workshop, I thought about writing a basic botany book. This was too vast a subject and as I am not a trained botanist, I decided to focus on one of my favourite parts, floral botany and dissection. With my professional botanist at hand, I finally made it to the finishing post and created the book you may well be holding in your hands soon. This tutorial book will teach you a great deal about flower botany and give you an understanding of how to draw a flower dissection accurately and in detail. It is packed full of information with plenty of illustrated diagrams and photos. There is also a reference section at the back on flower botany and terms.
What’s in my book
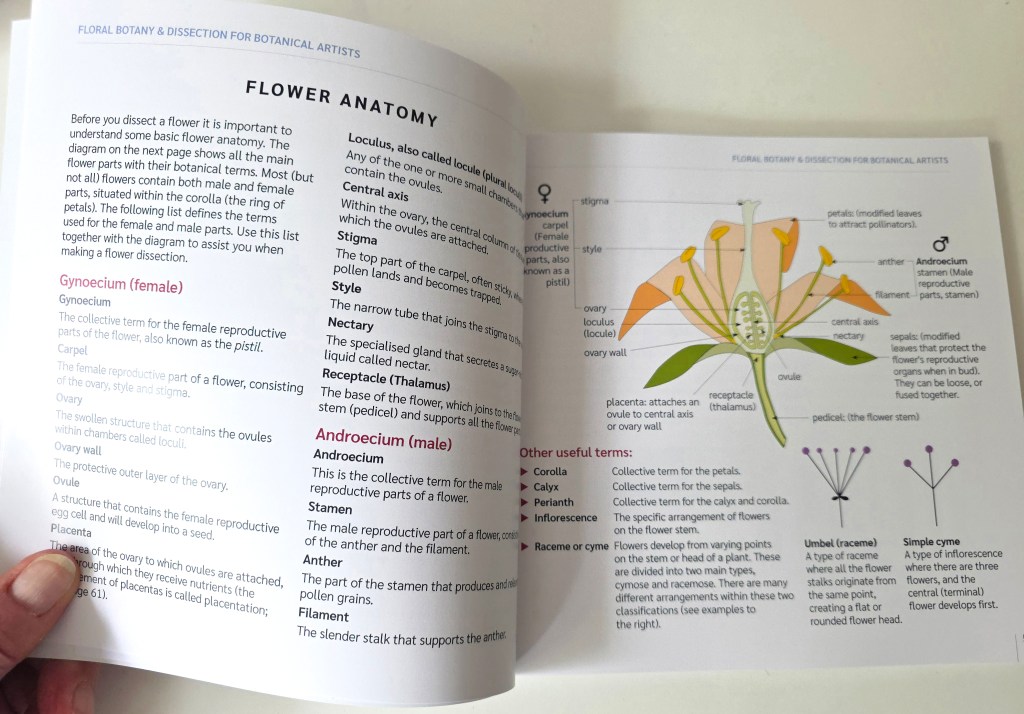
• Learn about the different parts of a flower.
• Learn how to draw a flower dissection to a measured scale.
• Follow a detailed step-by-step Fuchsia flower dissection.
• Explore other more complex flower dissection examples.
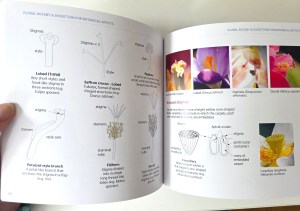
• Examples of flowers with unusual botanical features.
• In-depth floral botany section to help you understand the detailed botanical features of flowers.
• Learn how to draw scale bars.
• Understand plant naming and nomenclature.
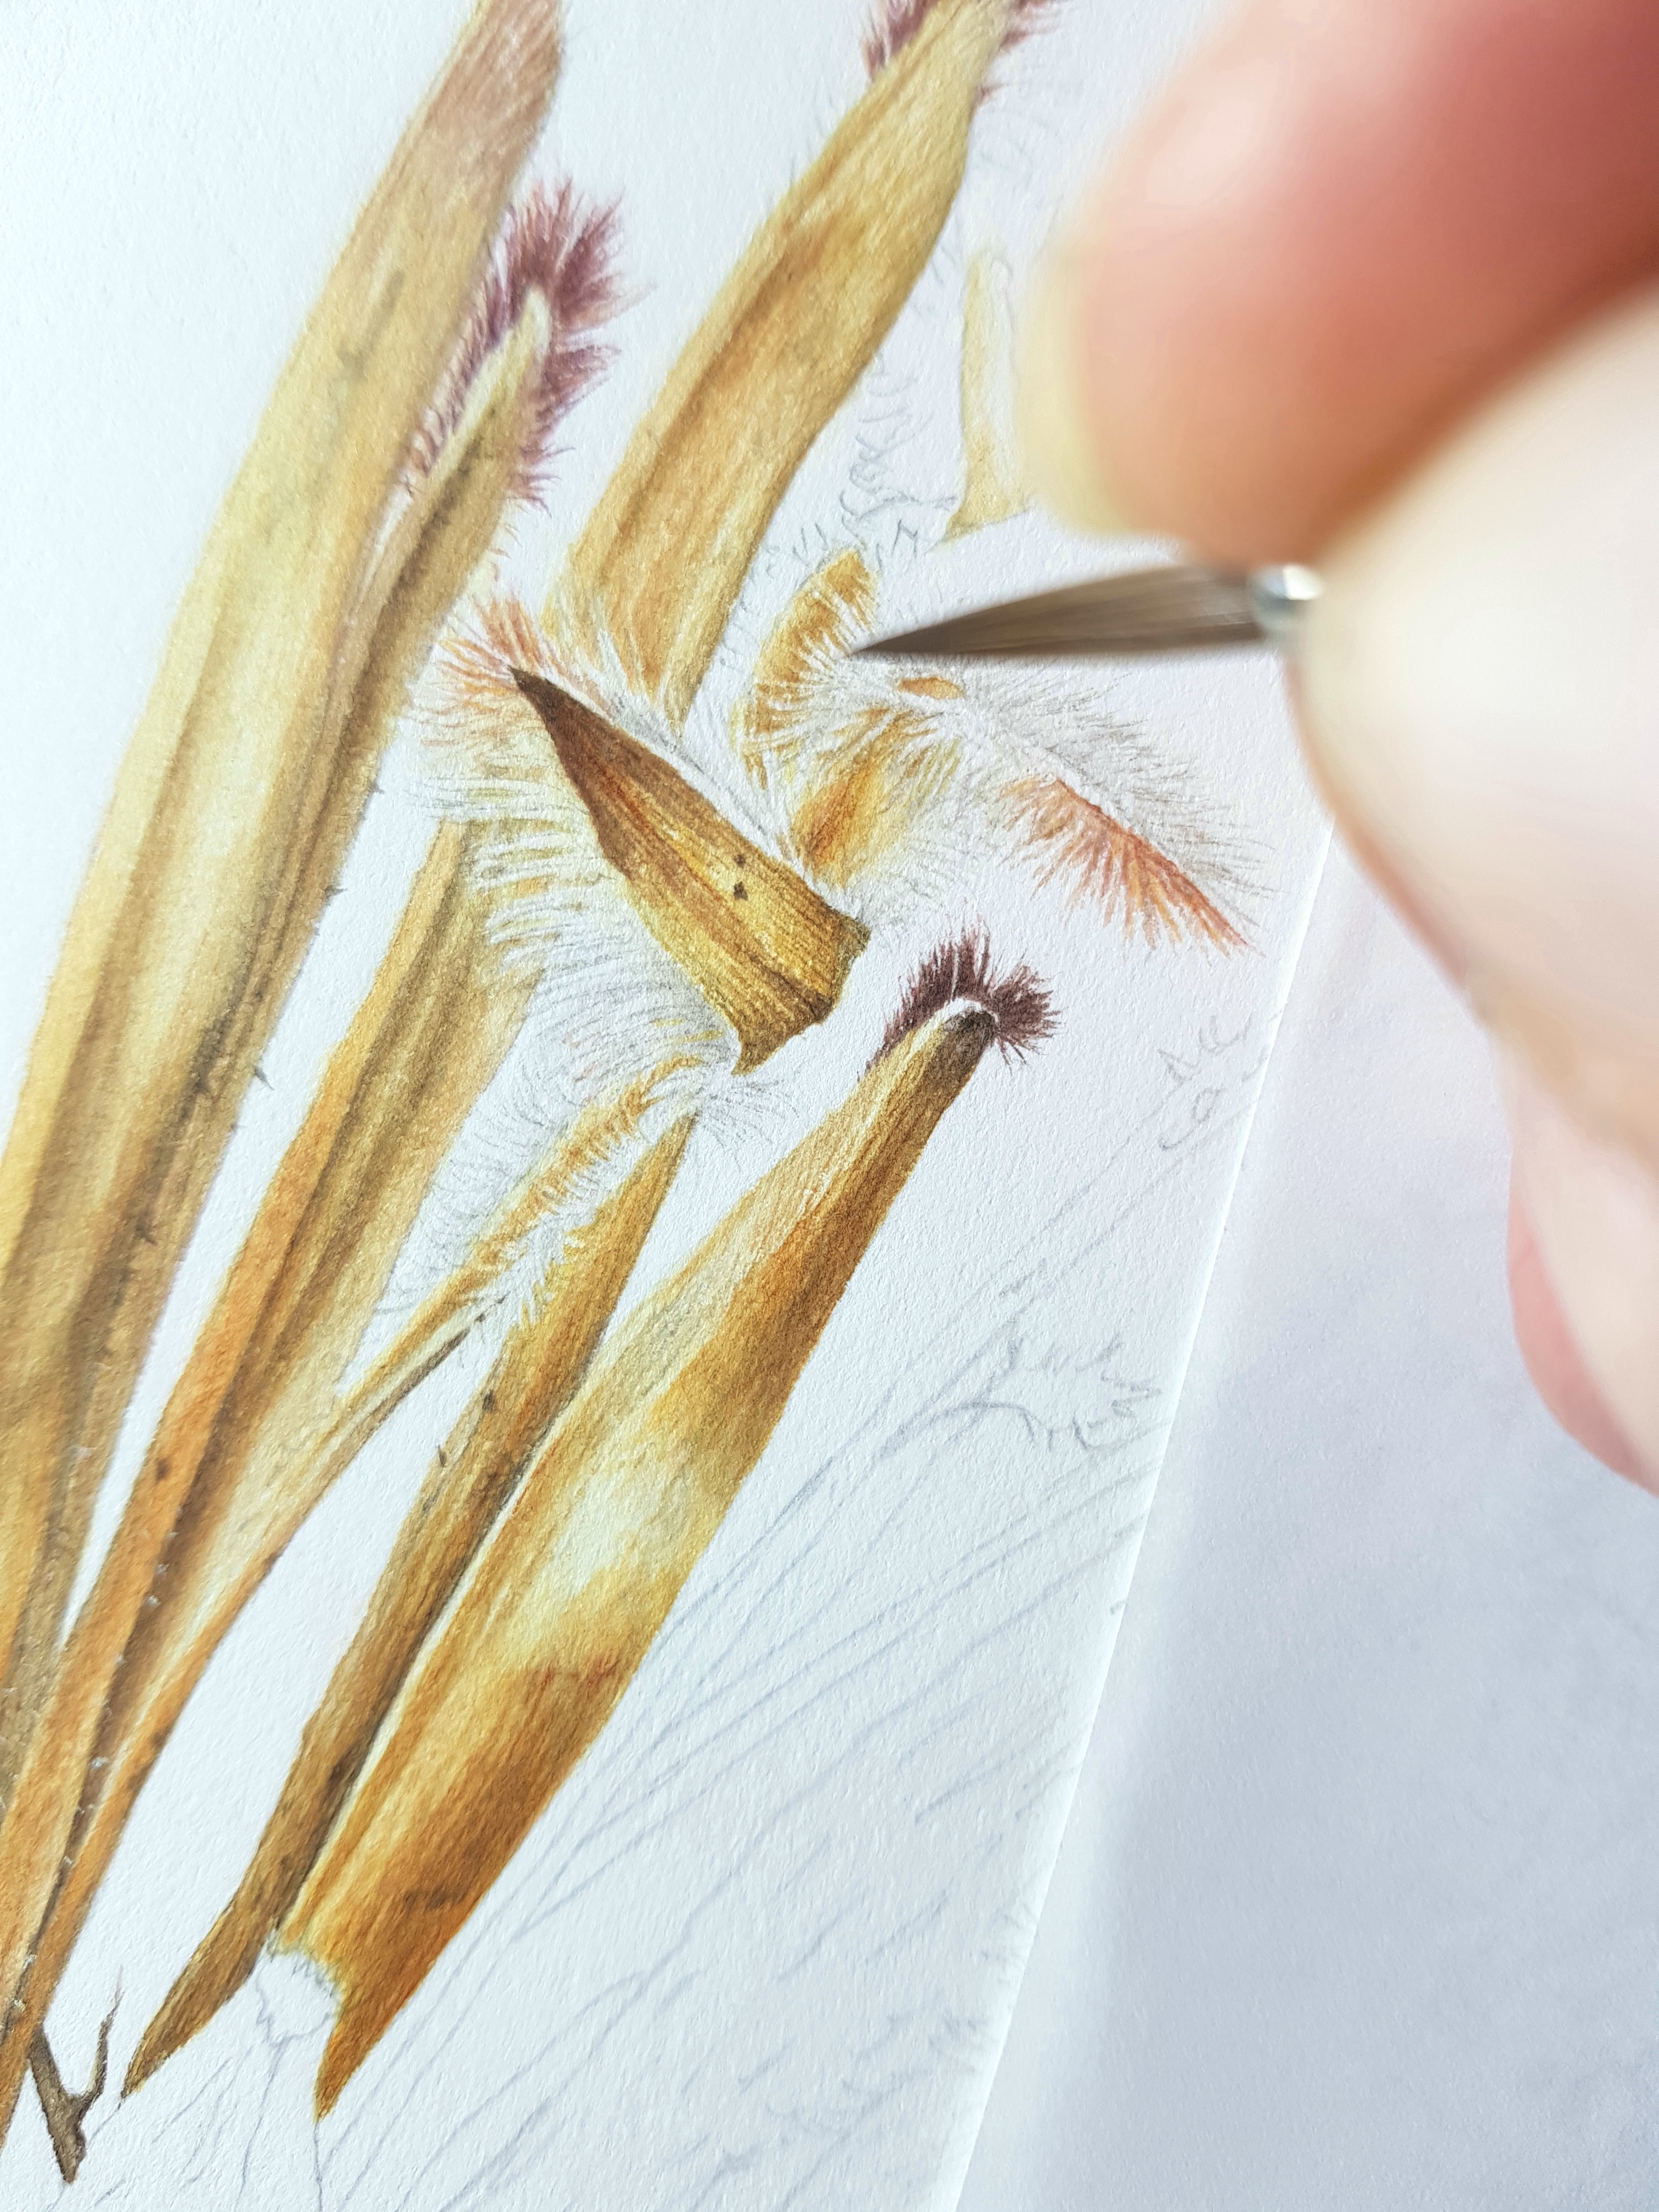
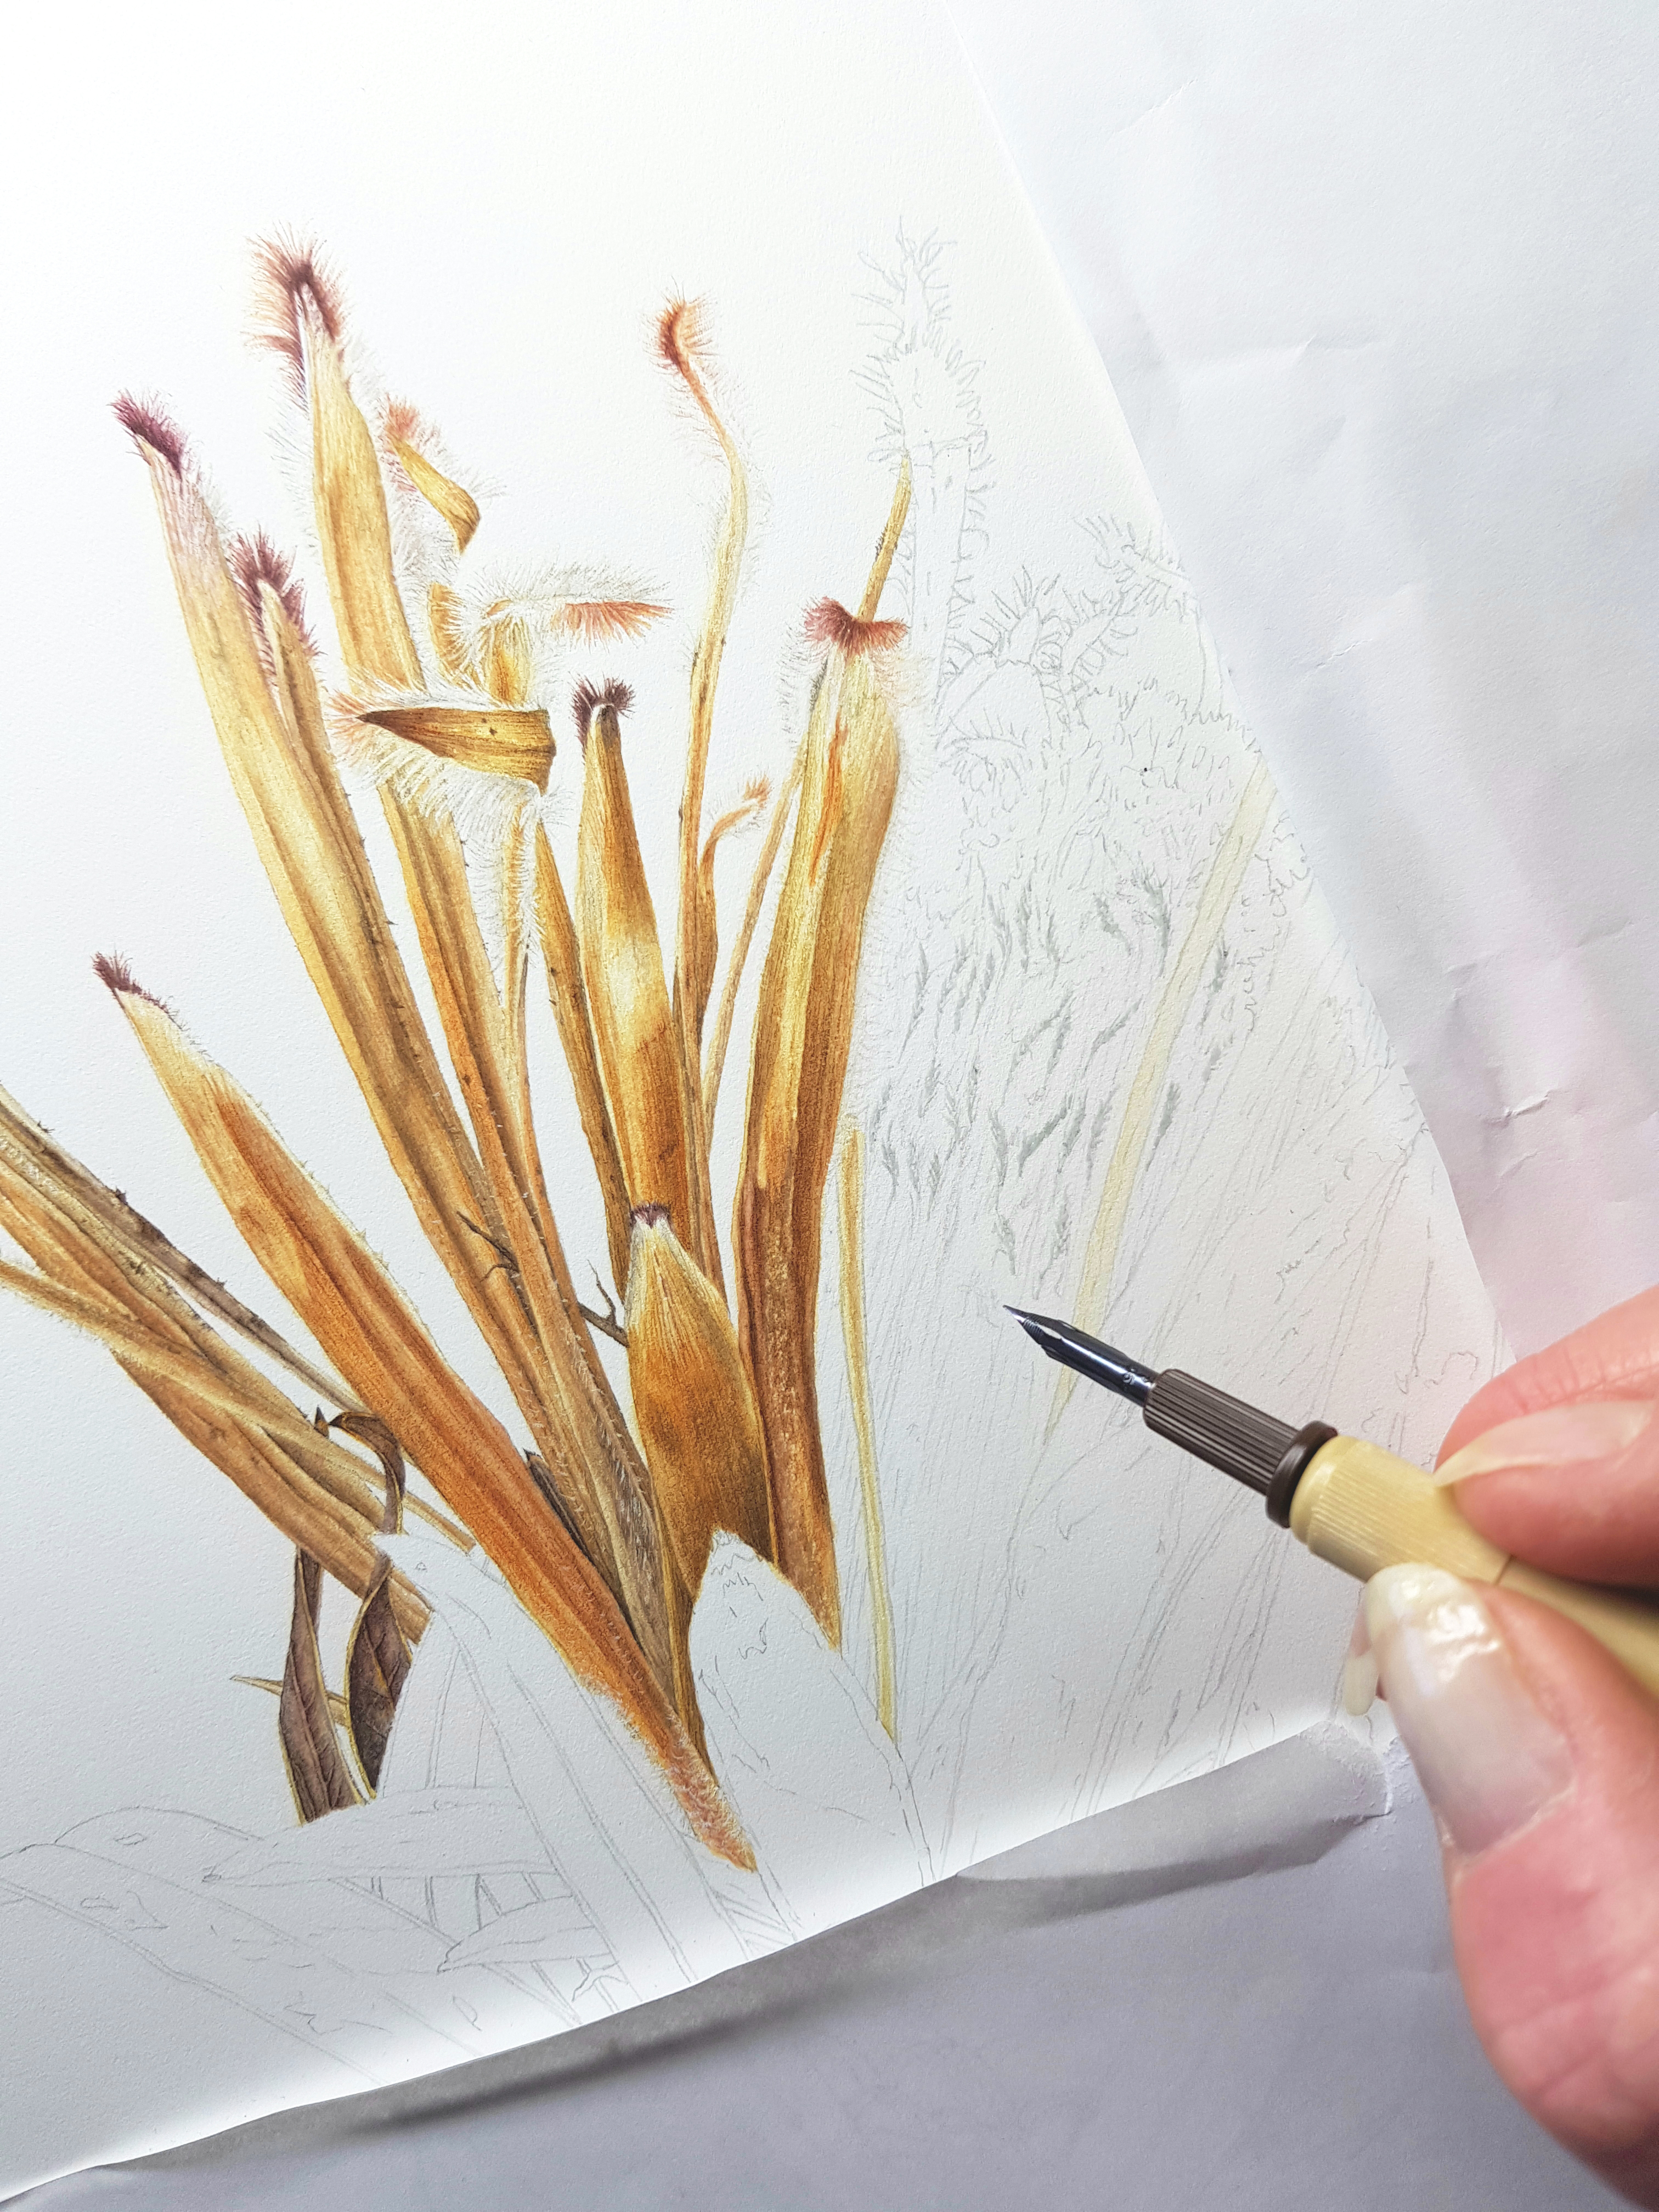
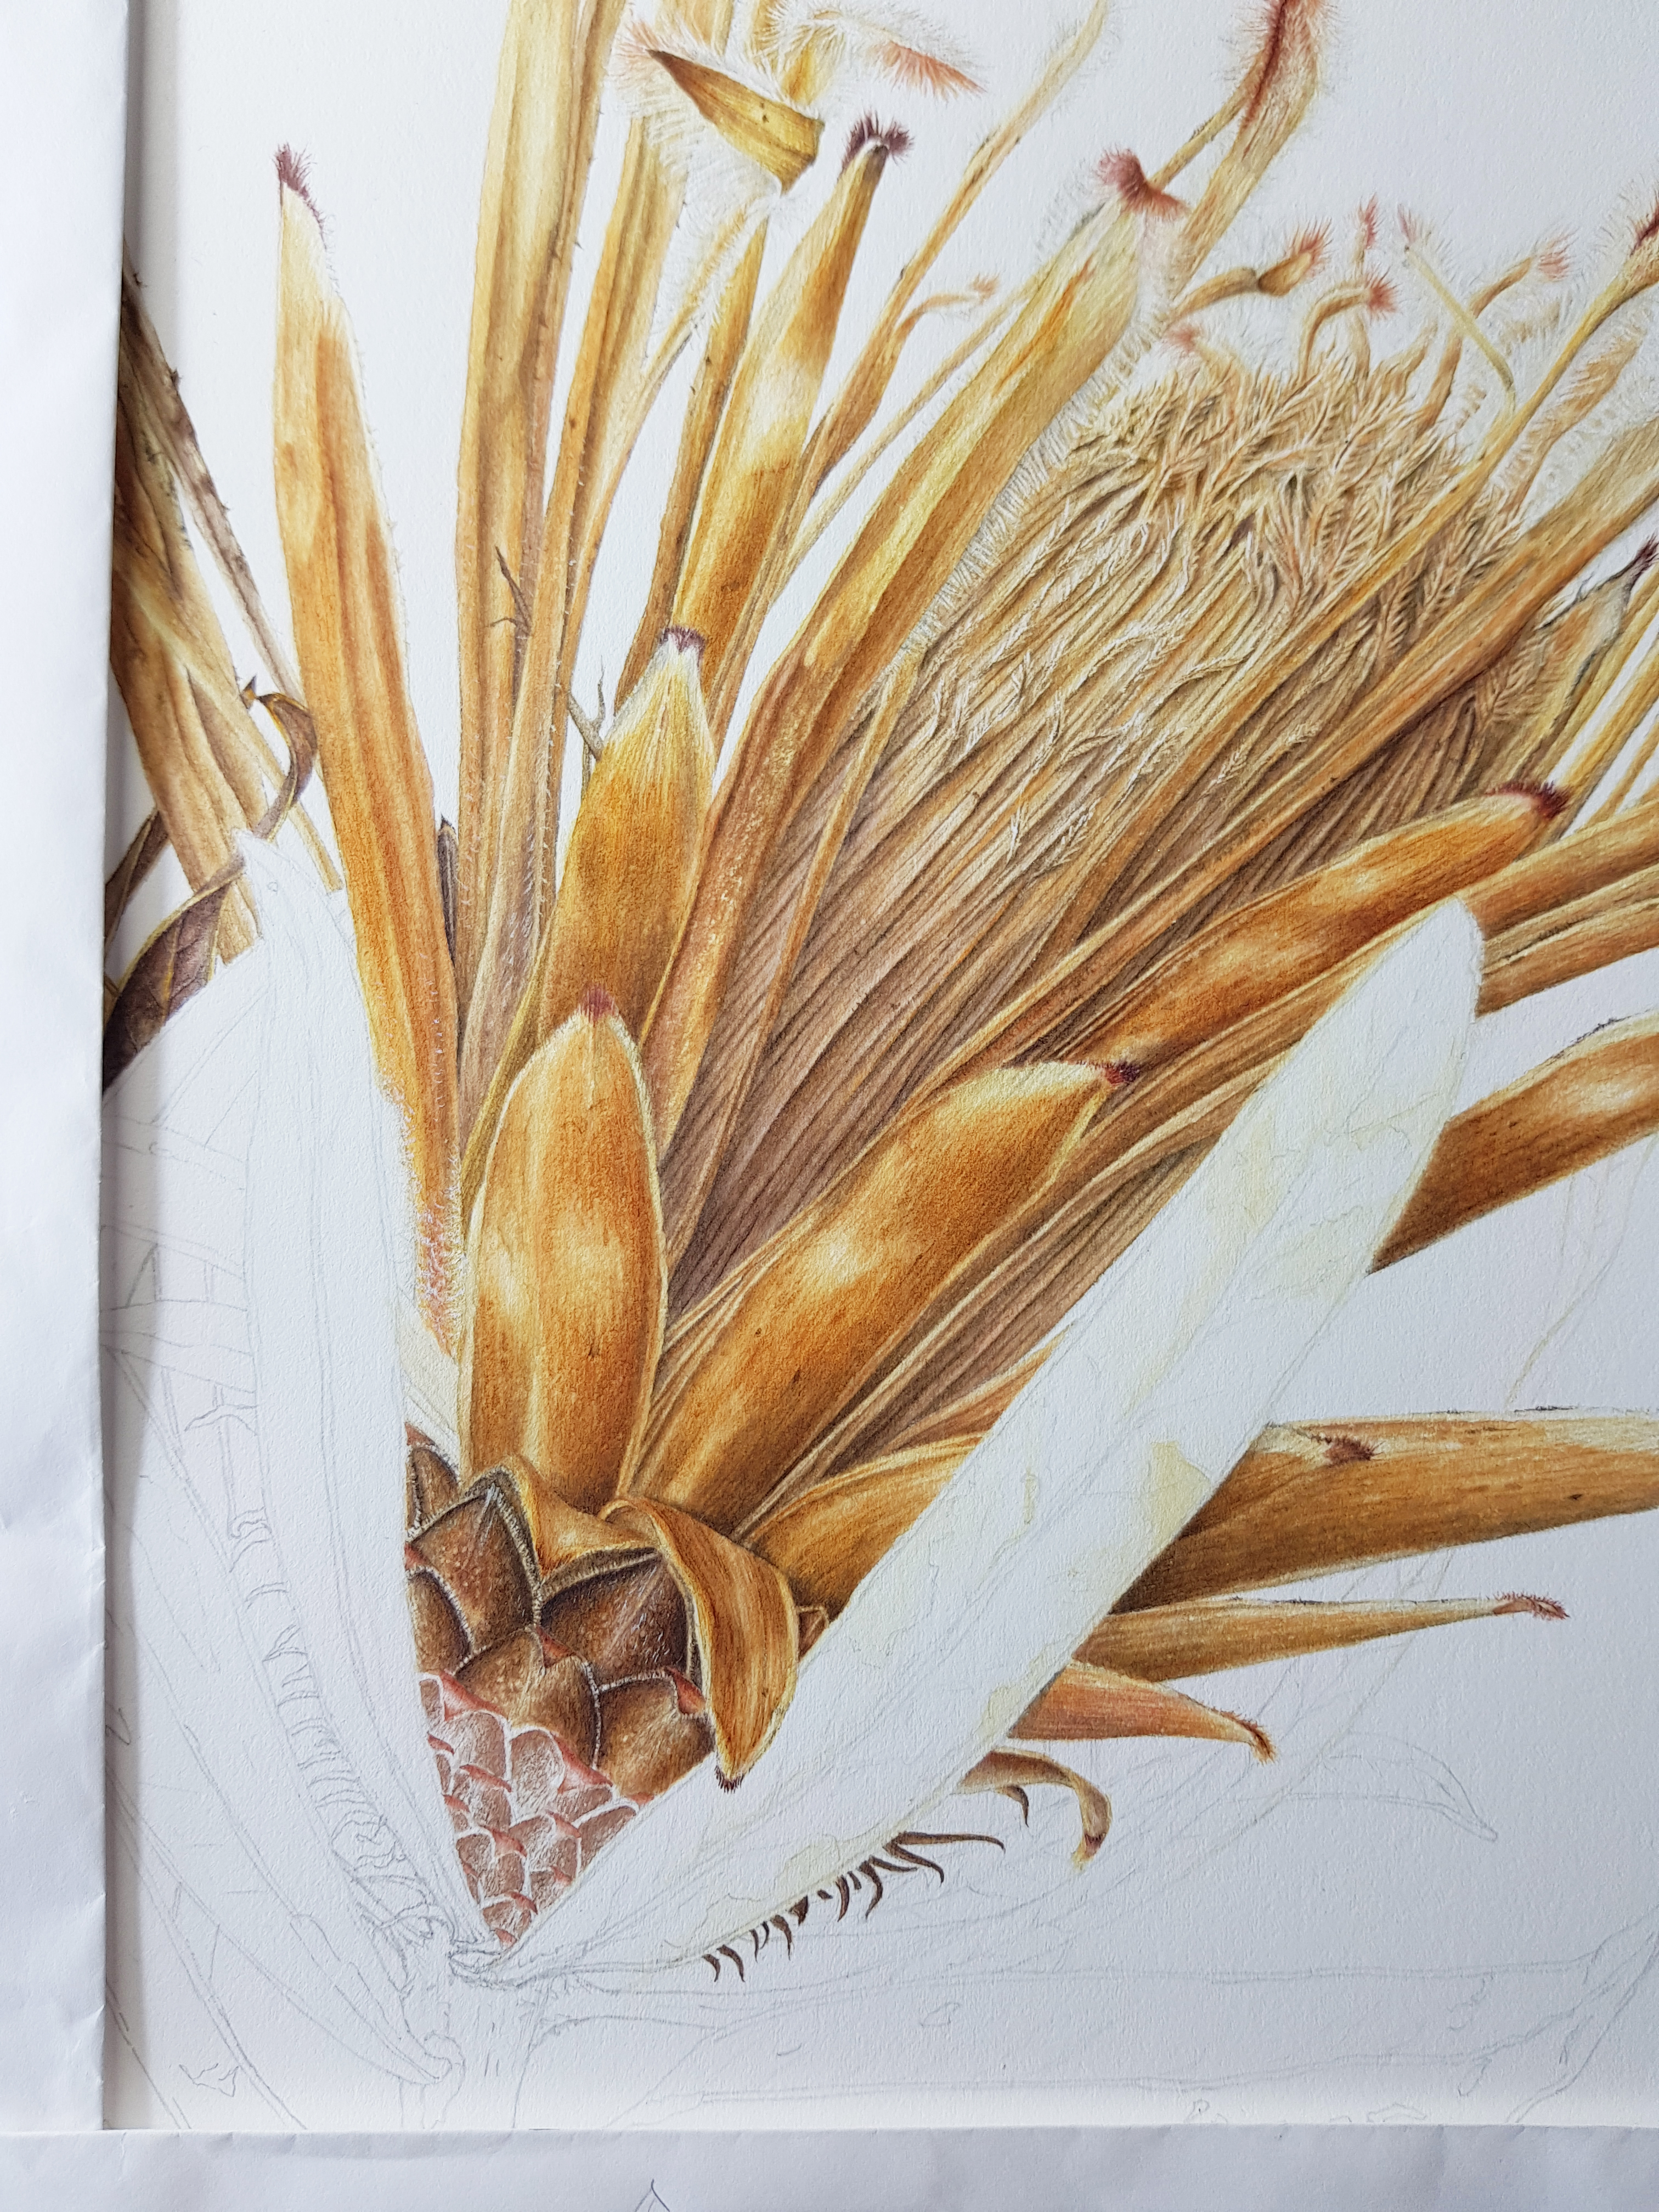
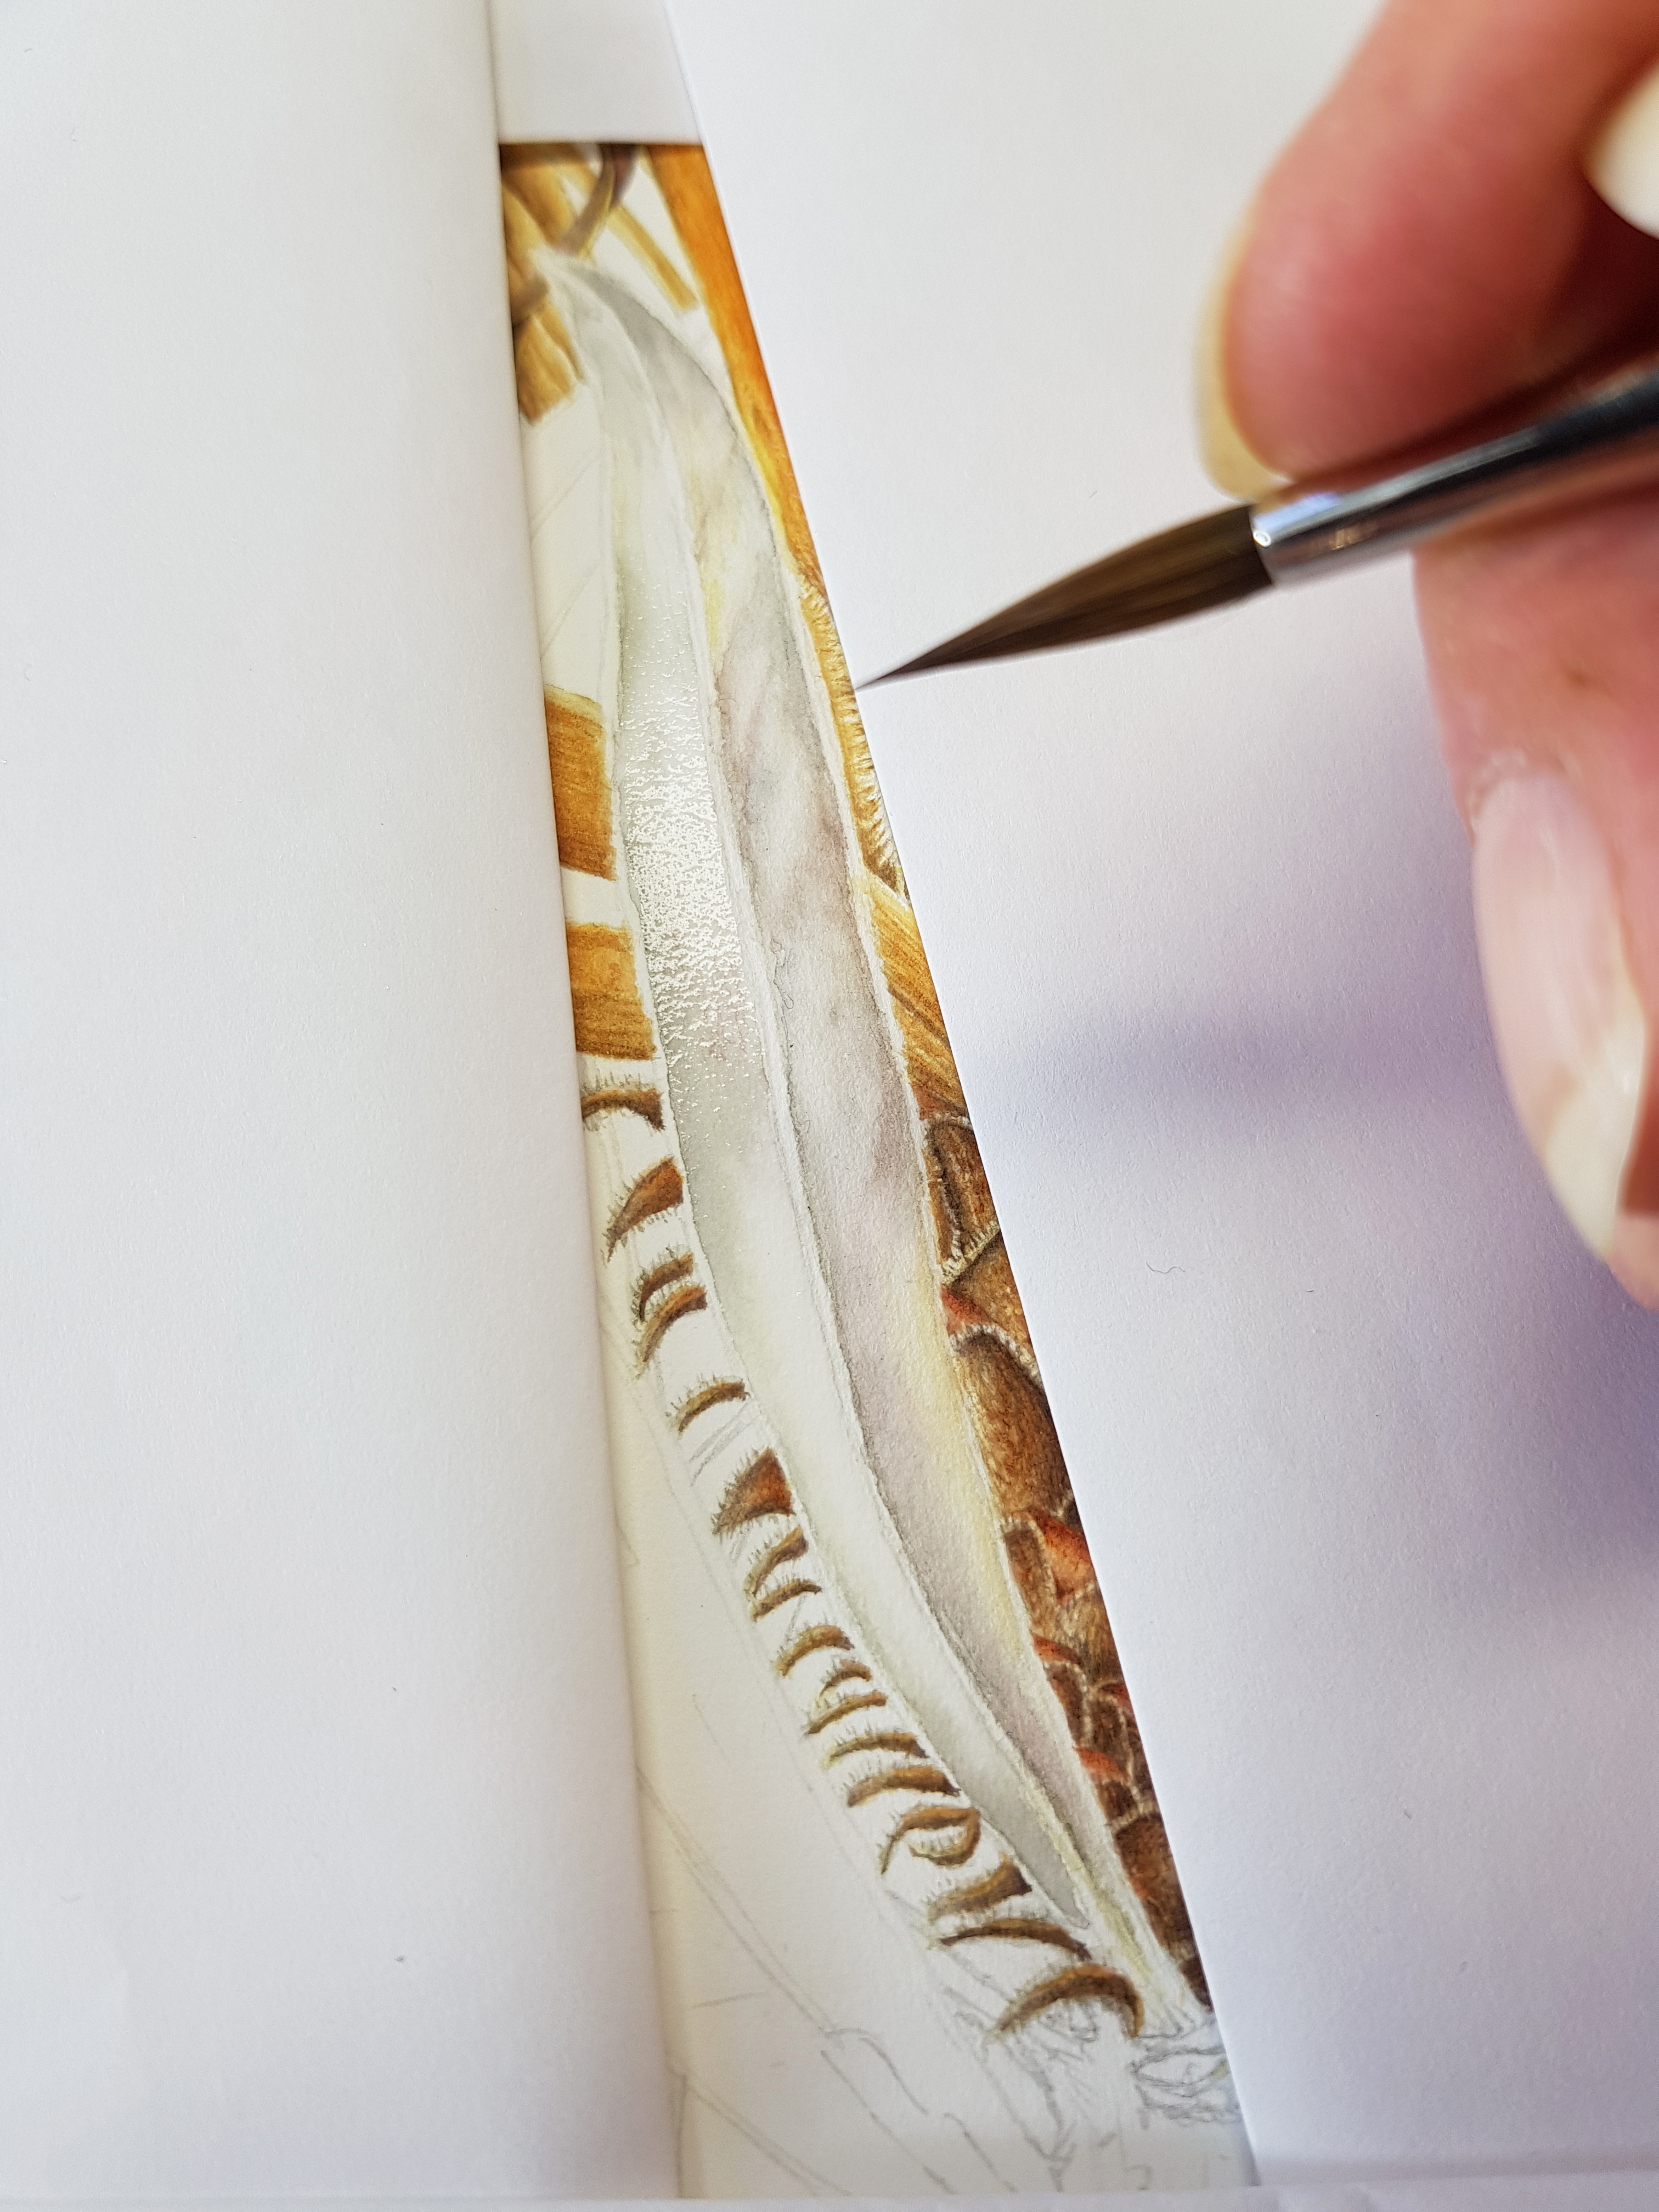
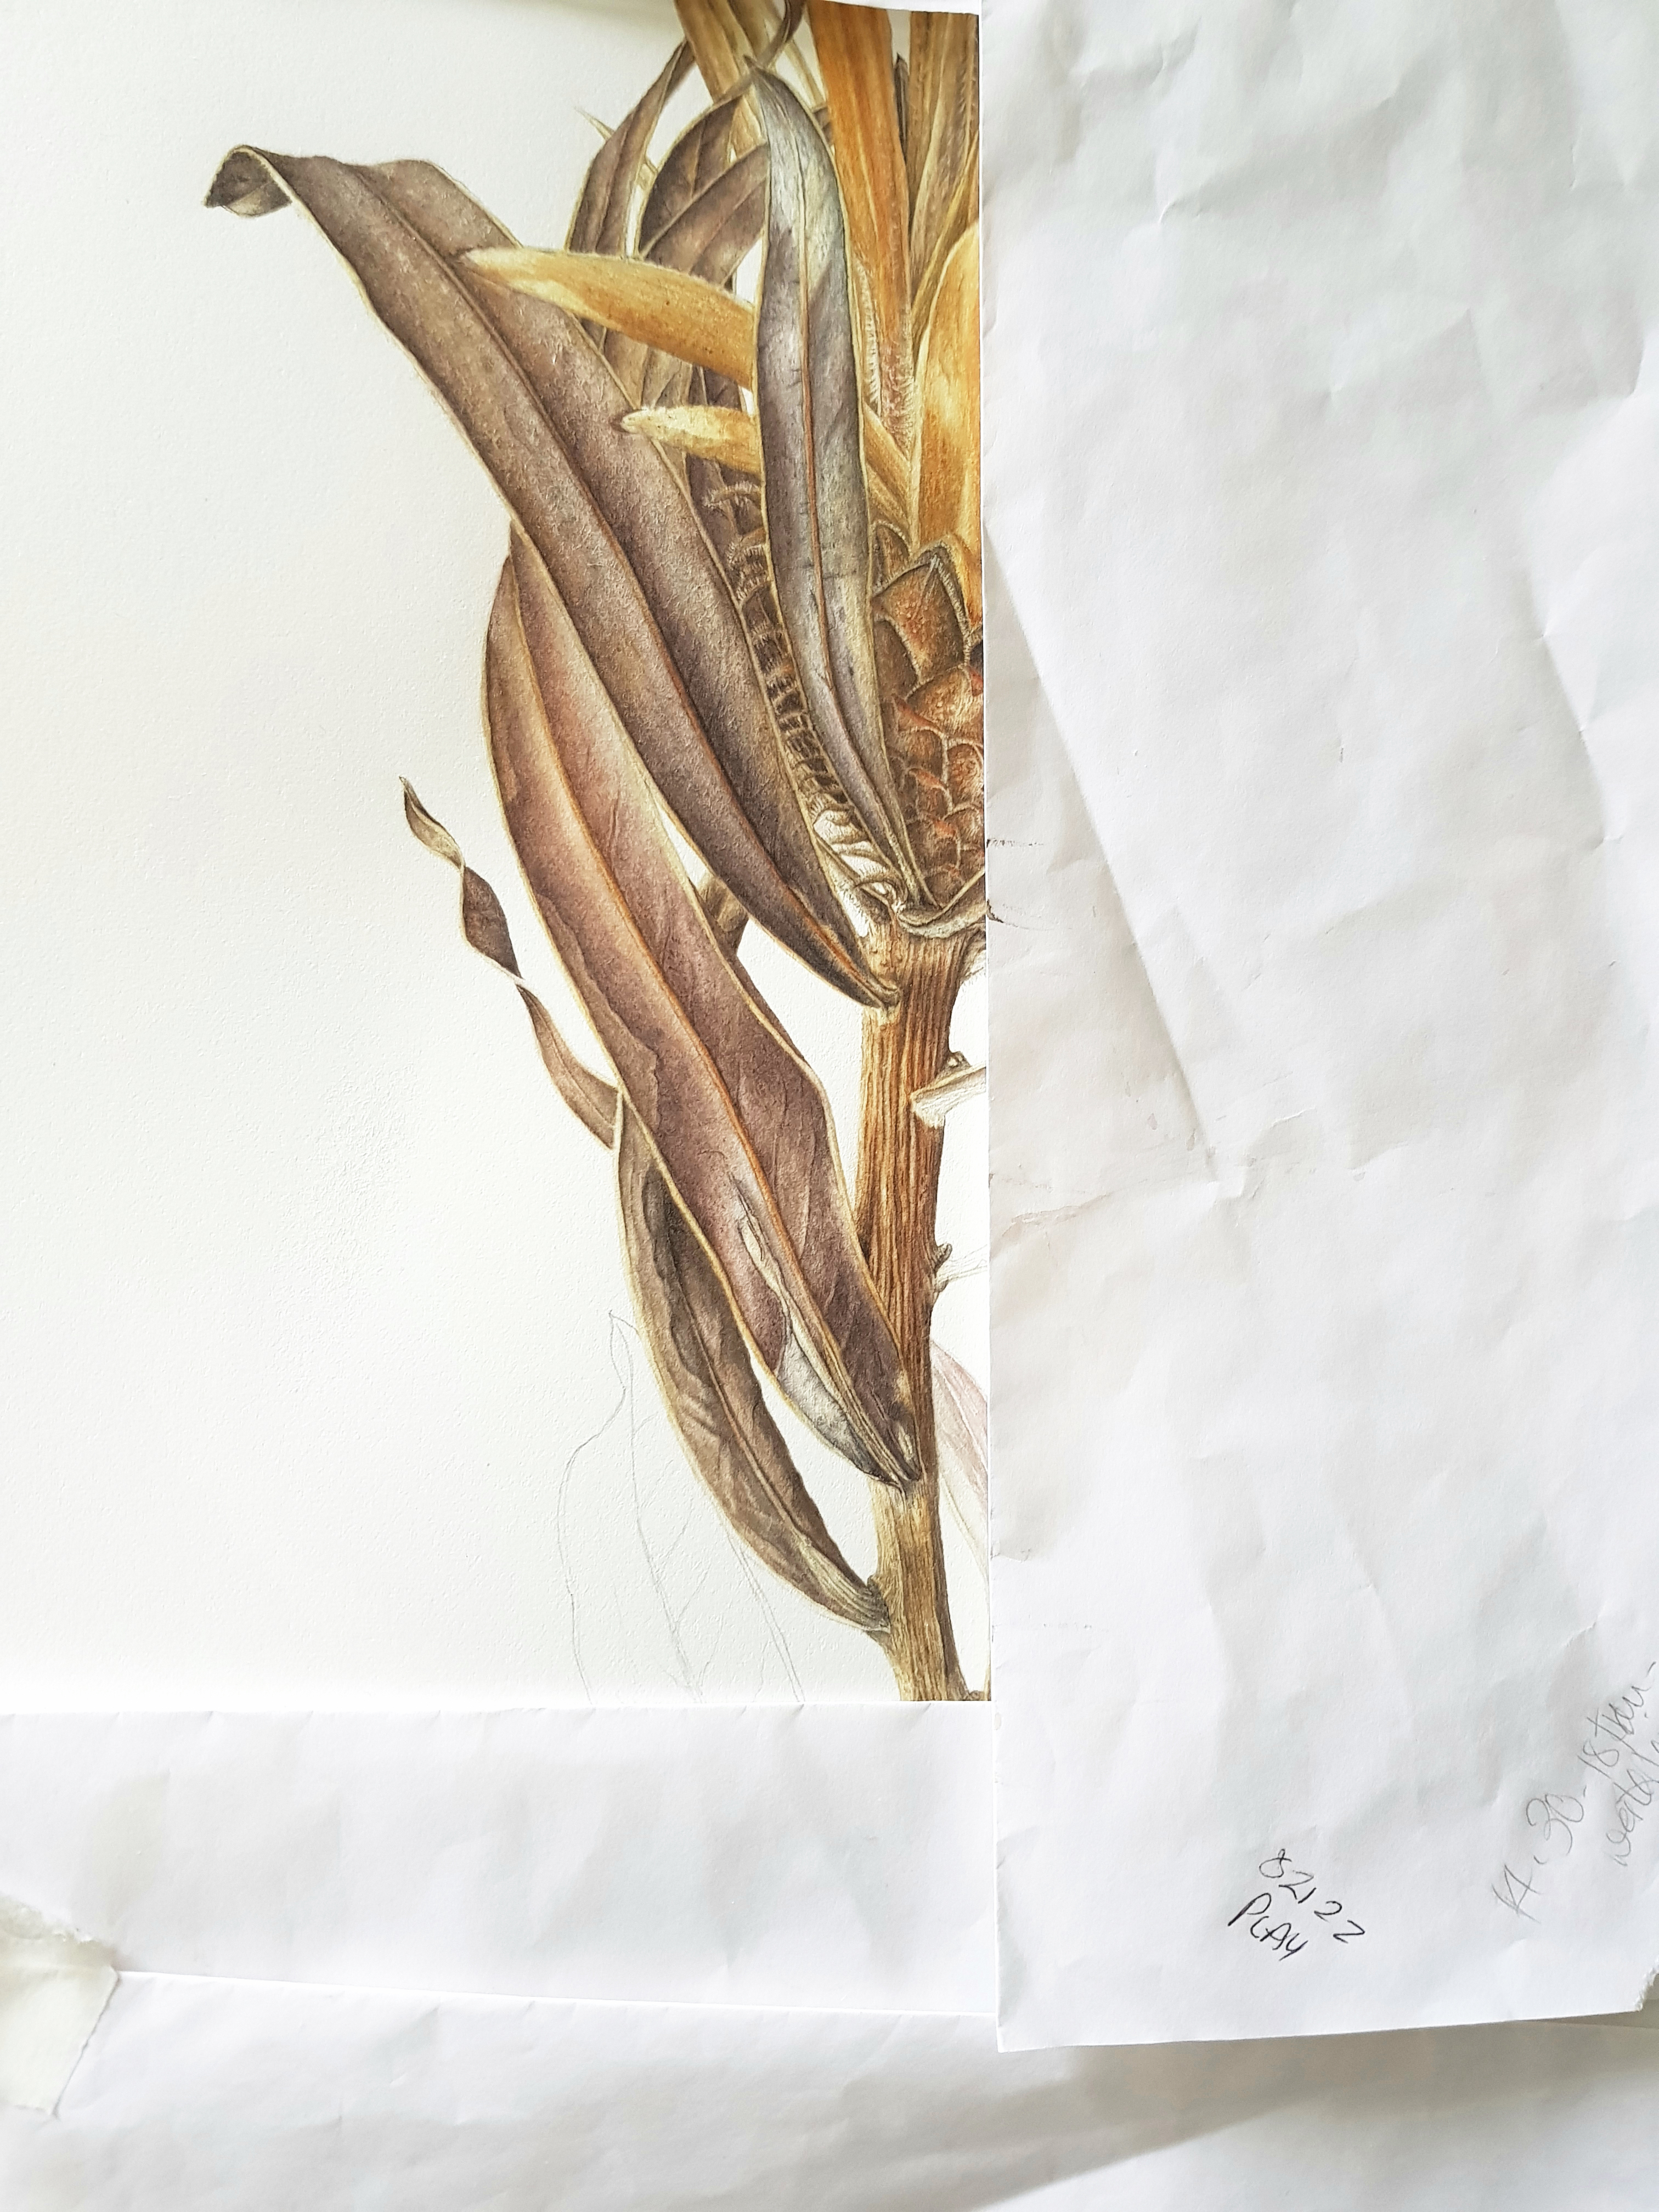
Here are some internal page images. The book has 86 pages and is 20cm x 20cm in size. A nice size to carry around without being too cumbersome.
The book…
£18 + postage (UK and worldwide) Written, designed and printed by Jackie Isard
Please note: This book is only available to botanical students and botanical artists/tutors worldwide (it is an educational book and is not for sale in the public domain). Email me to buy: jackieisard@googlemail.com
I hope you find the read enjoyable and do please pass your knowledge on to your students and other botanical artists.
If you do buy the book I would love to hear your feedback, thank you!
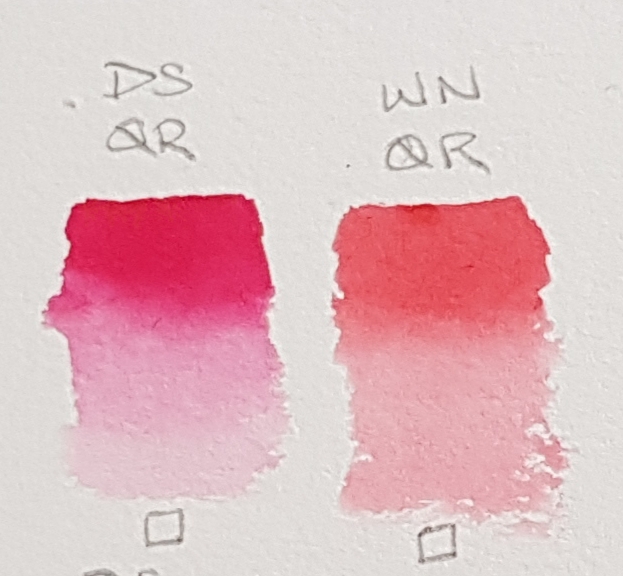
You may have seen my post a few days ago about two pigments in the Winsor & Newton range which are changing due to index colour PR206 (Quinacridone Pyrrolidone) being discontinued. Many of you love these two colours so went out and bought some before they disappear. The two colours were W&N Professional Quinacridone Gold and W&N Permanent Alizarin Crimson. Both have index colour PR206 at present. The Quinacridone Gold will now include PR179 (previously PR206), PV19 and PY250 and has changed its name to Transparent Gold Deep. PR179 is also the index colour for Perylene Maroon.
Following on from this I thought it would be helpful to do some research on other brands to see which of those would be affected too. I have compiled a list below for you all.
Pigments which have index number PR206
Colours by name:
Winsor & Newton Permanent Alizarin Crimson Quinacridone Gold Brown Madder
Daniel Smith Quinacridone Burnt Scarlet
Sennelier Quinacridone Gold Crimson Lake ( not the Crimson Lake Alizarin)
The PNBA (Pacific Northwest Botanical Artists) asked me to write an article for their newsletter and I thought I would share this as a blog with you too. I hope you enjoy it.
The reason
This Autumn COP26, the United Nations Climate Change Conference, was held in Glasgow Scotland. It brought together the nations of the world for one of the most important international meetings about the future of our planet. The conference had six major themes and the theme that was relevant to the ABBA (Association of British Botanical Artists) ReflectionS exhibition was:
Nature – to safeguard and restore natural habitats and ecosystems to preserve the planet’s biodiversity
Inspired by COP26, ABBA has released an exhibition focused on the crucial role that plants play in preserving the planet’s health and biodiversity. ABBA’s slogan for the exhibition is ‘No plants – no planet’.
Thirty-five juried artists’ submissions are being exhibited in digital form in the prestigious Shirley Sherwood Gallery (Royal Botanic Gardens, Kew). The exhibition is also online until March 2022 which includes all sixty-six artists’ entries, http://www.britishbotanicalartists.com/reflections-1. At present the Shirley Sherwood Gallery is featuring an exhibition by Sculptor Zadok Ben-David called ‘Natural Reserve’ and the ReflectionS digital exhibition can be viewed on a large screen within the same building.
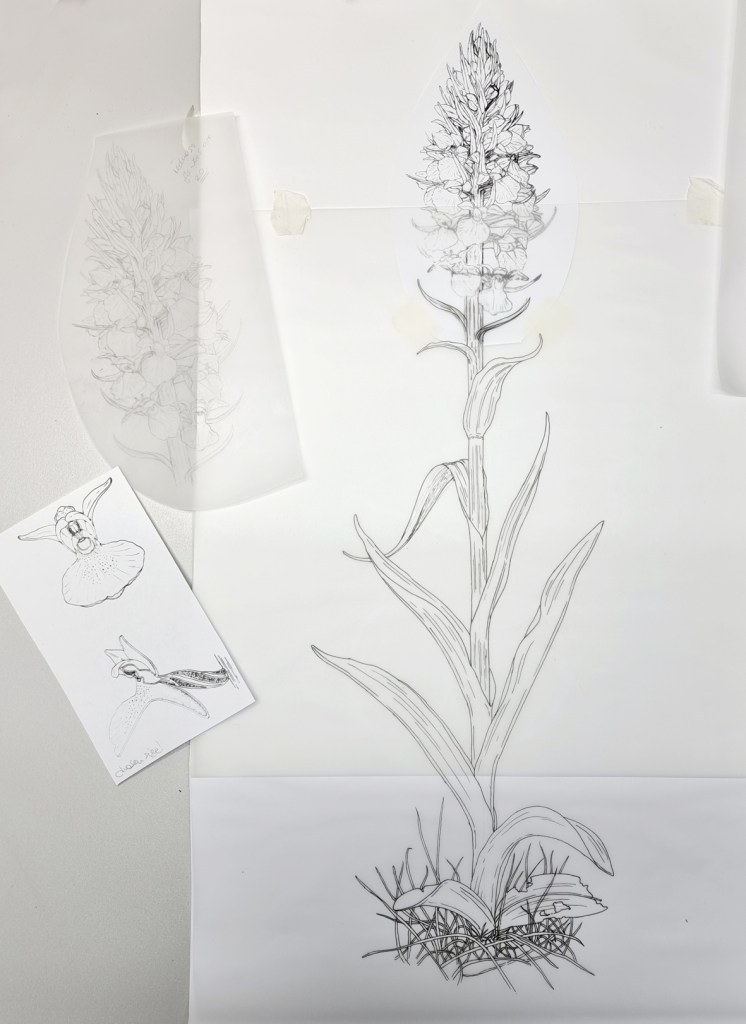
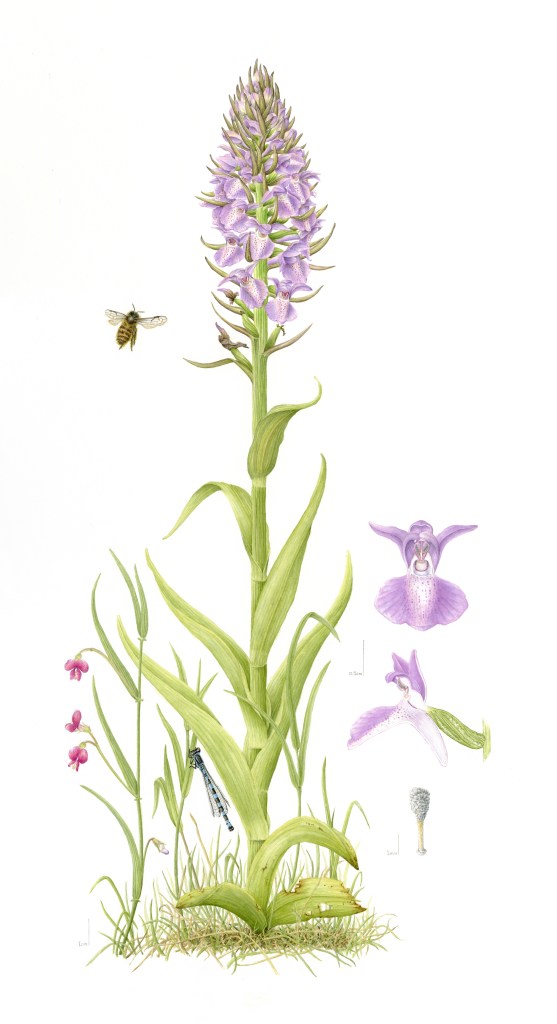
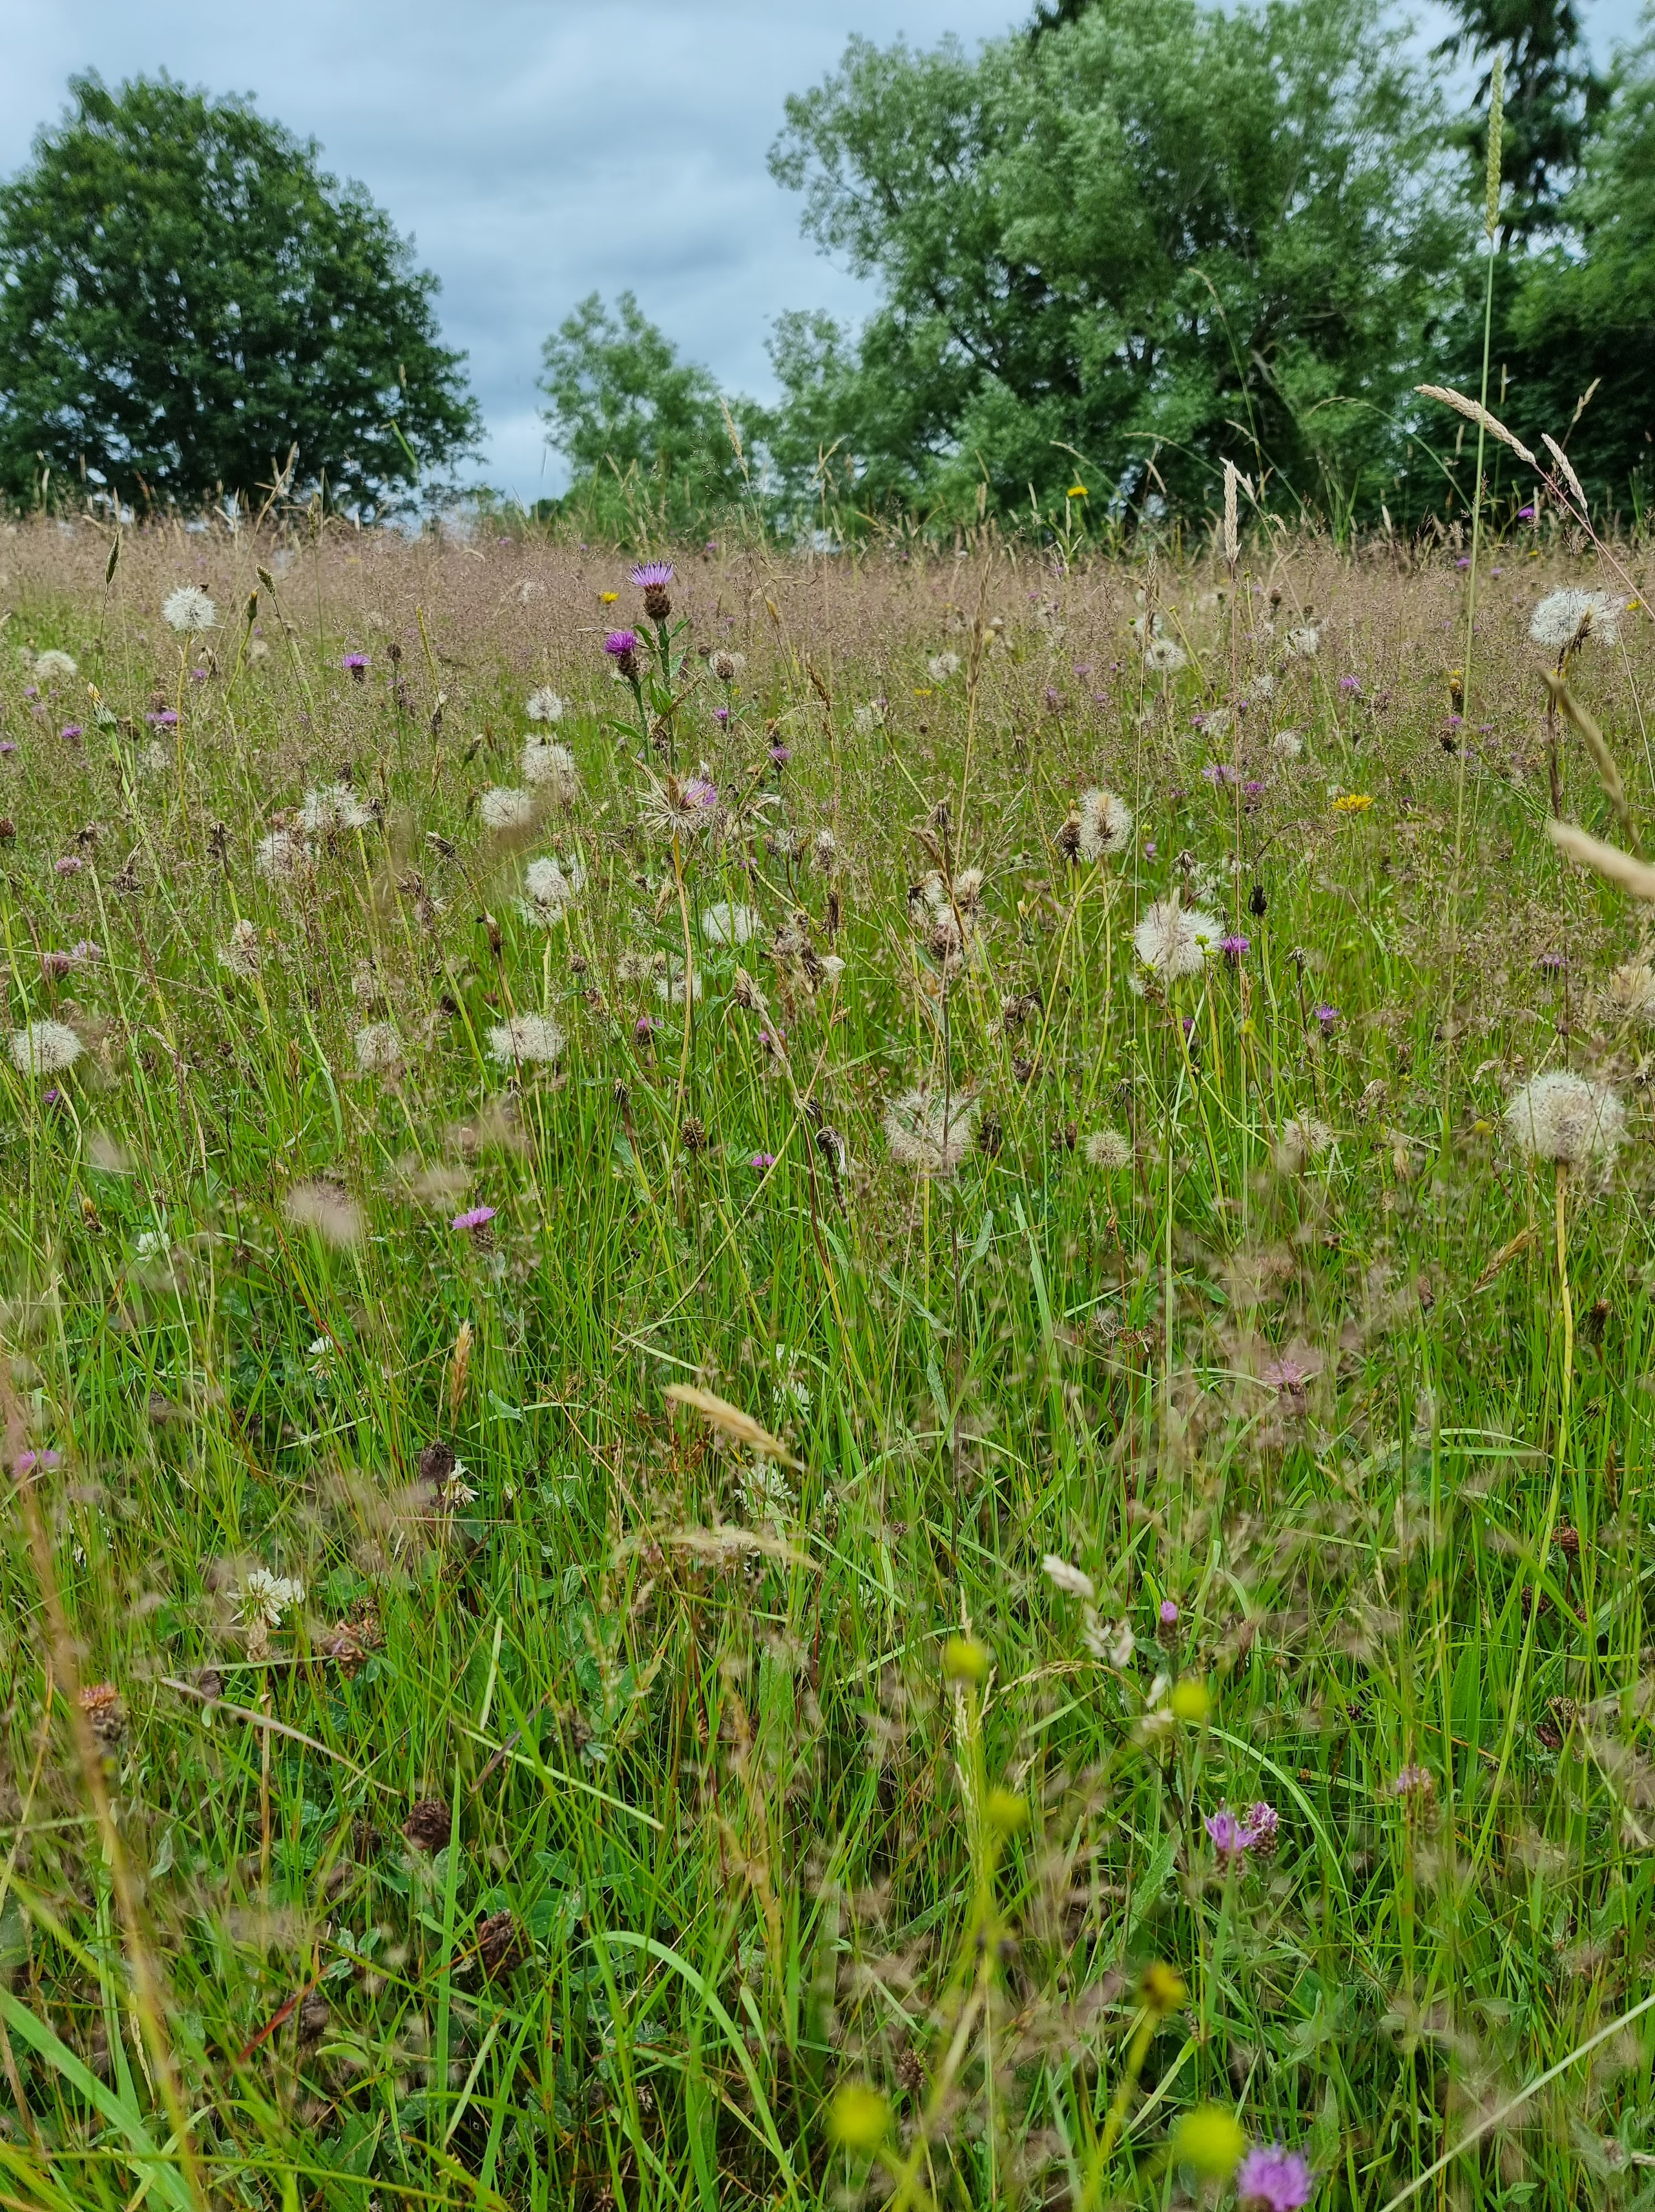
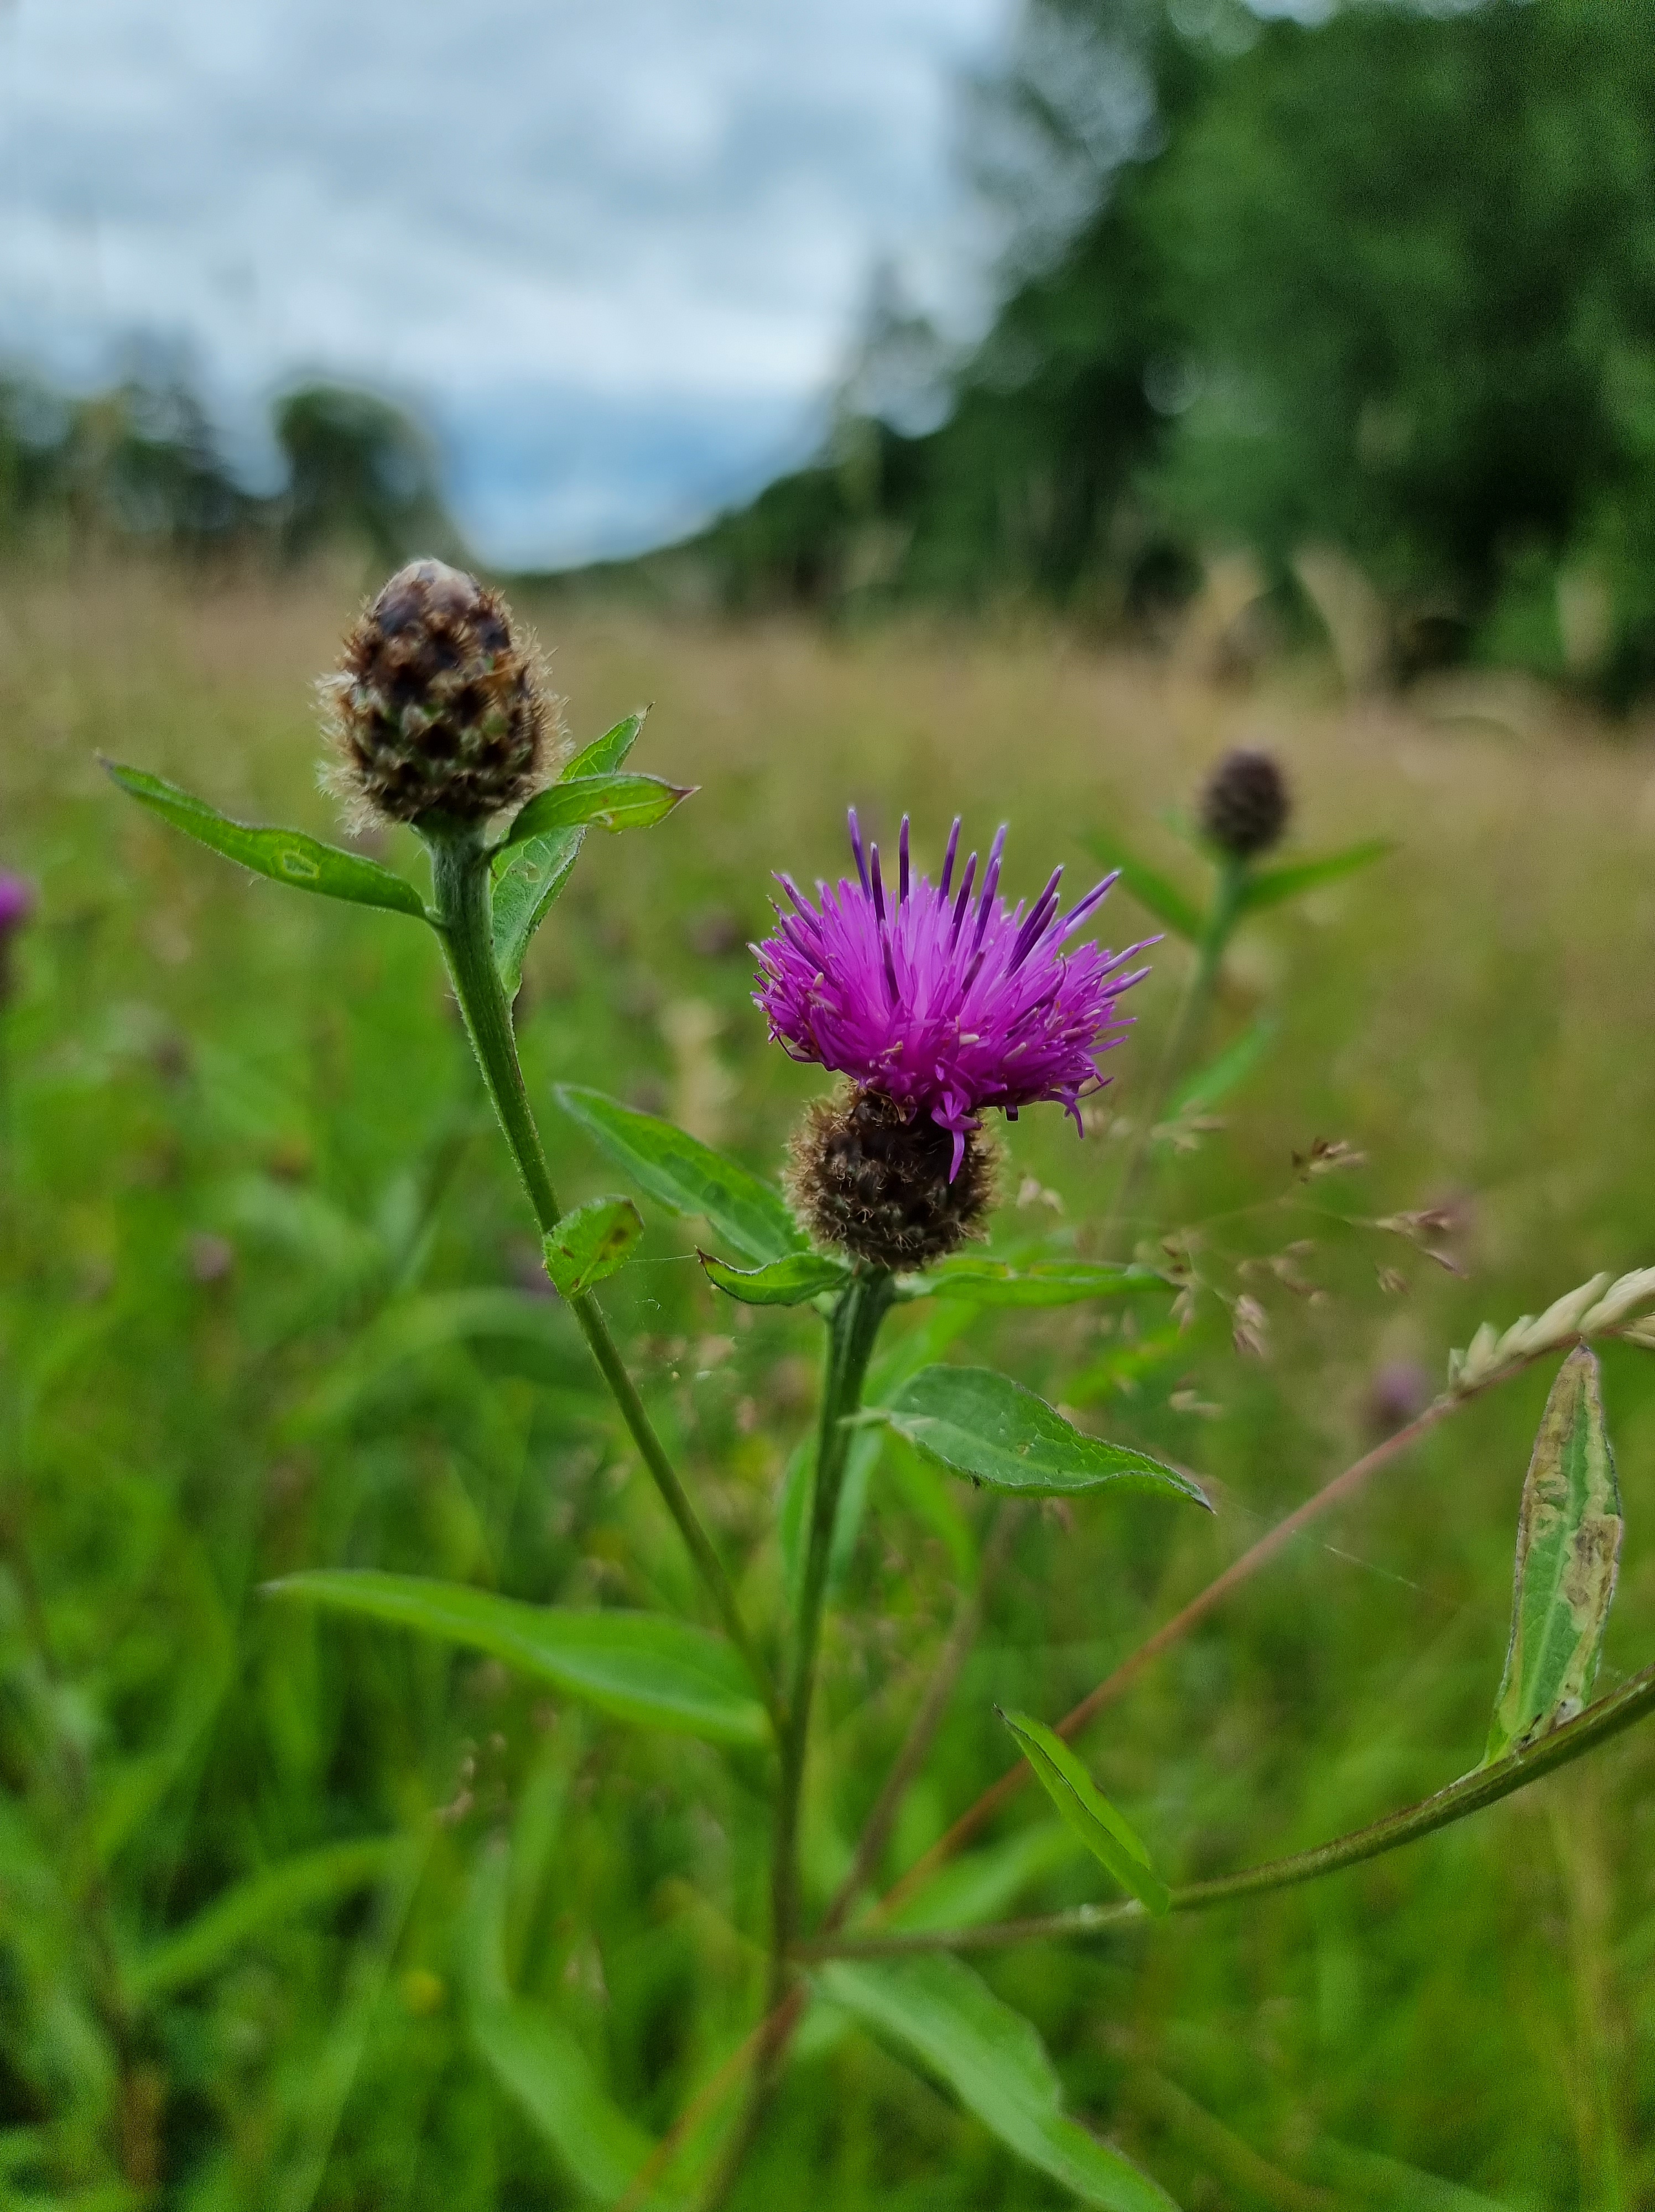
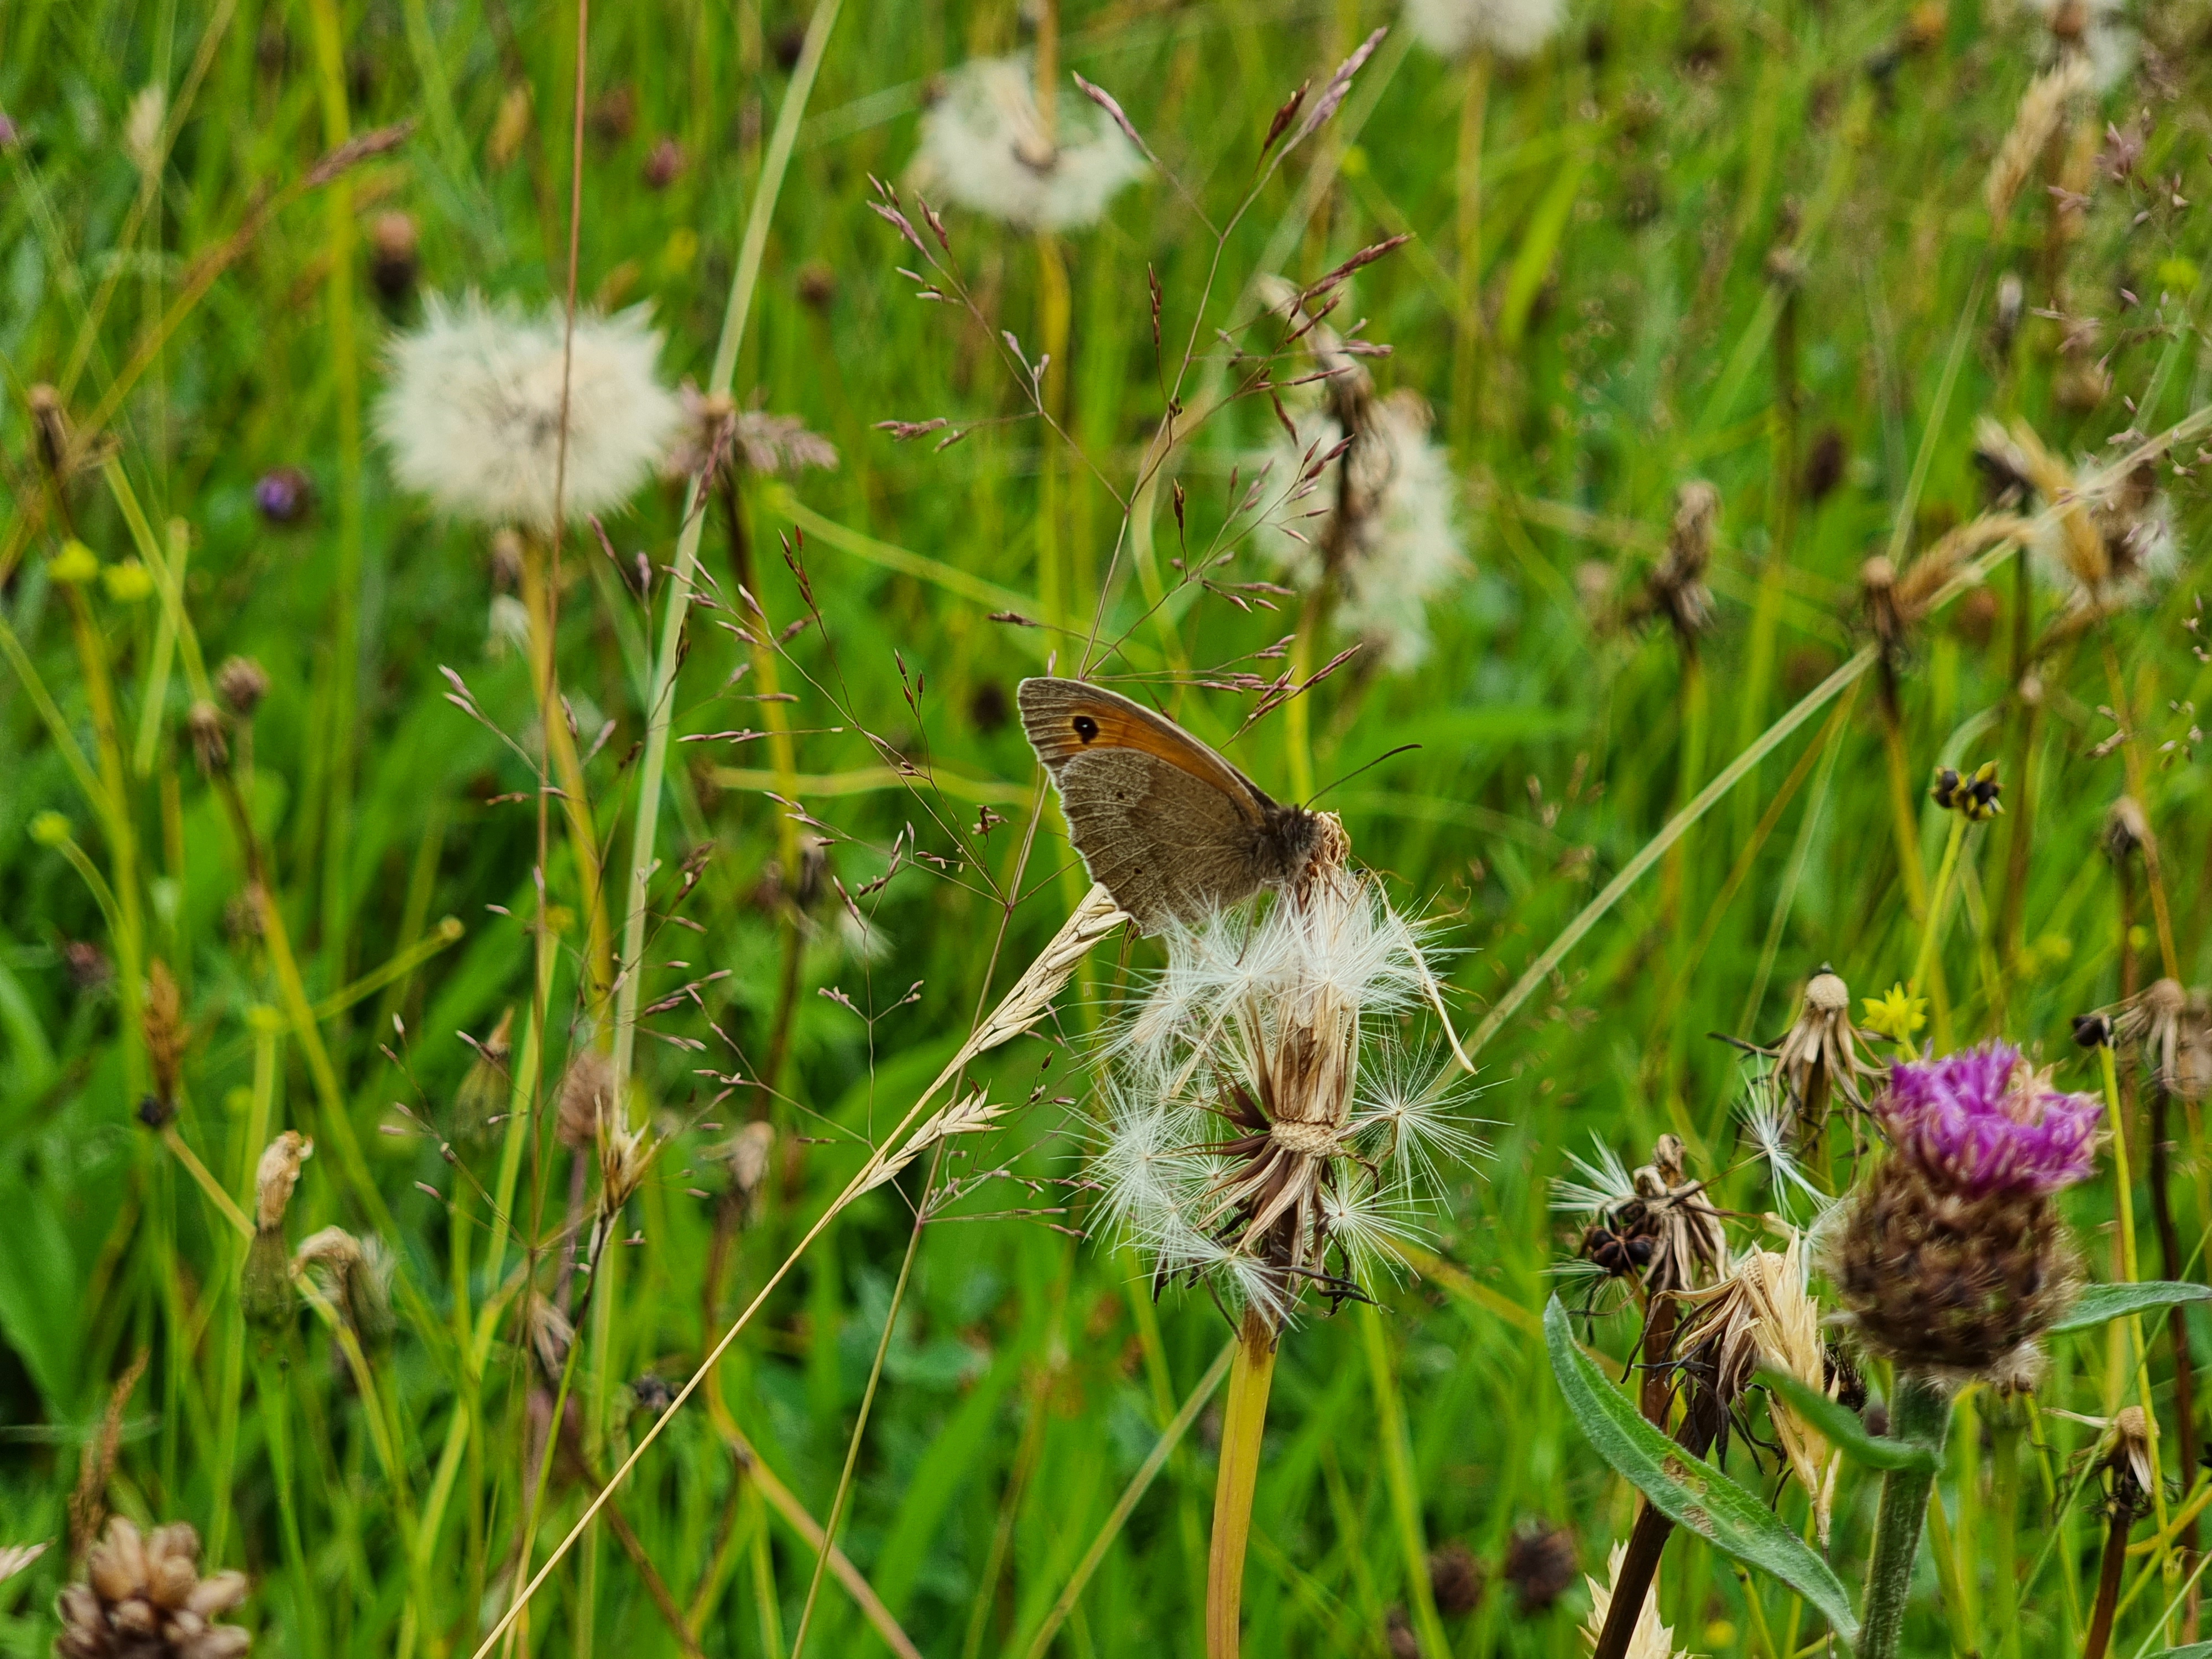
I am very privileged to have had my work selected by the judges to be shown at the Shirley Sherwood Gallery. This blog is about the painting I made and why I felt it was important to show. The Southern Marsh Orchid (Dactylorhiza praetissima) is a British wet meadow wild orchid. This orchid was restricted to southern UK but due to climate change, recent records now find it as far north as Newcastle upon Tyne. A warmer climate may result in this orchid declining or disappearing from southern UK altogether. Wetland is one of our essential habitats for small mammals, insects, birds and wildflower species.
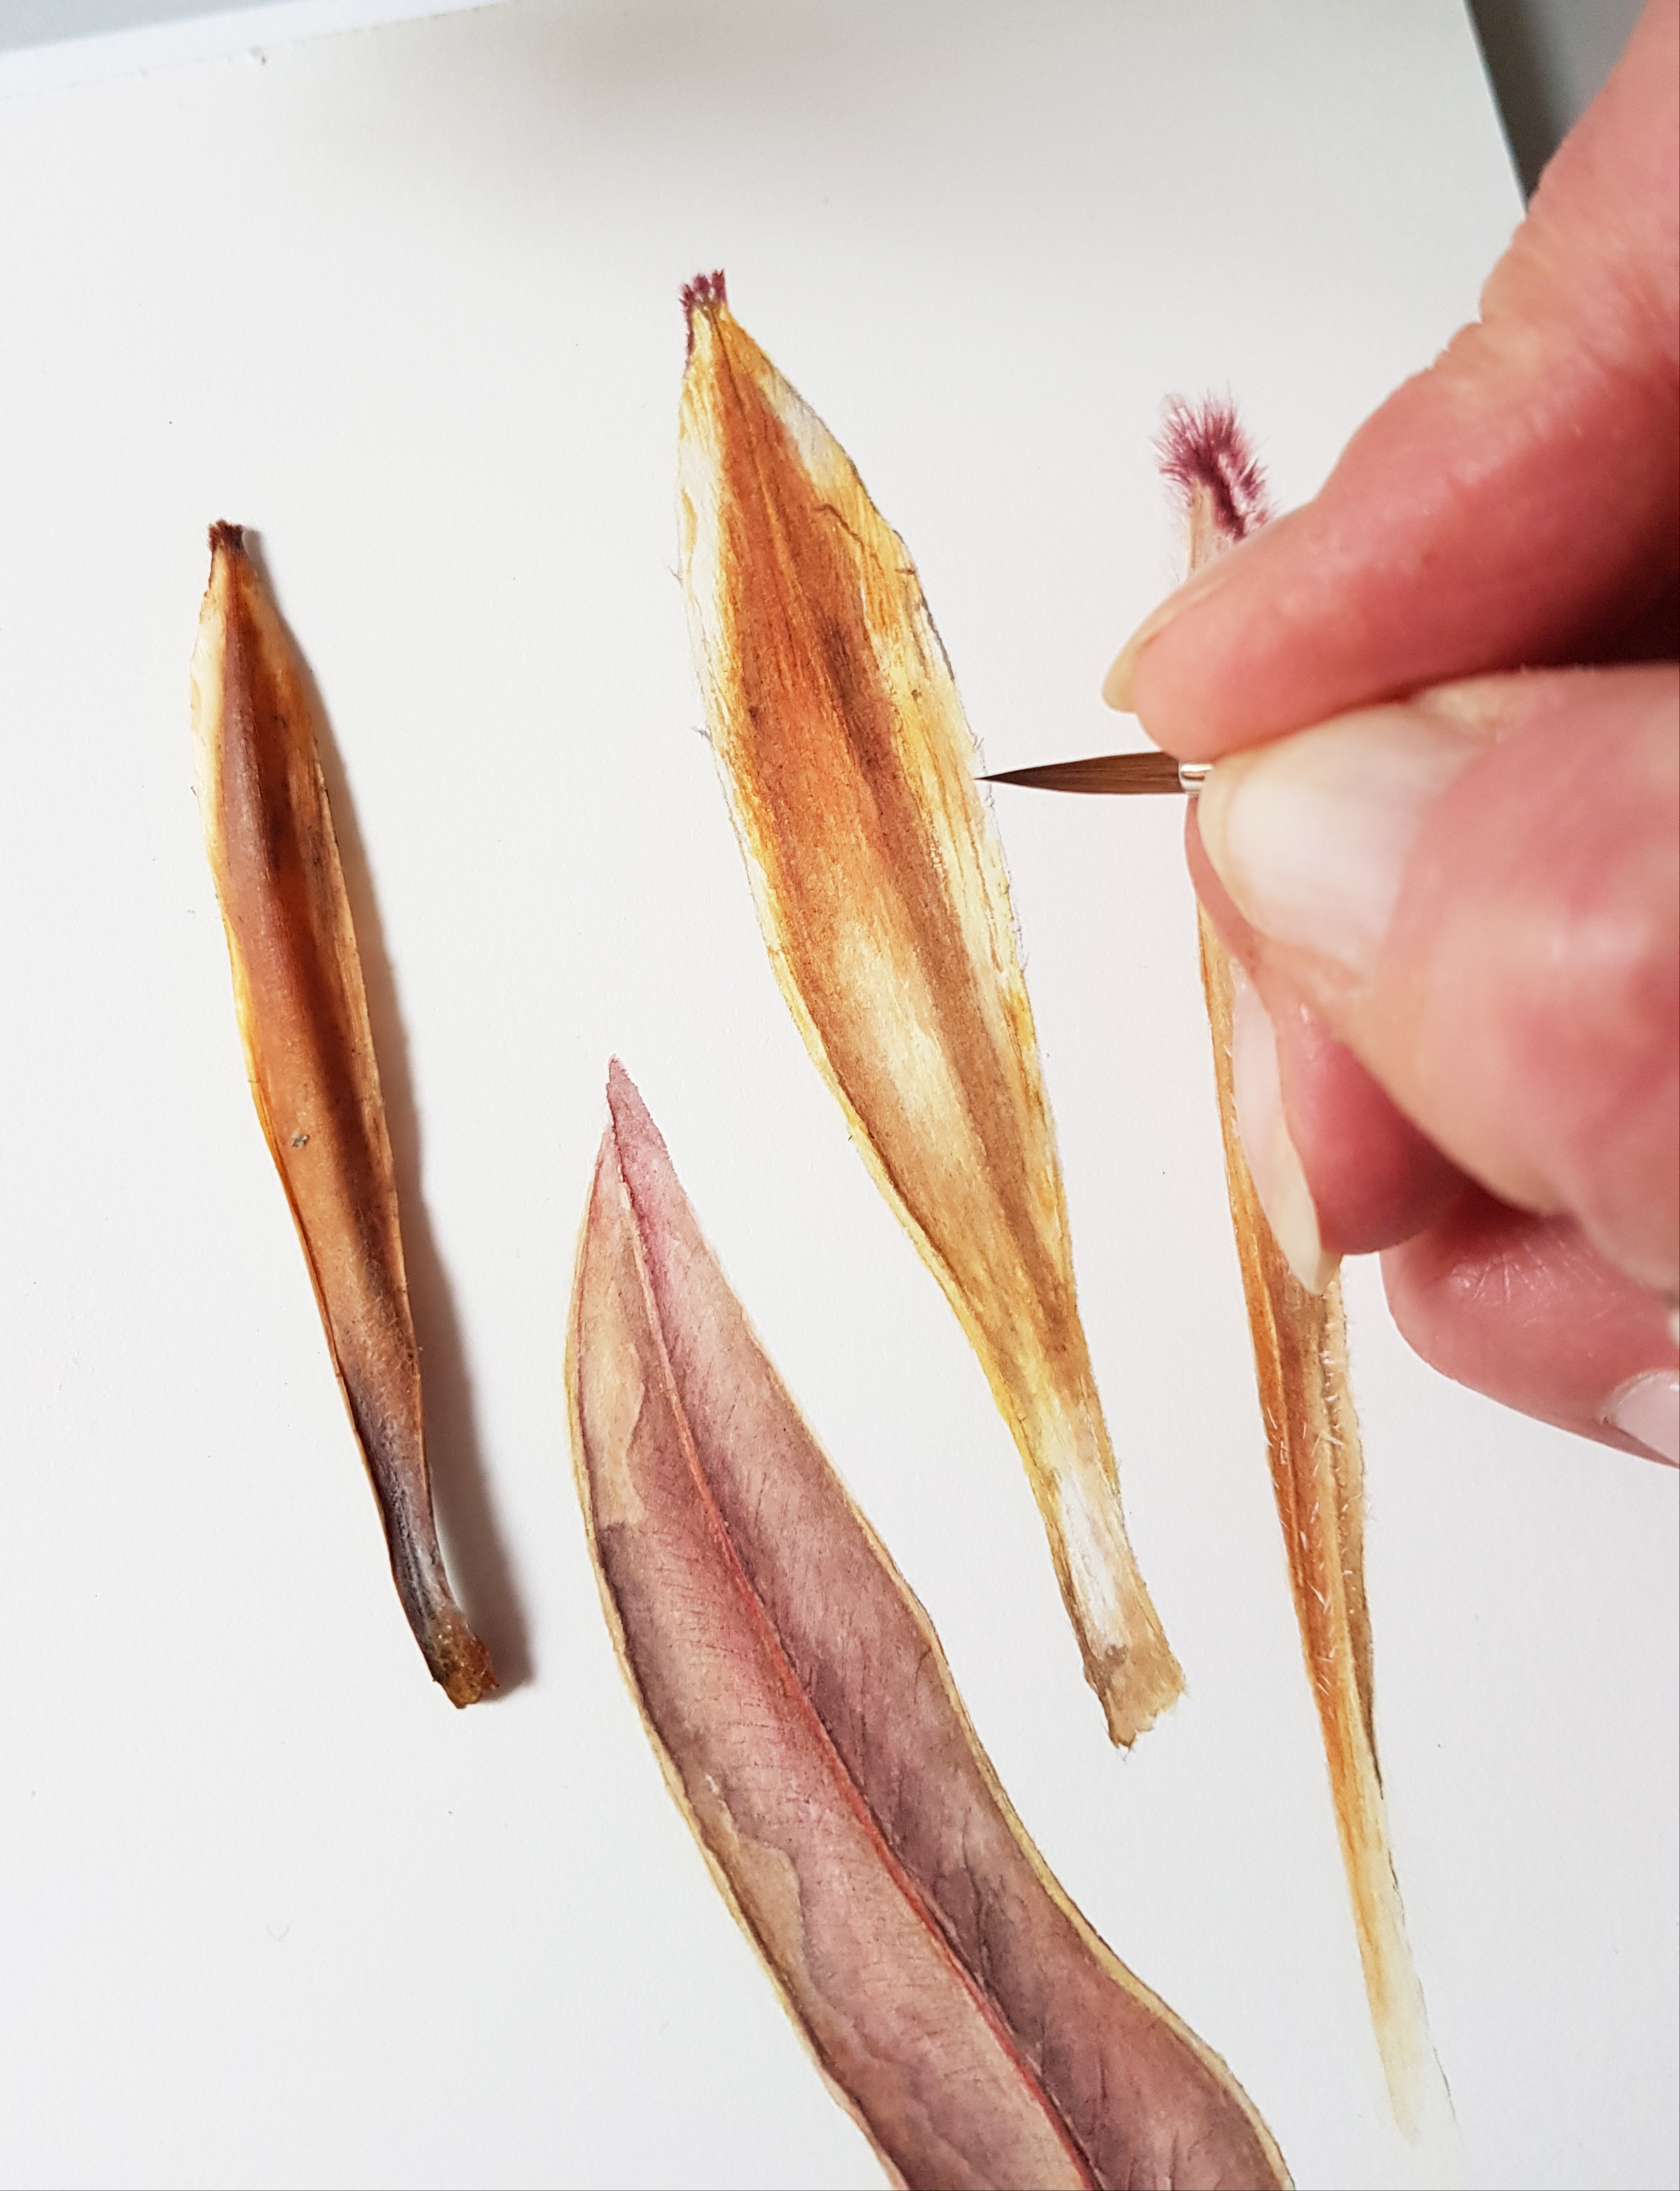
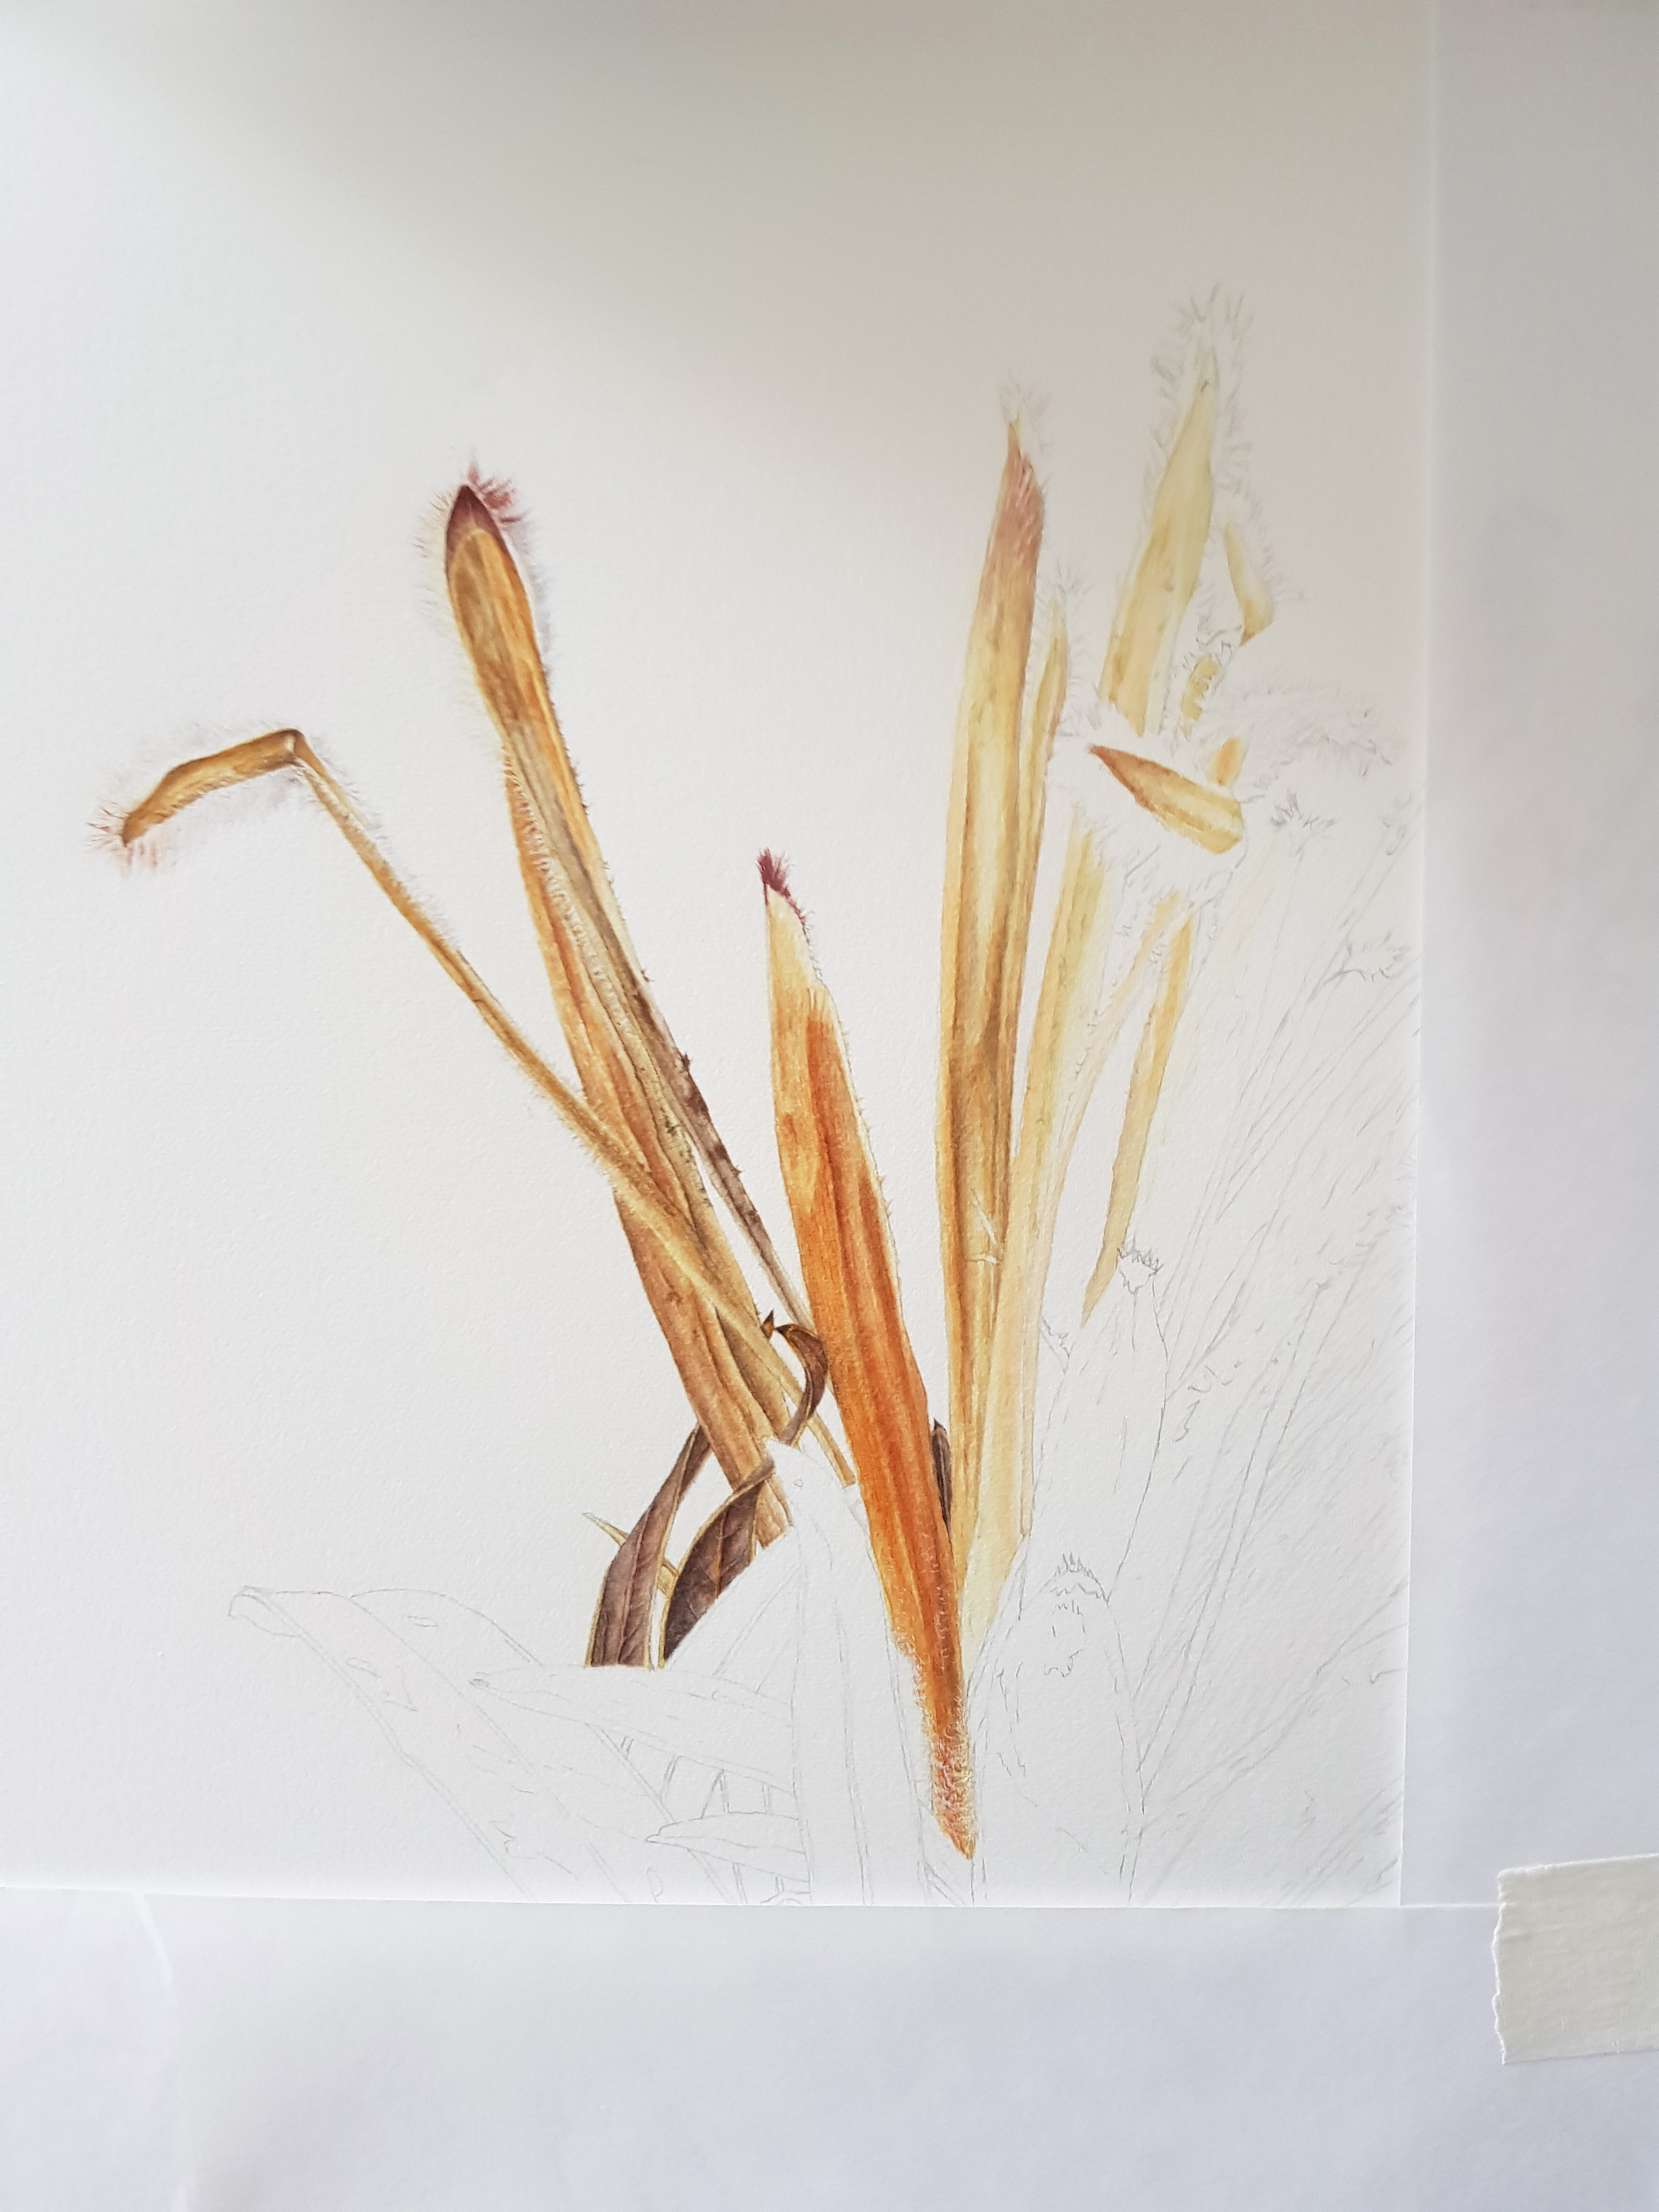
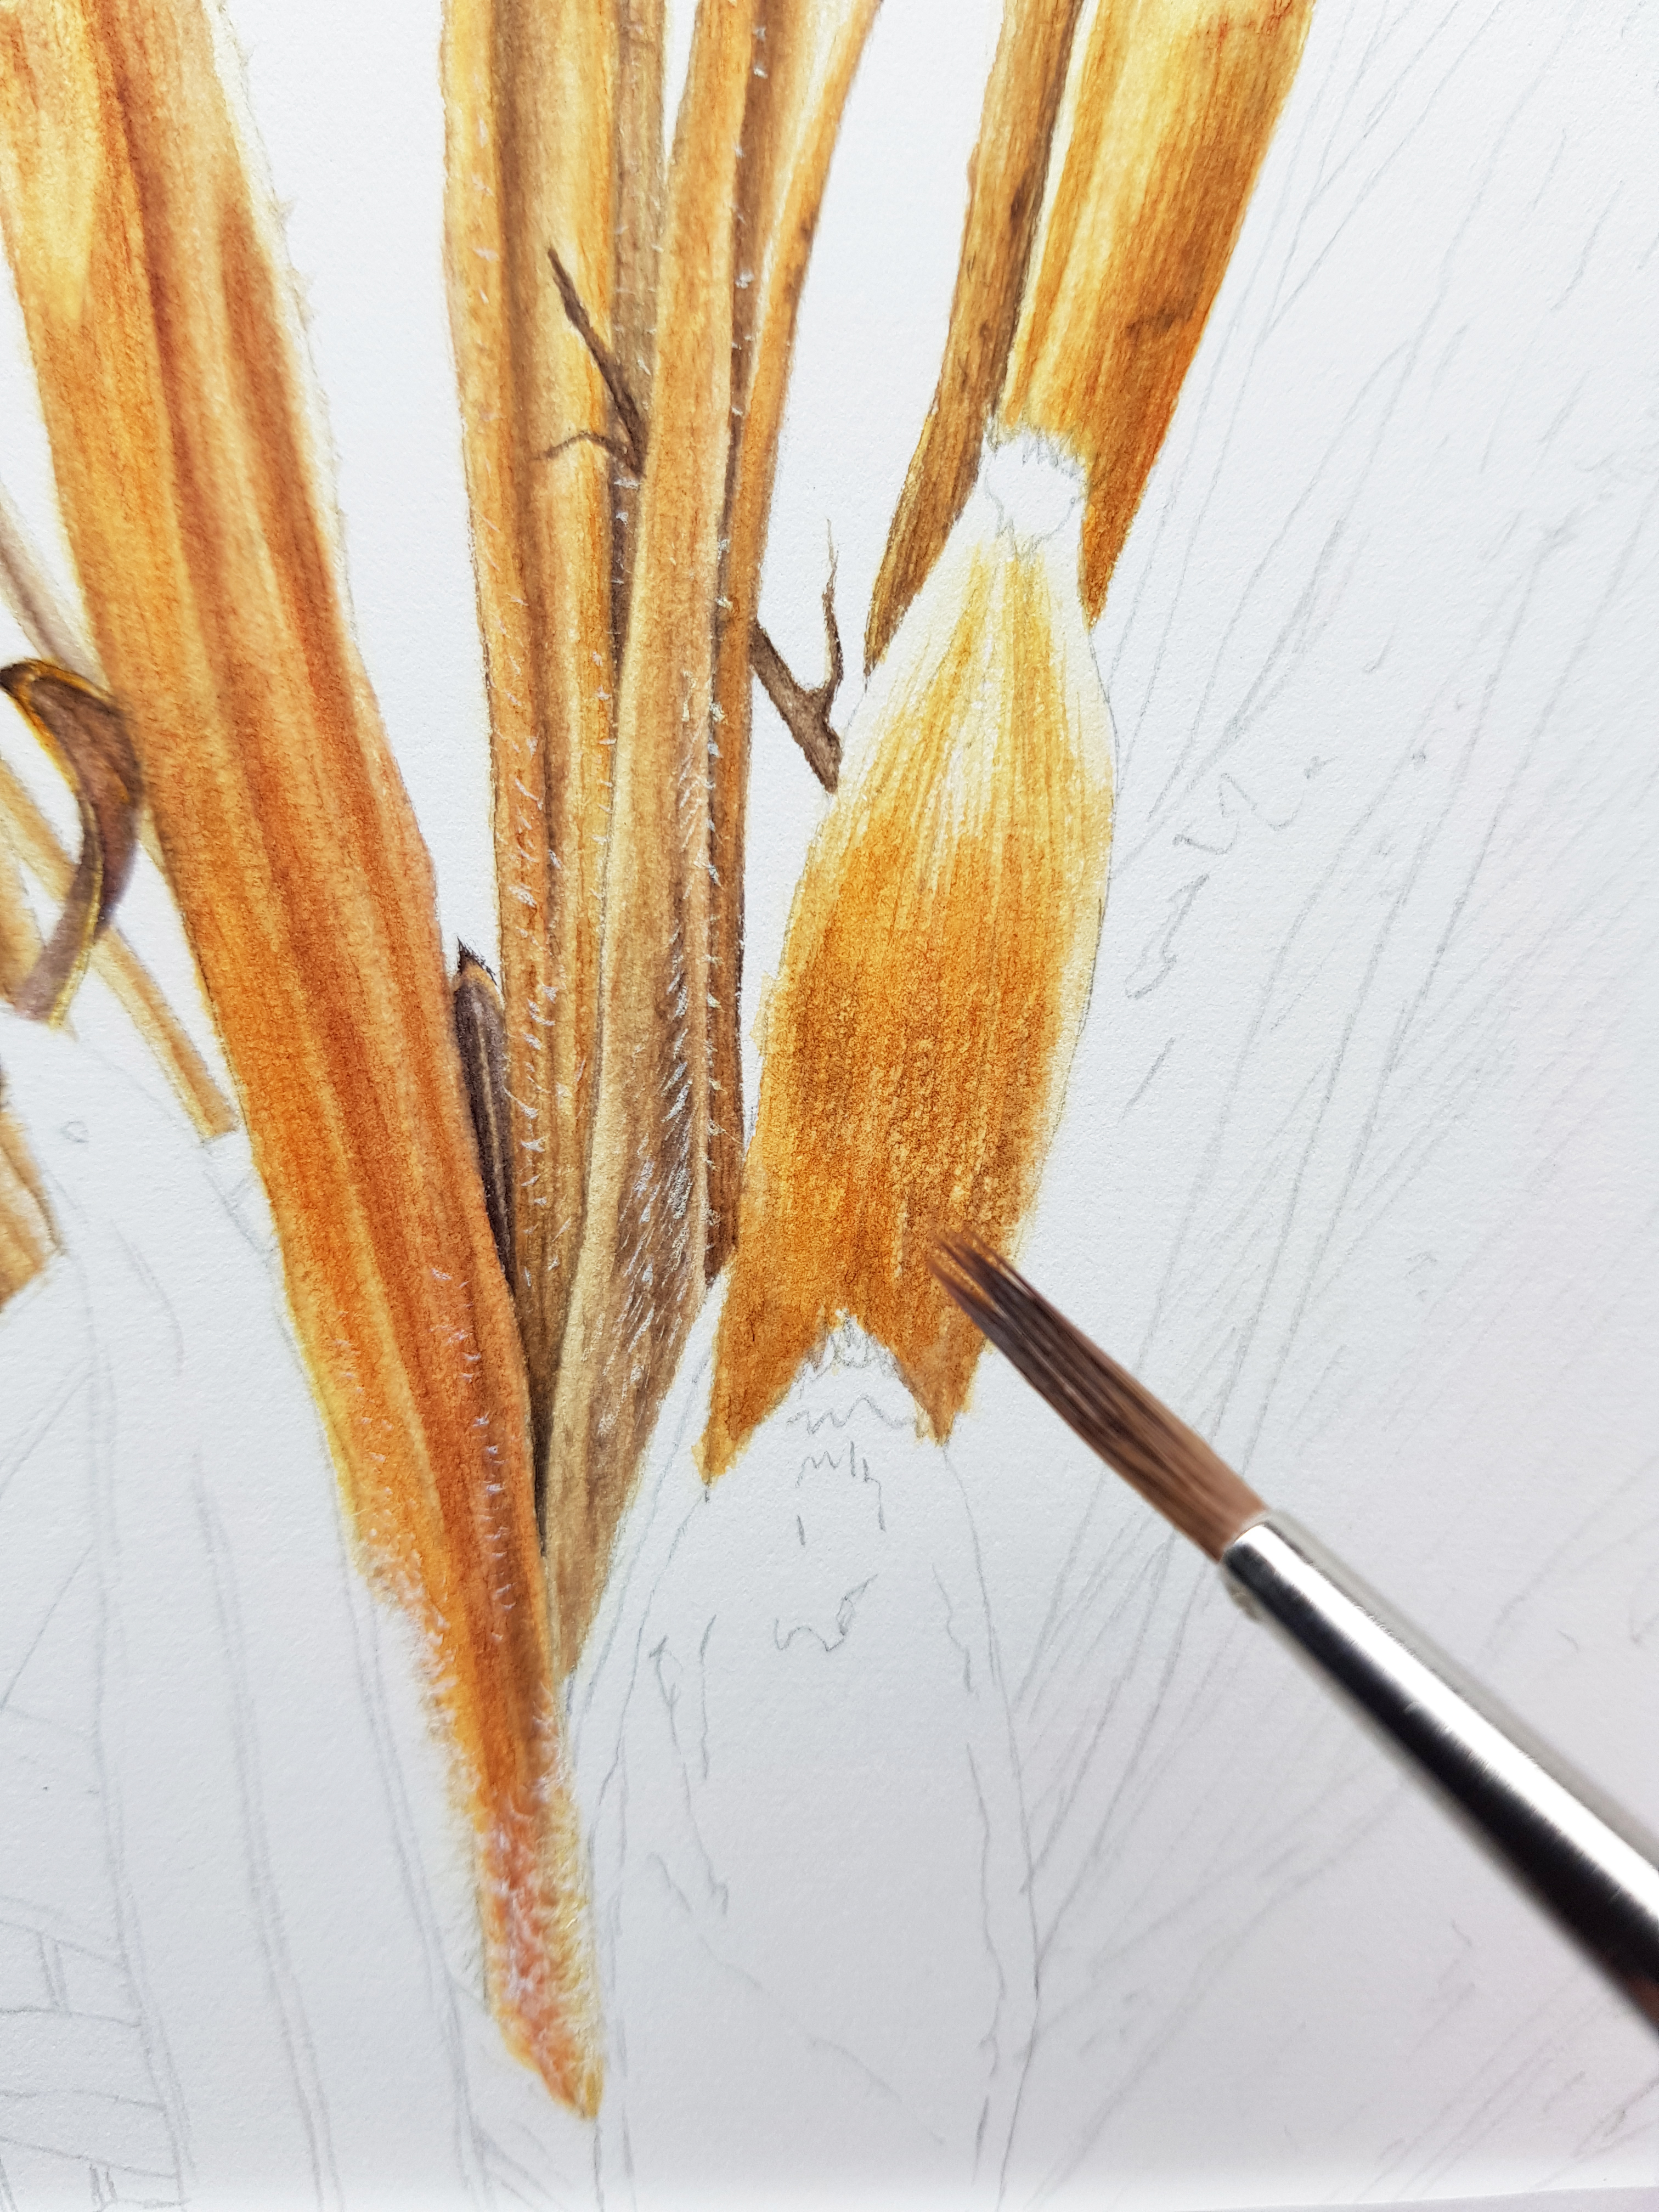
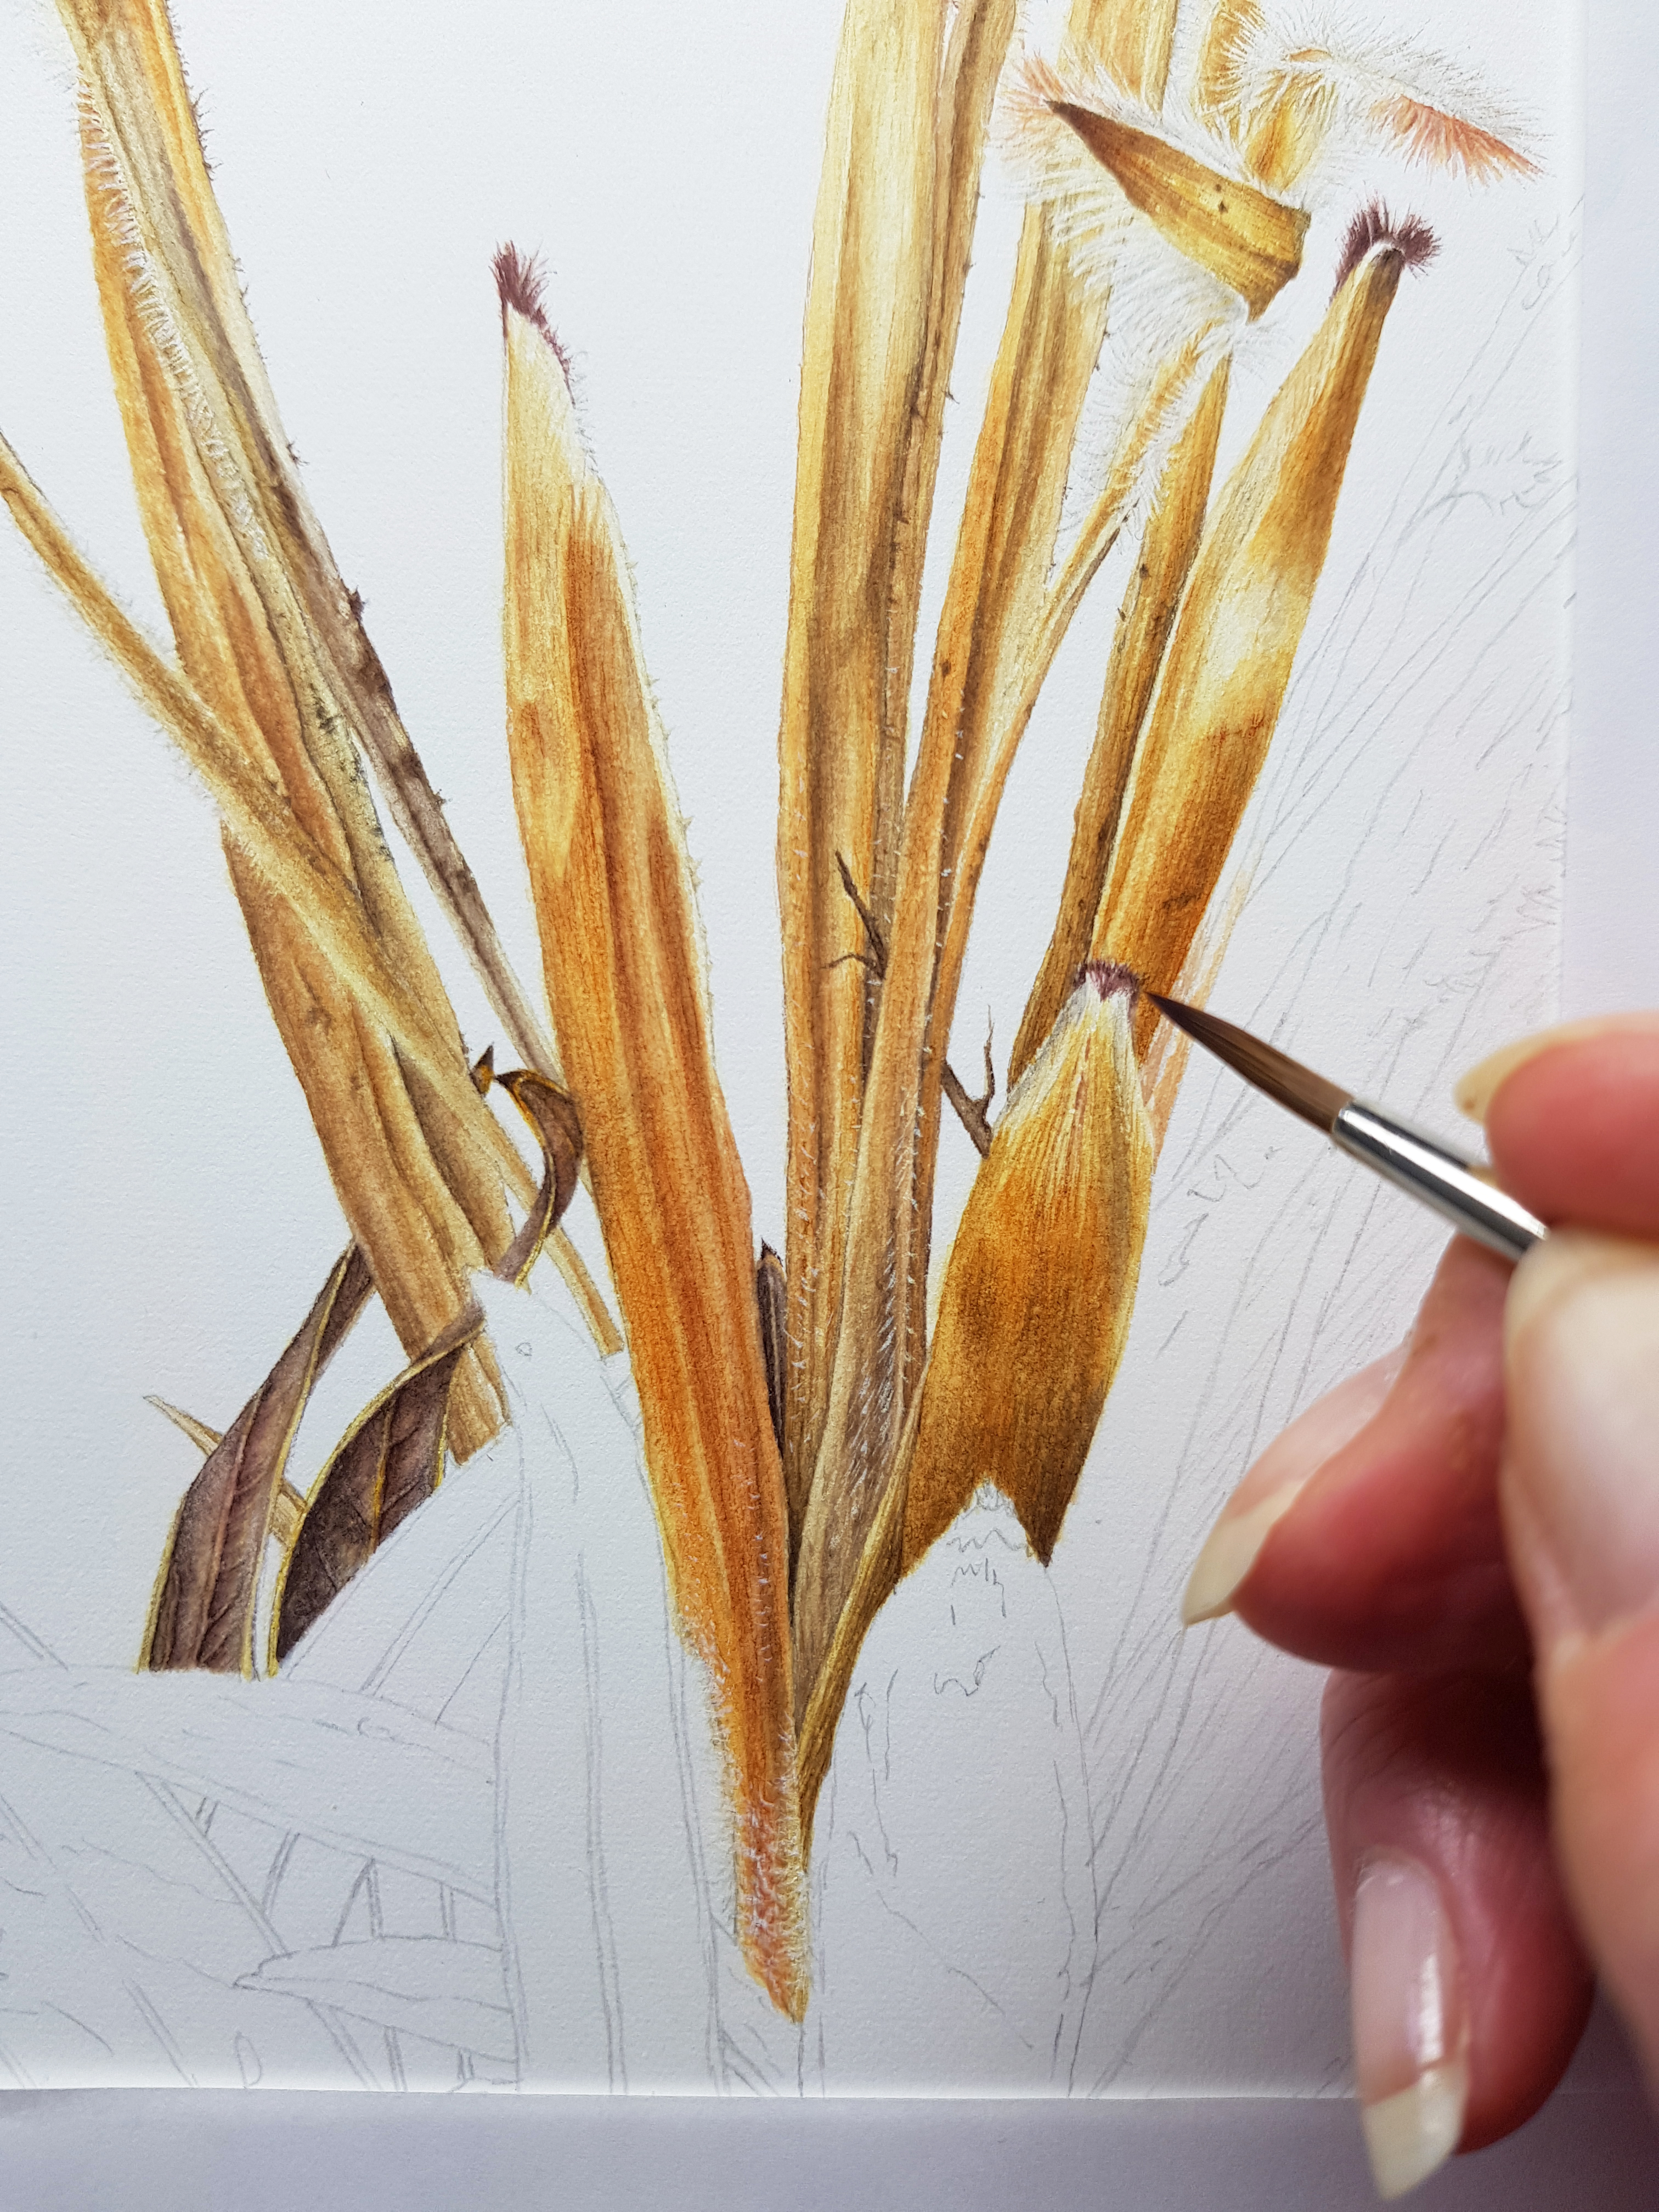
My working method
I like to find wild plants in their own habitat to make an accurate drawing and study the plant botany first. Working in this way allows you to understand everything about the plant before you start to draw. If I am able to, I will pull a plant apart and examine each individual bit before I start my composition. I make study drawings of all these parts and note measurements too. With a head full of information and notes I will start to plan out the composition. For this wild orchid, I wanted to show part of its living habitat too, which is why I included some grasses and insects in the composition. These were Grass Vetchling – growing nearby, a common blue damselfly – an insect flying around in the area and a solitary mason bee – a bee which pollinates early flowering wildflowers. I feel by including these details the plant and its story are being told.
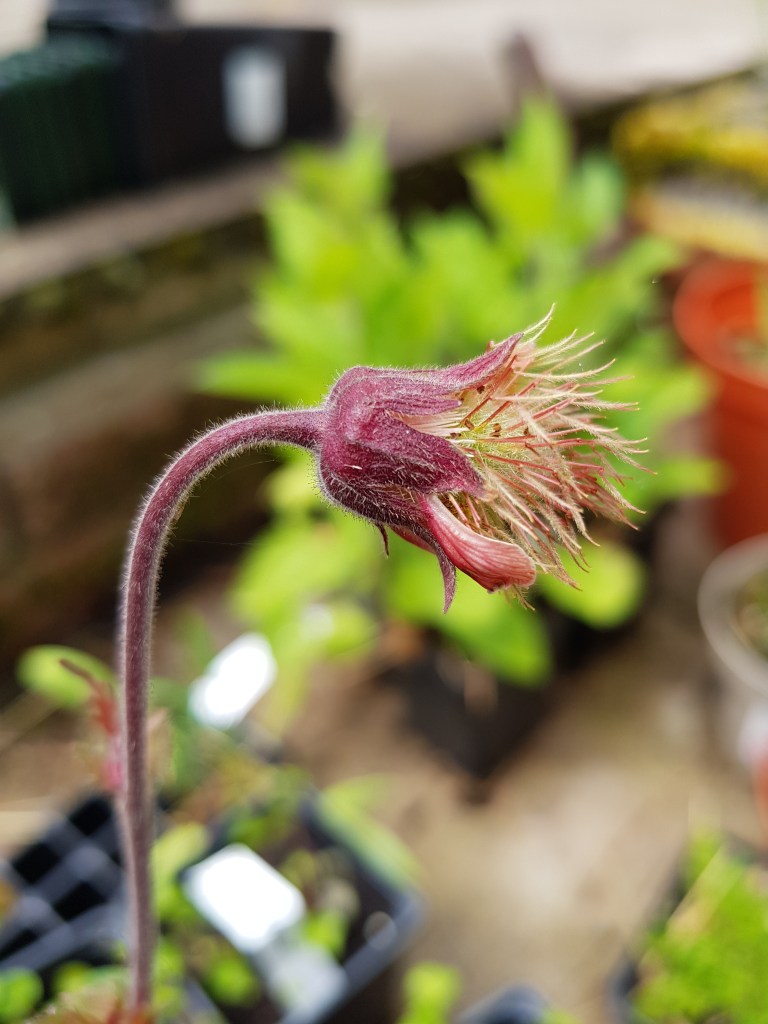
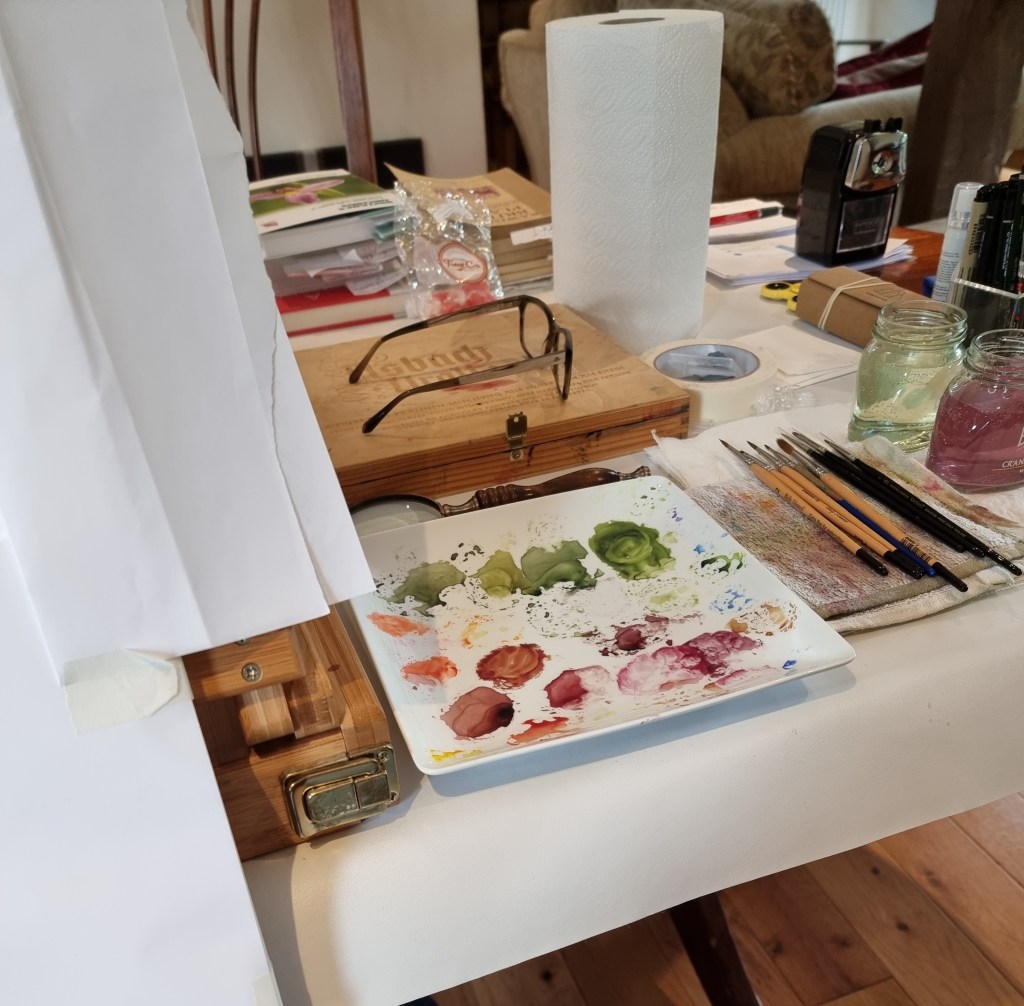
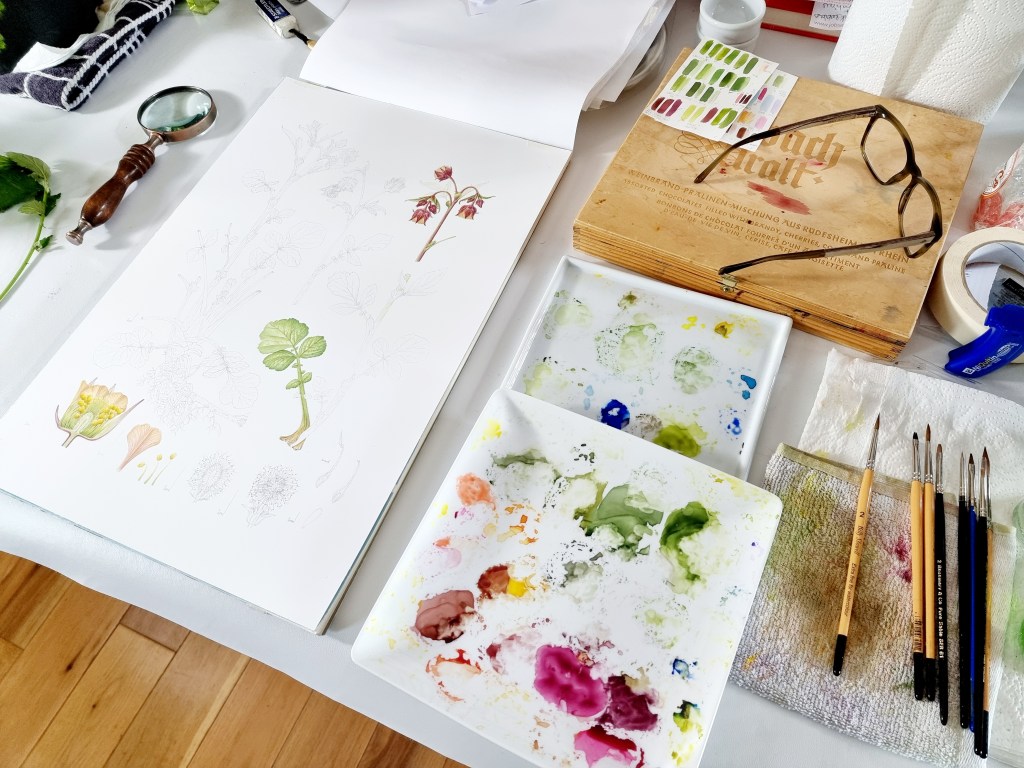
My workspace whilst working on Geum rivale (Water Avens) for my RHS project
The journey
I was having great trouble locating this orchid locally when the University Bristol Botanic Garden called me one day to say they thought they had a specimen growing that I could borrow. I was delighted! Having a specimen right next to you on your desk is such a benefit when drawing and painting. However, the specimen was not a true Southern Marsh Orchid but a very similar hybrid and so my hunt went on. I have a lot of experience in hunting down wildflower species as I have had to do this for all the plants which feature in my RHS (Royal Horticultural Society) botanical exhibition work. It isn’t easy sometimes and involves a lot of research, driving around and walking!
This is the plant that was very kindly loaned to me by the University Bristol Botanic Gardens, growing in a pot with another shrub!
I was disappointed but kept on with my research in the hope that I could find one before it was too late. There was a tight deadline! By chance whilst chatting to a local walking friend (Simon Harding), who works in the area recording wild orchid and flower species, I was told that he knew exactly where I could find plenty of specimens to study in the field. Excited and so very grateful, I followed his map to a place about 20 minutes from my home, see image.
There I found hundreds of Southern Marsh Orchids living quietly in a damp field on the nature reserve. I measured, made colour studies, sketched and also made a note of what other plants were growing nearby. I also noted insects visiting the area too. This was a typical wet meadow environment, the type I love, as all my RHS exhibition species are wet meadow plants too. My initial sketches were raw and I found the inflorescence very tricky!
Some of my rough sketching
Research and botany
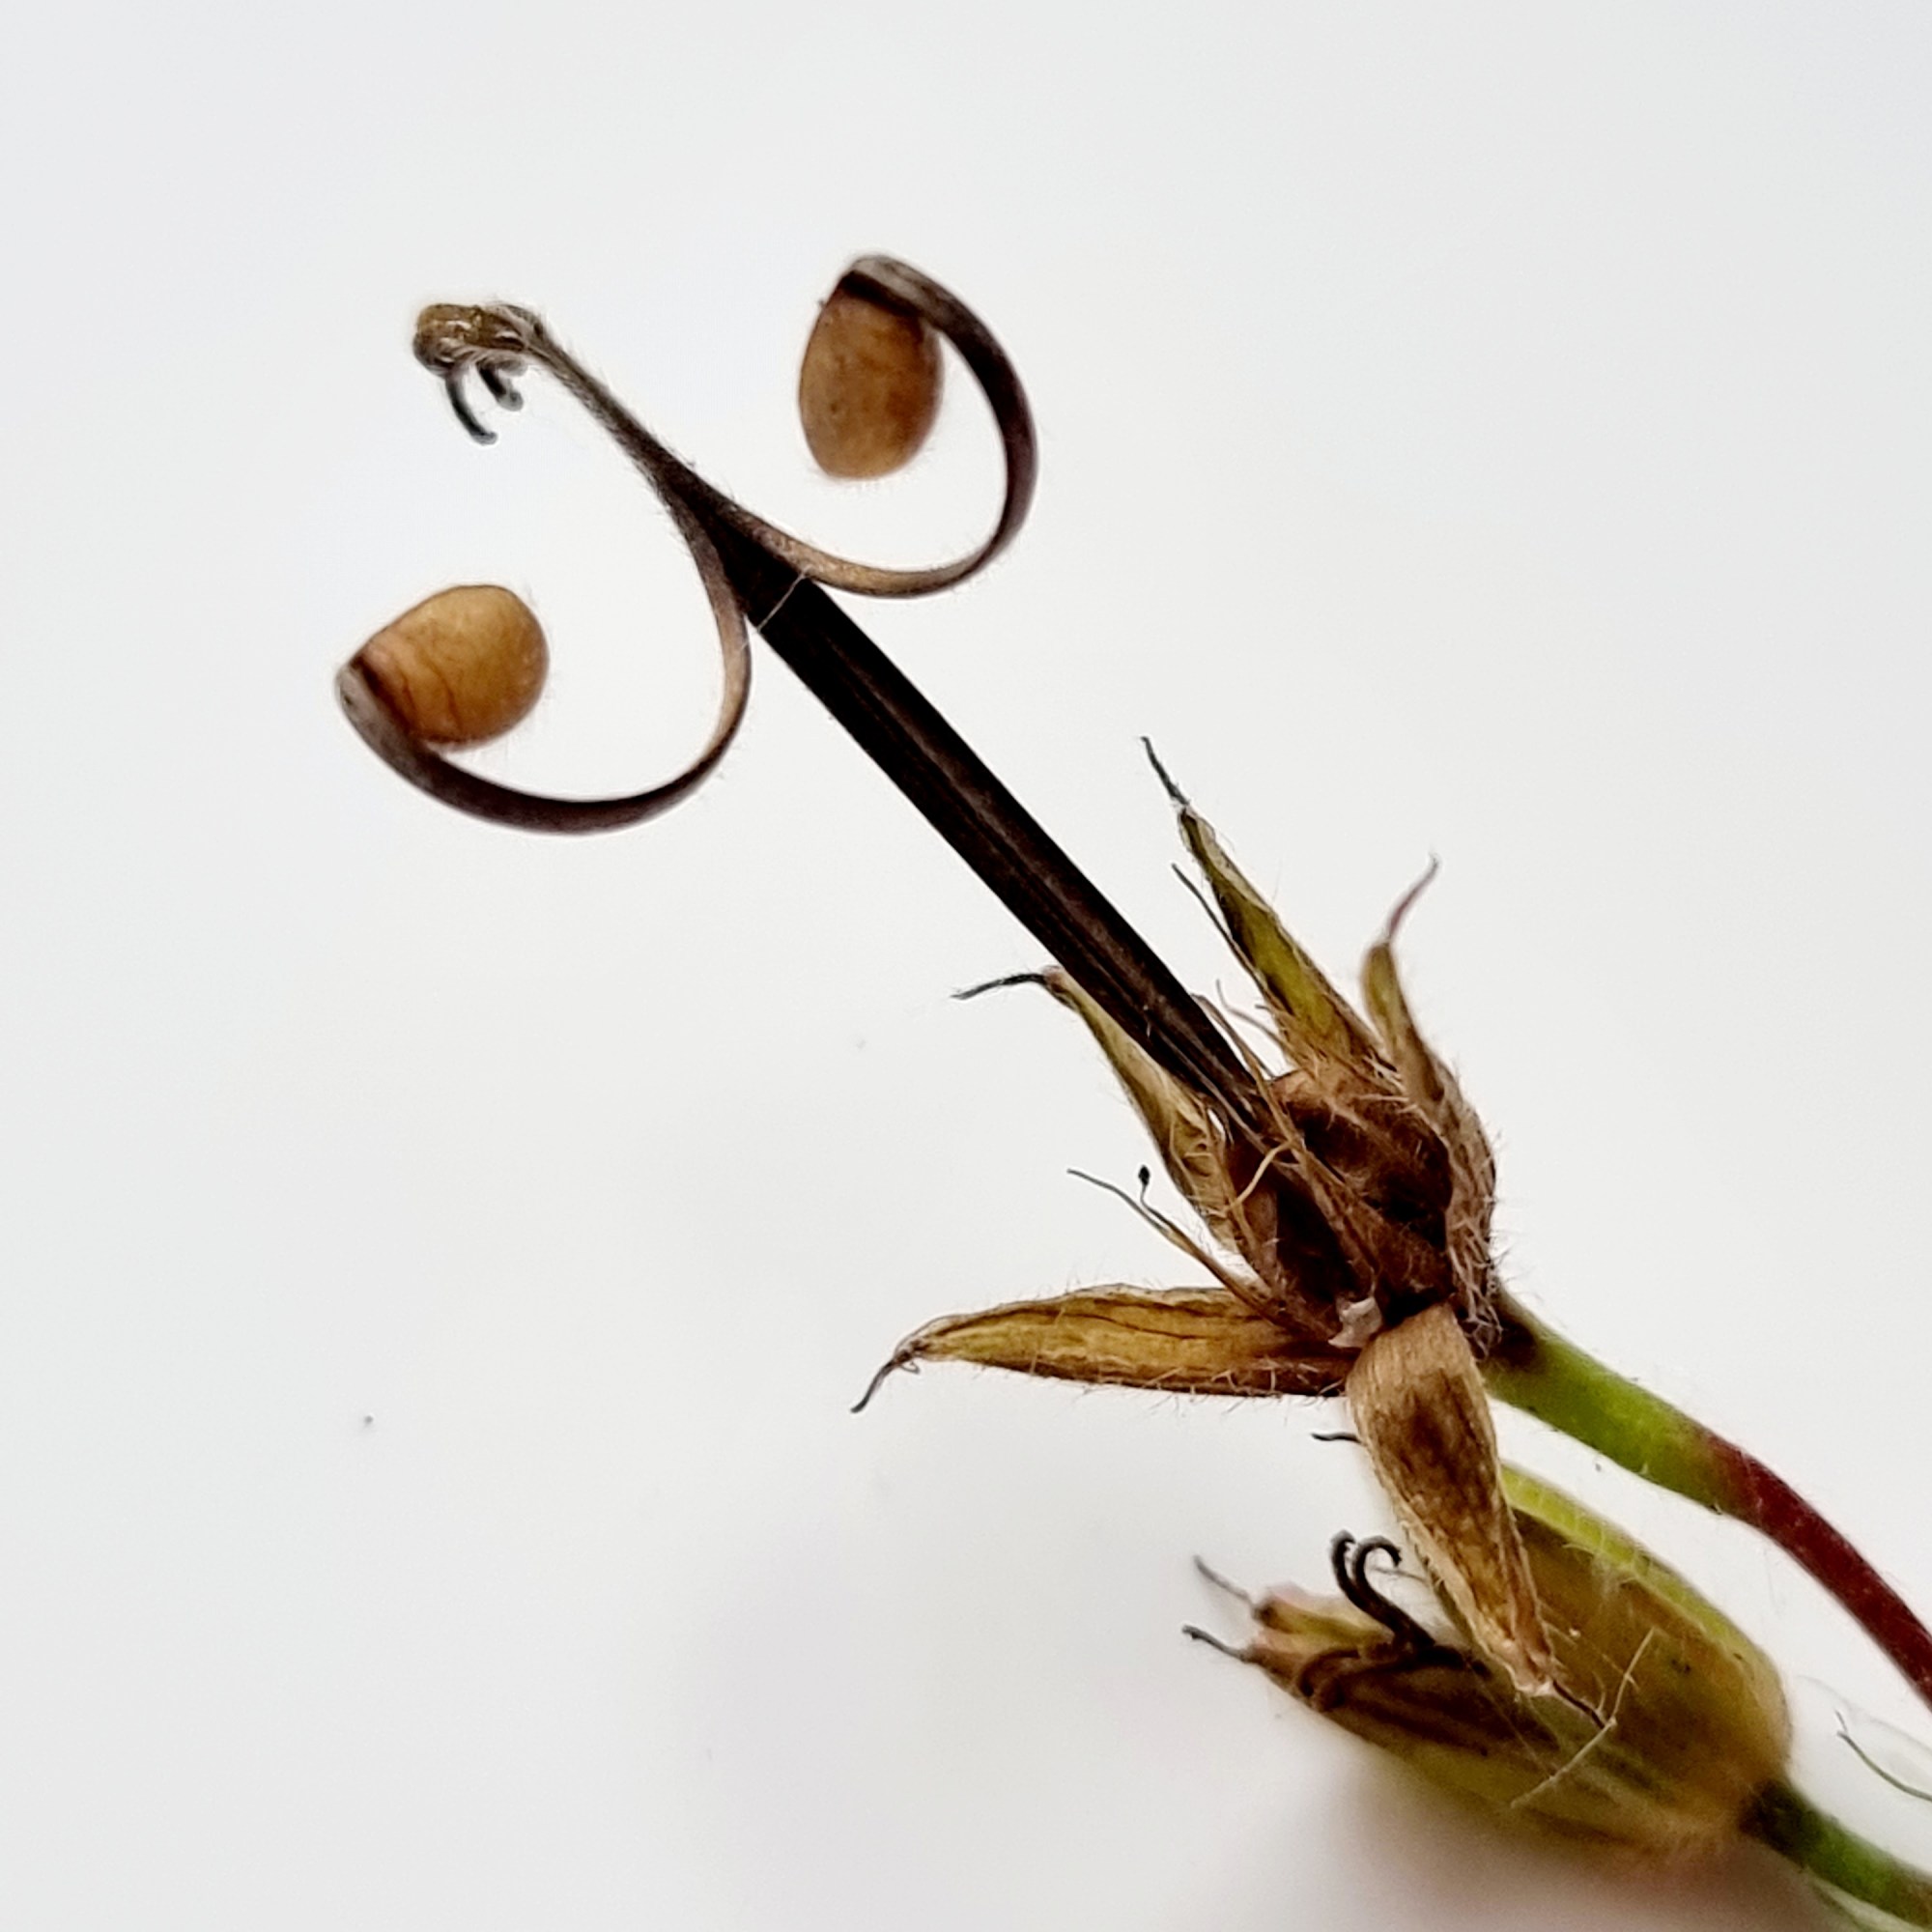
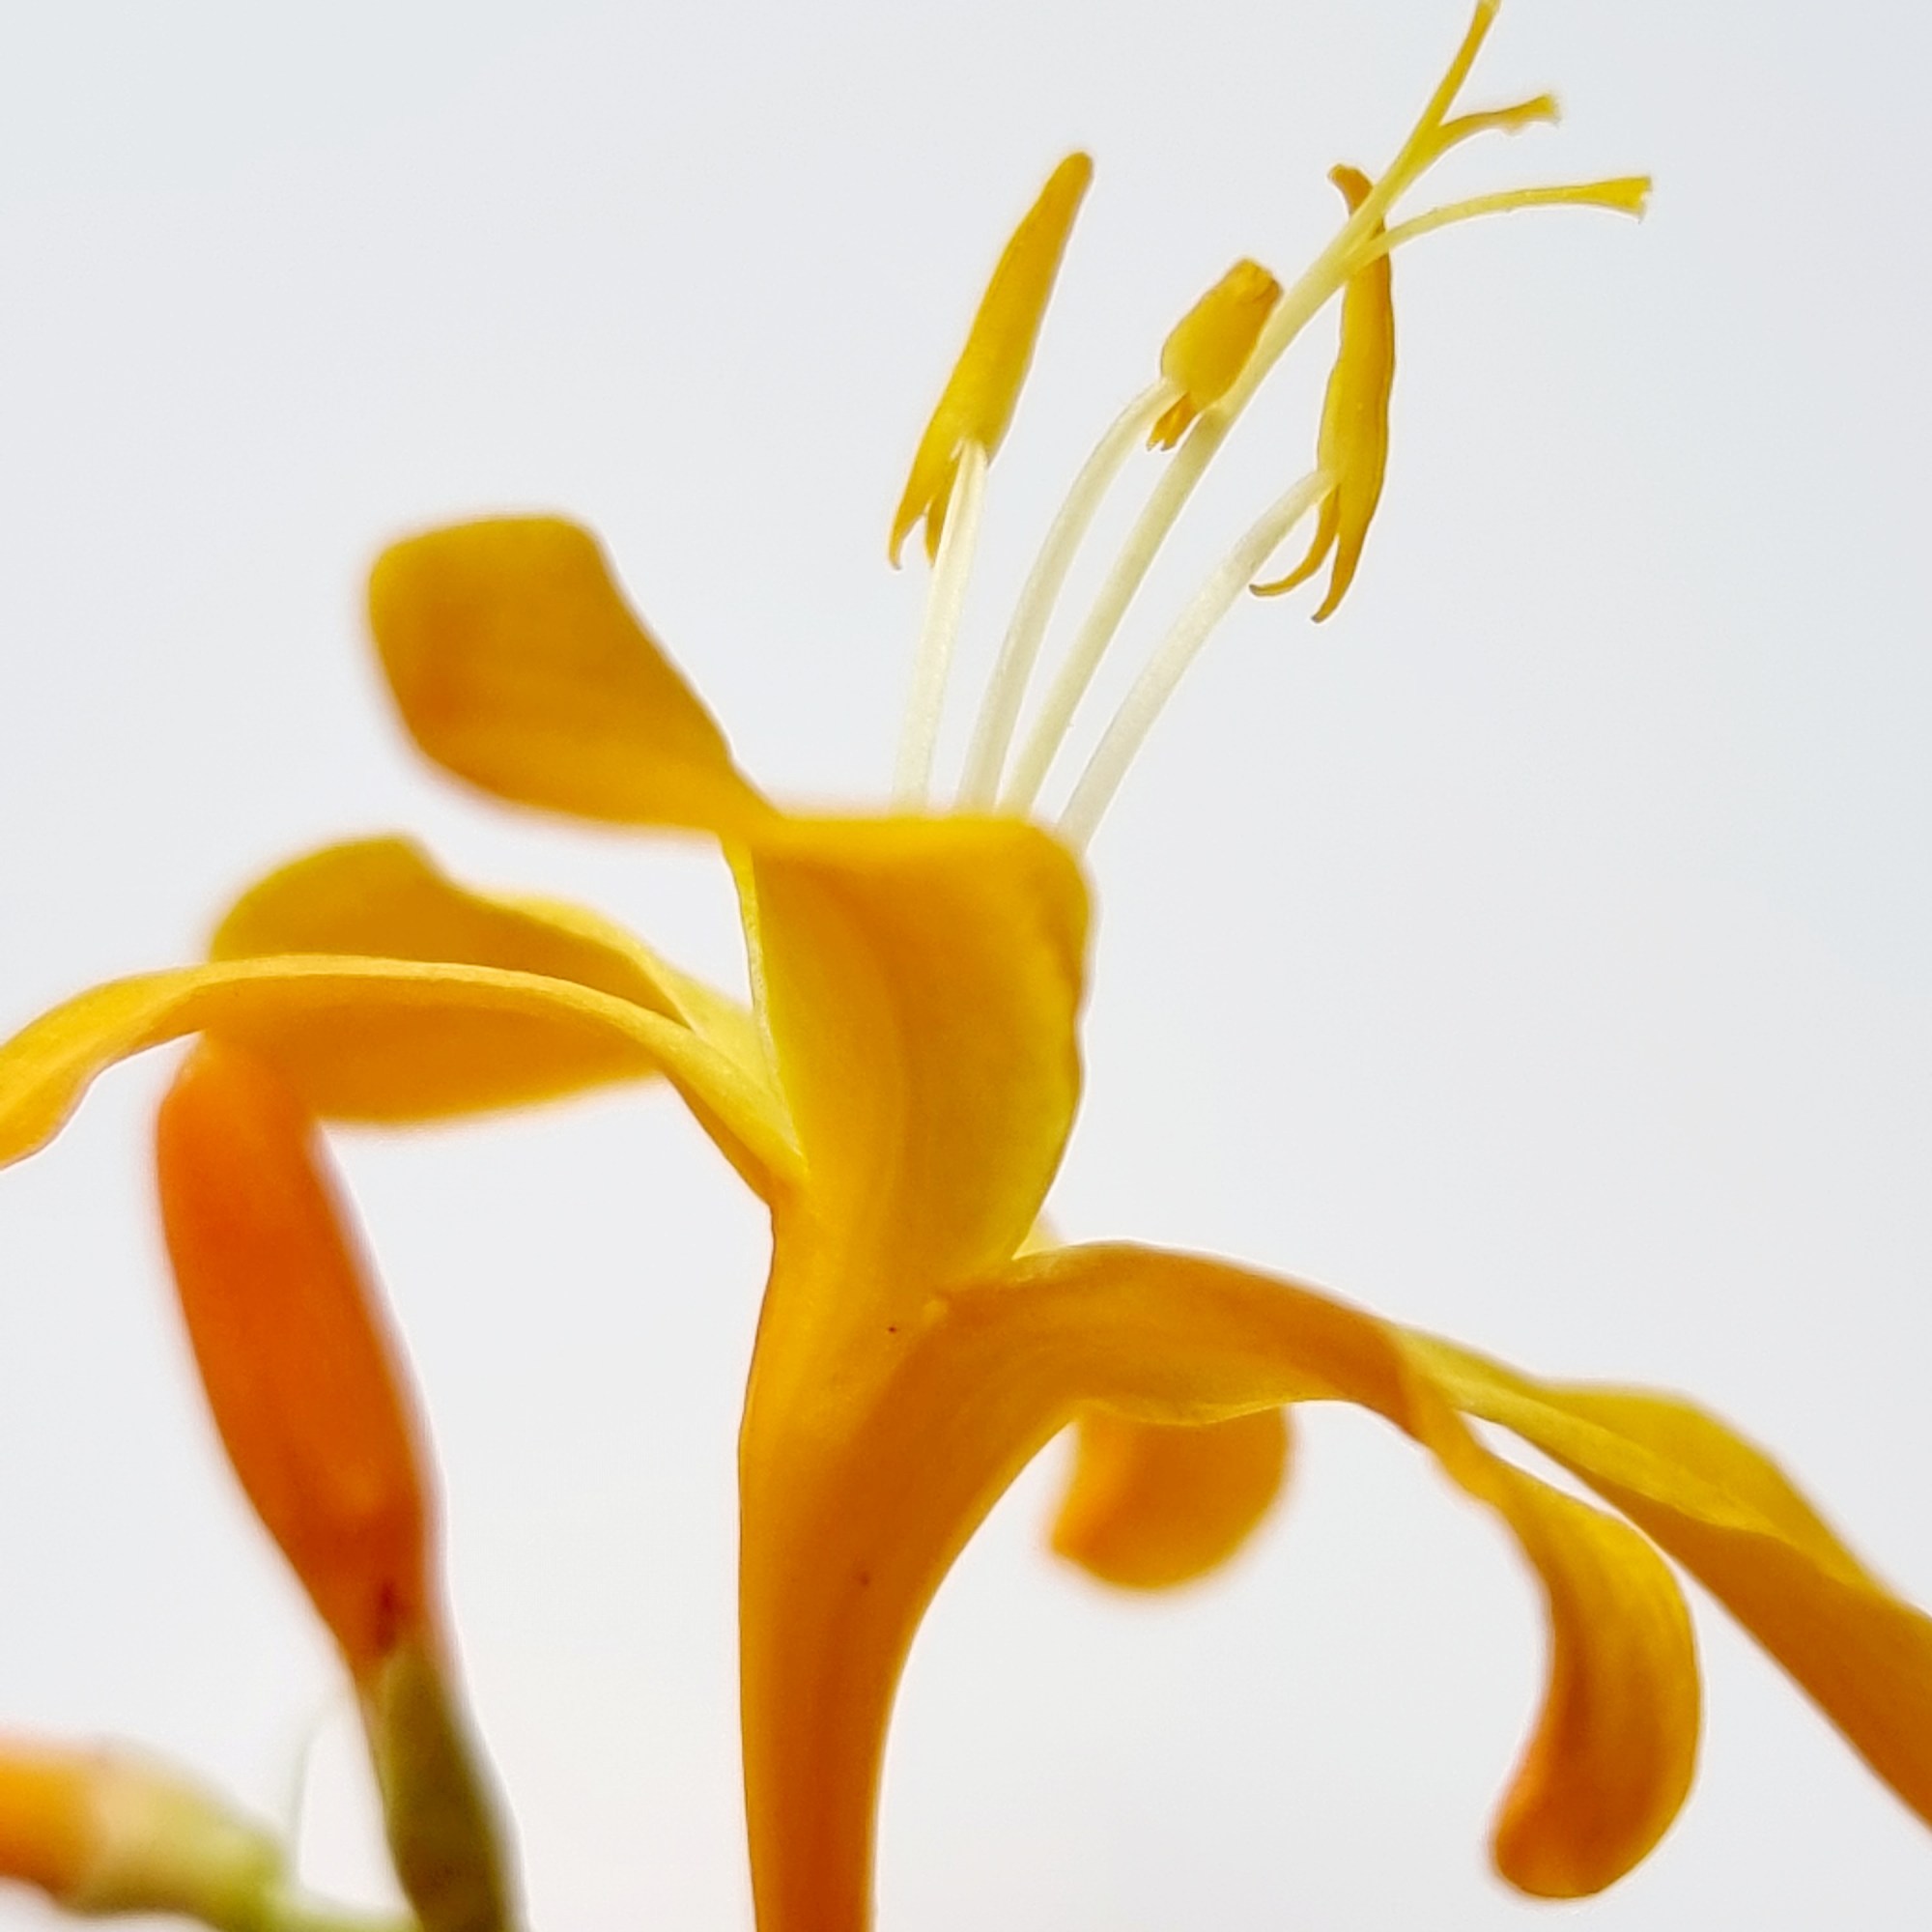
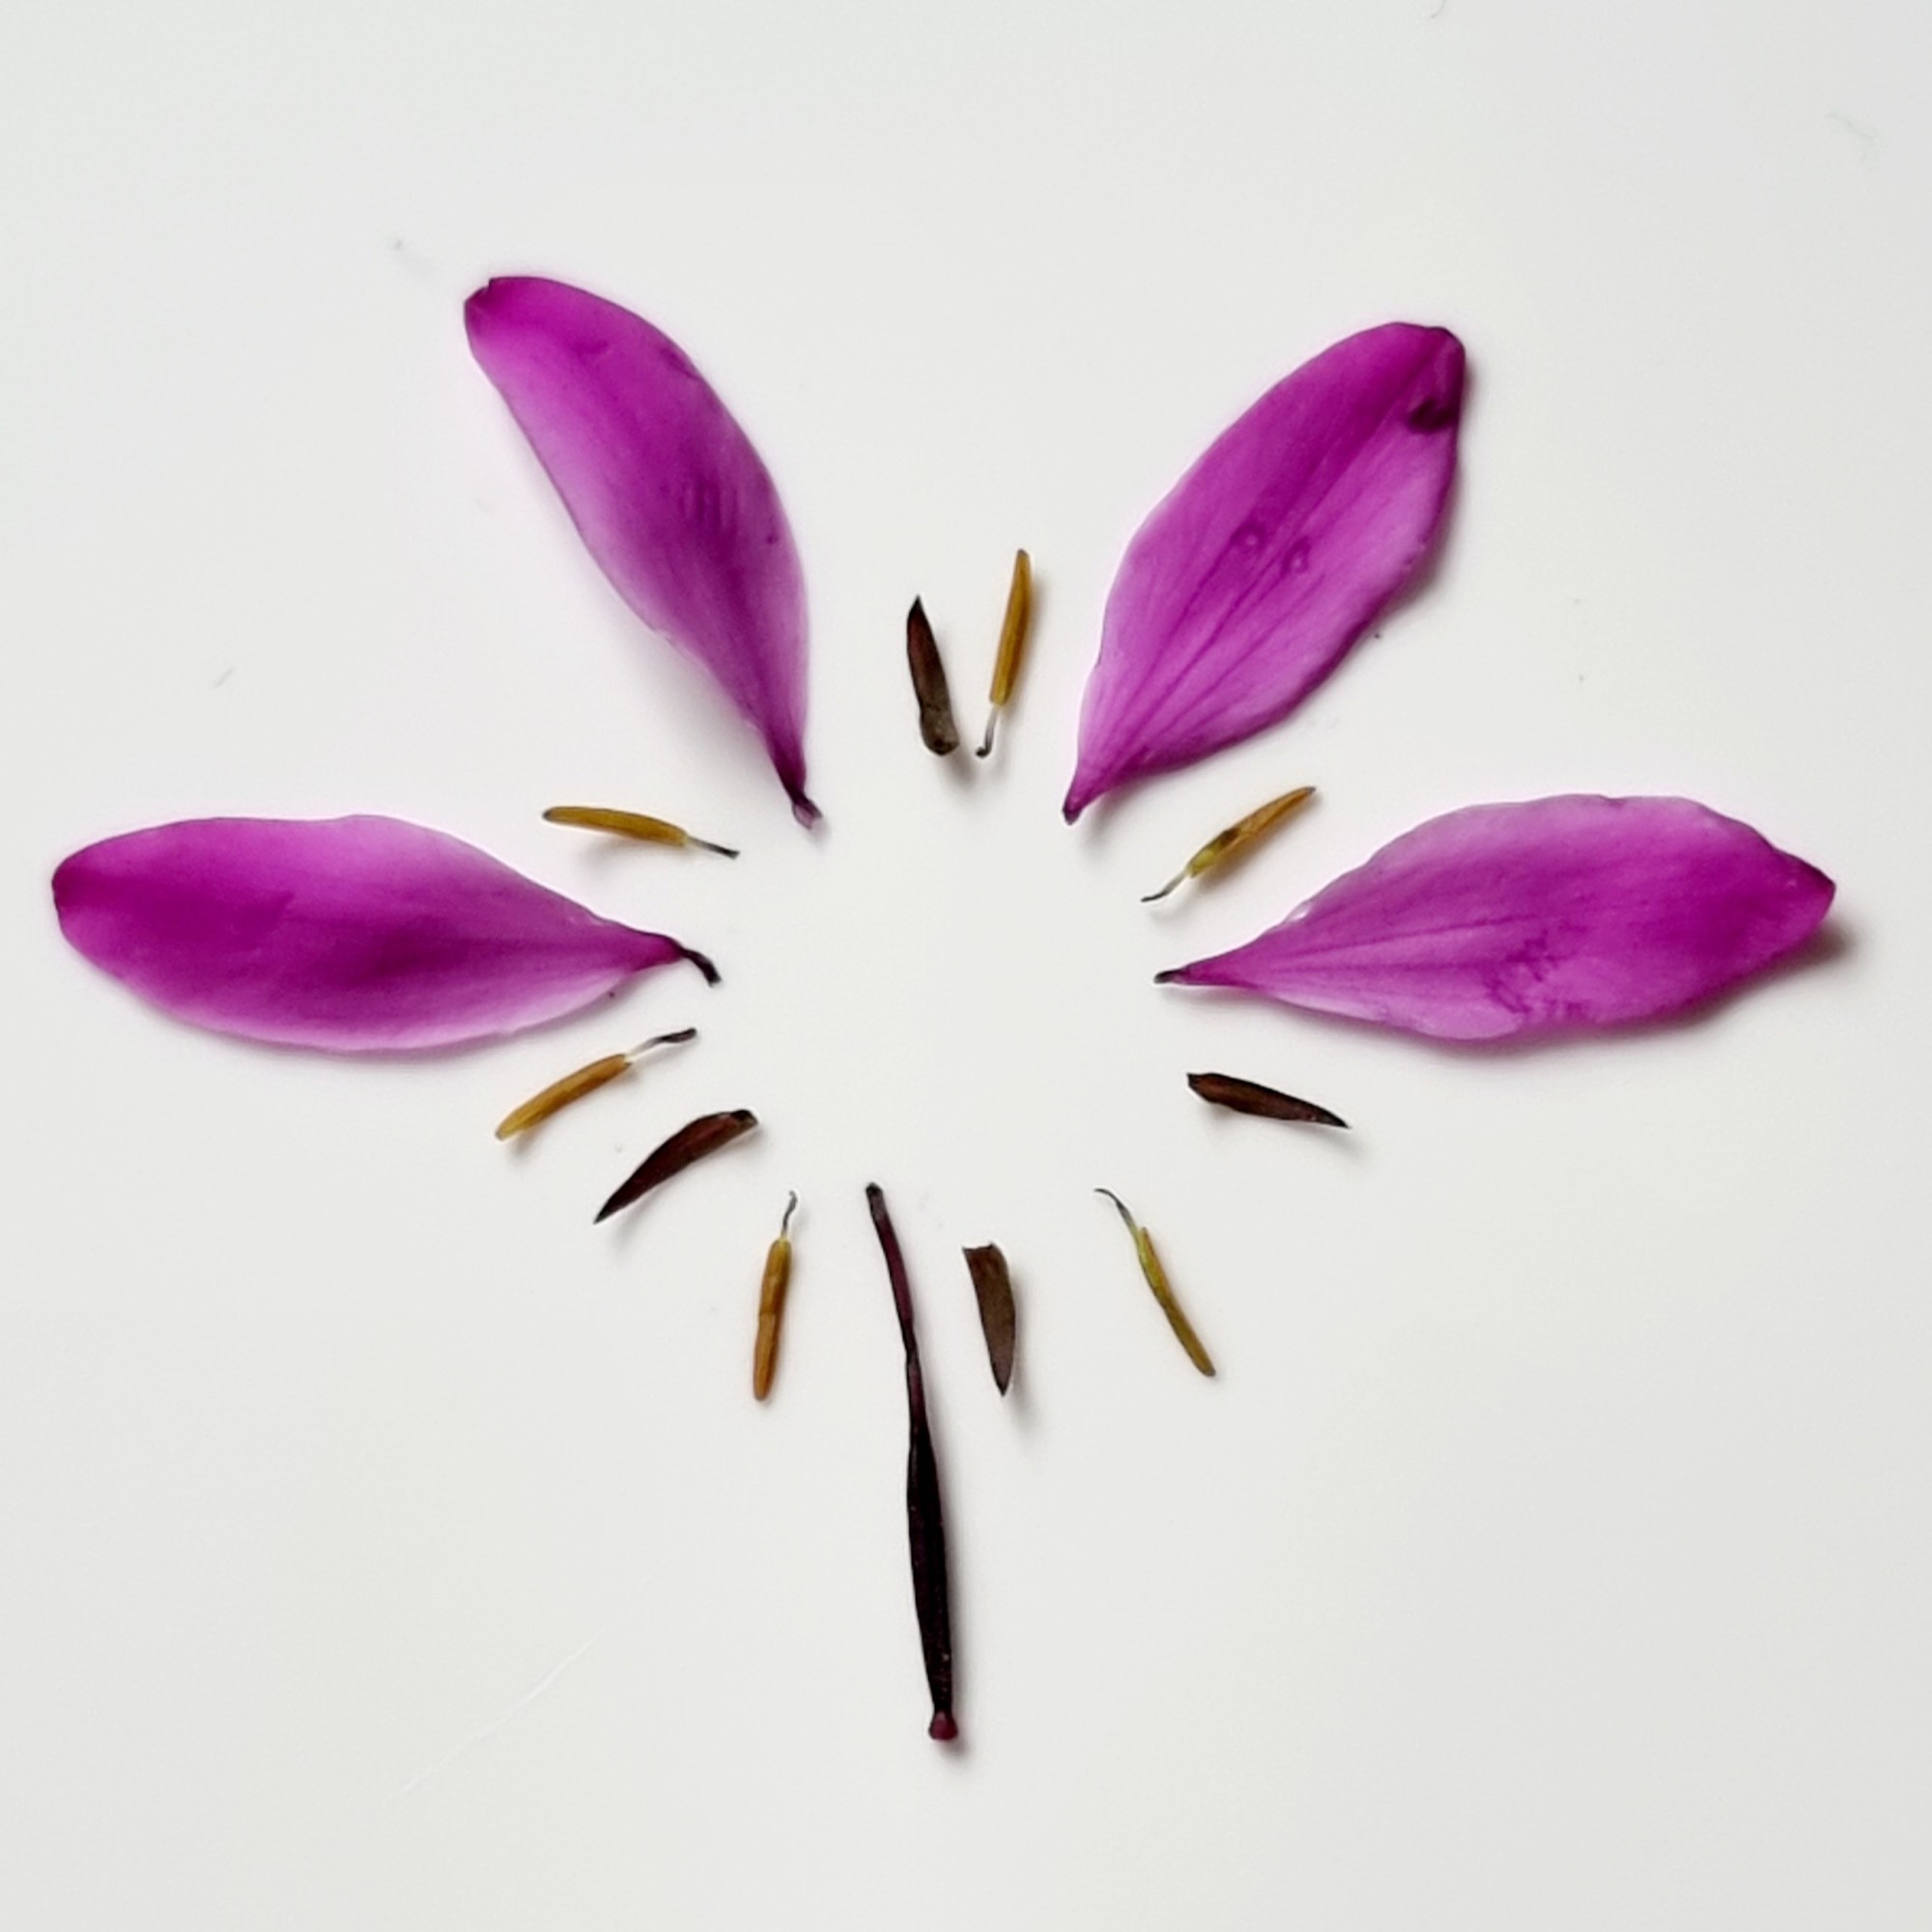
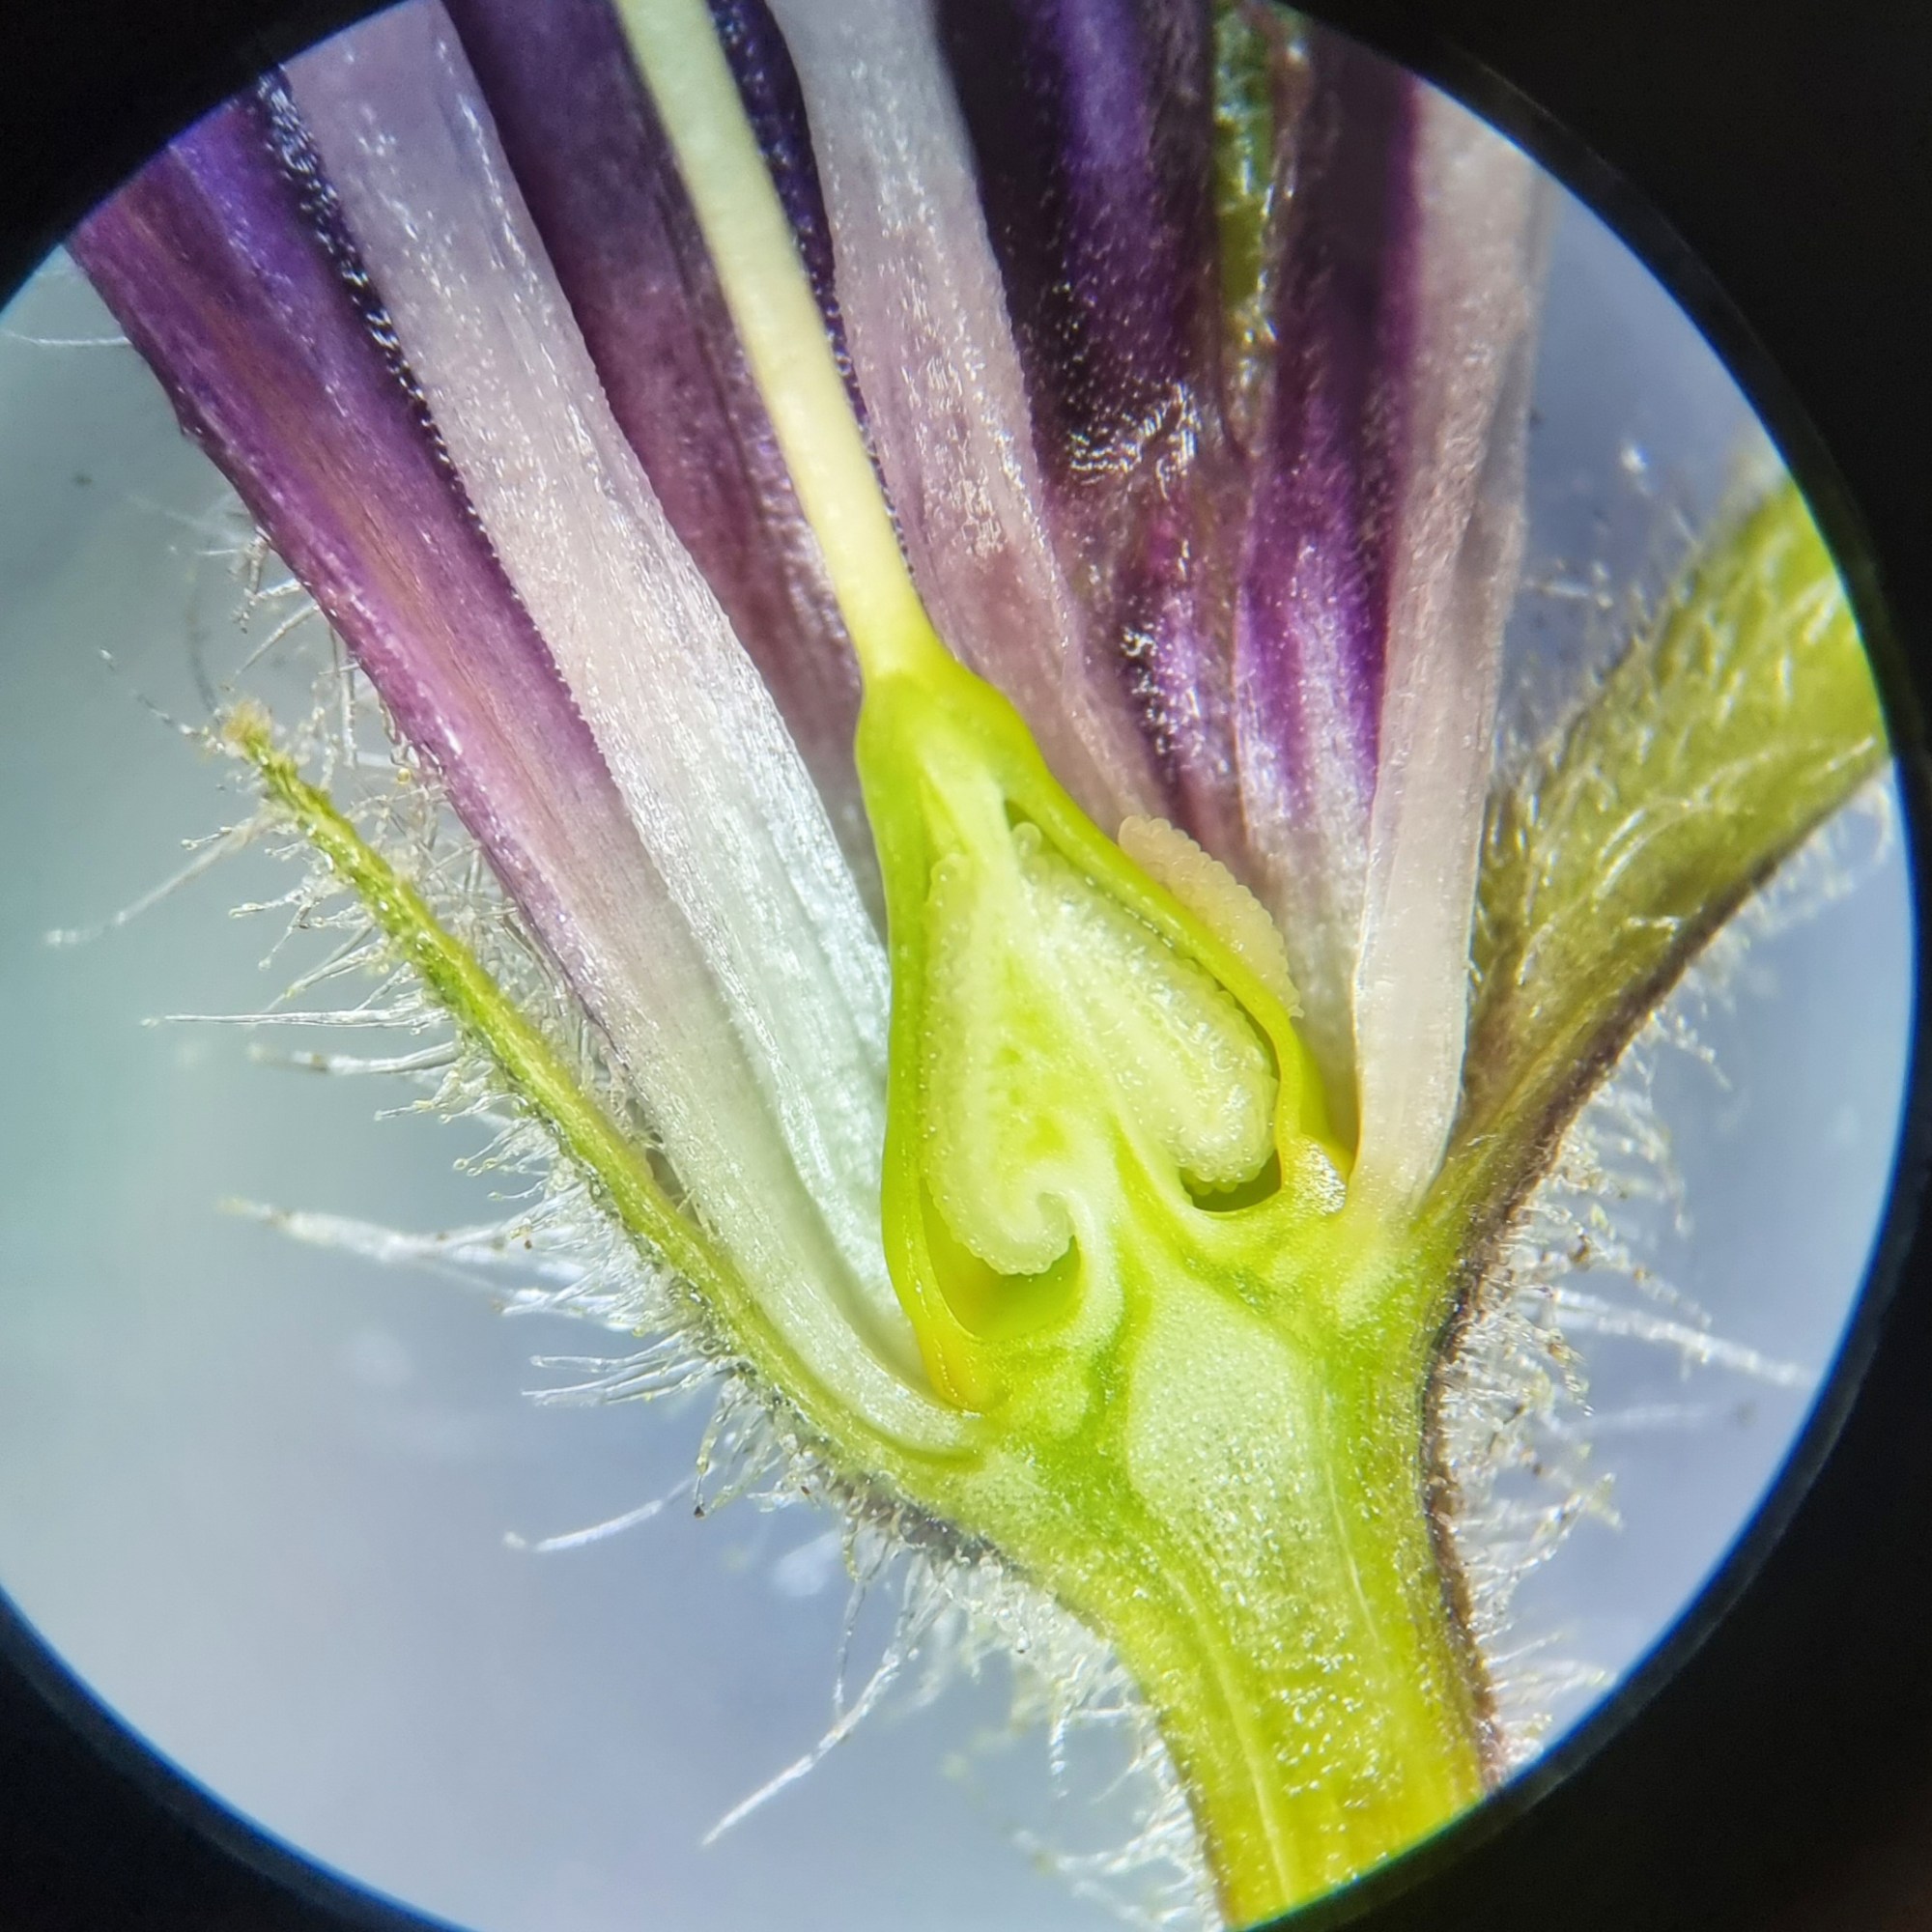
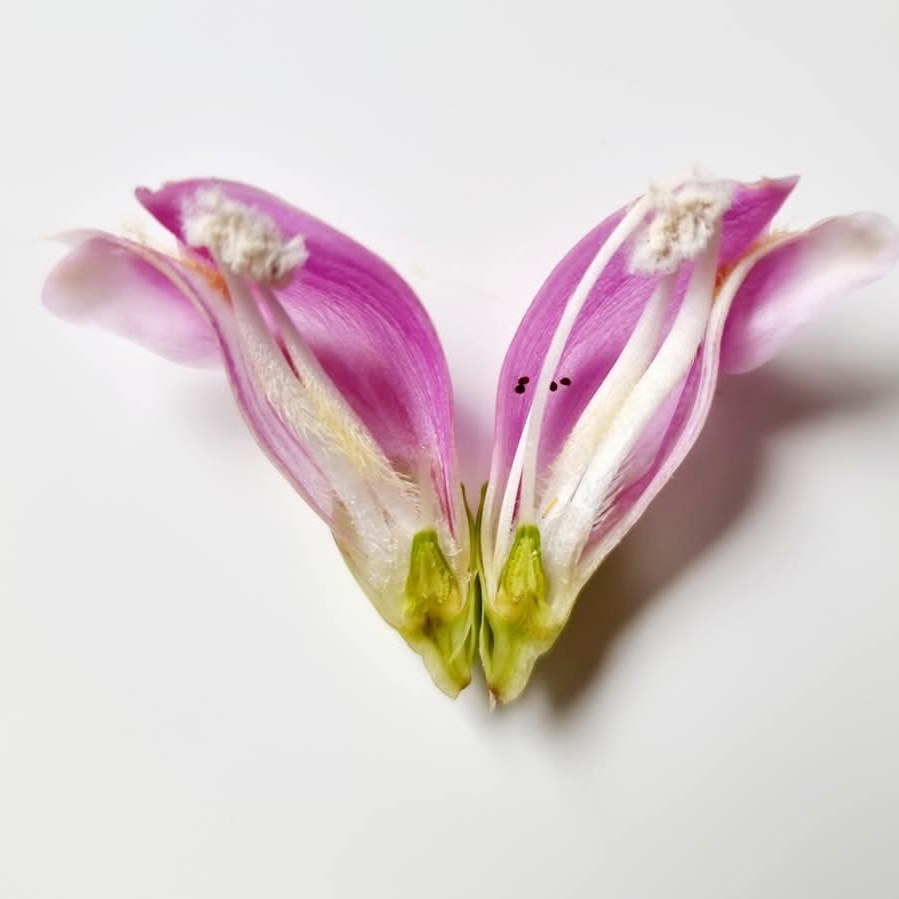
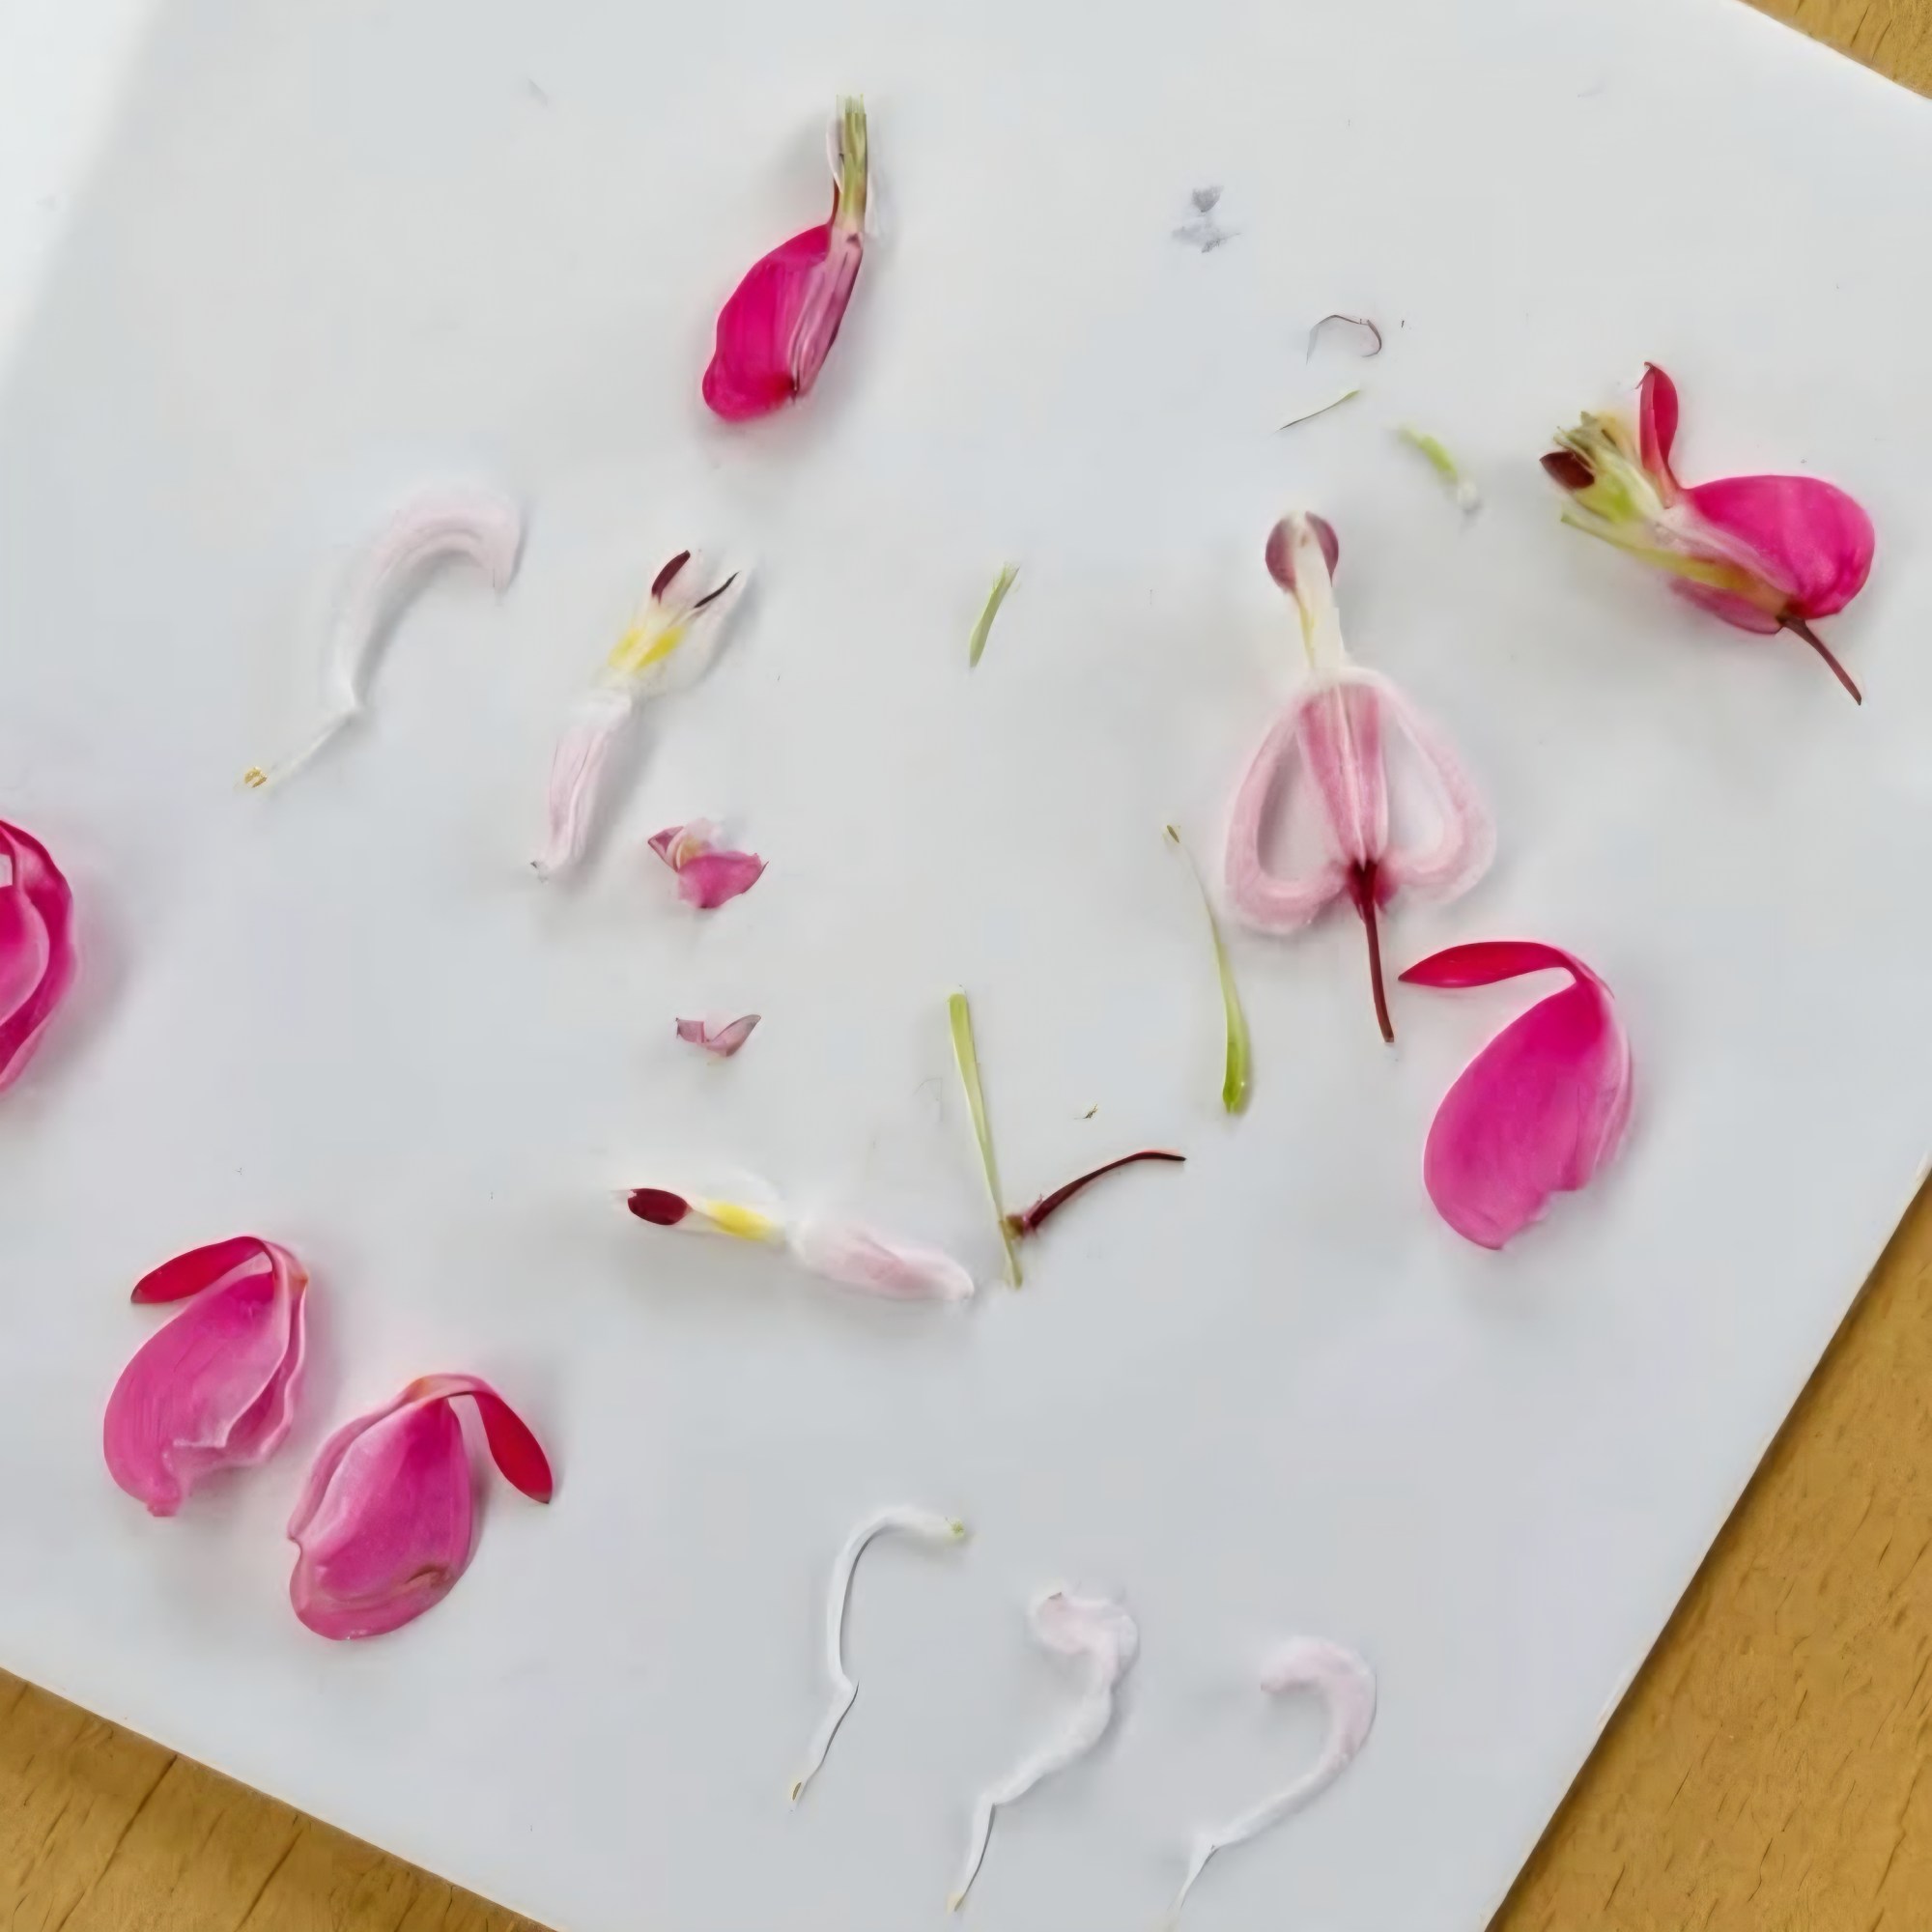
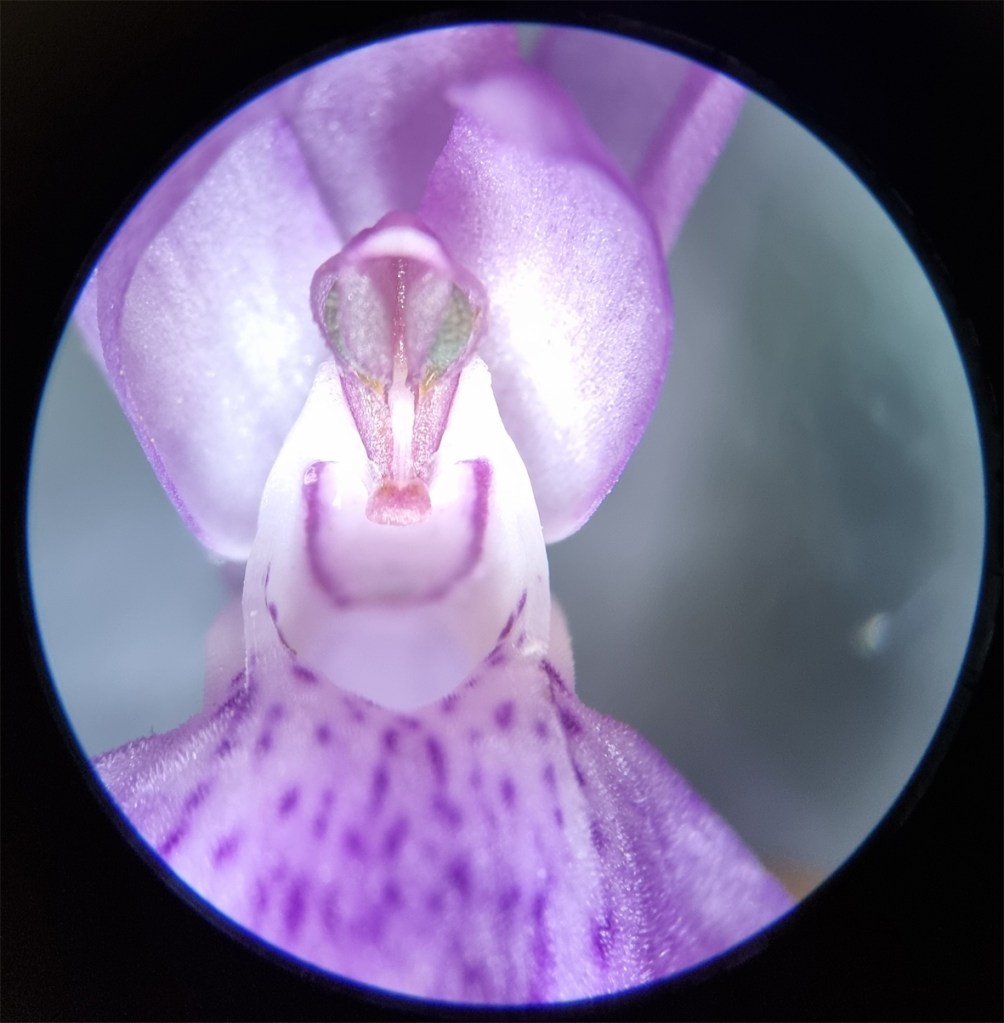
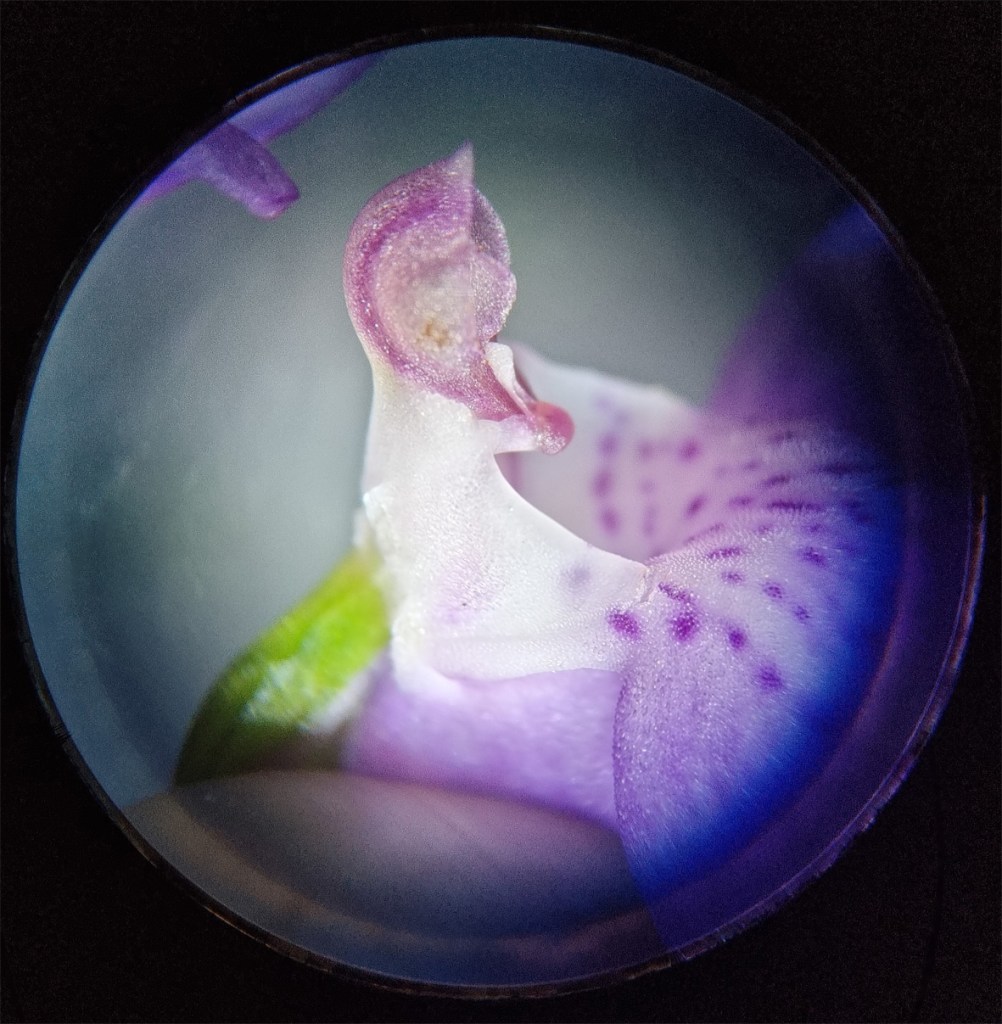
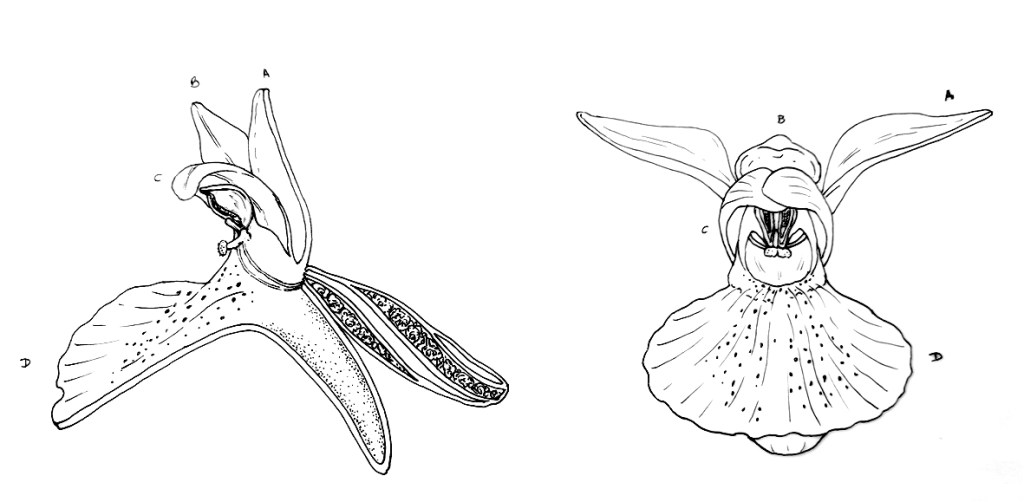
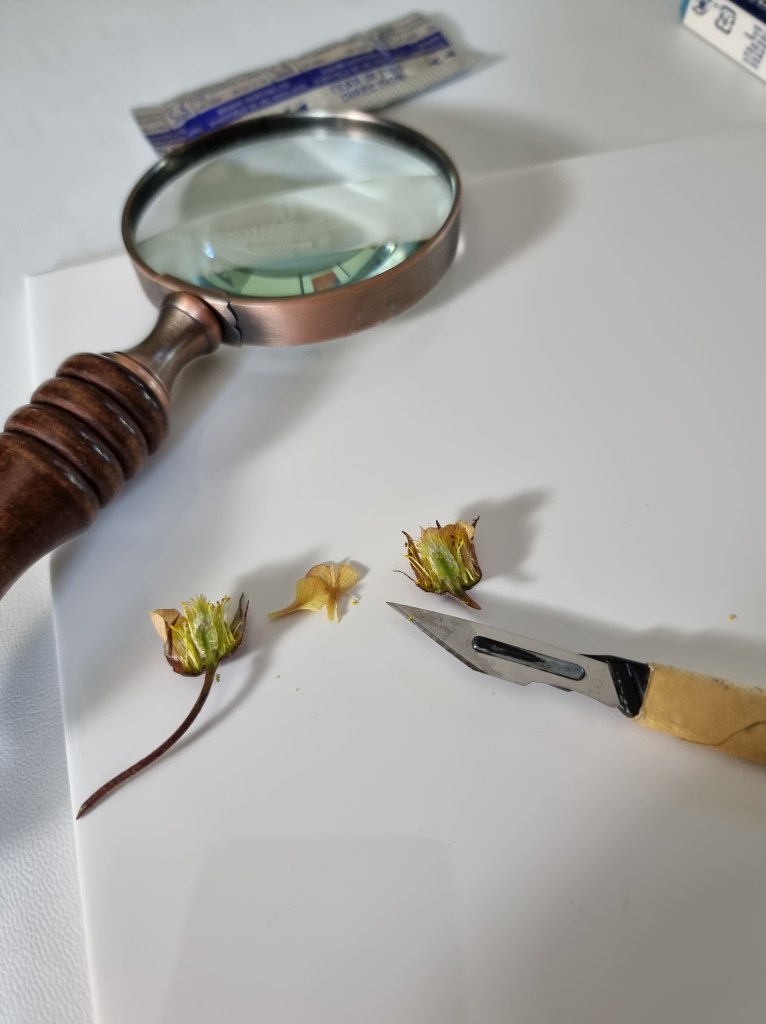
I was allowed to take a few individual flowers from an inflorescence to help me with my dissection illustrations. Orchids are difficult to dissect and understand but with the help of a botanist friend, I managed to make a perfect dissection drawing. I also painted an enlarged pollinium; a body of pollen grains forming a mass and attached to a sticky pad. There are two of them per flower on this plant. This reproductive part attaches to an insects head as it enters the flower. It is then taken by the insect to another orchid flower or plant and pollination happens. To see all the detail of these flowers I used a microscope. The front-facing orchid flower reminded me of an alien face and the side view of a baby in a bonnet! Below are images of my studies and microscope photos.
Microscope images of the reproductive area
A pollinium enlarged
The dissection and front-facing flower illustrations
Preparing to paint
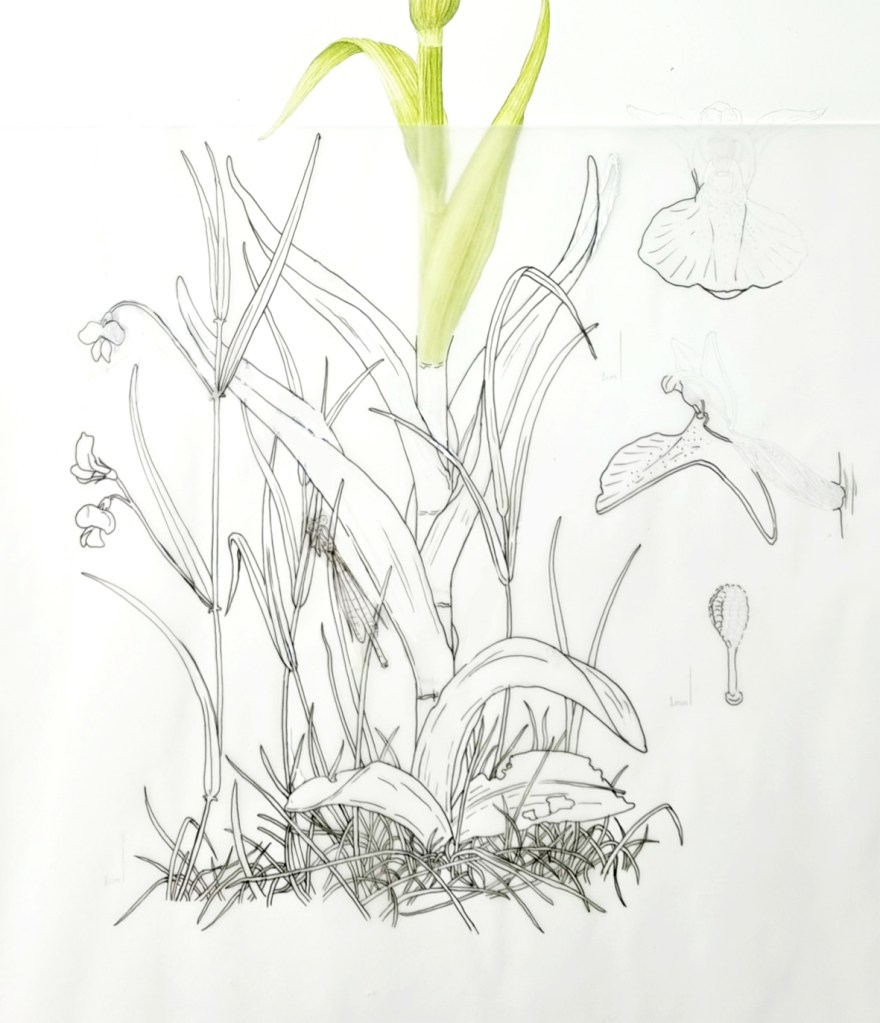
The colour on this orchid was quite tricky to match. It has a lovely pink/lilac flower, burgundy/brown tinges on green bracts and the stem and foliage are quite a bright green. I tested my mixes using live pieces that had been carefully removed from plants in the field. I also took many reference photos to help me with the final drawing and colouring. Not an easy task, as photos make this plant look so different where colour is concerned, but then, photos generally do!
I decided to make this a long thin painting as the subject was tall and its foliage quite upright. I completed the drawing in outline and left the habitat part at the bottom to finish later. I really needed to start painting!
My original inflorescence sketch was too large so I outlined it in black fine liner and reduced it on my laptop, then printed it out at the correct size. It was tidied up later and drawn neatly before I transferred it to watercolour paper.
Testing colour mixes for the flowers, stem and leaves on a small practice piece
The finalised habitat drawing and painted habitat area
I particularly enjoyed painting the insects. This is the start of the bright blue damselfly. No black paint was used, this black is a mix of Indanthrene Blue, Permanent Carmine and New Gamboge. I prefer to mix my own black as there are many versions of black too, warm and cool! This is a warm black mix that compliments the bright vivid cool blue.
This painting was a mammoth task with such a short time to complete. I really wanted to be involved in this exhibition as the theme is very close to my heart. Protecting all our ecosystems is crucial to human survival and these environments are becoming so rare. In the UK 97% of all meadow grassland has been lost since the 1950s due to modern intensive farming, housing and draining of wetlands. Then there are pesticides that are killing the pollinators of our food plants. Something needs to change….
Extra research
I went back to the nature reserve later on to see the seeding inflorescences. I did this so that if I had time to include this plant in my RHS entry, I would have more information available about its lifecycle. It would be a different style composition to this painting here as I have done my RHS paintings in a more scientific way. I do now have all the necessary information and research to hand though, just in case! The seeds are very small, fine and delicate, almost like dust. see microscope image below.
The finished painting
Dactylorhiza praetissima (Southern Marsh Orchid) with Lathyrus nissolia (Grass Vetchling), Osmia bicornis (solitary mason Bee) and Enallagma cyathigerum (Common blue damselfly)
I was pleased with the result and thrilled that it was chosen to be shown in the Shirley Sherwood Gallery by ABBA judges. It is probably the fasted detailed painting I have ever done!
I hope you enjoyed my painting journey for the Southern Marsh Orchid.
I wish you all a Merry Christmas and Happy New Year, it’s very close now!
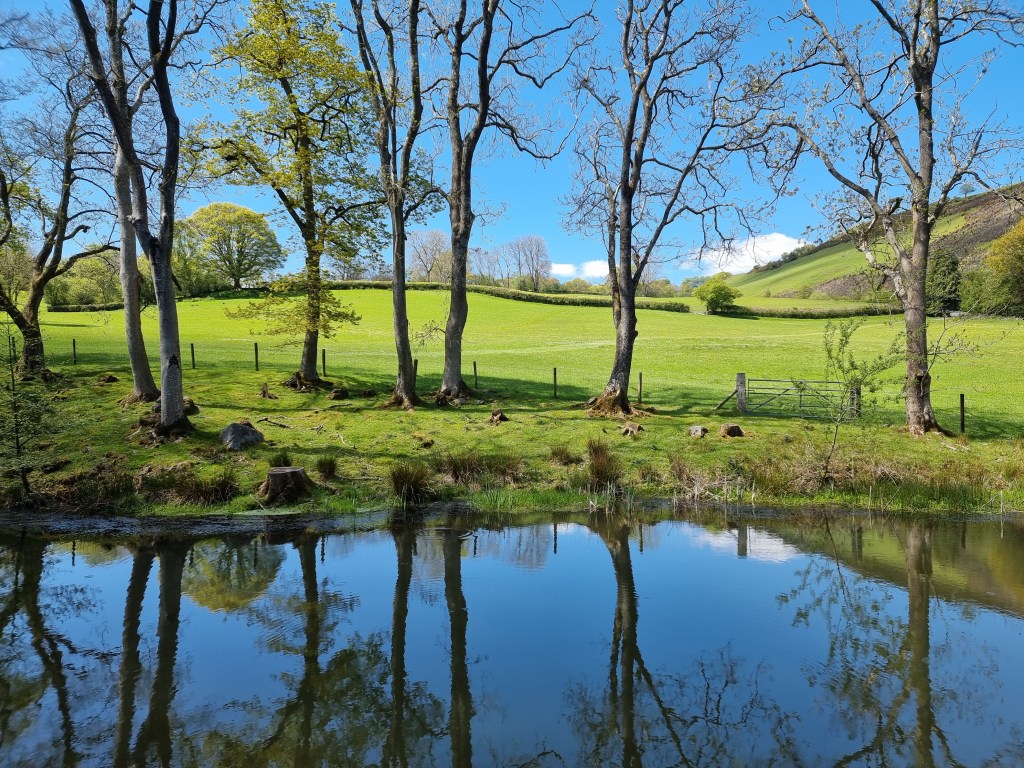
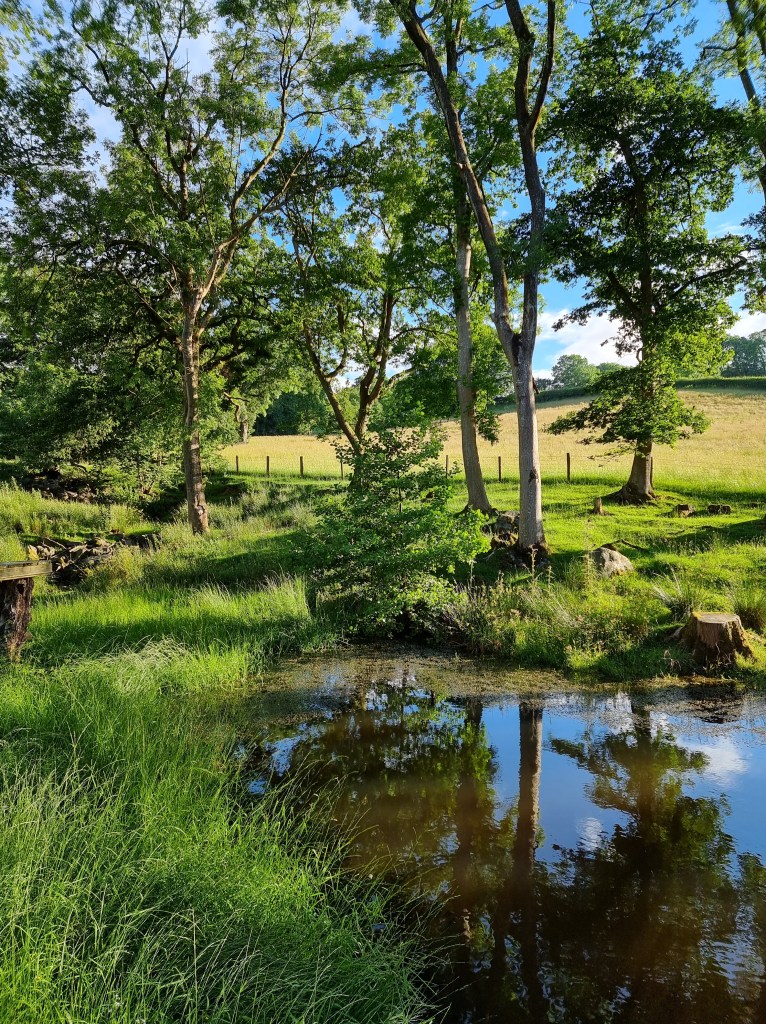
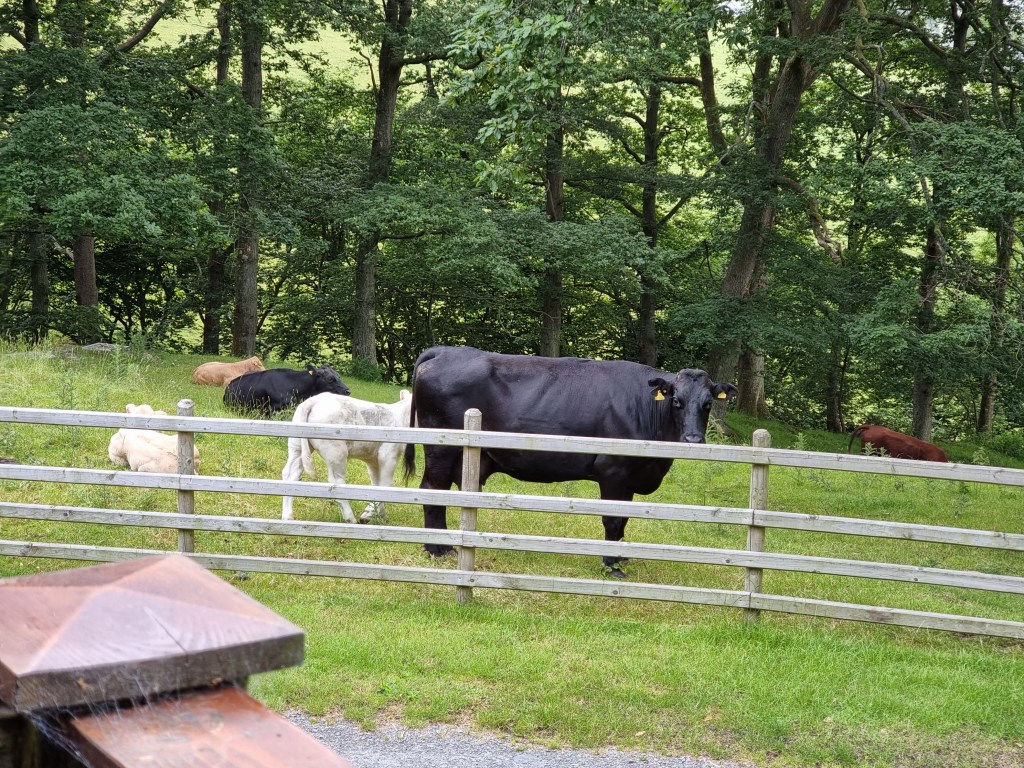
I had a wonderful summer this year with time to concentrate on my RHS paintings. I took myself away to a lodge in Trefeglwys, Wales. The lodge was in a quiet, remote location and it gave me time to focus on my work. The lodge is surrounded by fields, woodland, hills, sheep (I miss the bleating!) and cows.
What more could you want!
The wildlife
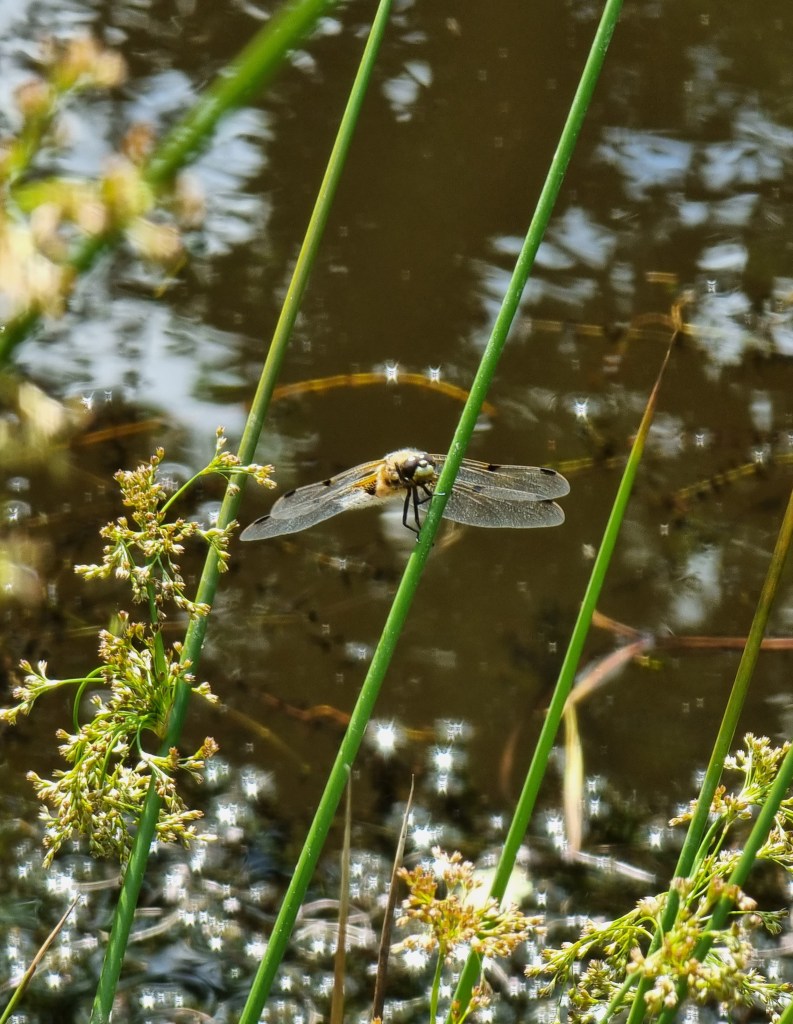
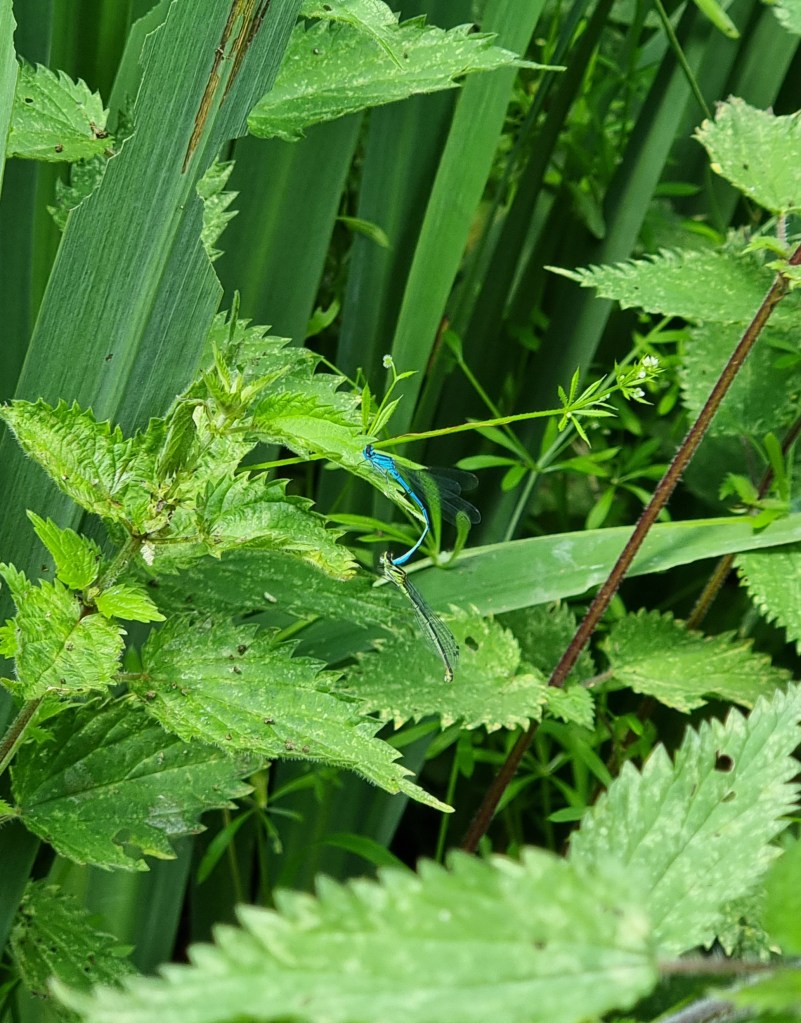
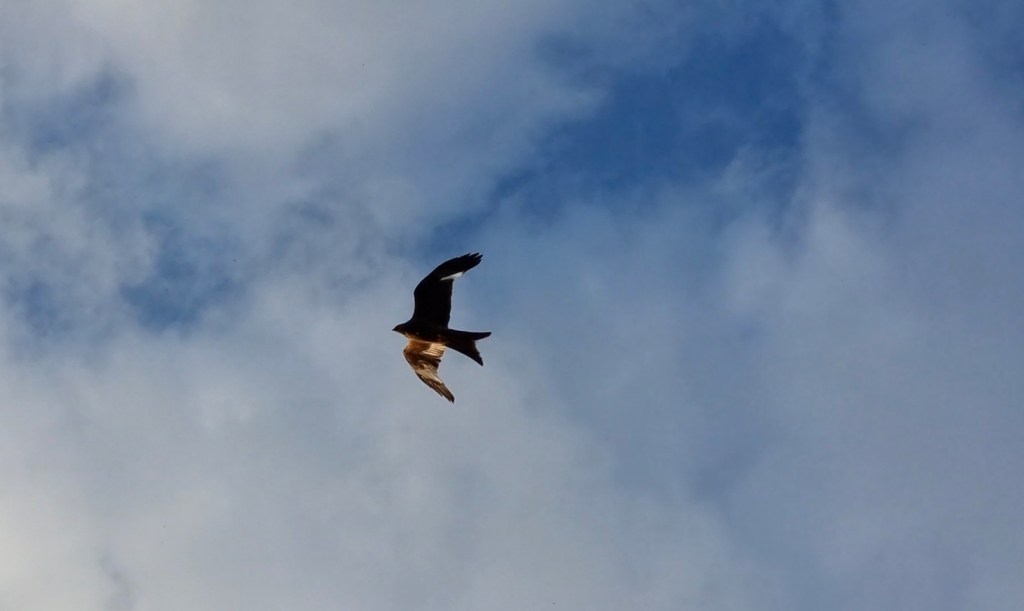
Wild hares leapt around the fields at night. A pond faced the deck of the lodge and many dragonflies and damselflies frequented it. For the first time, I saw a dragonfly emerge from its nymph. The process took almost 2 days and was fascinating to watch even though I found the nymph a little scary at first! Overhead many Red Kites flew, I’ve never seen them this close up. They are magnificent birds, although a little noisy on occasions as they were nesting!
Bugs and birds
Nature reserve visits
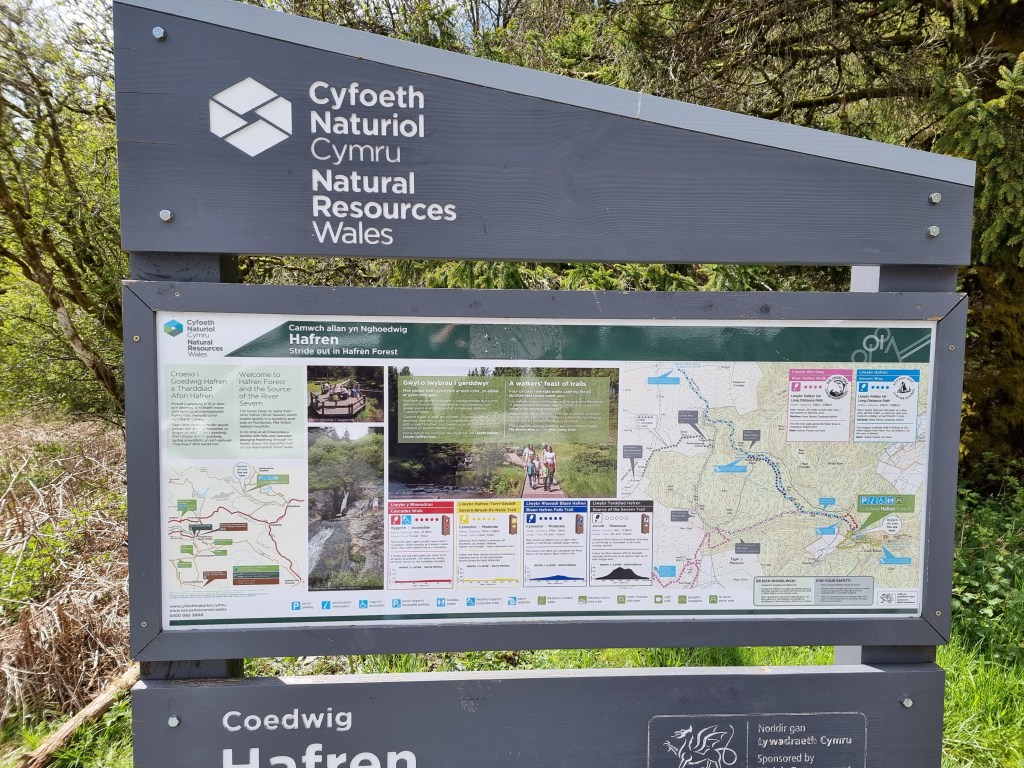
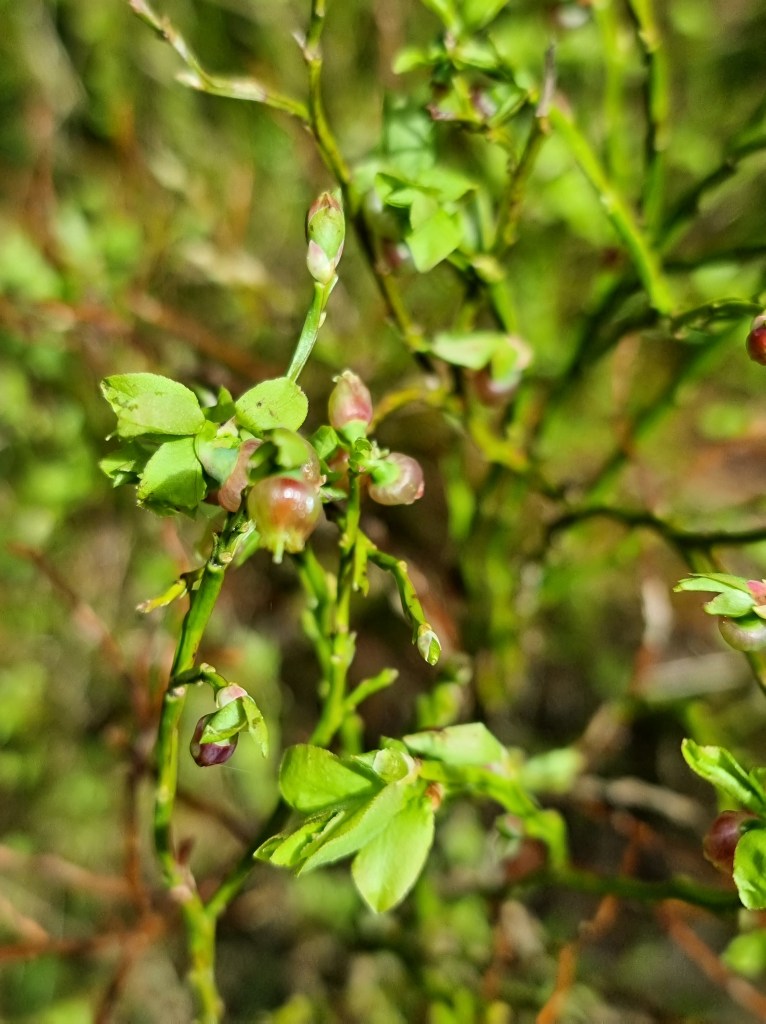
As well as visiting my usual Trewalkin meadow, on the journey, each time I travelled to the lodge, I also visited two other local meadows, Llanmerewig and Pen Y Waun. The latter was such a tiny meadow but full of wildflowers. One weekend my cousin and hubby came to stay and we went to Hafren forest. An amazing place, the atmosphere there is very dear to my heart. It was teaming with unripe bilberries too.
Hafren Forest Nature Reserve
Below are photos of Llanmerewig meadow. It was a very hot balmy day and it was buzzing with bees, hoverflies and I even spotted a nursery spider web. These grassland habitats fill my heart with joy especially so as they are very rare. Let’s hope in the future we will see more of these grasslands appearing and that there will be protection for what we have left – only 2% only since the 1930s!
I visited Pen Y Waun meadow in June. The tiniest nature reserve I’ve ever encountered! However, this tiny meadow was boasting some wildflower species. I went in the hope of finding evidence of Devil’s bit scabious growing there. This plant doesn’t flower until late summer but I would recognise the basal leaves if they were present. Unfortunately, nothing was to be seen. Below are photos of Pen Y Waun. You can literally see all of it in the first photo!
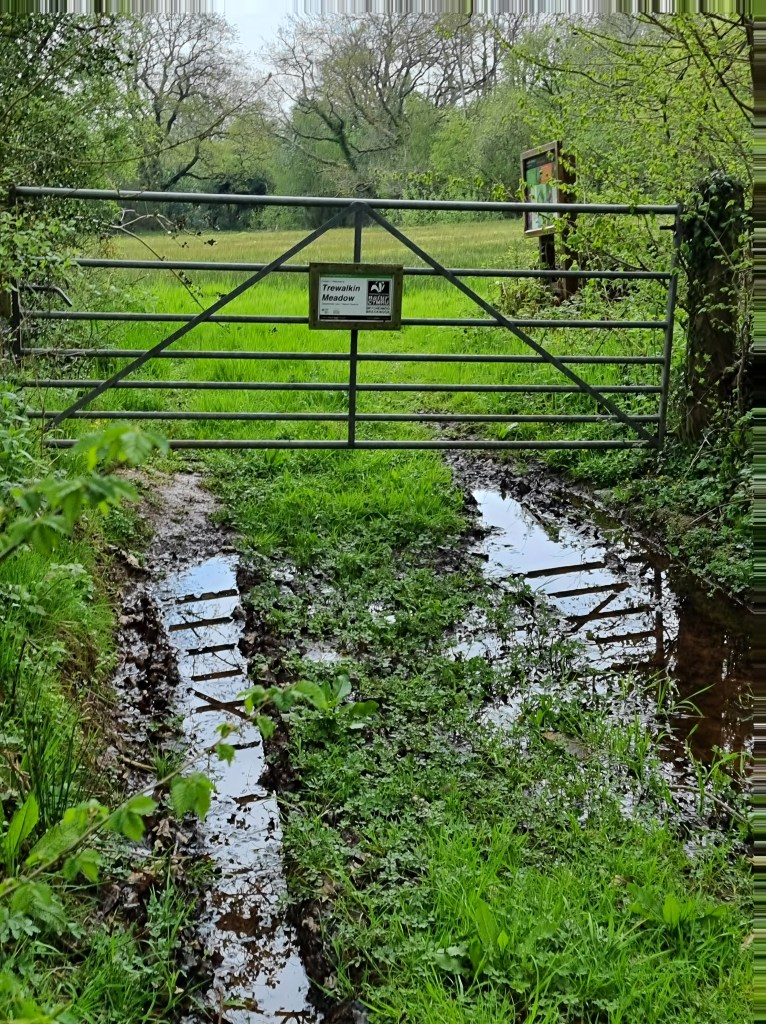
The main meadow for my research, Trewalkin
Trewalkin meadow is en-route to the lodge in Trefeglwys, snuggled down a narrow country lane. A small, damp, flower-rich meadow at the foot of the Black Mountains between Llangorse and Talgarth. I stopped on the way on all my journeys to see how the meadow was progressing. I have visited this meadow many times since I started my plant research. It is home to all but one of the species I am painting. I was delighted to find a lot of them still flowering along with wild orchids when I visited in July.
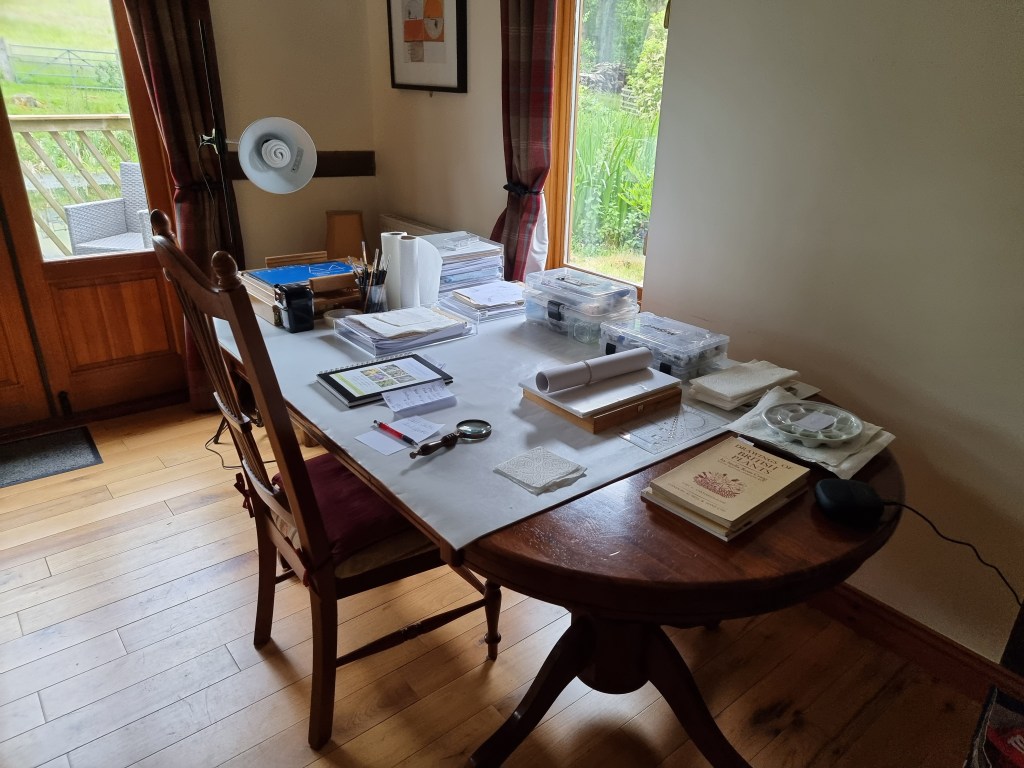
I took with me all the paintings I have already started in order to do some more work on them. Setting up my workspace at the lodge was simple, there was a huge dining table! The light wasn’t as good as I expected but I had pre-empted this and taken my lamps with me. I moved the table as close to the windows as I could. My car was overflowing as I needed to take reference books, research work and all my equipment too. I didn’t enjoy the packing and unpacking but the place was perfect and idyllic. I also had to take some plant stems from my garden at home for reference.
The painting
I started by working on my Ragged Robin and Greater Birds Foot Trefoil dissection details using my plant specimens as reference. Here are some photos of the work I completed whilst away. The hours flew by…
On my next trip to the lodge, I took a Water Avens plant with me and again checked Trewalkin meadow on the way. Trewalkin was very water-logged in May and the Water Avens plants growing there were very short in comparison to my home-grown Water Avens. I have found it was important to find all my chosen species growing in the wild as they grow more naturally than in a garden. Habitats in the wild are quite different. Because the field was so water-logged, this year the plants had been stunted a little. They were much smaller than last year.
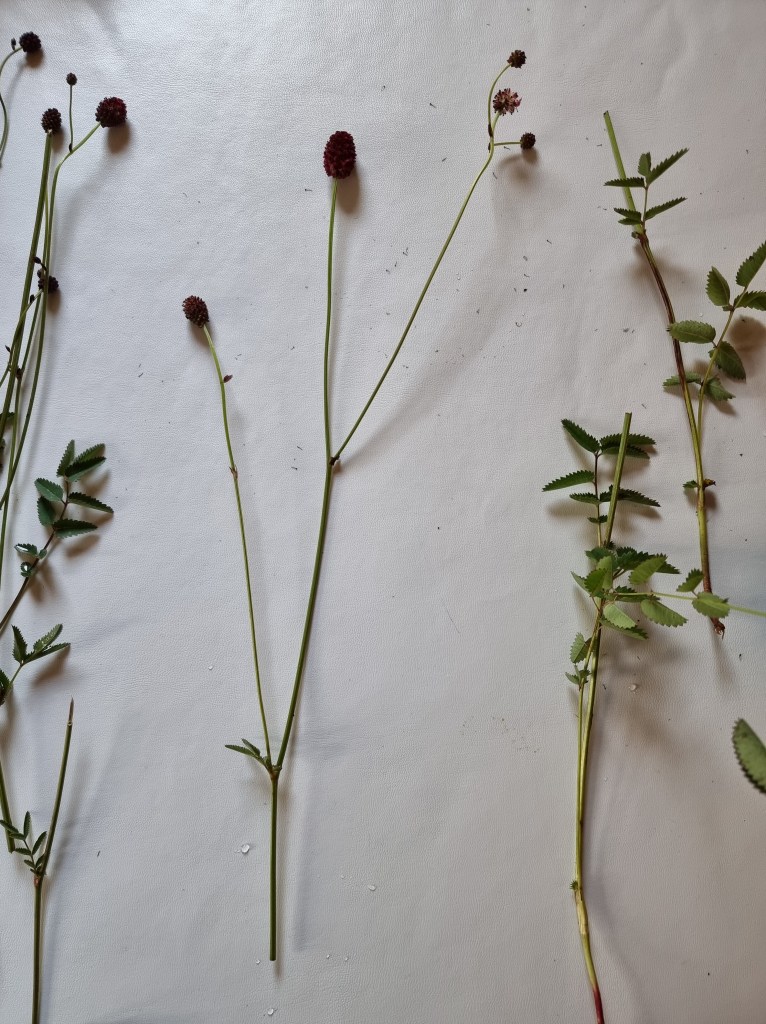
On my final visit to the lodge, I collected Great Burnet specimens (with permission) from Trewalkin to study this plants botany and make preliminary sketches. In August Great Burnet (Sanguisorba officinalis) fills this field and looks like hundreds of red lollipops. It’s a sight to see in real life. Hoverflies were enjoying the nectar too!
I had come to the end of my visits to Trefeglwys where I had done a great deal of work. I was pleased with my progress. On returning home I was distracted by other things I needed to catch up on and pressing work for the SBA. It took a little while before I could settle into my studies again. I have just completed a Devil’s bit scabious composition which you may have seen on Facebook. This has taken over three weeks to get the composition and drawing just right. Next, I will be making my composition for Great Burnet. This will be the last one of the six paintings prepared, then all I have to do is complete the paintings!
I have learned a great deal along the way about wildflowers and botany. Thanks must go to a well know botanist who has helped me learn and get my drawings right along the way. I am very grateful to her. I so enjoyed learning about botany that I designed a course for my local students in September. I called it ‘Flower Studies and a little Botany’. They learned so much and made a page of botanical studies on a chosen plant. They were all very excited by what they had learned and are now looking at plants in a new way!
Well, that’s it for now. I hope you enjoyed this blog and I will be back with another one soon.
I’m back at last! I have decided to continue on from Blog 25 which discussed Quinacridone Gold across three brands and how very different they all were. It is very easy to make the mistake of thinking different brand pigments will be the same if they have the same name or a very similar name. Some even have the same pigment index number!
In this blog I will be looking at a number of pigment colours across the Daniel Smith and the Winsor & Newton range. All but one have identical names but as you will see many of them are quite different. One colour even shows a difference in temperature, one is warmer and the other cooler. Some are more intense than others, five are completely different!
I am a big fan of W&N as the colour selection, where primaries are concerned, suits me well. Don’t get me wrong I like DS pigments too. DS pigments are beautifully intense and I especially like their iridescent range. These are great for adding shine to butterfly wings. I just feel there is too much choice in the DS range as it is possible to mix every colour you need with 3 blues, 3 reds and 3 yellows. When you mix with primaries, I really don’t think you need 25 reds to choose from, do you? There are also 13 violets in the DS range and I only use 2 from the W&N range, Winsor Violet and Perylene Violet. Some pigment colours across both brands make you think, do you really need them? W&N Ultramarine Violet for instance, why not add a little Winsor Violet to French Ultramarine? Cobalt Violet….a little Quinacridone Magenta mixed with Cobalt Blue will do the trick! Anyway, it’s food for thought.
I have selected 25 W&N pigments for my palette and one DS, Lemon Yellow. The only reason this yellow is there is because it is very like cool Winsor Lemon but DS Lemon Yellow is transparent, not semi-transparent. I generally use 6-9 of my pigments at the most when painting, depending on the subject.
The colours with the same names (except one) that I have selected to compare across these two ranges are listed below:
New Gamboge Indian Yellow Quinacridone Gold Quinacridone Red Permanent Alizarin Crimson Perylene Maroon Burnt Sienna Cobalt Blue French Ultramarine Indanthrene Blue (Indanthrone Blue) Perylene Green Perylene Violet
I have written an outline for each pigment below to show you the differences and qualities. As you will notice below there are four DS pigments which are semi-transparent. I prefer to use transparent or semi-transparent pigments. Some of the differences here are huge but some are actually quite favourable!
(Note: Some photographs are not always a true representation. The DS transparency symbols are different to W&N. Their semi-transparent symbol is a circle which is half black and half white. W&N uses a square which is half white and black but in this brand it means semi-opaque).
New Gamboge DS – Transparent PY97, PY110 W&N – Transparent PR209, PY150 DS – very close to the primary yellow with a slight orange bias. A lovely pure pigment similar to W&N Indian Yellow but nearer to the yellow spectrum. W&N – a muted yellow, similar to Transparent Yellow with a very slight brown bias when at full colour. A little warmer than Transparent Yellow. Makes a beautiful pale cream/yellow when watered down.
Indian Yellow DS – Transparent PY97, PY110 W&N – Transparent PO62, PY139 DS – a cool yellow with translucency. Not what I would consider an Indian Yellow, more like W&N Transparent Yellow or Winsor Yellow Deep. This pigment could be used as a transparent yellow although Nckel Azo is closer. W&N – a rich orange-yellow, flows smoothly and makes beautiful cream/apricot tones when watered down. Great for mixing bright oranges and muting green to an olive/green tone.
Quinacridone Gold DS – Transparent PO48, PY150 W&N – Transparent PR206, PV19, PY150, Be aware W&Nhave run out of index colour PR206 so this will change. It will be replaced with PR179. The name is changing to Transparent Gold Deep. So, if you love Quinacridone Gold buy some now! DS – a warmer, less muted version with a lovely golden glow. It has an orange bias. W&N – a muted, duller QG with a strong warm yellow bias. Rich brown/gold when at full strength.
Quinacridone Red DS – Transparent PV19 W&N – Transparent PR209 DS – a cool magenta/red resembling Permanent Rose (PV19). Quinacridone Red in the DS range is closest to Permanent Rose. W&N – a warm primary red. The match for this red is Quinadridone Coral (PR209) in the DS range. It is quite a weak pigment in both ranges but a beautiful pink/red.
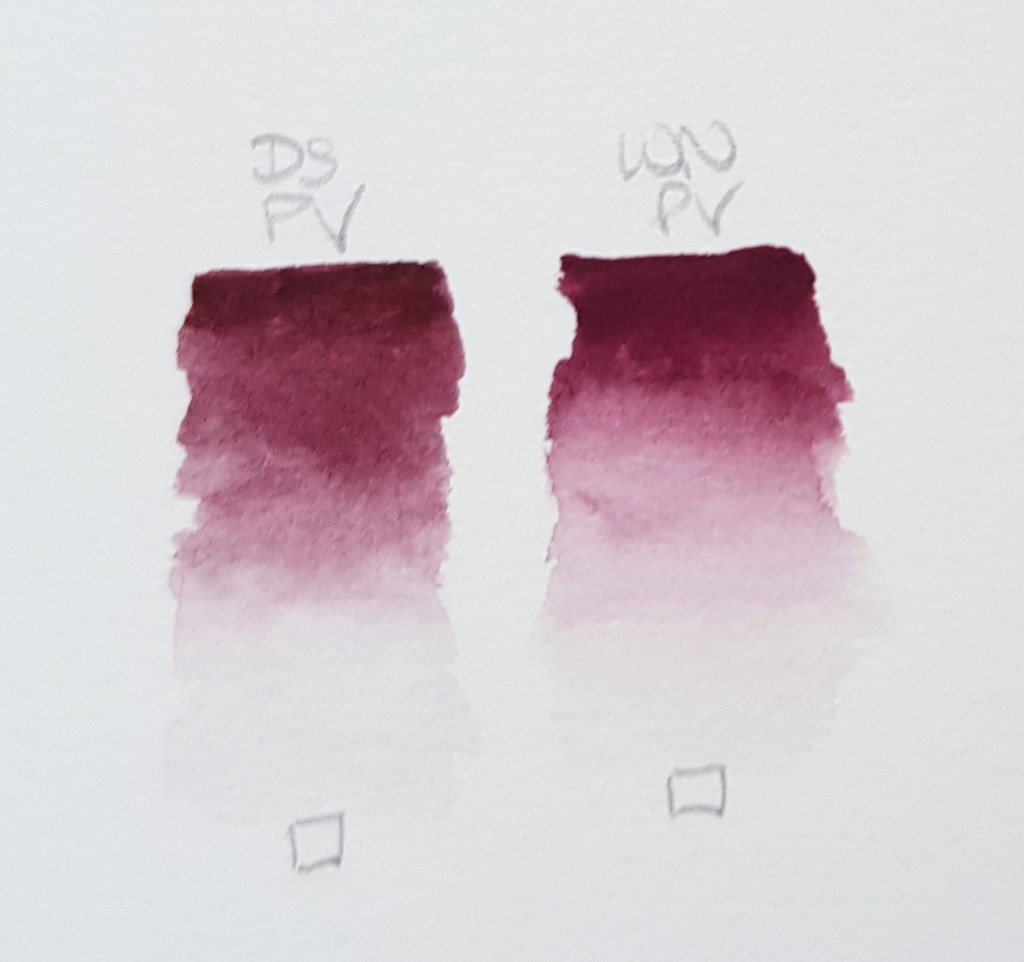
Permanent Alizarin Crimson DS – Transparent PR177, PV19, PR149 W&N – Transparent PR206! Be aware W&N have run out of this index colour so this will change. So if you love Permanent Alizarin Crimson buy some now! DS – a rich intense version of this colour but made with three index colours. It has a slightly warm red bias compared the W&N version which is cooler. W&N – a cool not as intense version which can look a little flat when watered down on some watercolour papers.
Perylene Maroon DS – Semi-Transparent PR179 W&N – Transparent PR179 DS – a rich intense version of this colour. It has a slightly warm red bias compared the W&N version which appears a little cooler. W&N – Nicely intense too. Very slightly cooler than the DS version.
Burnt Sienna DS – Semi-Transparent PBr7 W&N – Transparent PR101 DS – a very different Burnt Sienna to W&N and it appears to granulate. It is also semi-transparent. W&N – one of my favourite reds. A much warmer version than DS. It is more like Pompeii Red (PBr7) in the DS range. I would add a tiny bit of Transparent Yellow (DS Indian Yellow) to Pompeii Red to make it a perfect match!
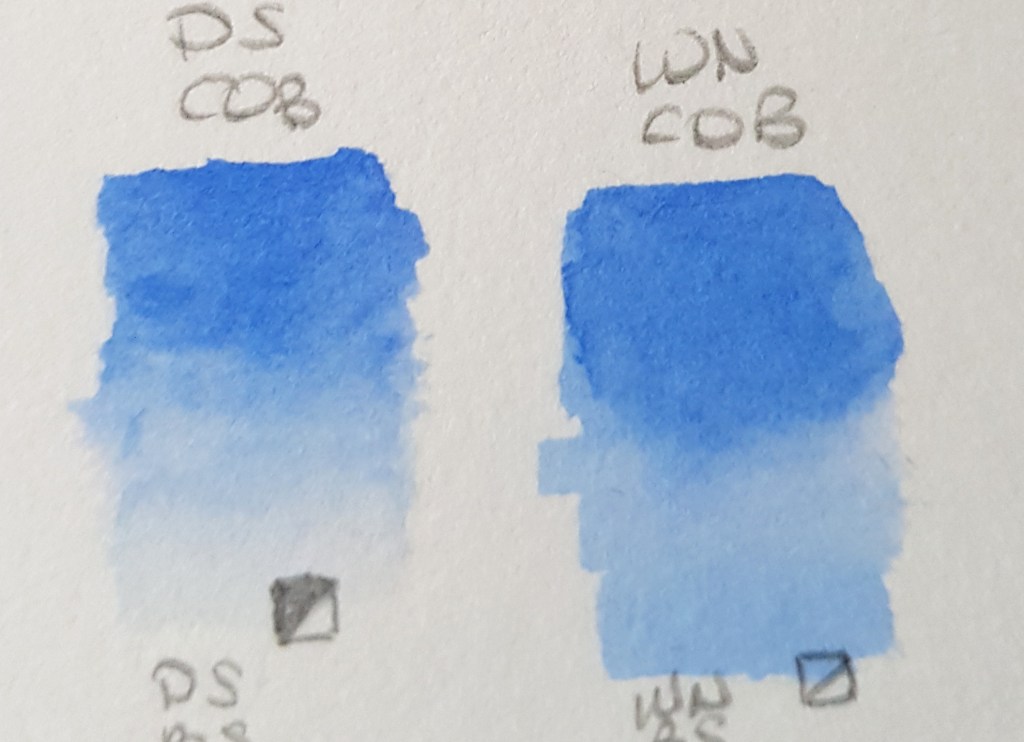
Cobalt Blue DS – Semi-Transparent PB28 W&N – Semi-transparent PB28 DS – this appears to granulate a little more than the W&N version and is very, very slightly cooler despite having the same index number. W&N – a lovely middle blue, granulating. There seems to be a very slight difference but it is minimal.
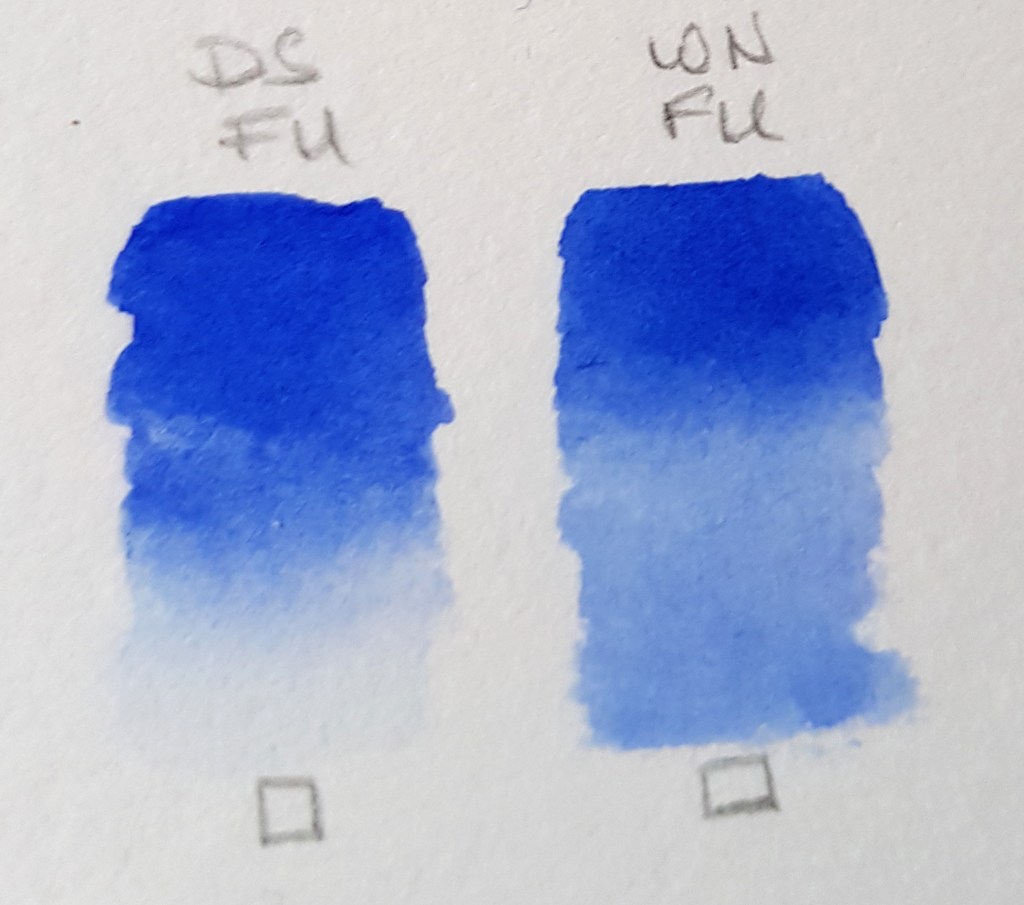
French Ultramarine DS – Transparent PB29 W&N – Transparent PB29 DS – a pure primary blue slightly more intense than the W&N version. Granulates. W&N – a vibrant primary blue with no bias. Granulates. The only difference here is the intensity of pigment is greater in DS.
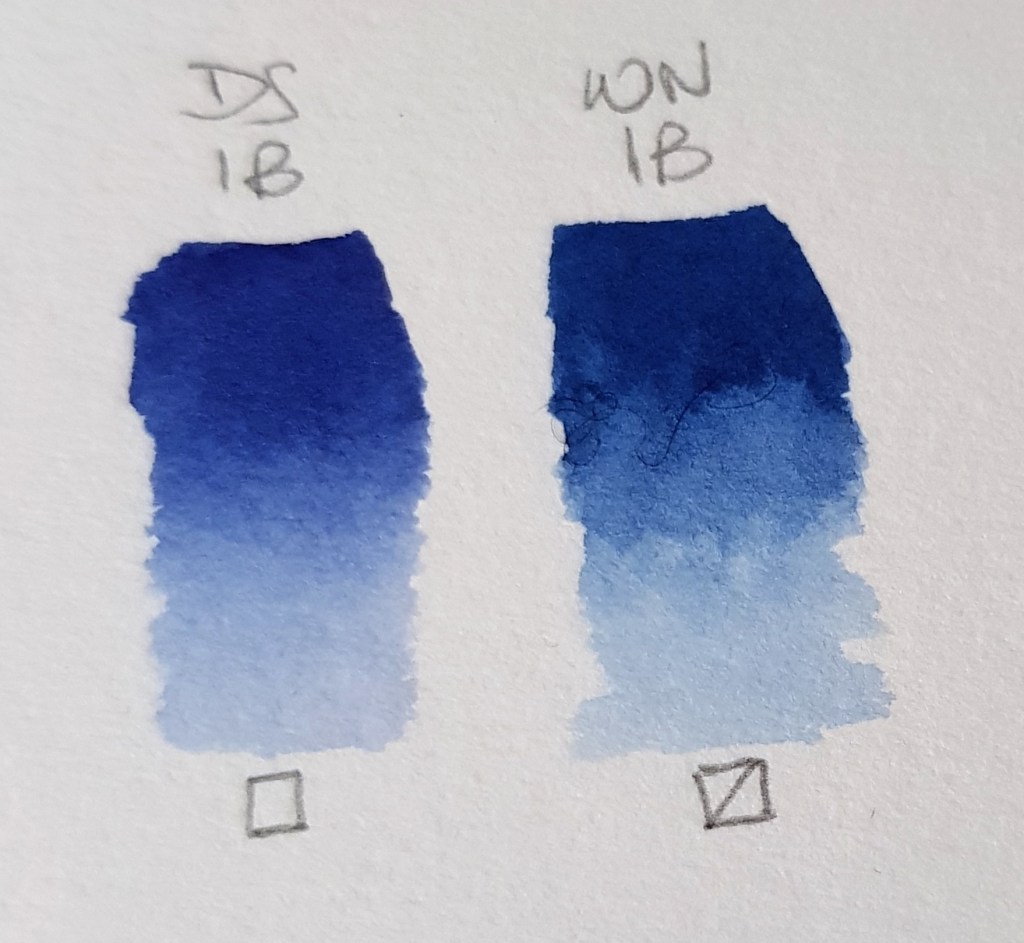
Indanthrene Blue & Indanthrone Blue DS Indanthrone – Transparent PB60 W&N Indanthrene – Semi-transparent PB60 DS – Indanthrone Blue is more like royal blue compared to Indanthrene Blue. It has a very slight red bias. W&N – this version is very different to the DS version. It is a deeper blue with a very slight green bias. They both have the same index number though! These are a nice option for a choice of warm or cool darker blues!
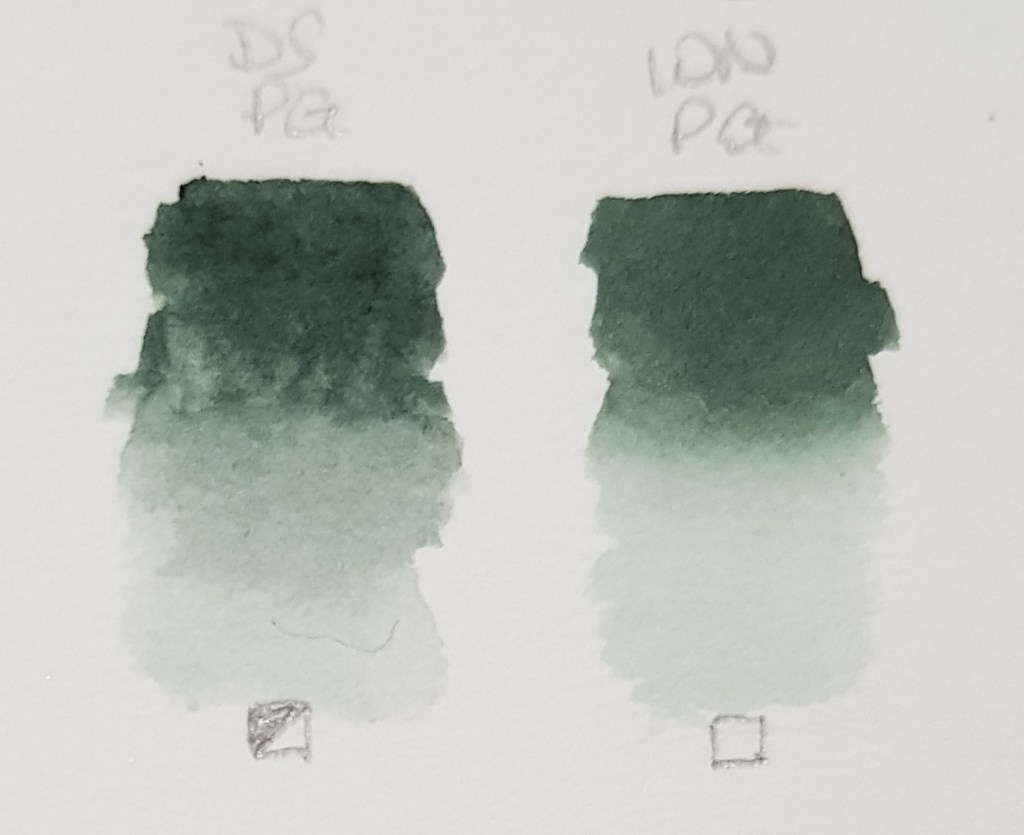
Perylene Green DS – Semi-Transparent PBk31 W&N – Transparent PBk31 DS – very slightly warmer than W&N. It is semi-transparent. Mix it with a rich red like Pyrrol Crimson for a true black. W&N – this version is very similar but it has a very slight blue bias. It is totally transparent. Add a rich red like Permanent Carmine for a true black mix.
Perylene Violet DS – Transparent PV29 W&N – Transparent PB29 DS – a rich pigment but it is more muted than the W&N version, that is, it has duller appearance. W&N – slightly brighter and more intense. It veers more towards the violet spectrum and less towards the brown like DS. A favourite pigment of mine, seen so much in plants! Mix with different yellows for some wonderful muted ochre and brown tones.
As you have seen there are various differences for a number of pigments listed above. There are even slight differences with pigments that have the same index numbers. This variation will most likely be due to different production processes and binders. On one occasion above we saw that a comparison offered up warm and cool versions, W&N Indanthrene Blue and DS Indanthrone Blue. When mixing with these two pigments, the tones would be more muted with Indanthrene Blue and brighter with the DS version. A few DS and W&N pigments have the same name but another colour in the DS range matches more closely.
So, I hope you enjoyed this blog and that it proves useful to you. Thank you for reading and I’ll be back soon with more interesting colour matters.
For more information on colour mixing, theory and painting techniques, see below.
My book is selling well all over the world I am pleased to say! I have had some excellent reviews and people writing to me to tell me that it is their go-to reference book. Thank you for all your kind comments and reviews!
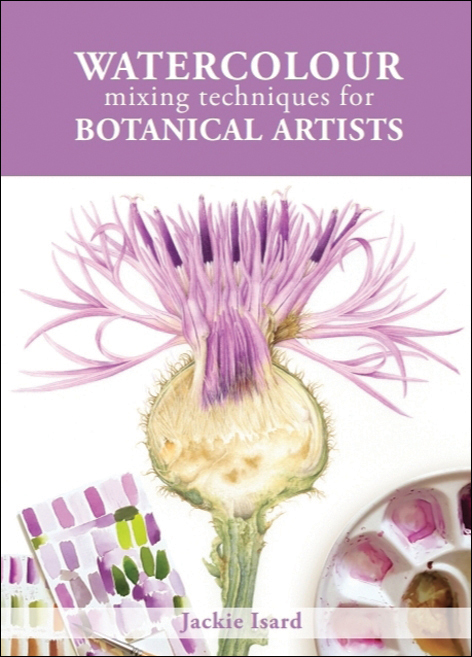
Watercolour Mixing Techniques for Botanical Artists
A practical guide to accurate watercolour mixing with primaries for botanical artists Colour mixing is a key skill for the botanical artist. In this practical guide, Jackie Isard explains how to observe and use colour accurately. She shows artists how to make informed choices when selecting pigments, as well as how to learn about colour mixing and its application. • Gives detailed instruction and advice on understanding colour and pigments • Explains how to ‘see’ colour and tricky mixes, from greens and reds to the difficult botanical greys • Includes advanced colour application techniques – colour enhancement, shadow colours and colour temperature transition • Step-by-step guides illustrate how to paint with layers, how to use underlaying colours to enhance, and colour and fine detailing
Order online via major book shops or Amazon. Published by The Crowood Press Ltd
Nature is painting for us, day after day, pictures of infinite beauty if only we have the eyes to see them” John Ruskin
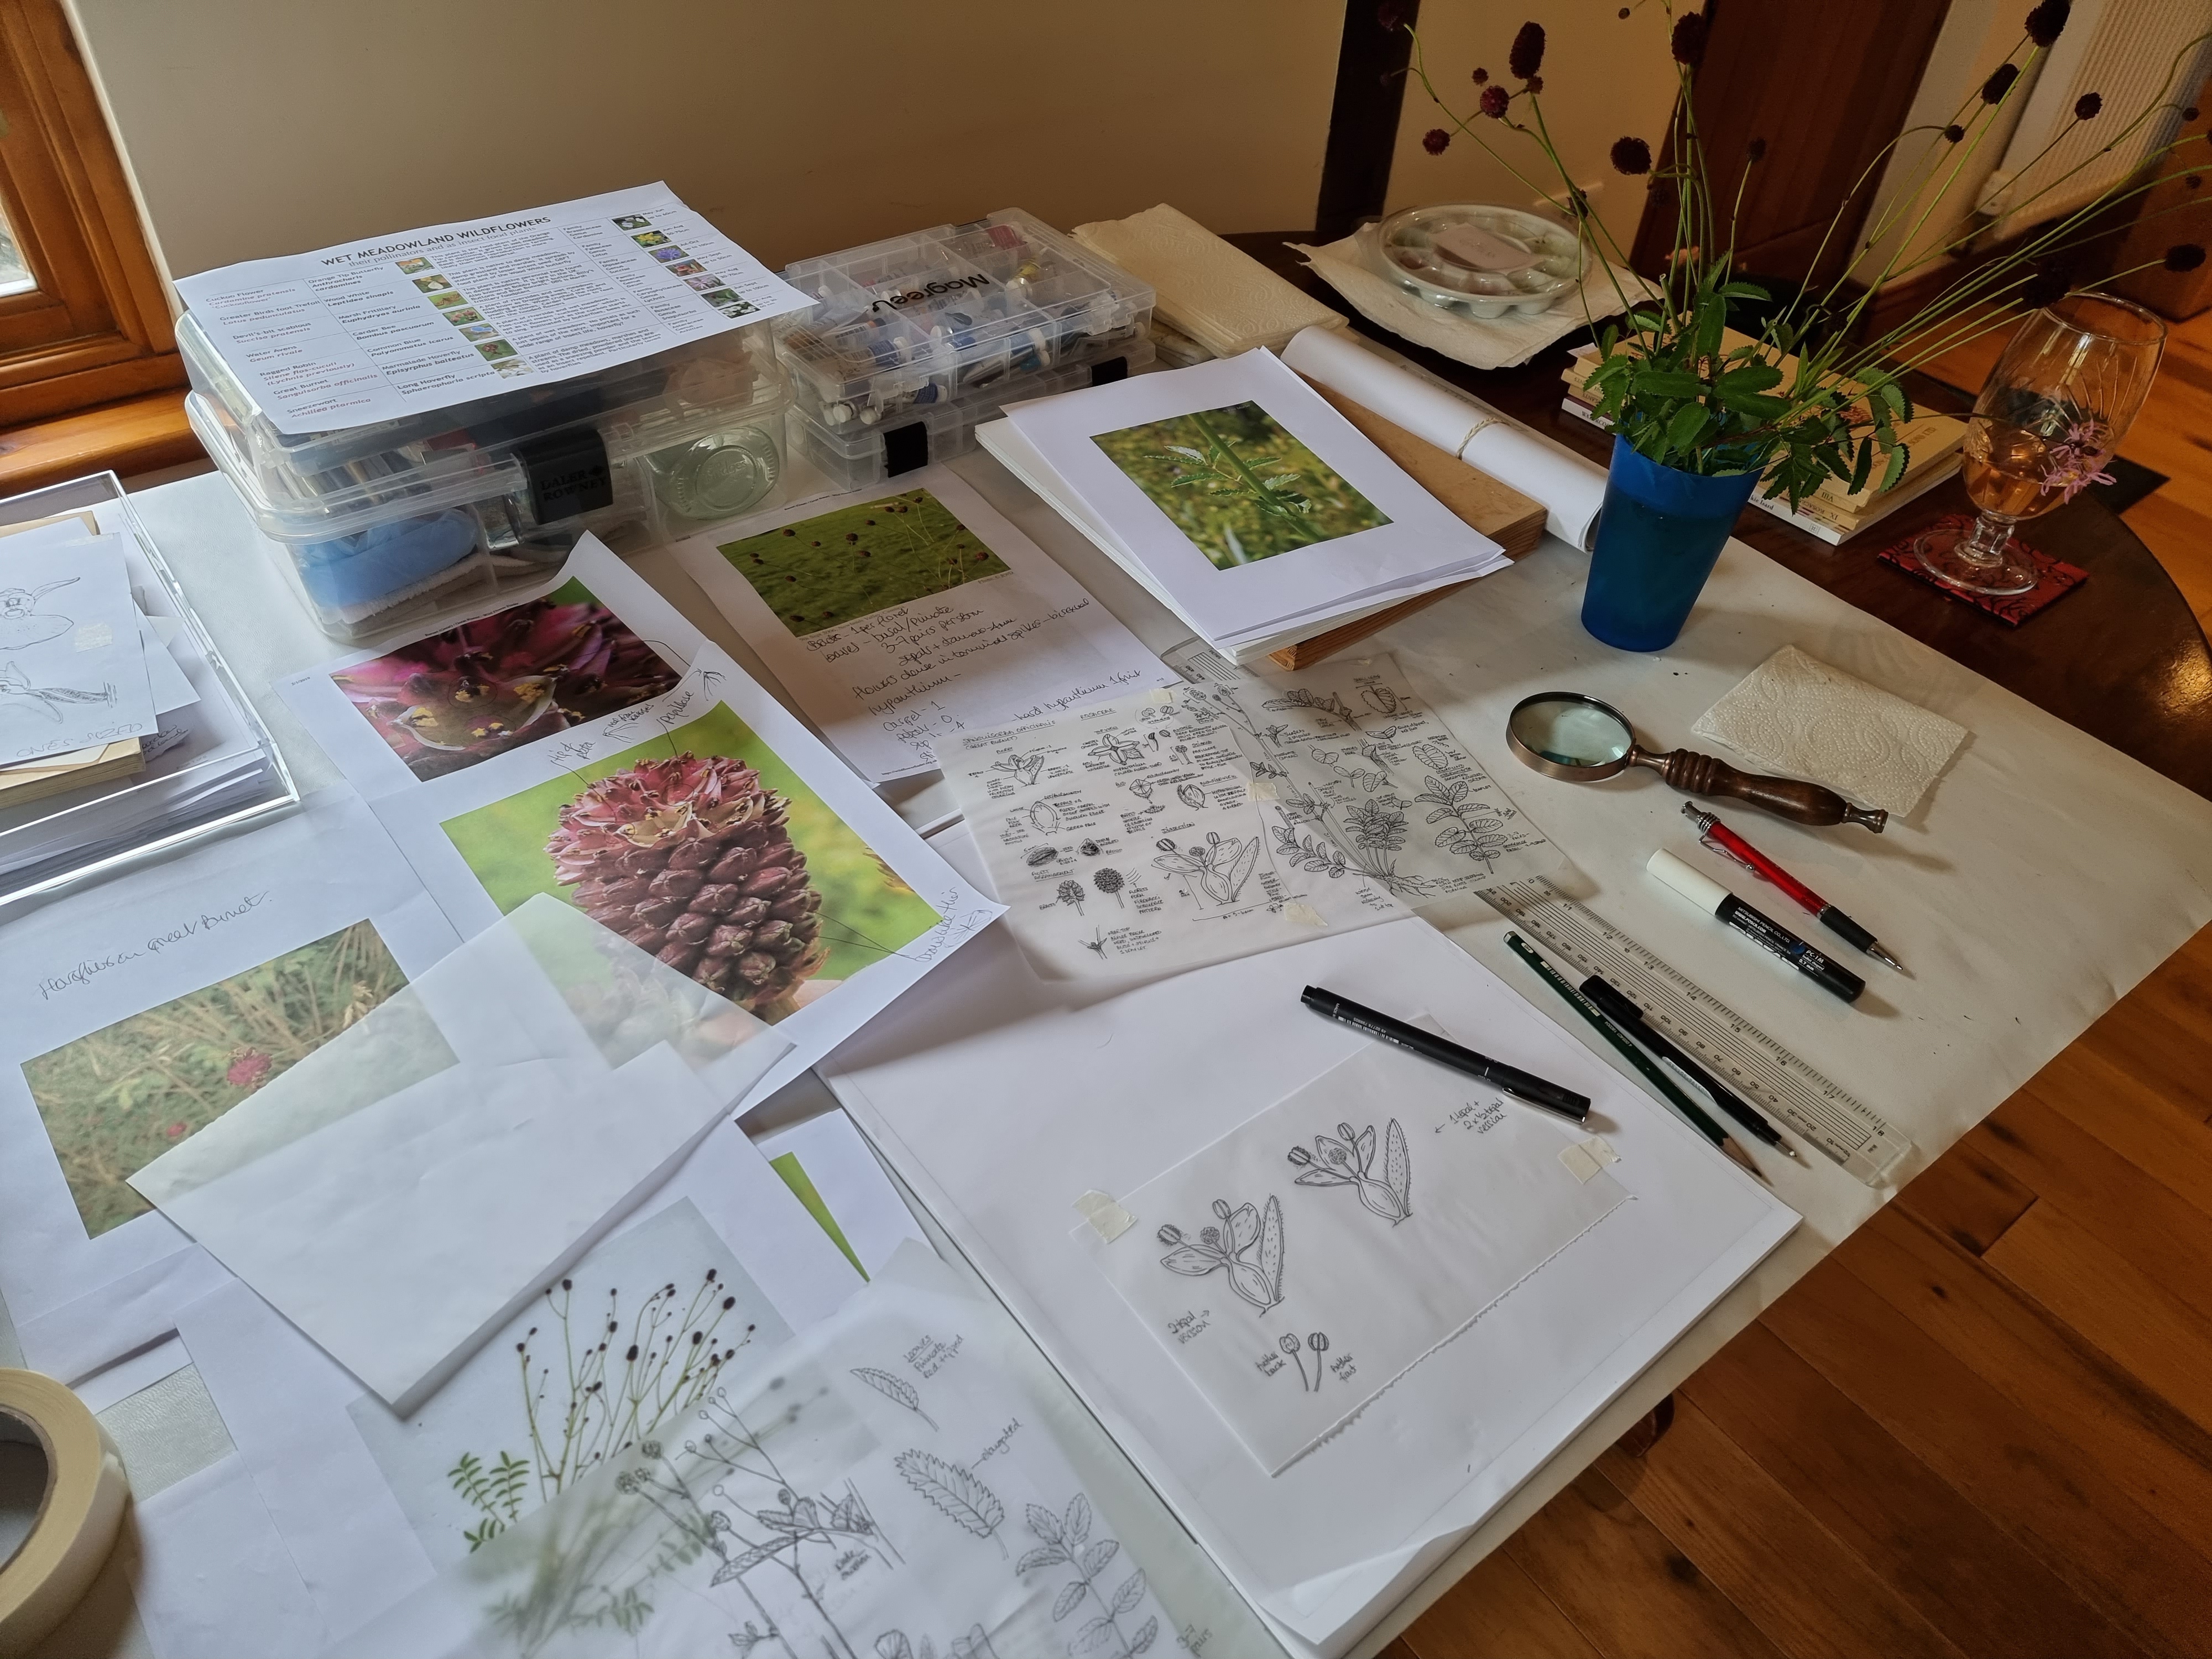
This years journey has been full of adventure and some very hard botany learning. It became evident that it was essential for me to understand exactly what I am painting! As the weather perked up in April and was good to us during the summer months, my decision to go on a search for my chosen 6 plants in their natural habitats proved very successful. Their habitat is wet meadows, the selected subject of my RHS exhibition. I knew this was very important to ensure my drawings were as accurate as they could be to the wild plants of the field. My son also has a great interest in nature and accompanied me with his little dog, Toby, on my treks. Always great to have company!
Having completed 4 plants in my Botany sketchbook, I asked a botanist to check my final drawings for me. Good job I did! Even though you think you’ve got it just right there can still be little details which need adjusting, especially with dissection drawings which I’d never attempted before. I’m so pleased I took this advice from a fellow botanical artist. I had very little knowledge of botany when I started this project and still struggle to remember all the botanical terms. My brain doesn’t have enough space left at my age! It’s been a massive learning curve.
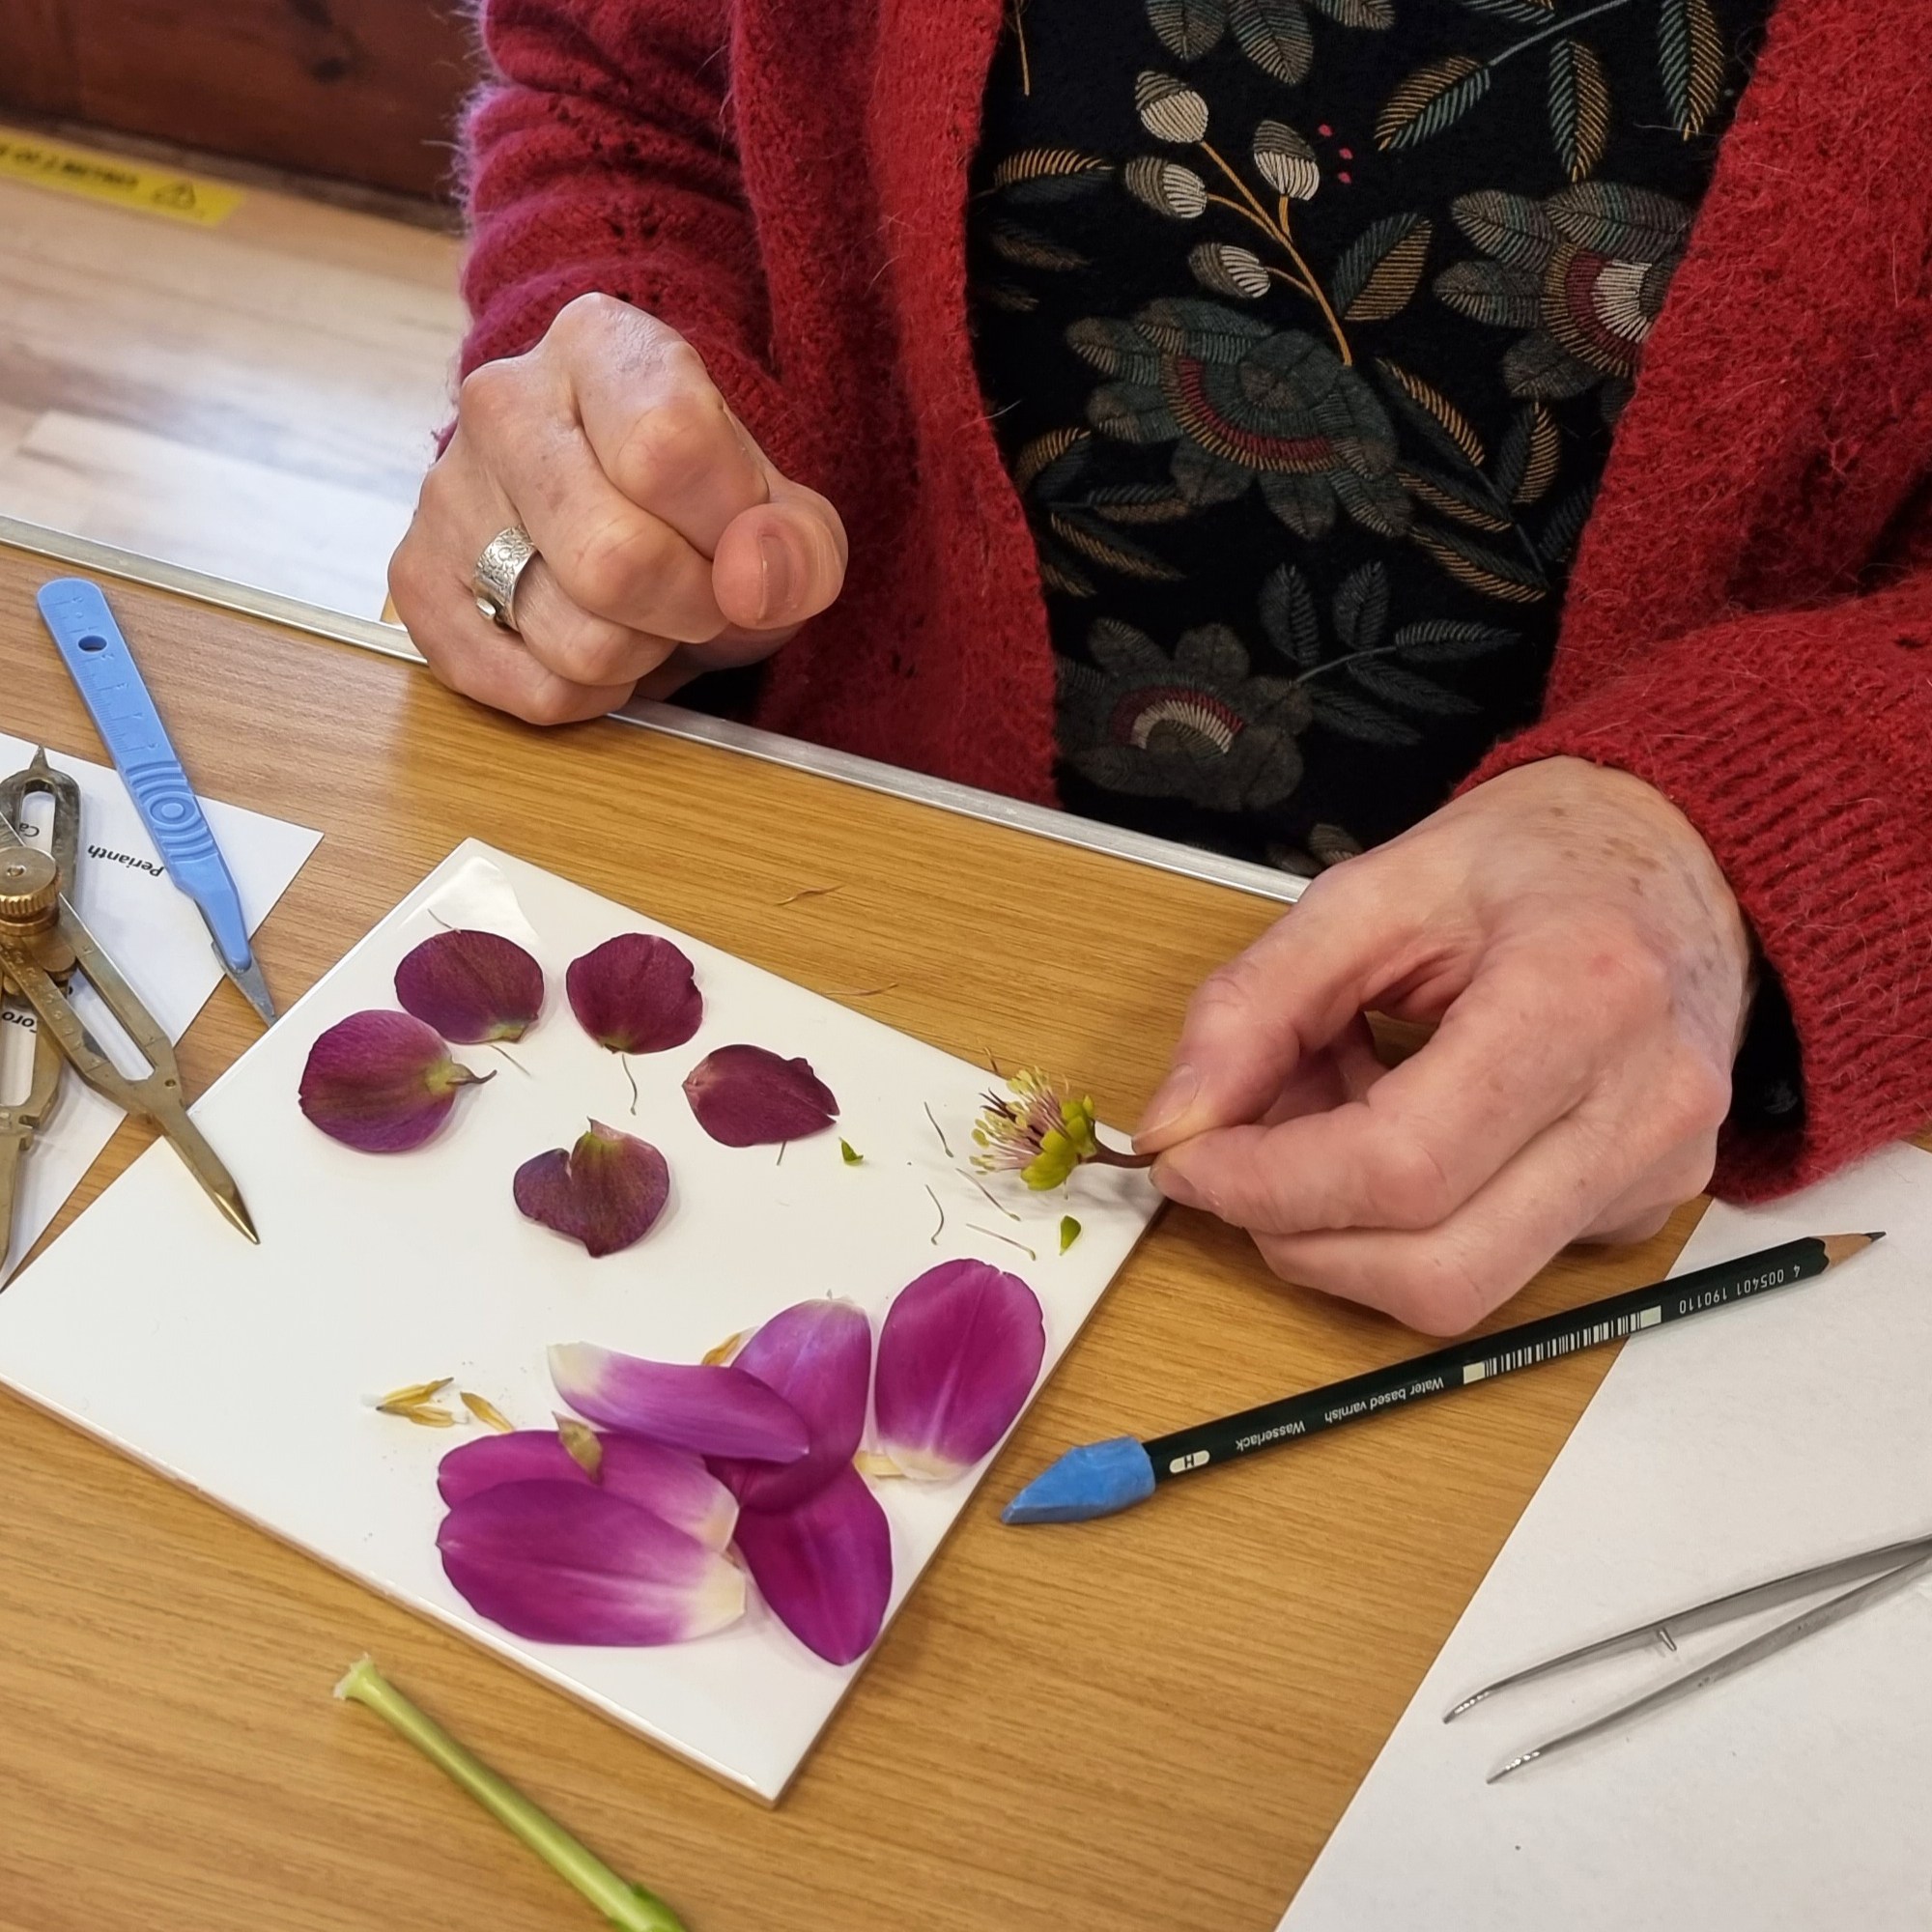
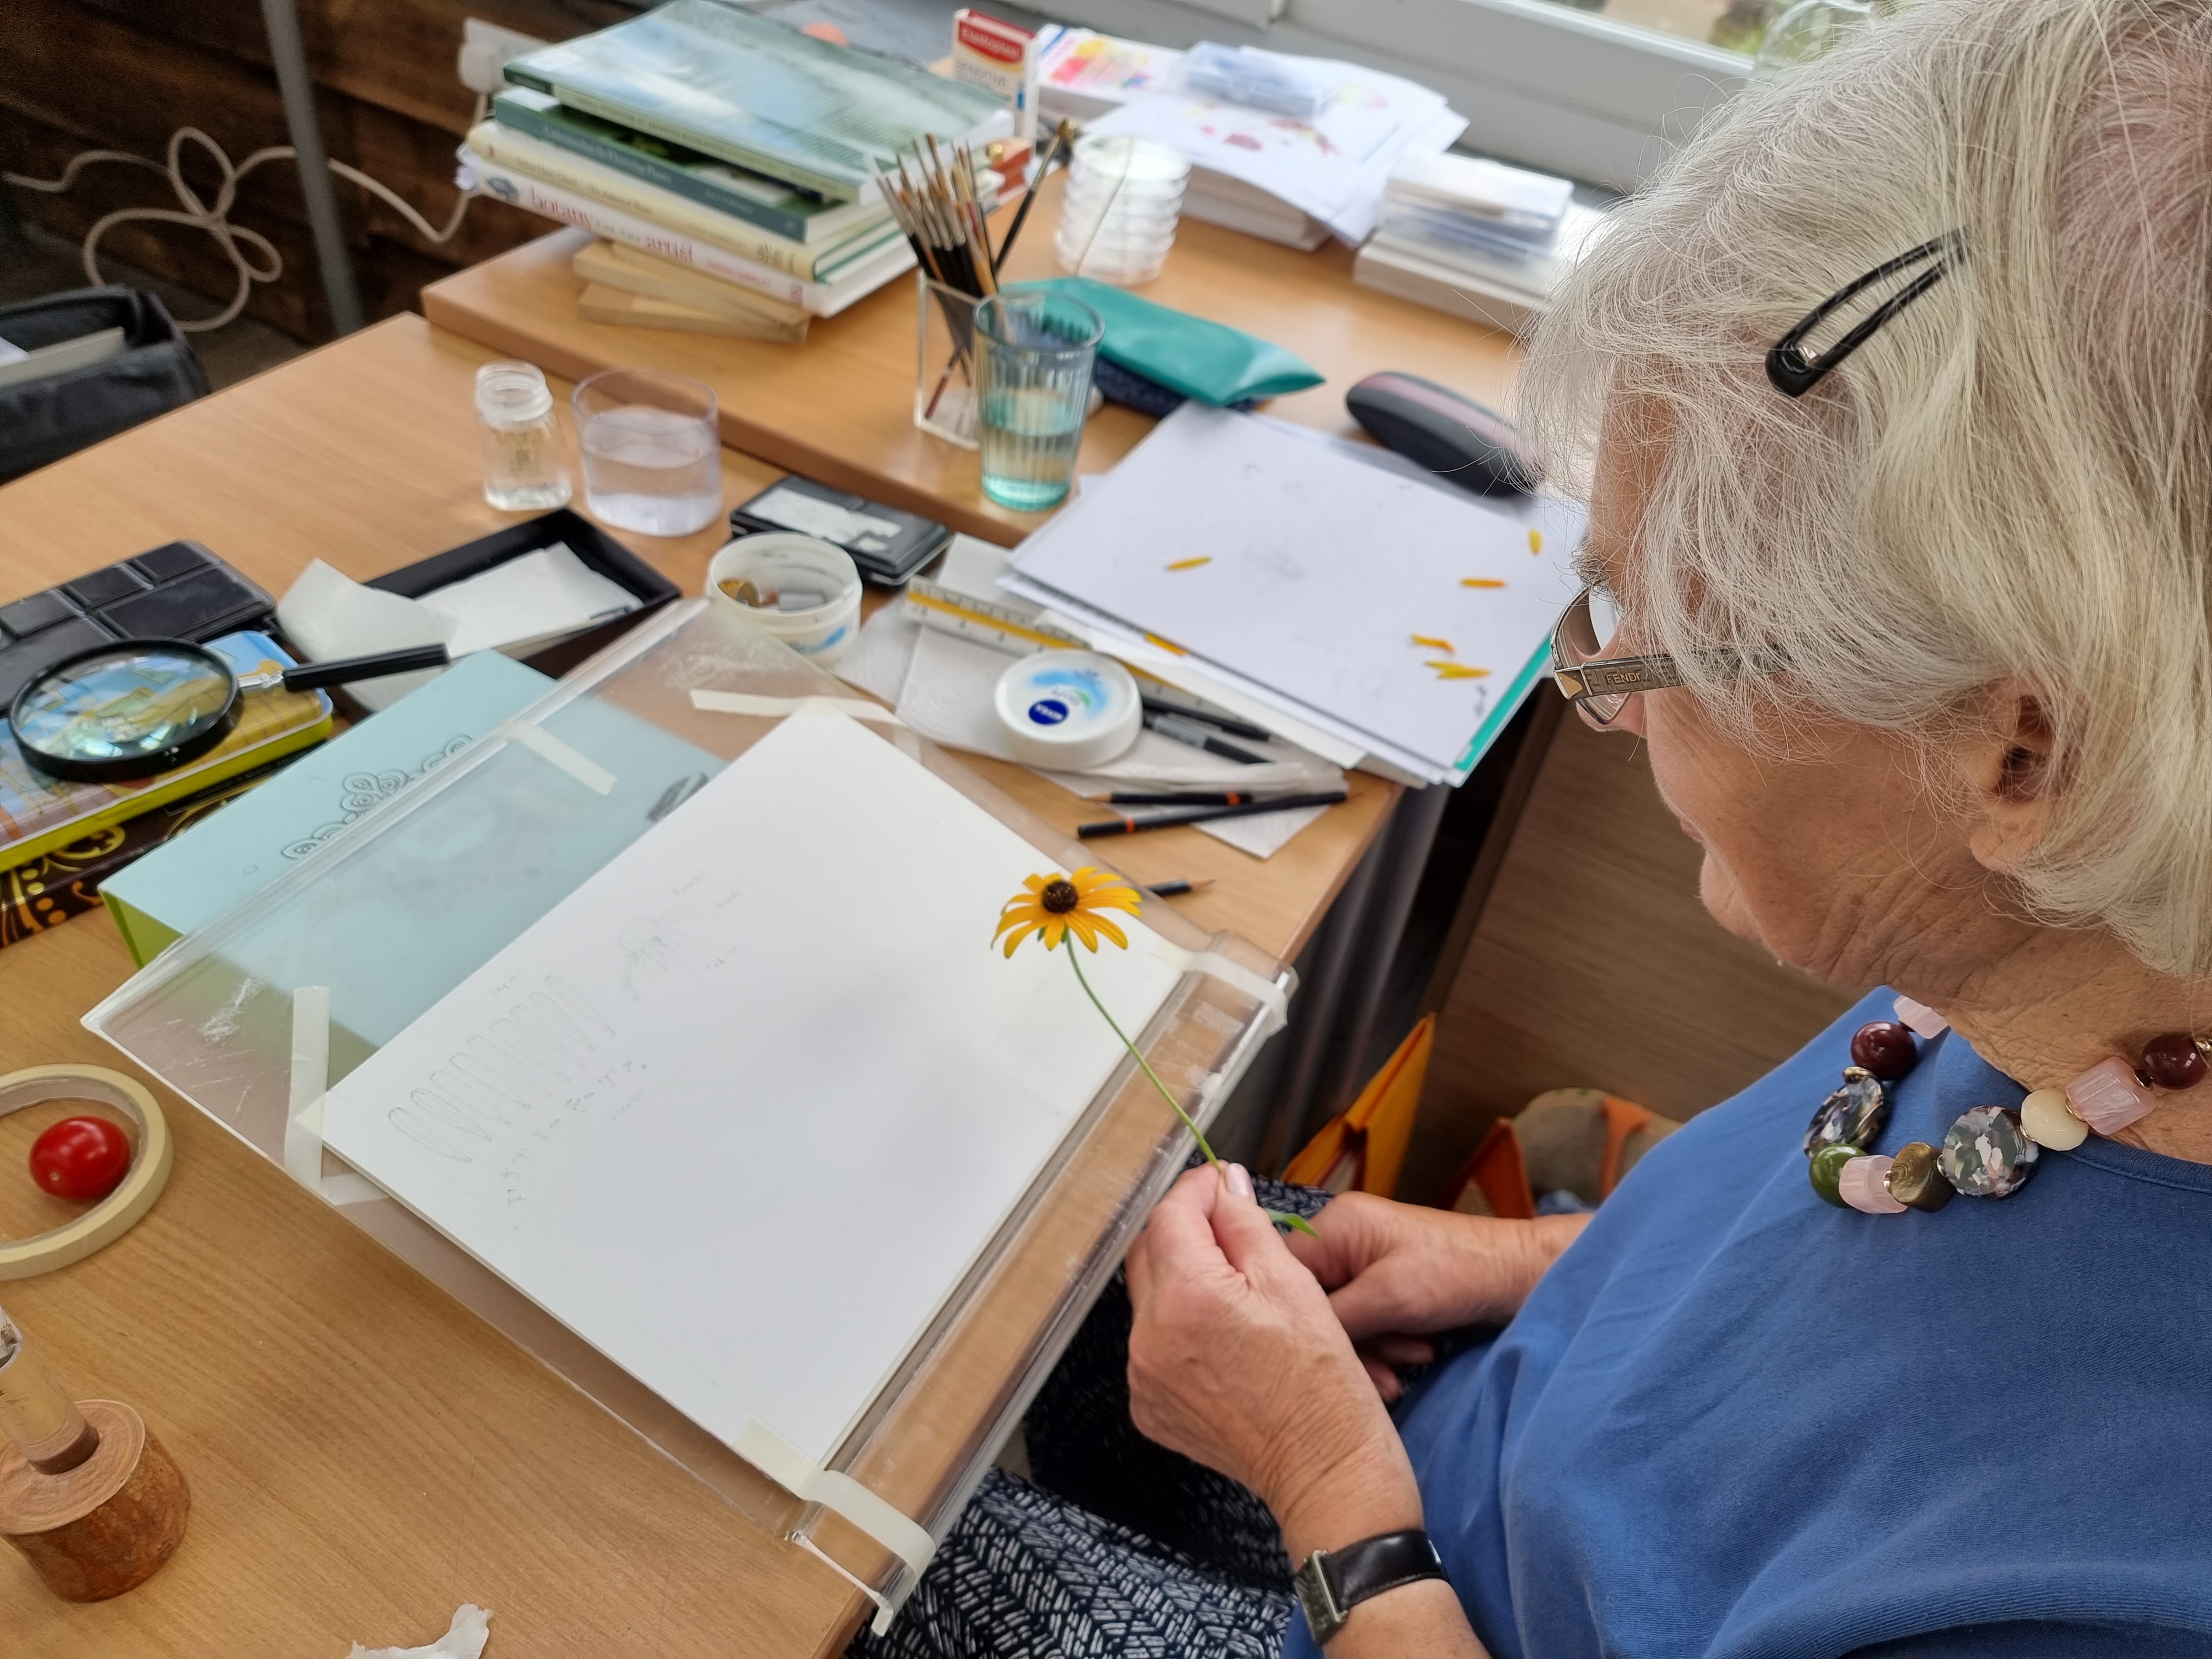
Below are my botany sketchbook pages for 4 of my chosen species. This helps me to learn about each plant before I start drawing. I measure them, study their habit, dissect them, study them under the microscope, press pieces of plant in a flower press, have a little practice run on mixing up colours and paint a few small sections of each one. The record is then referred to as I draw and paint the final compositions.
Botany Sketchbook – Water Avens
Botany Sketchbook – Devil’s bit scabious
Botany Sketchbook – Ragged Robin
Botany Sketchbook – Cuckoo flower
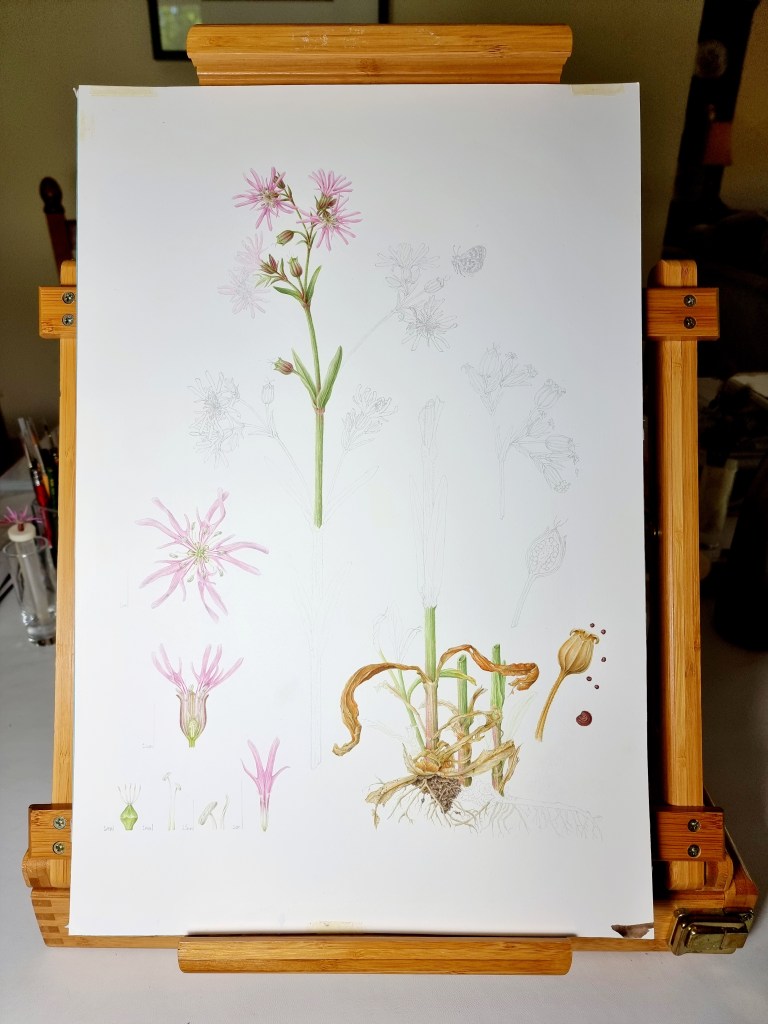
The drawings so far… My drawings for Ragged Robin, Water Avens, Greater Bird’s foot trefoil and Cuckoo flower have now had a full botany check and are transferred to watercolour paper ready for painting. It took many, many months to get to this stage. Left to right below: Cardamine pratensis – Cuckooflower, Lotus pedunculatus – Greater Birds foot trefoil, Geum rivale – Water Avens and Silene (Lychnis) flos-cuculi – Ragged Robin. They are all life-size compositions.
Next year, as well as painting the final pieces, I will be studying and drawing up Great Burnet (Sanguisorba officinalis) and Devil’s bit scabious (Succisa pratensis) in late summer. I have managed to get some of the painting for three of my chosen species done this year which are featured below. The sections below were painted using live plants. I have a great deal of photo reference to enable me to continue painting these three through the next few months.
Cardamine pratensis drawing
Lotus pedunculatus drawing
Geum rivale drawing
Silene (Lychnis) flos-cuculi drawing
The Journey…
My journey started locally where I live in Bristol. I have grown some of my chosen plants in my home garden which were doing well. Although these are great to refer to, they do not necessarily grow in exactly the same way as they would in their natural habitat. It’s great to have them on the doorstep though. They can be dug out and popped into a pot to use when painting! To find my chosen species in the field was really difficult but with a lot of research and walking I eventually located all of them this year.
Cuckoo flower (Cardamine pratensis) grows near my house and also on a lovely dog walk my son and I often do from Alveston to Old Down. One sunny day in May I decided my son and I should try this walk in order to find the pub at the end and have a lovely roast dinner. What a wonderful walk with yummy food half way. Essential therapy! It was full of meadow plants and pollinators. I saw my very first Green winged orchid and Musk thistles on this walk, one of which had a white flower. It became our favourite local dog walk this summer. Later in the summer I thought I had found Devil’s bit scabious (Succisa pratensis) growing there too but unfortunately it turned out to be Field scabious with a genetic fault! It looked like Devil’s bit but the leaves and height were all wrong. It’s also very important to research your wildflower keys!
Cuckoo flower
Green winged orchid
Selfheal
White Musk thistle
Comma butterfly
Not Devil’s bit… Field scabious with a genetic problem!
Two of my plants were really difficult to locate so my journey led me into Wales this year. What a beautiful country. There is so much wildlife and Wales is abundant with wildflowers. Love it!
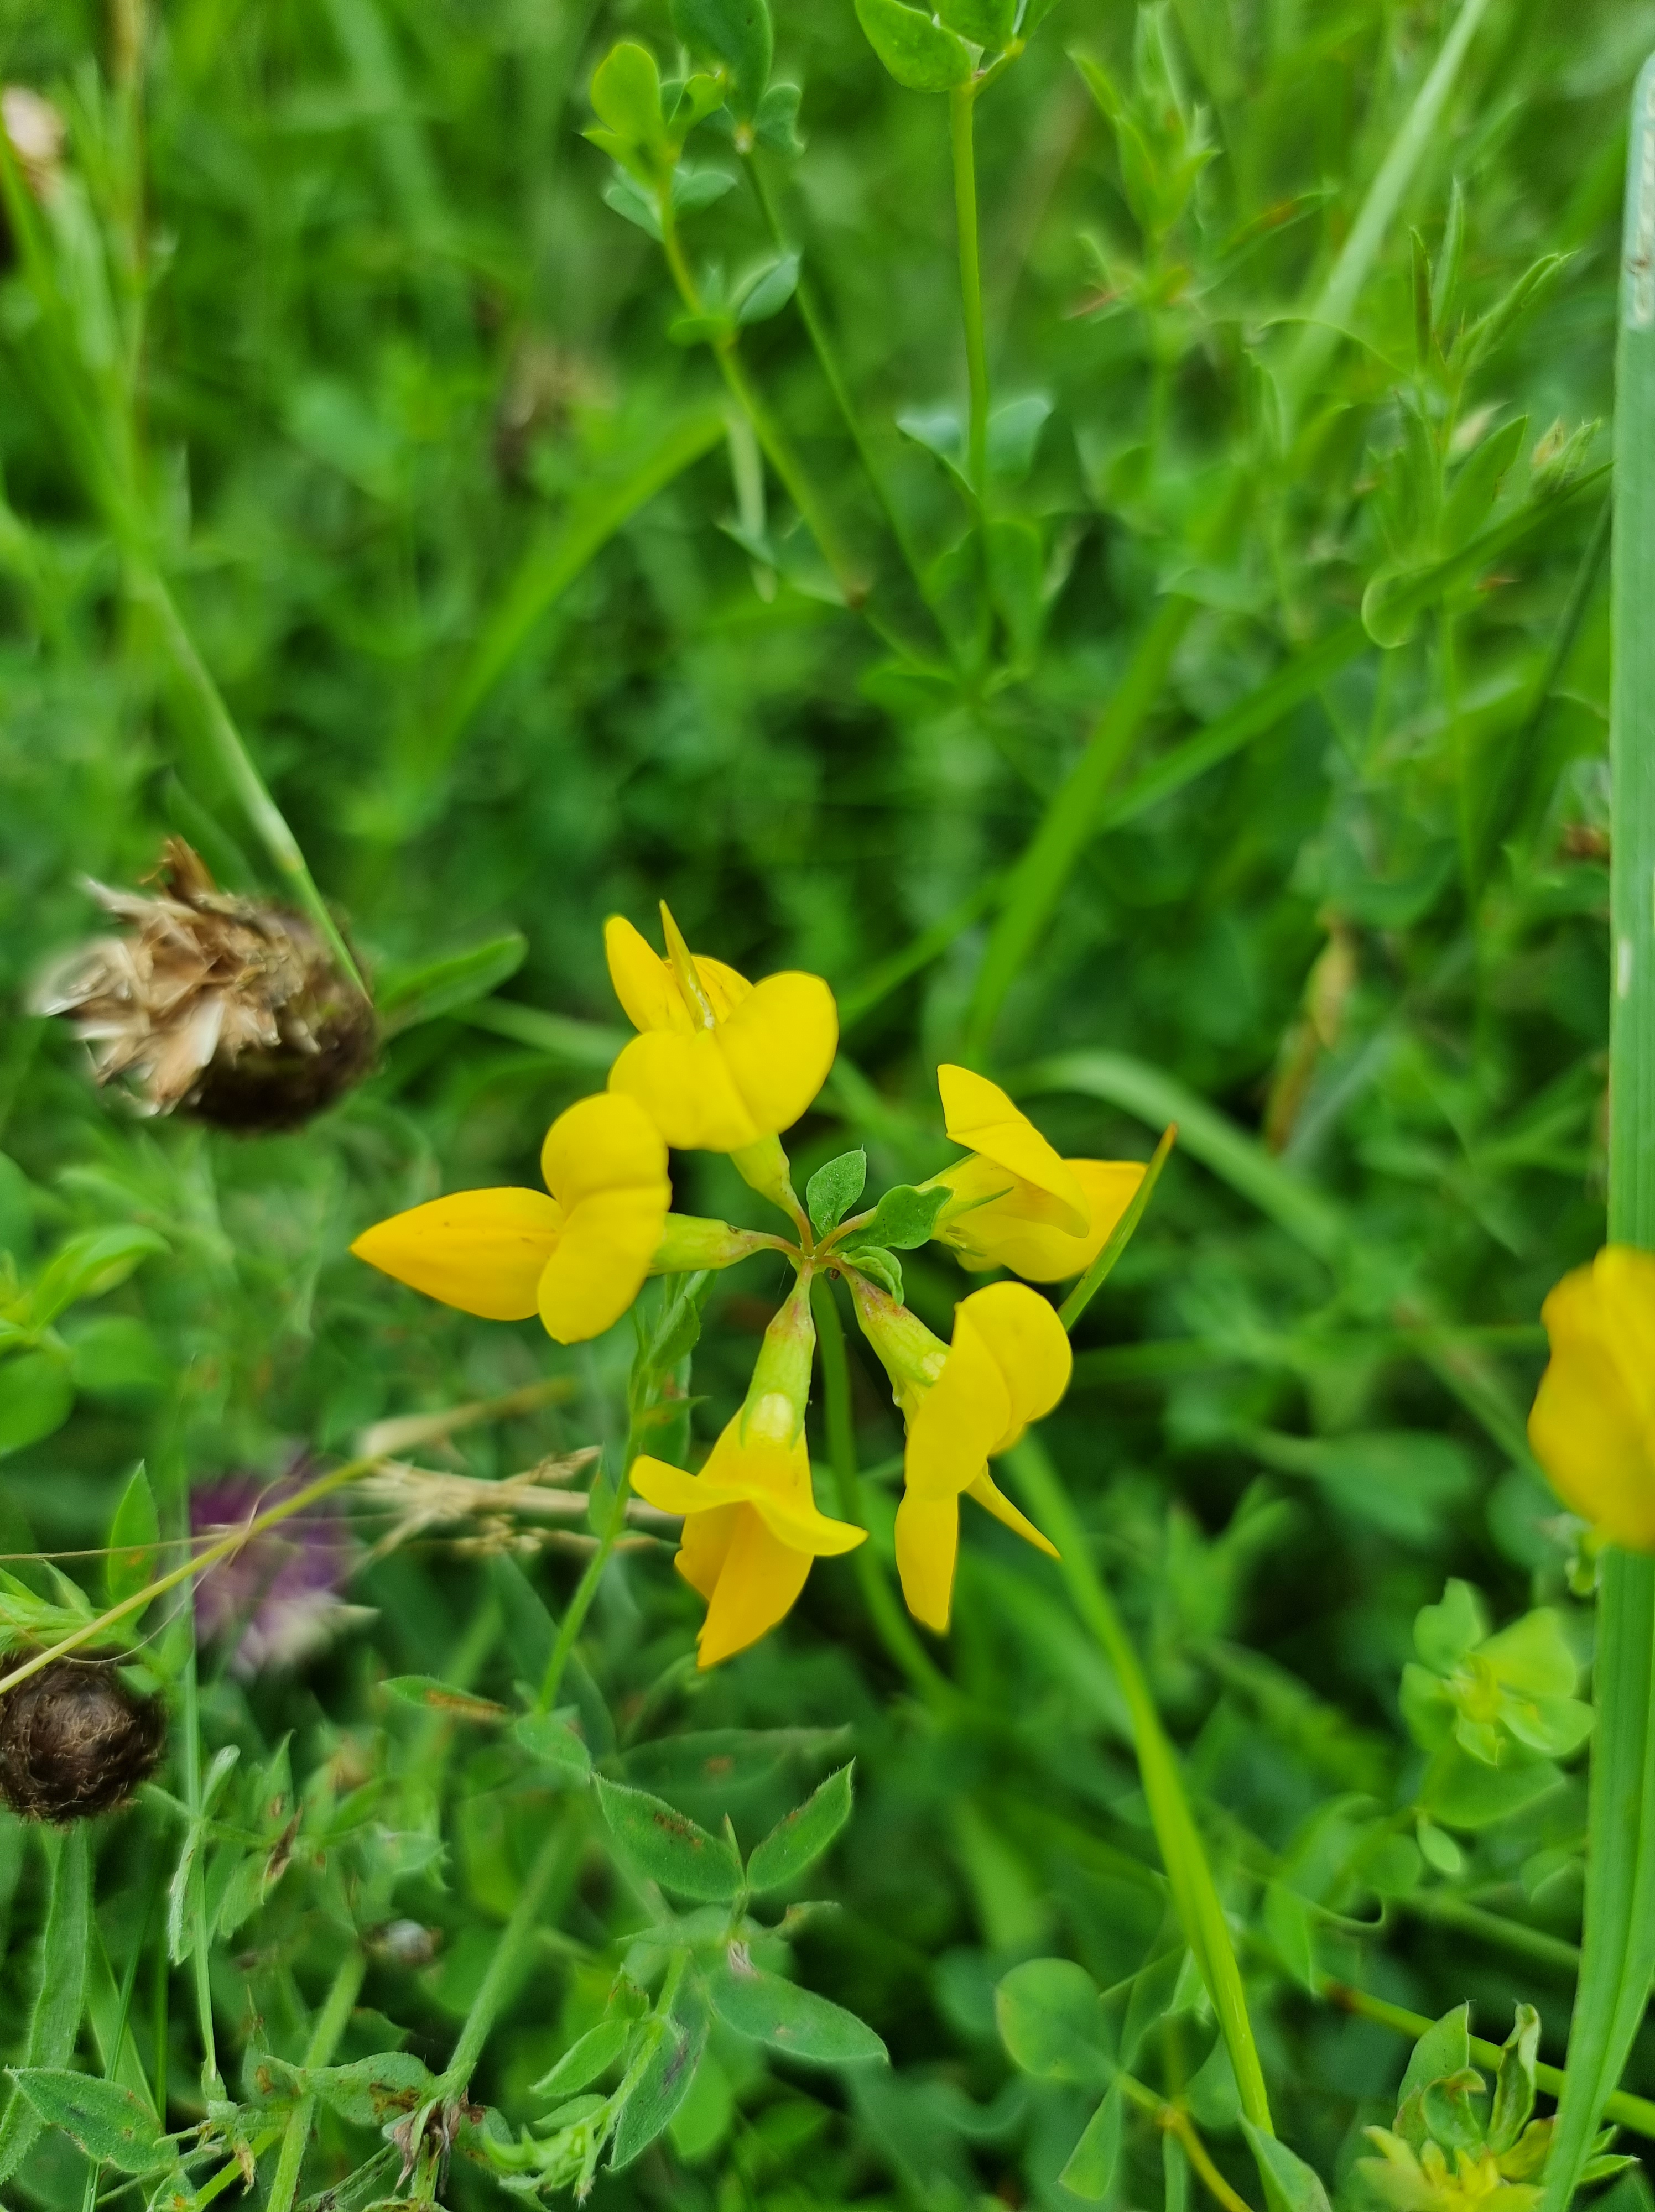
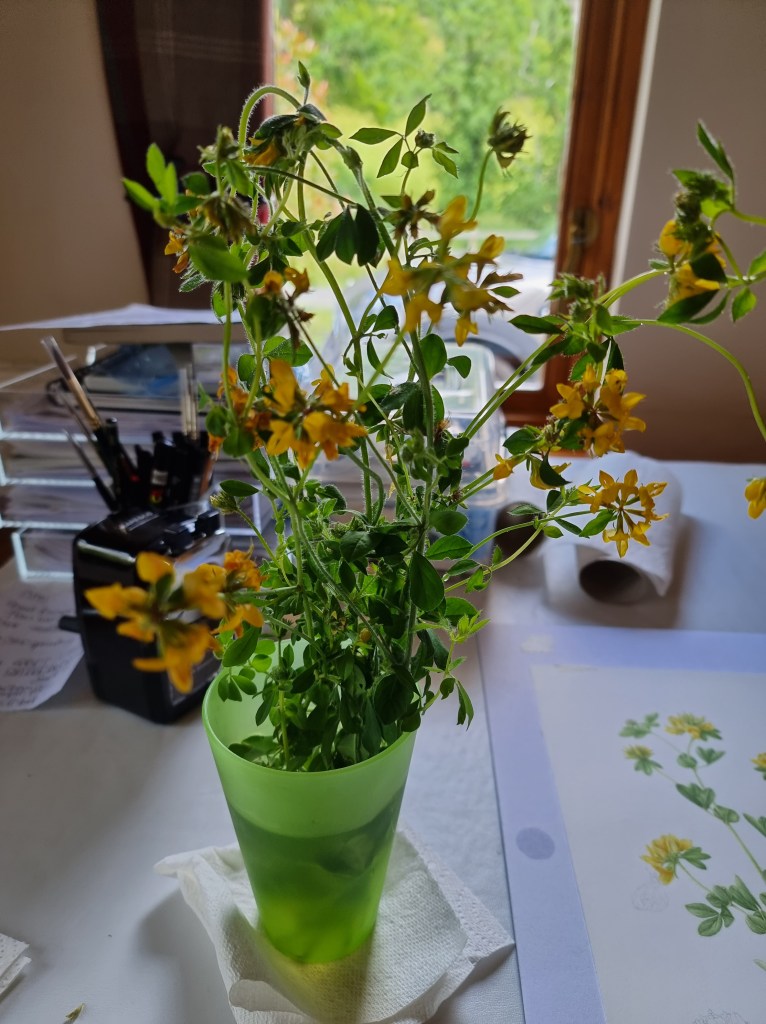
The first plant, Greater Bird’s foot trefoil (Lotus pendunculatus), I found at Great Traston meadows near Newport. Great Traston is a piece of protected land consisting of a series of wet meadow fields and teeming with insect life. We saw many dragonflies, damselflies and butterflies. We even saw a beautiful blue lacewing, many grasshoppers and later in the year a nursery-web spiders nest which was huge! This place is also home to the very rare Shrill Carder bee. Unfortunately, I didn’t see, or rather, hear one but maybe next year! There was also evidence of other wet meadow wildflower species like Marsh orchid and Marsh musk thistle. I visited three times in total. Once when Greater Bird’s foot trefoil was starting to grow, then when it was in full flower and finally when it had gone to seed. It is important for me to see the plant growth in all its stages as my drawings are intended to cover the whole aspect of each plant, telling their story.
“Hold nature in your hand and take a look at the intricate beauty within. Treasure our wildflowers and pollinators. It’s so easy to just walk by…” Jackie Isard
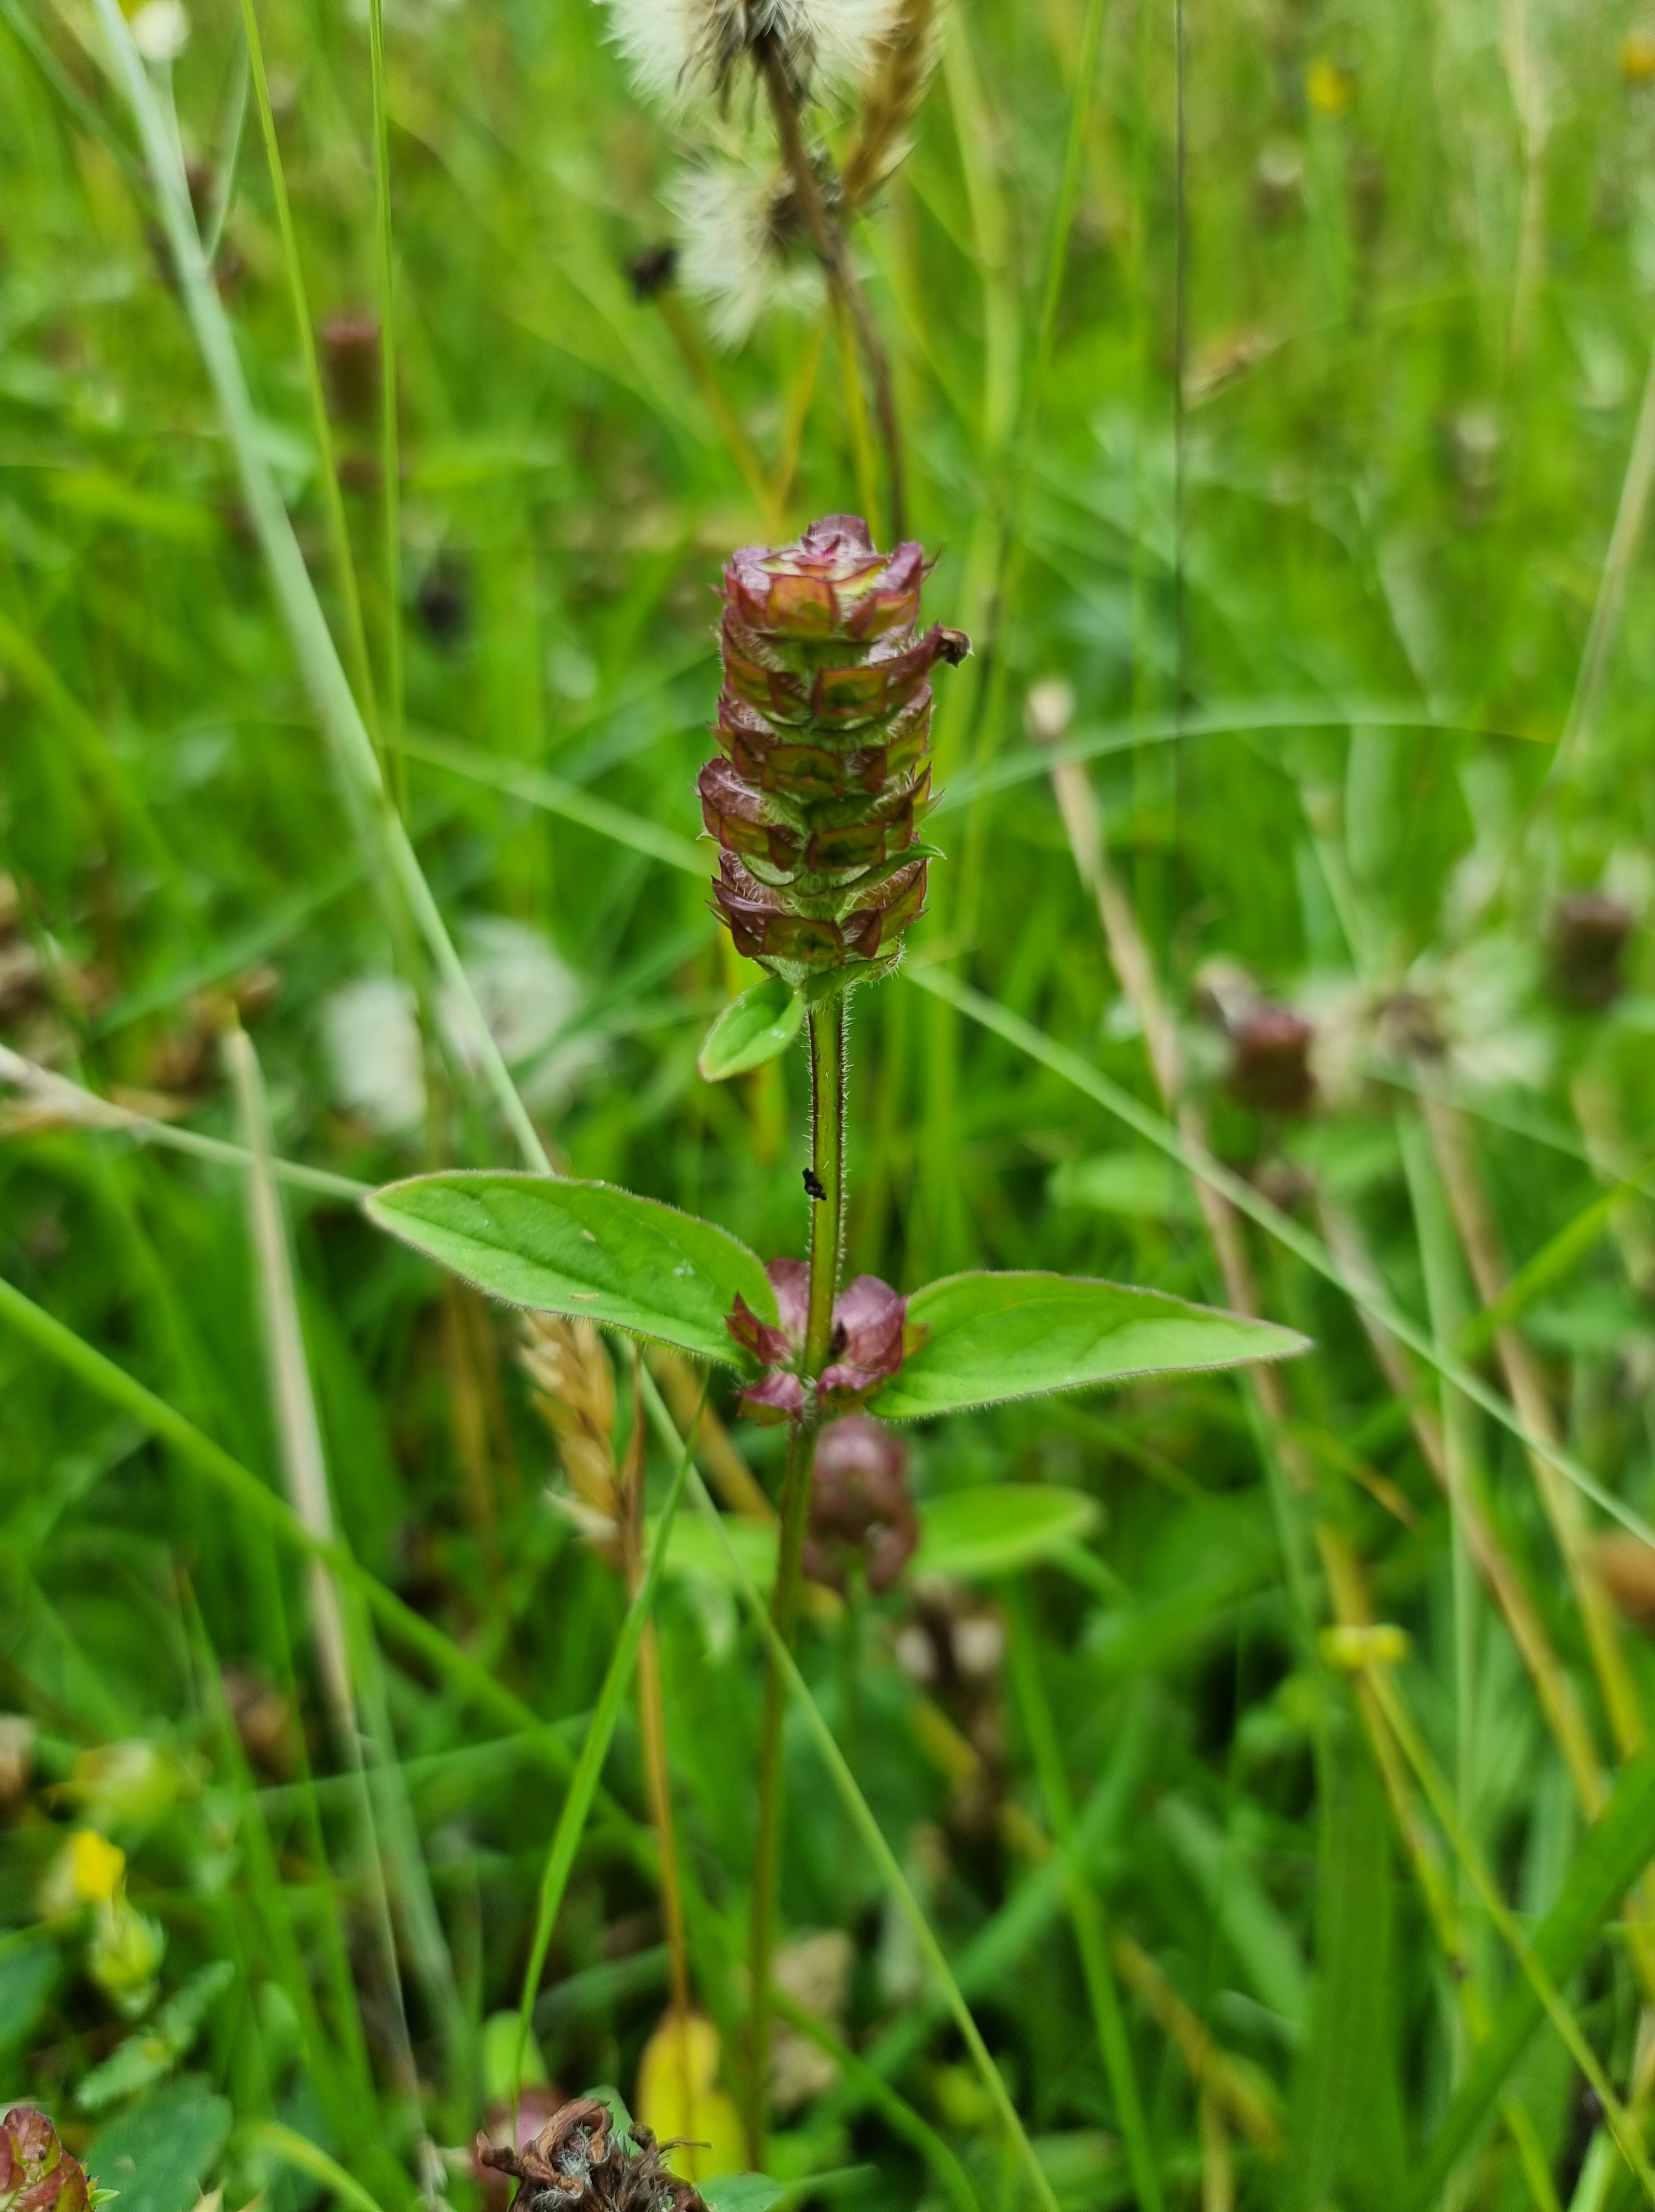
From here I wanted to find Great Burnet (Sanguisorba officinalis). After tons of researching, my journey took me back into Wales again to a tiny little meadow called Trewalkin on the edge of Brecon Beacons. Another naturally wet meadow. It is managed by the Wildlife Trust of South & West Wales. Unfortunately, the meadow had already been cut by the time I had found out that Great Burnet grew there. However, there was evidence of the species as some new plants were starting to grow. It has very distinctive serated leaves.
I noticed a few other wet meadow species too including Devil’s bit scabious. This was exciting news as Devil’s bit was also one I needed to locate. When I returned home I contacted the Wildlife Trust officer and asked for a species list. I was so delighted when it was sent through, every one of my chosen plants grow in this tiny meadow! This included Water Avens (Geum rivale) which was proving almost impossible to find. There will be many visits to this meadow next year.
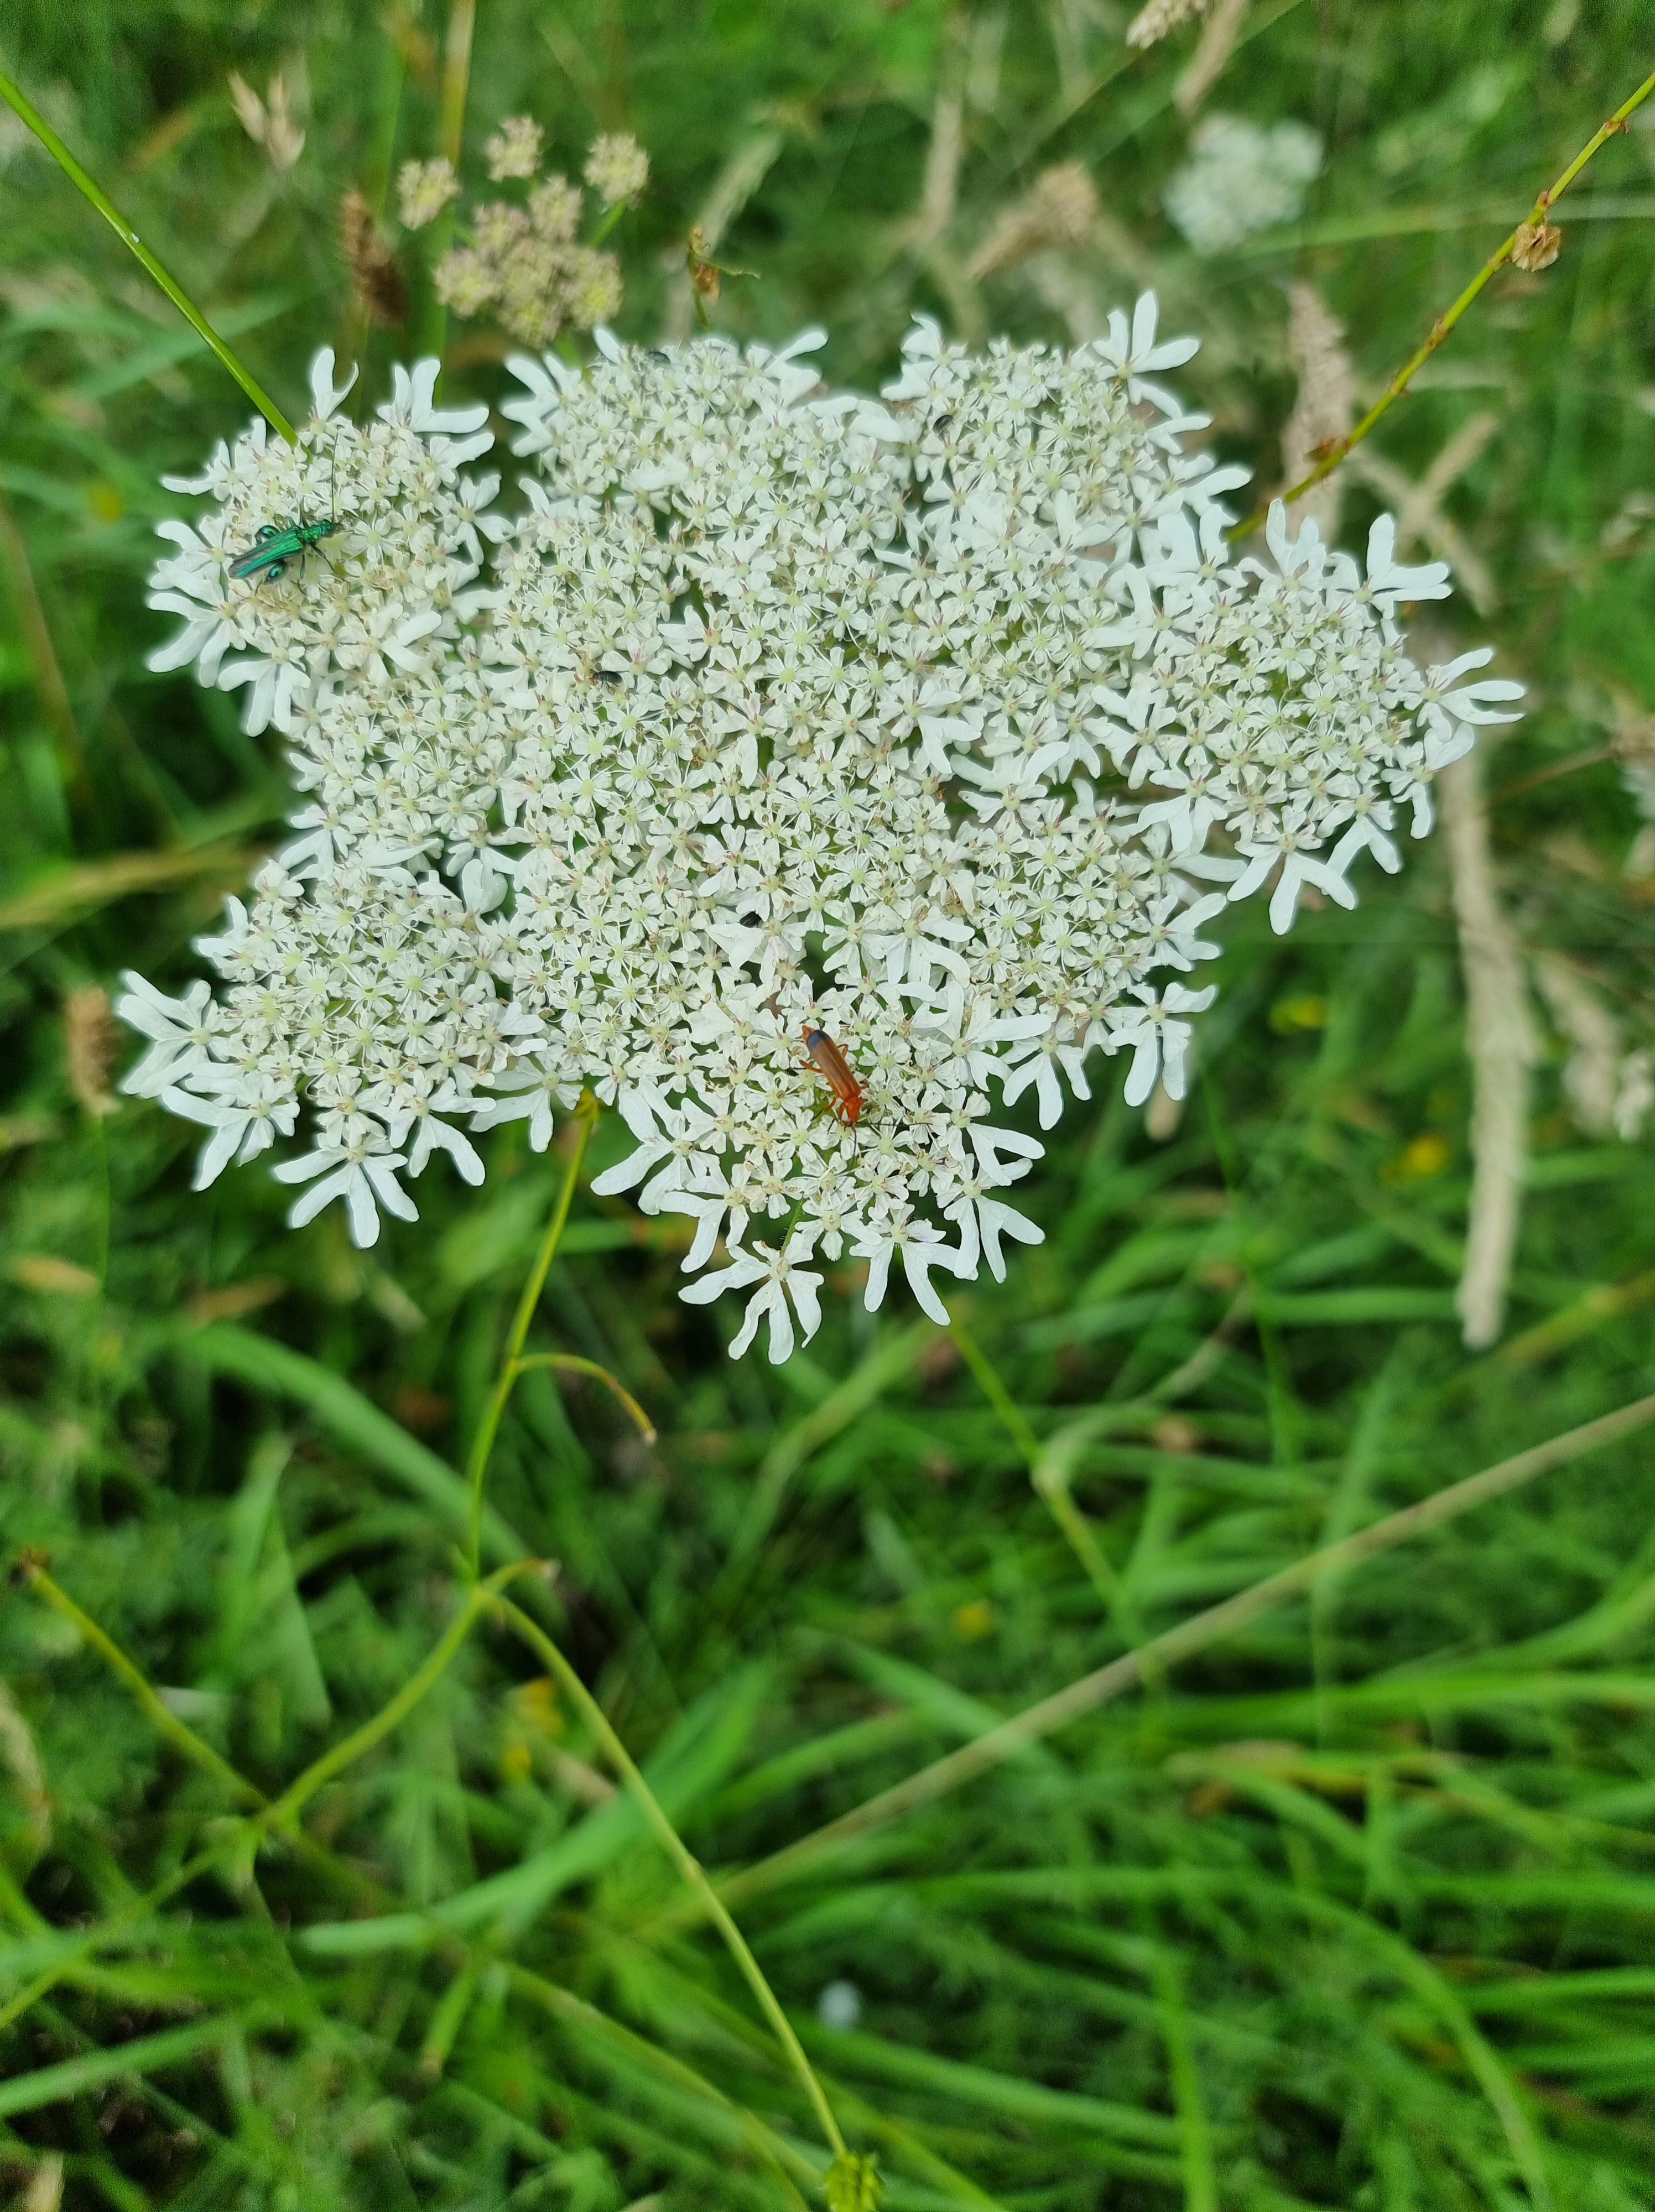
Another place I visited earlier in the year was Crickley Hill Nature Reserve, in Gloucestershire. This is a beautiful place with lovely walks. Many wildflower species live here and the insect life is abundant. I saw many 6 spot burnet moths who were loving the Field Scabious growing near the car park. Beautiful Harebells grow everywhere too. I wasn’t expecting to find my chosen species as this is a dry limestone grassland area but I very much enjoyed the walk and the stunning views.
The last photo of trees, taken in the woodland area of Crickley Hill, I entered into the Gloucestershire Wildlife Trust photography competition. I was amazed to learn this week that it had been ‘Highly Commended’ by the judges!
6 Spot Burnet Moth
Harebells
My journey for wildflowers has ended this year as winter is now upon us. The plants will all sleep now until April/May next year when I’ll be off out with my camera and walking boots to see them again.
Until then, have a wonderful Christmas and a happy new year!
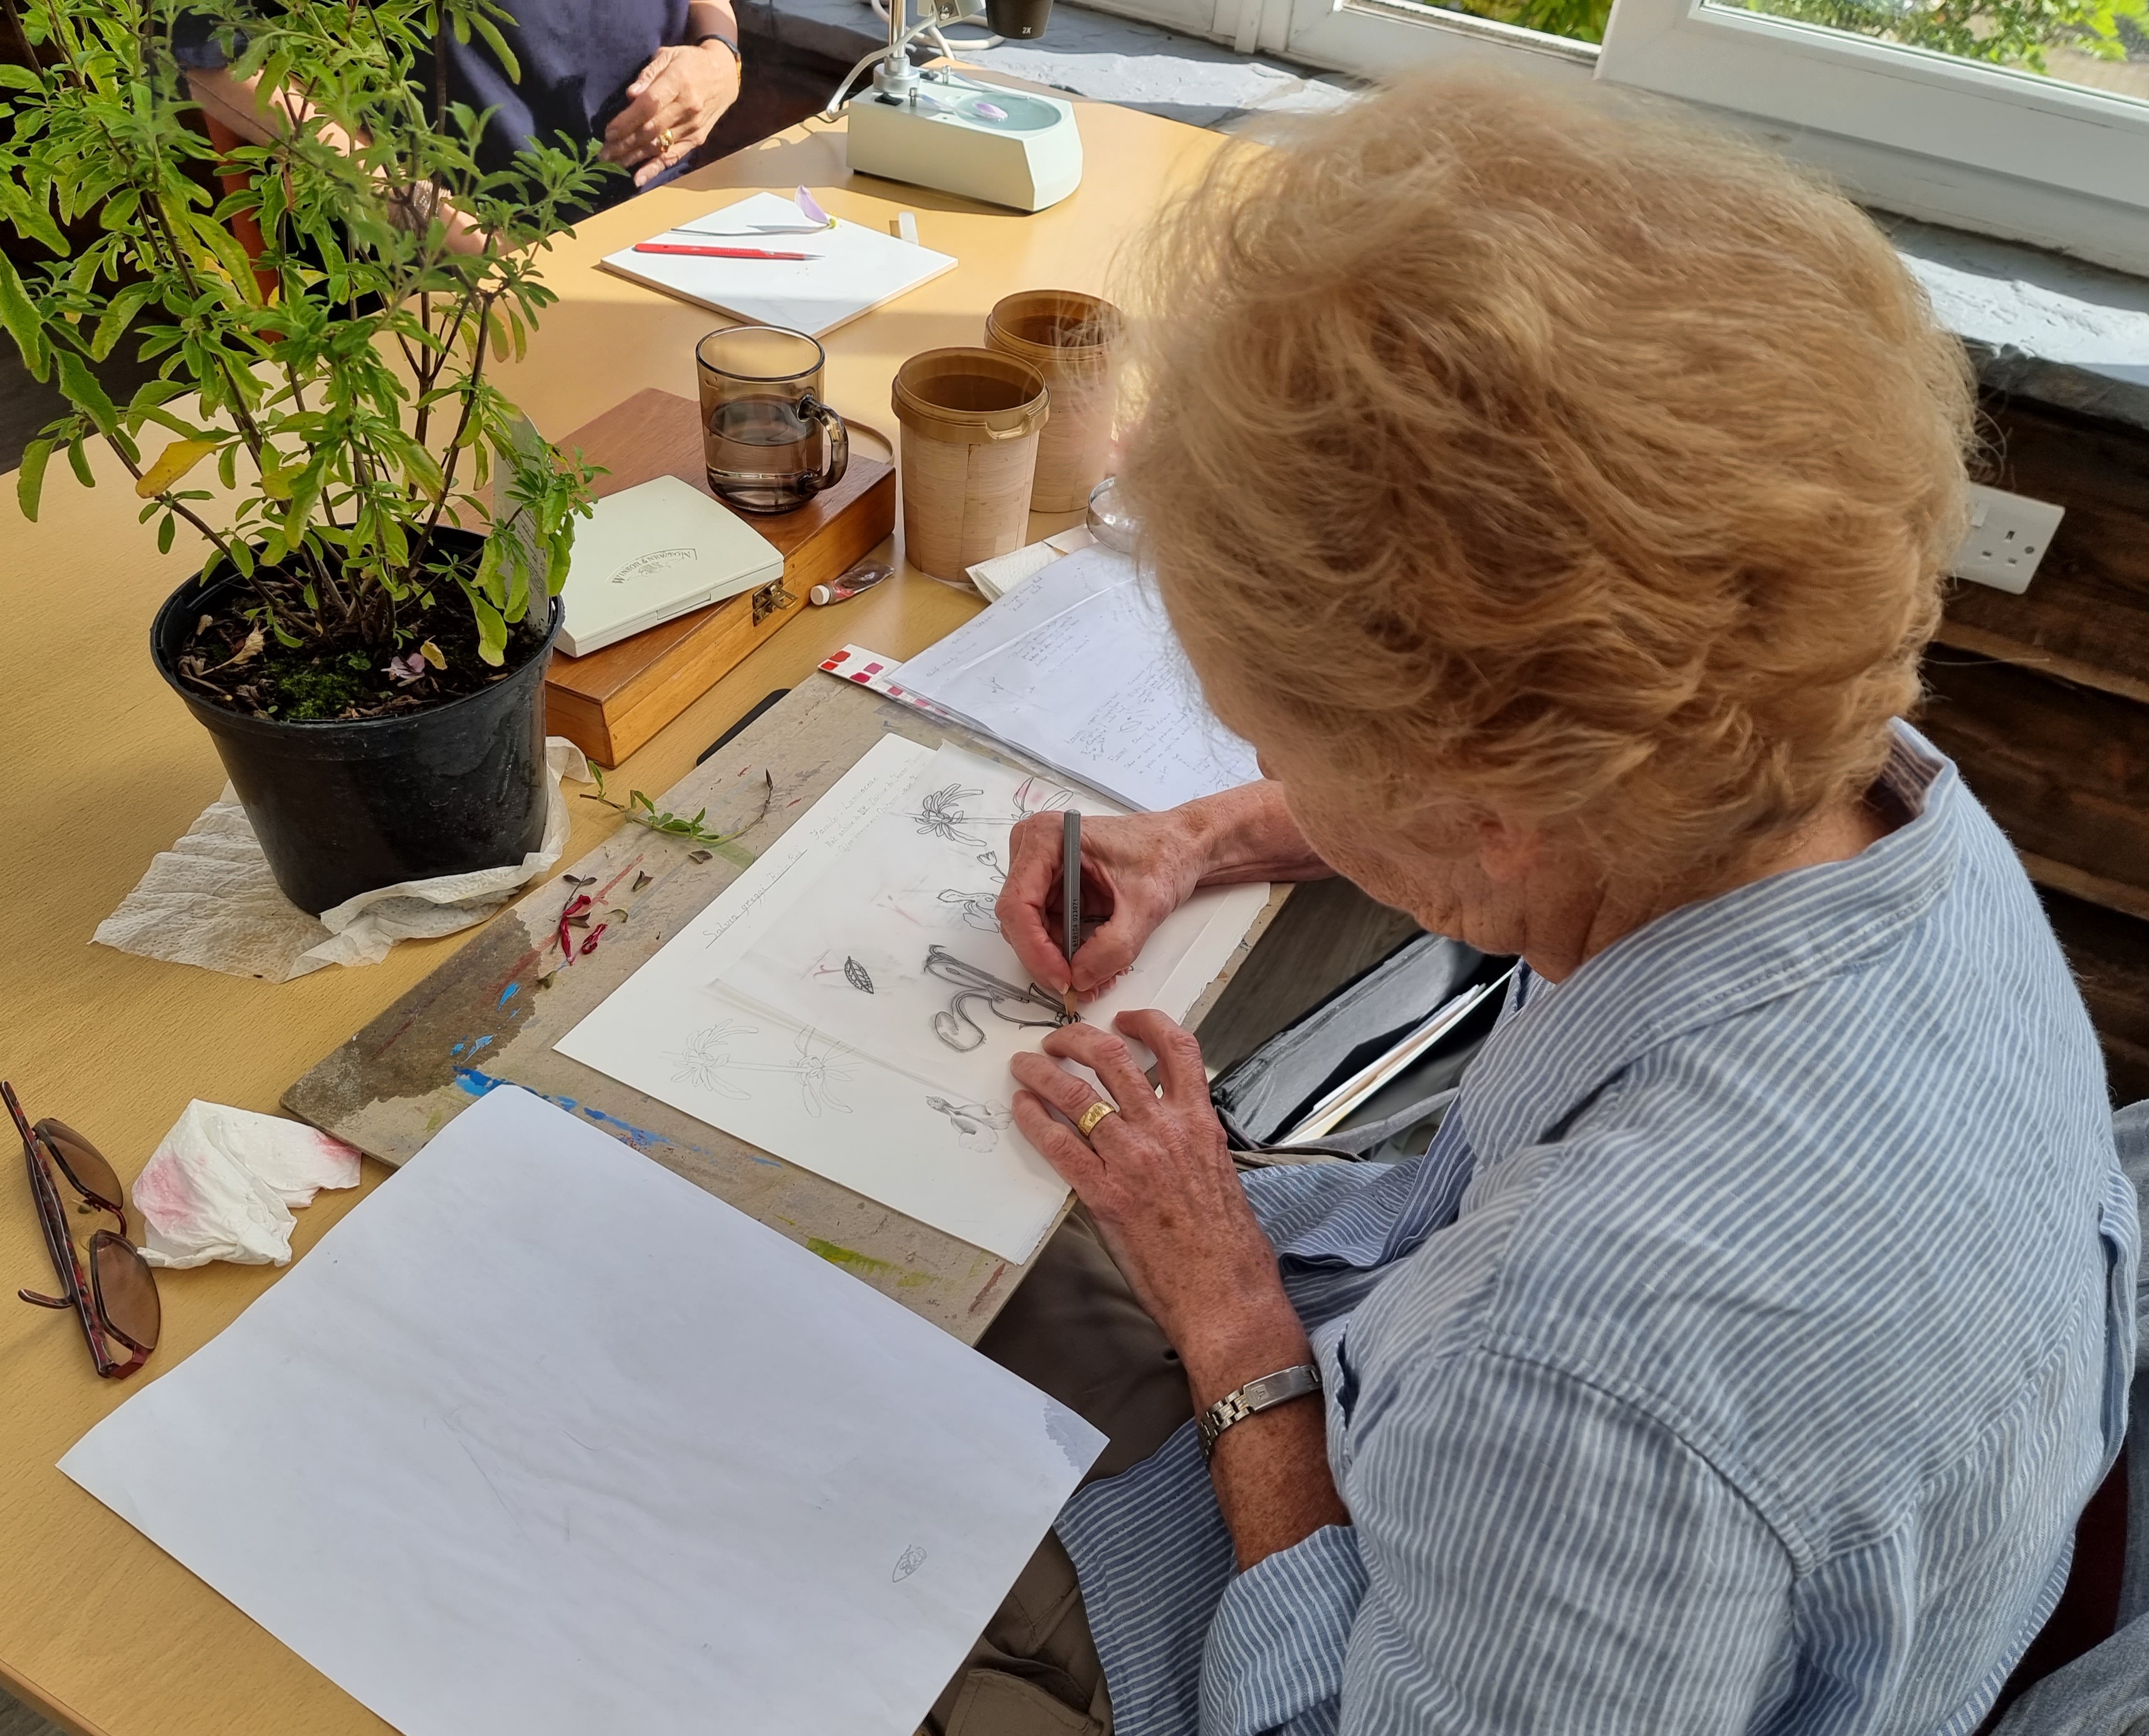
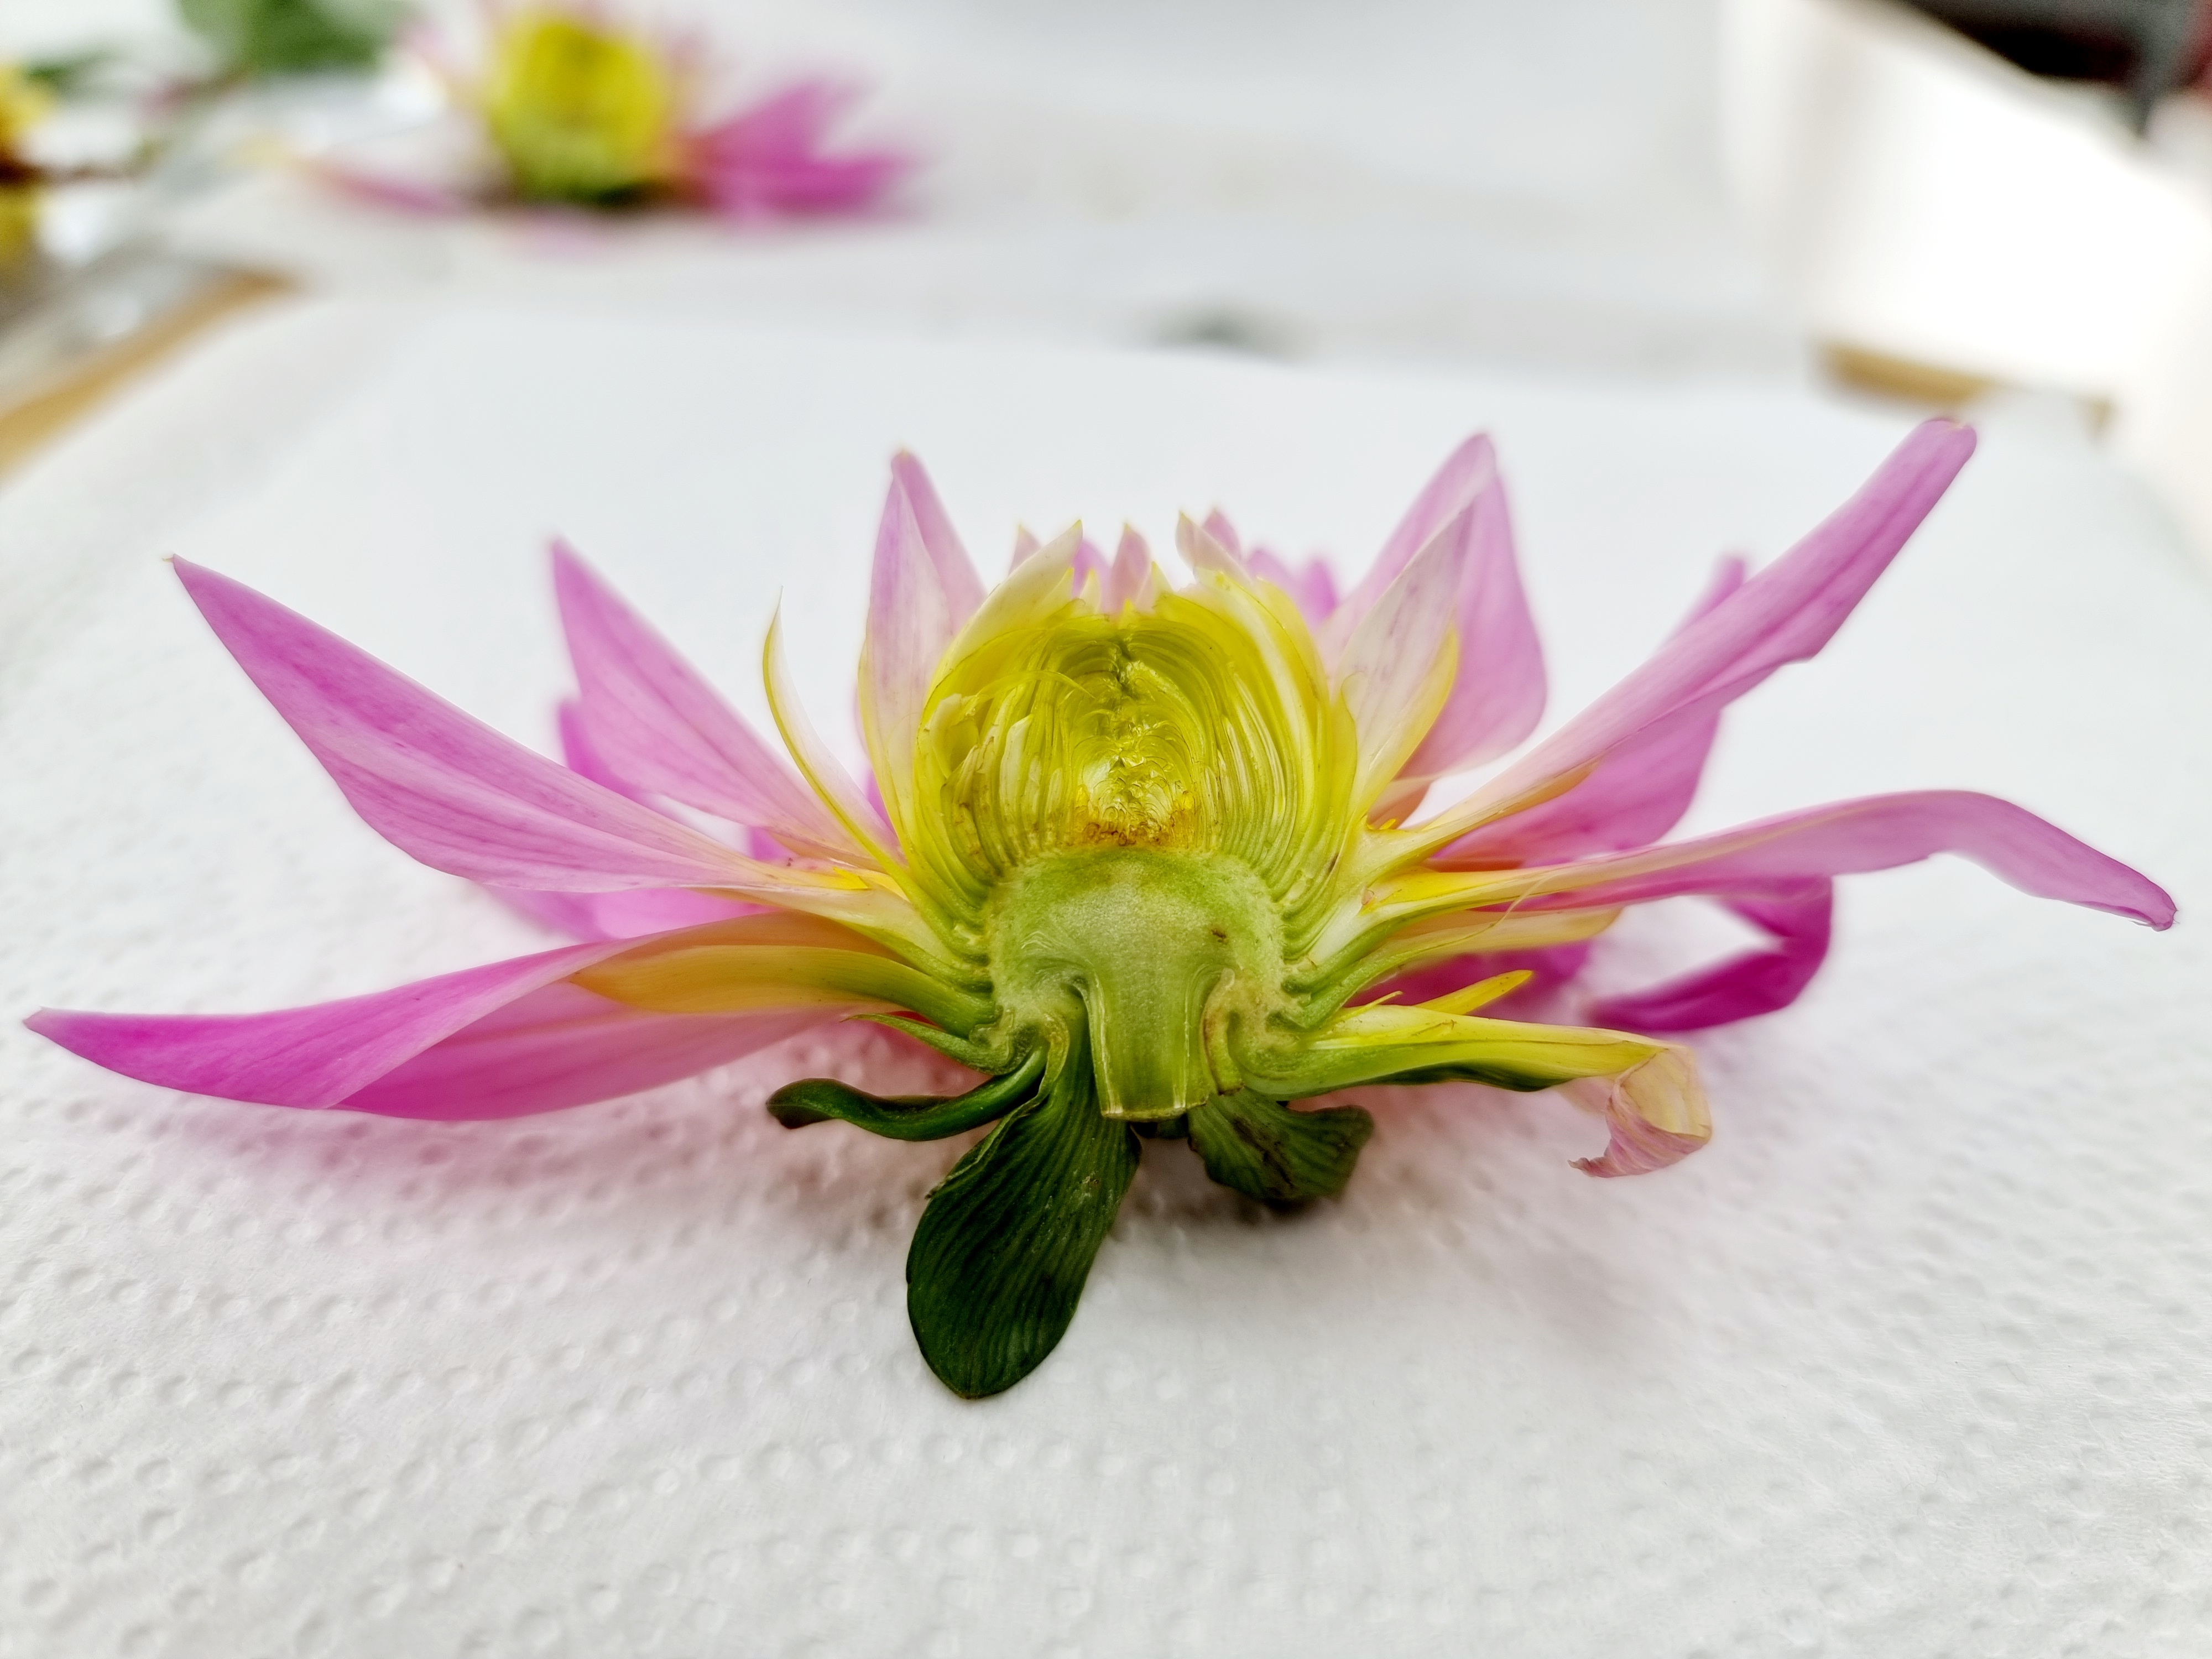
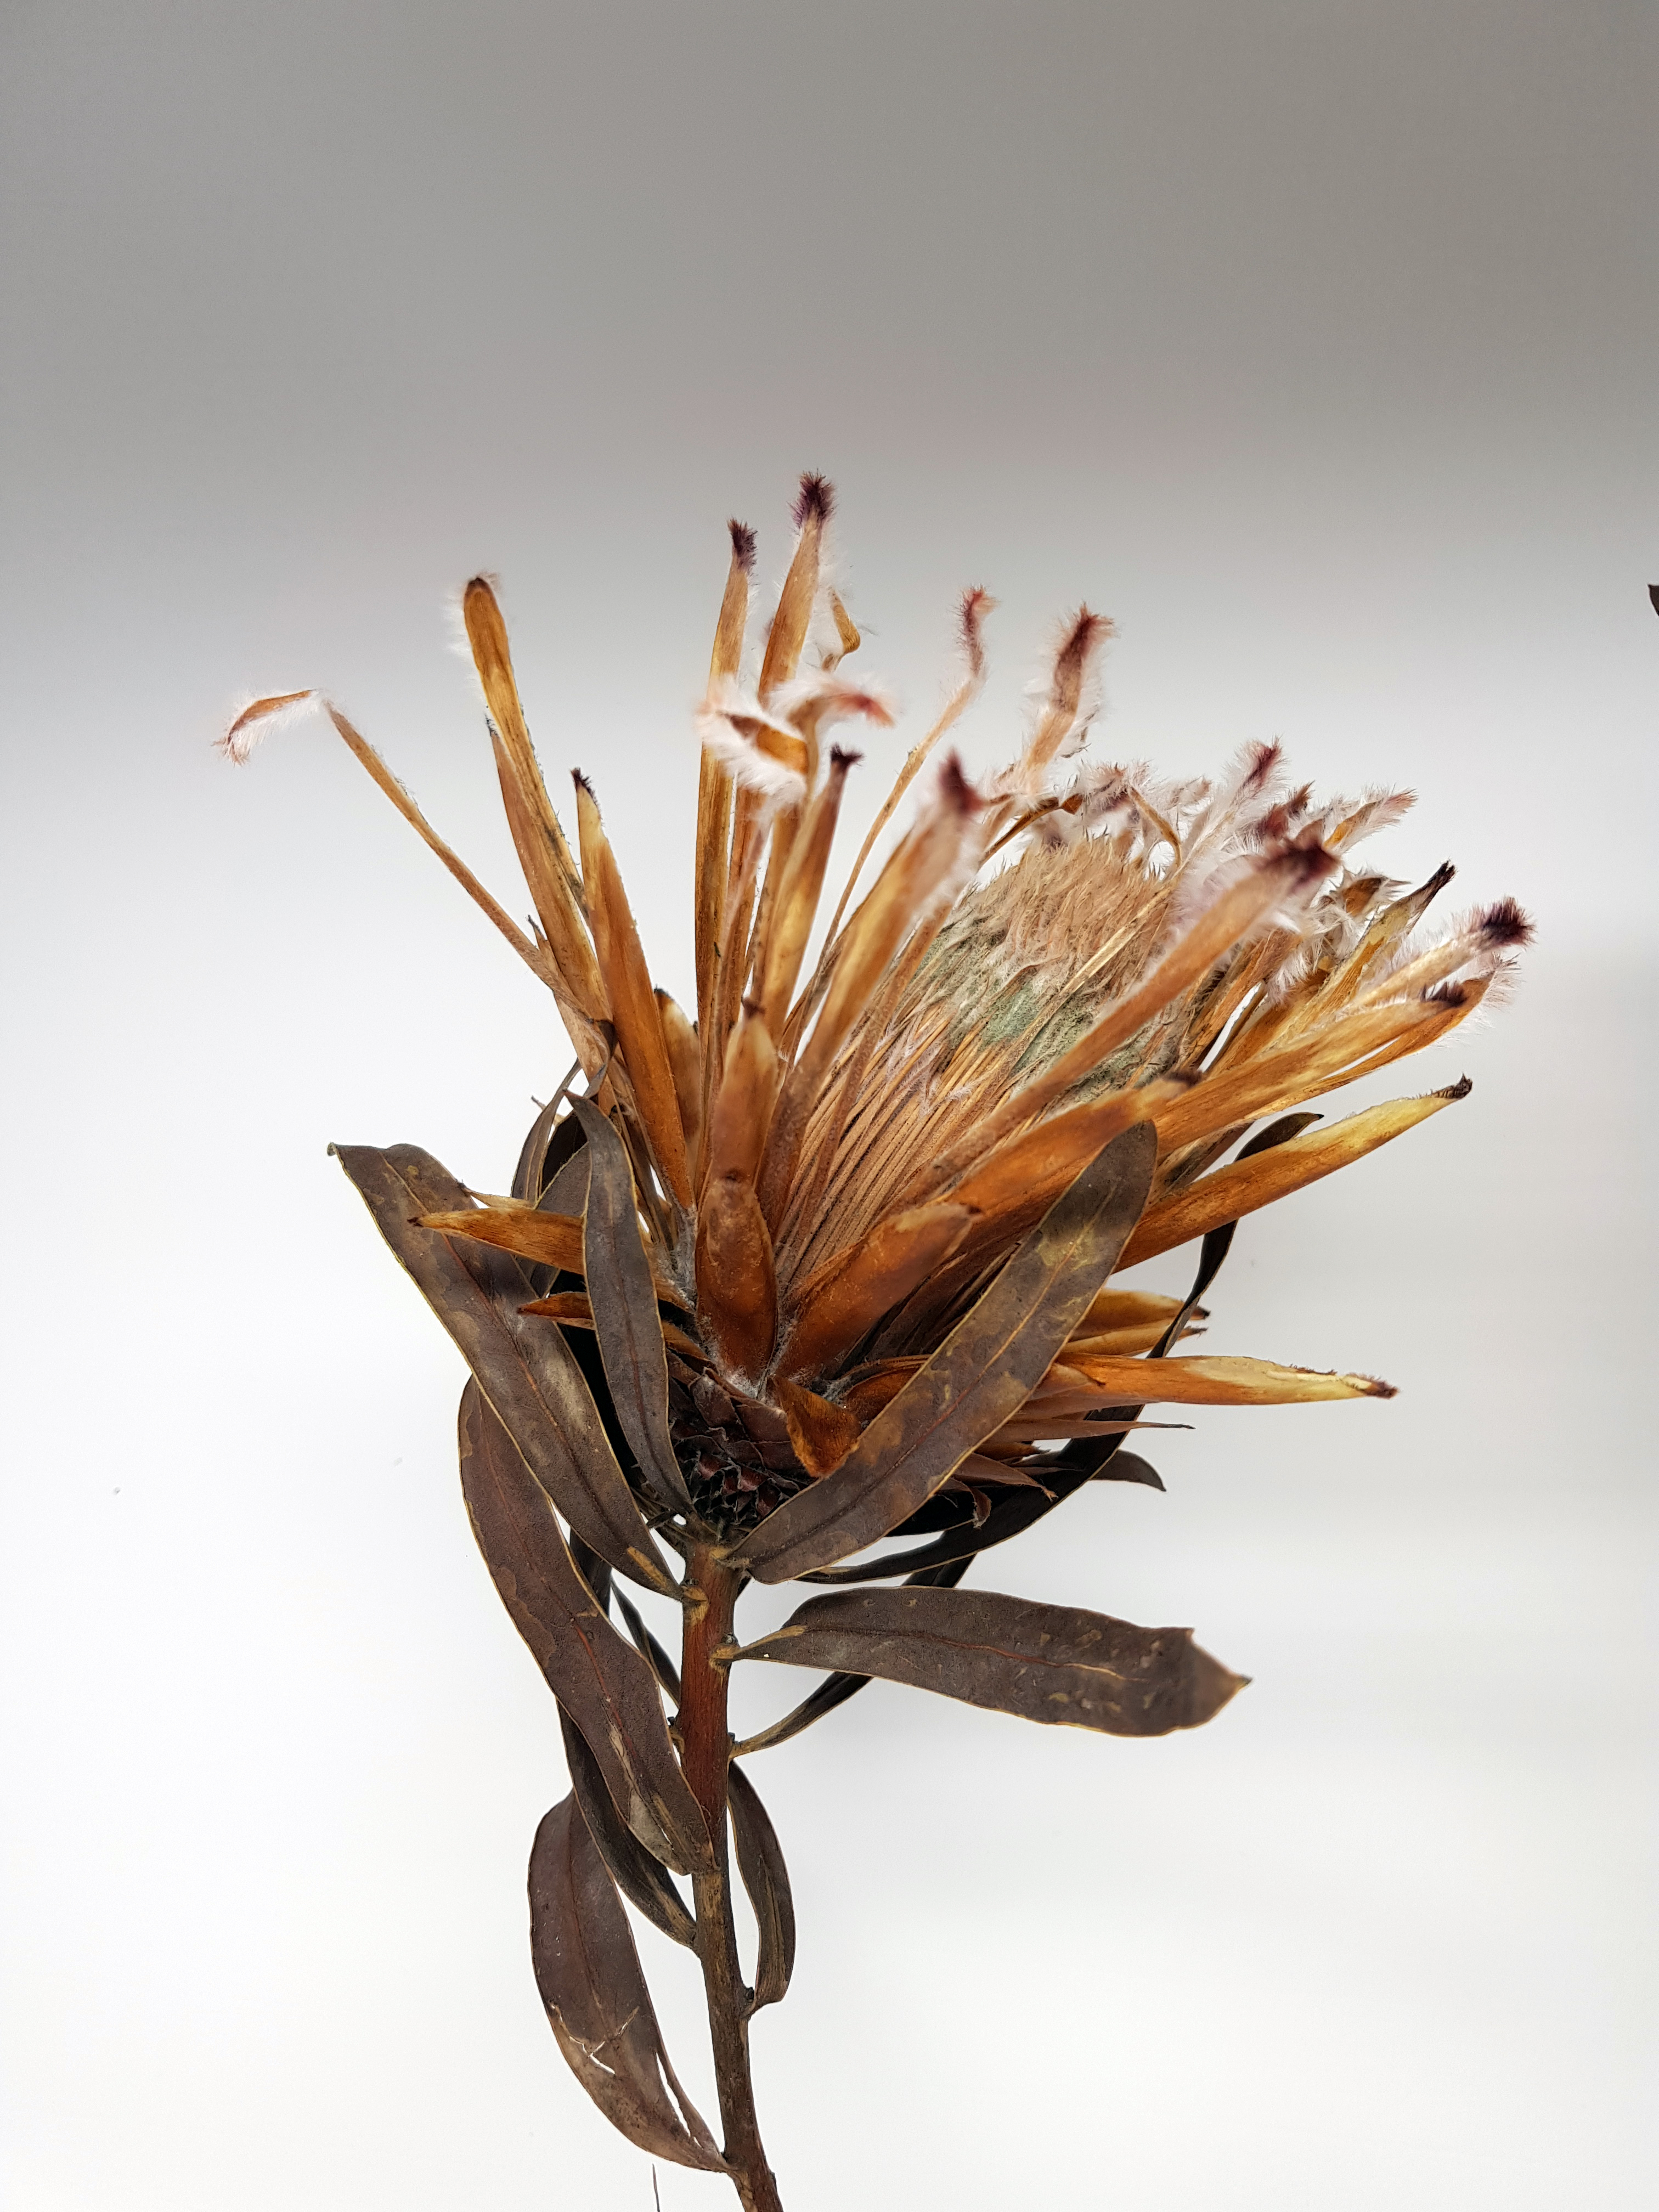
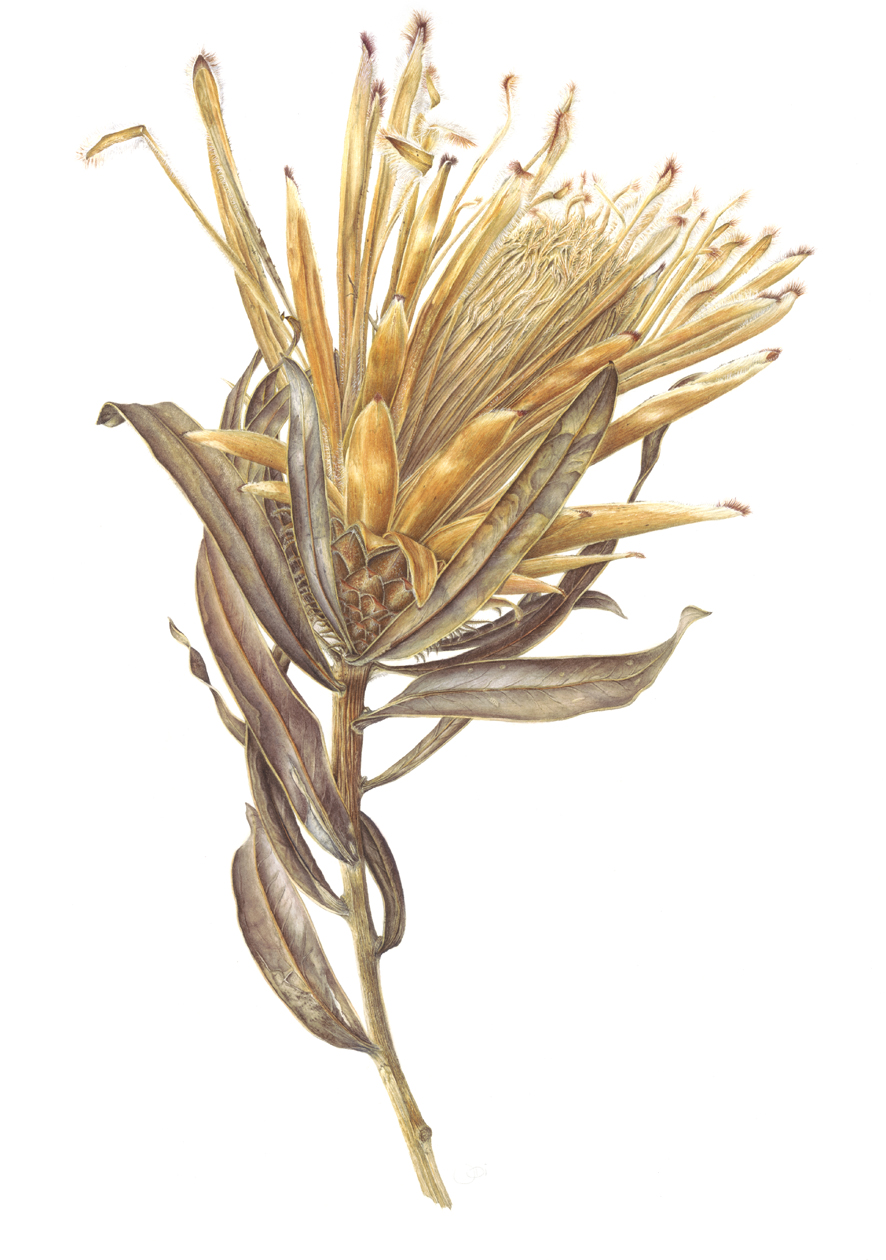
I thought I would share the process of how I made this painting with you all. I discovered this dying protea in the training room at the Bristol Botanic Gardens when I was teaching there. It had been discarded and left to go mouldy on the shelf. You can see the green mould on the inner stamens below. I rescued it and another one which I have yet to paint!
The whole thing began as an exciting new project. I plan to paint it for the SBA (Society of Botanical Artists) exhibition this year. It was the most mammoth painting I’ve ever made!
I started the process by studying my subject thoroughly so that I didn’t miss out any of those incredible details or colours. What looks like a flower to start with is actually a series of inner and outer bracts which protect the inner whorl of tepals containing the stamens and stigma inside. The feathery bits! The drawing took ages to complete but eventually it was all traced up onto watercolour paper (a piece of old stock Fabriano Artistico HP) and I was ready to go.
Firstly, I made a awatch of mixes to help me with the colours of my subject. I use this as a guide. My palette consisted of seven primaries (Winsor Blue (Red shade), Indanthrene Blue, Indian Yellow, Quinacridone Gold, Transparent Yellow, Permanent Carmine, Permanent Rose and two others Perylene Violet and Winsor Violet. These are all Winsor & Newton professional watercolour pigments. As you can see there are warm and cool mixes within each range below. See below drawing and practice pieces before I started the actual painting.
I practiced three tricky elements first. After this I was happy with the techniques I needed to use to achieve a good painting. The last photo above shows the beginning of the painting.
I used a fair bit of wet-in-wet technique on the first layers for the larger inner involucral bracts and the bottom leaves. The tepals, outer thin feathery ones, I did mainly in wet-on-dry and dry brush. The photo below shows a few individual tepals which sit outside the whorl (stigma and stamens) in the very centre. All are very tightly closed to start with but as they mature they spring open and spread out revealing the straight pointed stigmas. The centre part is then exposed. That’s the bit I love!
Next I had to decide where to start! I protected my painting with layout paper and moved around the painting from left to right and then down the middle, section by section. The centre section of stamens and stigma was a little scary and I often wondered how I would approach that area. I came to the conclusion that I would cross that bridge when I came to it!
I thoroughly enjoyed painting the golden hues of the bracts and tepals with their hairy tops. Making them shine was essential too. This meant the highlights had to be prominent. The first layer of wet-in-wet was followed by graduated soft washes to build up colour. Once I had achieved this I could concentrate on the dry brush and fine detailing. This sometimes included splaying my brush into points to created rough textured lines. At times I needed to use my eradicator brush to bring up highlights and lighten the edges of the tepals where they touched another. The following photos show the techniques used.
Painting the hairs…how do you paint white hairs on a white background I hear you say! Well, I used the very tip of my Billy Showell No. 2 brush and carefully painted in between the hairs (so painting the negative) where they overlapped another stamen in the background. For the ones that were loose with nothing behind them, I used a very pale warm grey colour and painted in the fine hairs. Of course, the red hairs were much easier. There were also little white hairs on the bracts which I painted in using a white paint……..sooooooo many hairs!
Suddenly, I realised I was reaching the centre section of stamens! Ugh….what to do? Taking a deep breath I checked the subject thoroughly to see how the colours changed over the stamens and where the warm/cool areas were. I had already drawn in fine lines to indicate where the stamens were and the little twirly hairy bits (anthers) which occasionally appeared within the mass. It was again a case of painting the negative and laying soft graduated washes down to create form. The anthers needed masking out before I started the fine detail work. I use a mapping pen for this but you must be careful not to scratch the paper as the nib is very sharp. It’s a great tool for small areas and fine lines though. See the first photo. I erased the masking fluid with a Tombow monochrome eraser pen. This has a small tip and is ideal for removing masking fluid. A soft rubber or a clean finger can also be used to do this. Make sure you do this gently to protect the surface sizing of the paper. The images below show these items.
I started by adding a thin layer of colour to the central area. This was a creamy tone which was what I call the ‘base’ colour. From here I began painting into the negative to create the fine lines between each one. I used soft graduated washes of various beige tones to build up form on the individual stamens as well as across the whole area. Once I had built up the colour enough, I rubbed off the masking fluid. I was now ready to paint the anthers. Treating them like feathers, I detailed in the shadow tones between the hairs. This took a very long time! The whole painting took about 4-5 weeks to complete.
Now I had to finish off the top part with twiddly stamens and hairy anthers to create the rounded top. This was all done with intricate dry brush work. Painting the shadows was important here to create form and give the impression of lots and lots and lots of stamen hairs!
Mission accomplished! Next on the agenda was to finish off the right side and the rest of the inner bracts. Once complete I used wet-in-wet technique to apply a base layer to the leaves. They had really beautiful pattering and were very colourful. See the two images here.
Laying in the subtle colour tones was great fun! This was the first layer of wet-in-wet followed by soft graduated washes and much detailed dry brush work. The hardest part with the leaves was getting them to look like the reverse of the leaf. In most cases they were reversed. Much erasing happened as whatever I did they looked the other way round! It was an optical illusion because the more I stared at it, they kept changing! The reverse of the leaf needed very short shadows along the midrib to achieve this. Eventually it all came together. But if you stare a while longer…..you may still see it the other way! See progress photos below.
Next on the agenda was the stem, my favourite part. I just love painting woody stems. Essentially it’s a lot of wet-on-dry and dry brush work with very fine detailing. Adding every little detail in counts too! The more detail the more realistic it will look.
The top part of the stalk has lovely red/brown tones with deep grooves but faded below to a beige/grey texture. For the top I used dry brush for the fine detail and on the bottom, soft washes with a splayed brush to make the pattering as described above in this blog. See images here.
Finally, the finished painting emerged. What a journey but so worth it as it won the Margaret Granger Award at the SBA Mall Galleries exhibition! I am so delighted as this was a very ambitious project for me. I now have three awards on my wall. I feel very honoured! The photo below shows me receiving my award and my Fellow Membership from the President of the SBA, Billy Showell.
Thank you for reading my blog and I hope you enjoyed it! Jackie 🙂
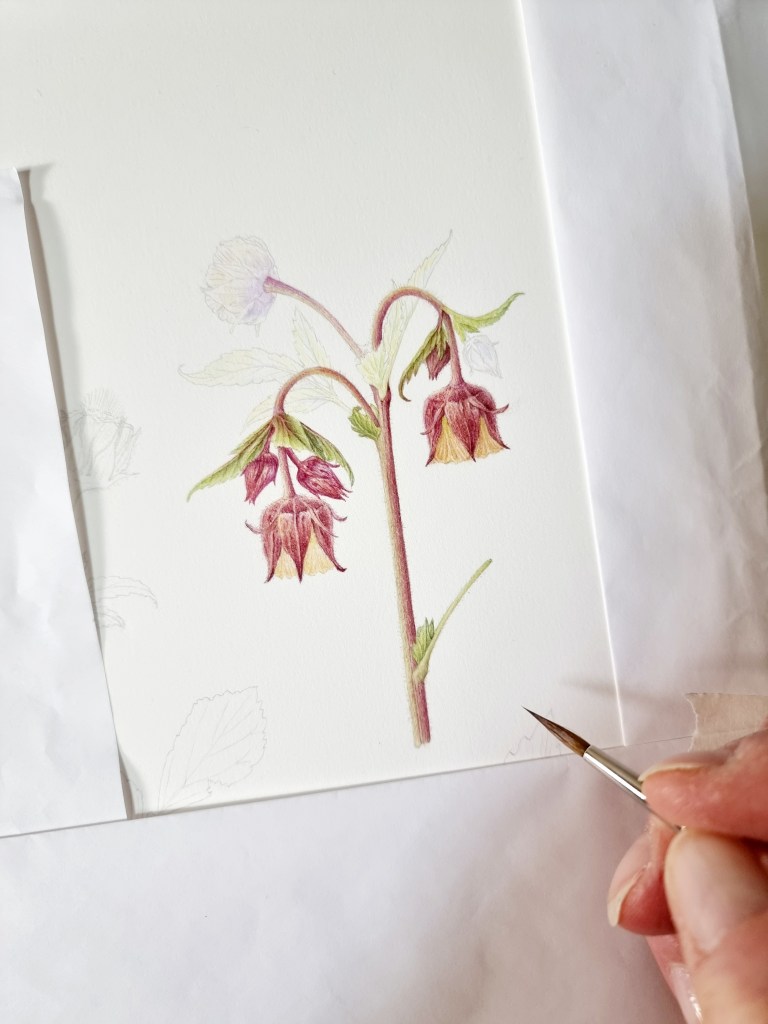
During the winter I’ve been very busy continuing with my RHS studies and finalising 3 compositions. It’s been a long trek! In between these studies I’ve been enjoying preparing for a course at Brackenwood which will cover White and Yellow Spring flowers. A subject many find hard to paint…even I do!
I also had a chance to go on an owl event where I had the pleasure of holding 6 different owls. The Owls in the photos above are a Barn Owl, a Tawny Owl and a Little Owl. My favourite was the Tawny Owl as we have a mating pair in the area where I live. I love hearing their calls, Twit – T-wooo. Apparently they are the only owls who make this type of call. I even got to hold an Eagle Owl. They are huge and very heavy! I’ve always admired these beautiful birds but never been this close up. It was delightful and I will remember it for a long time.
I have now completed my compositions for Cuckooflower, Ragged Robin and Greater Birds foot Trefoil.
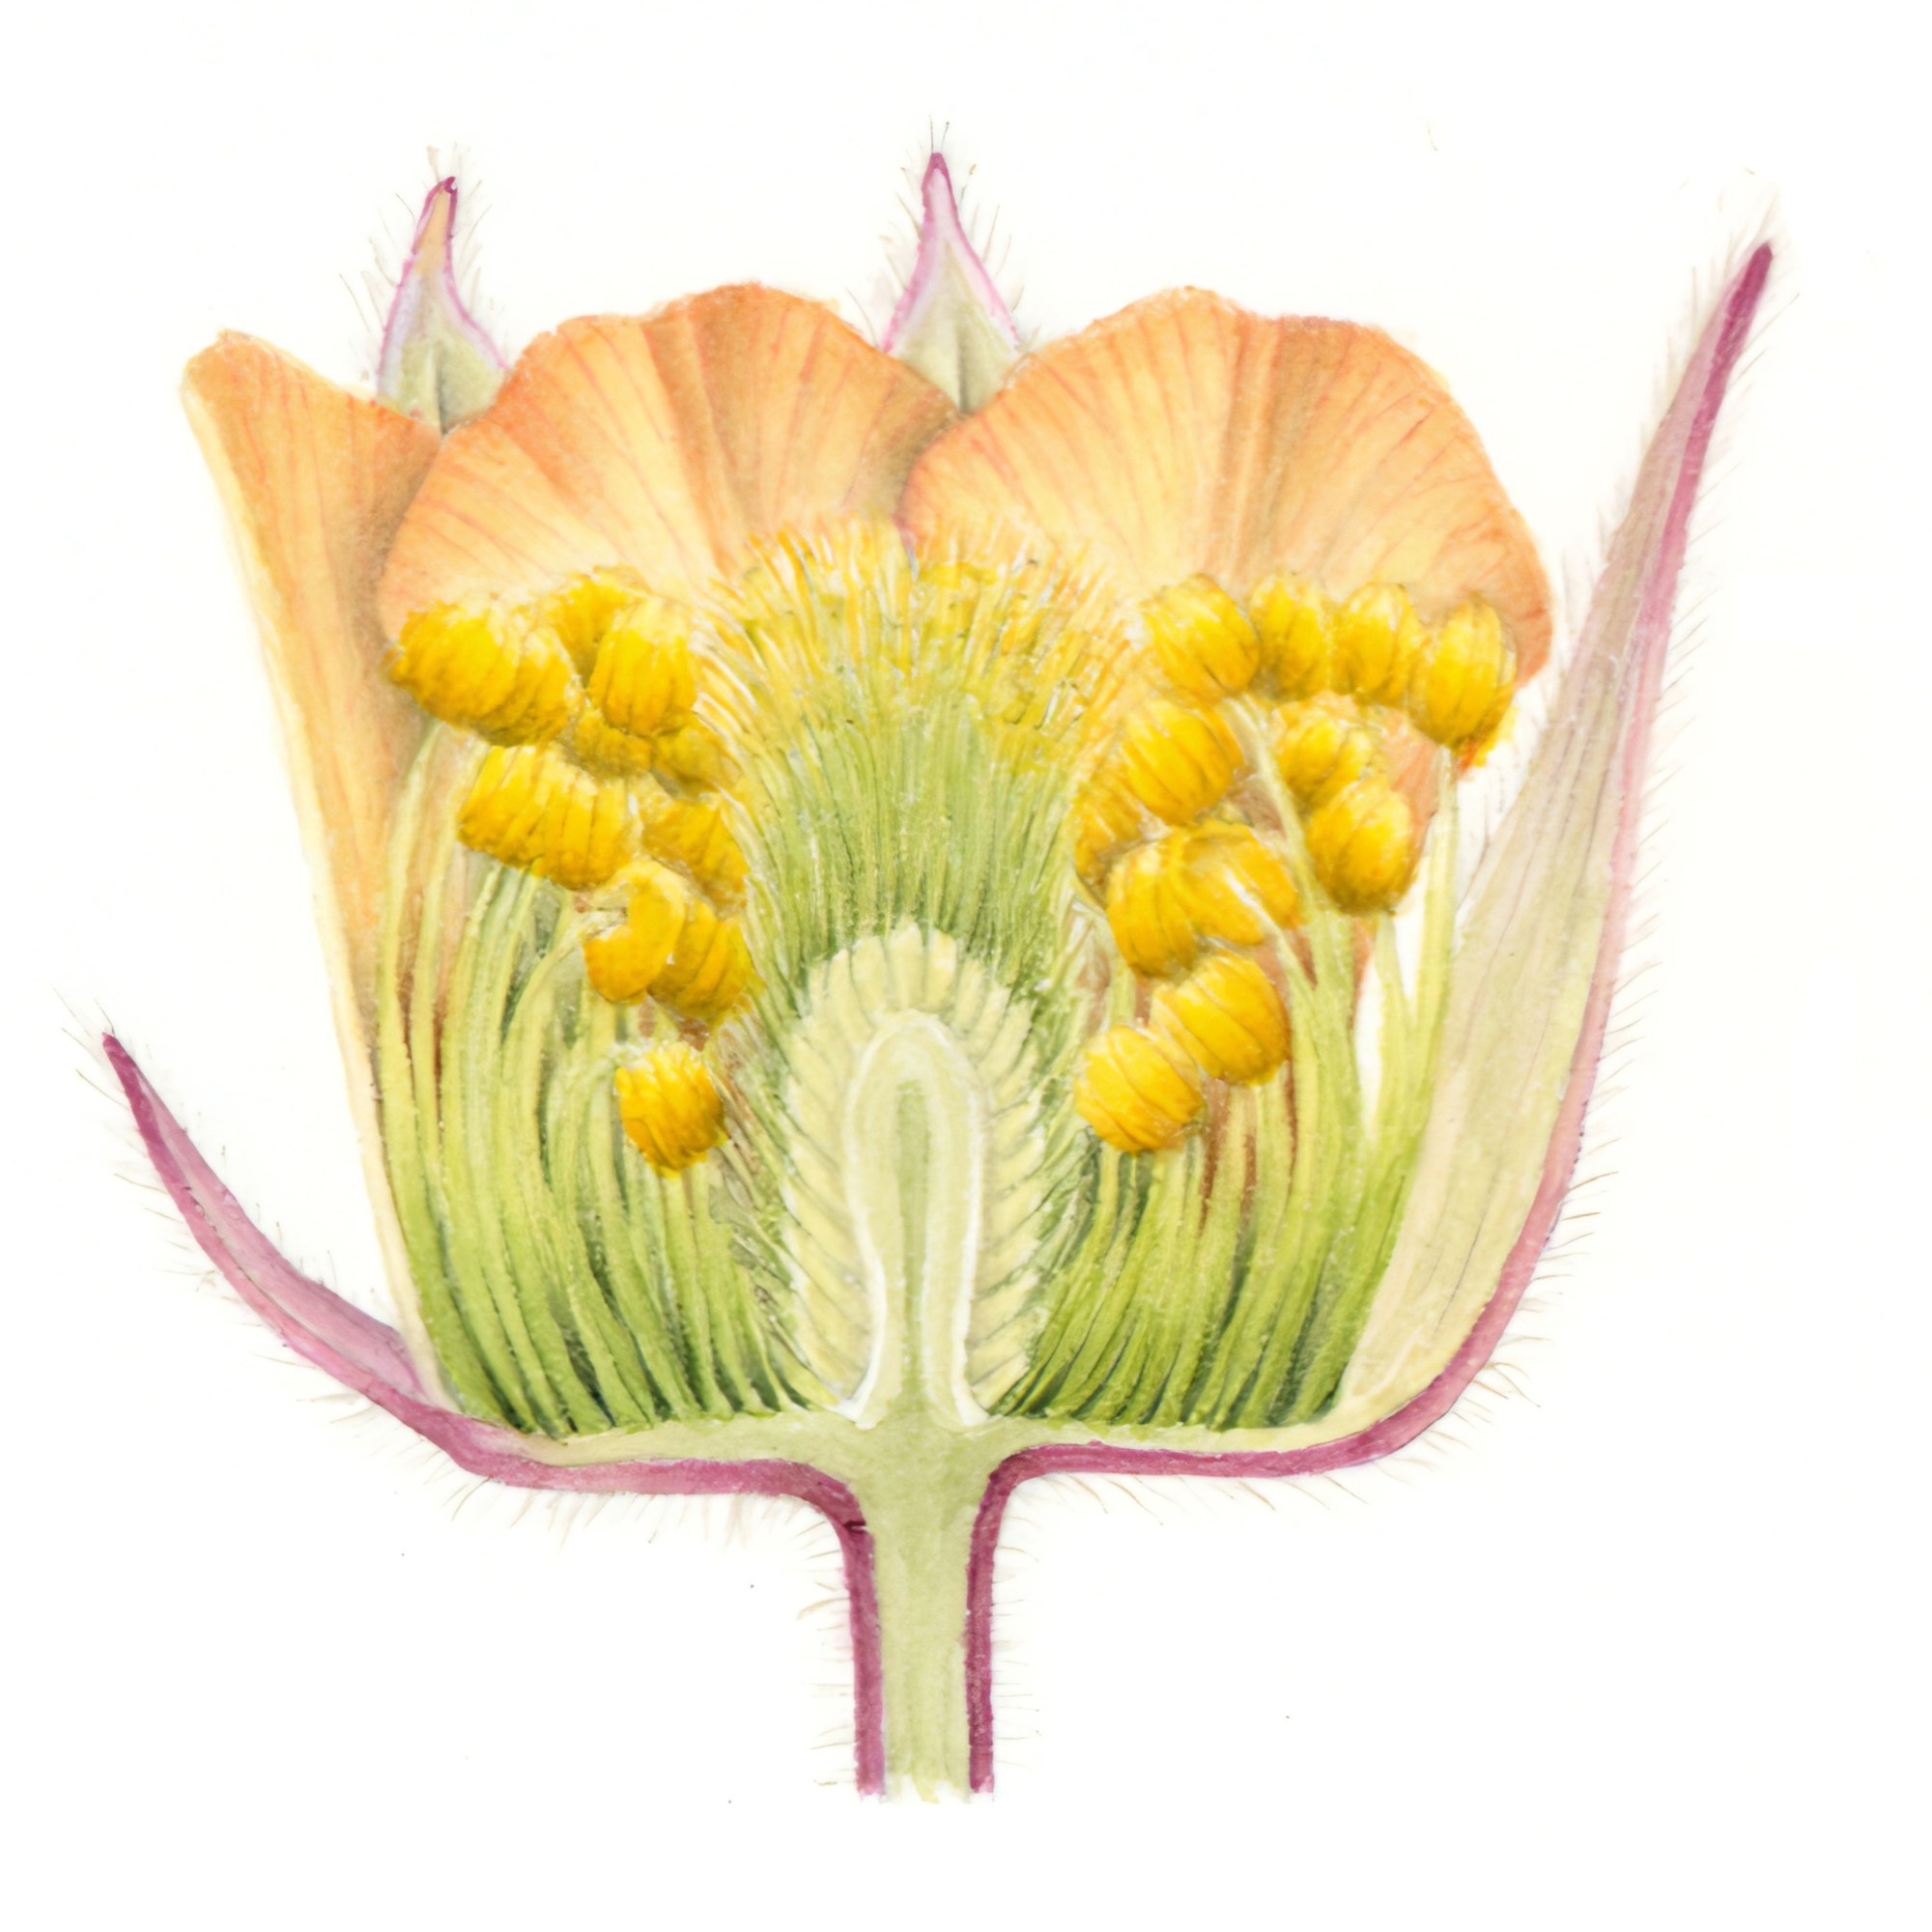
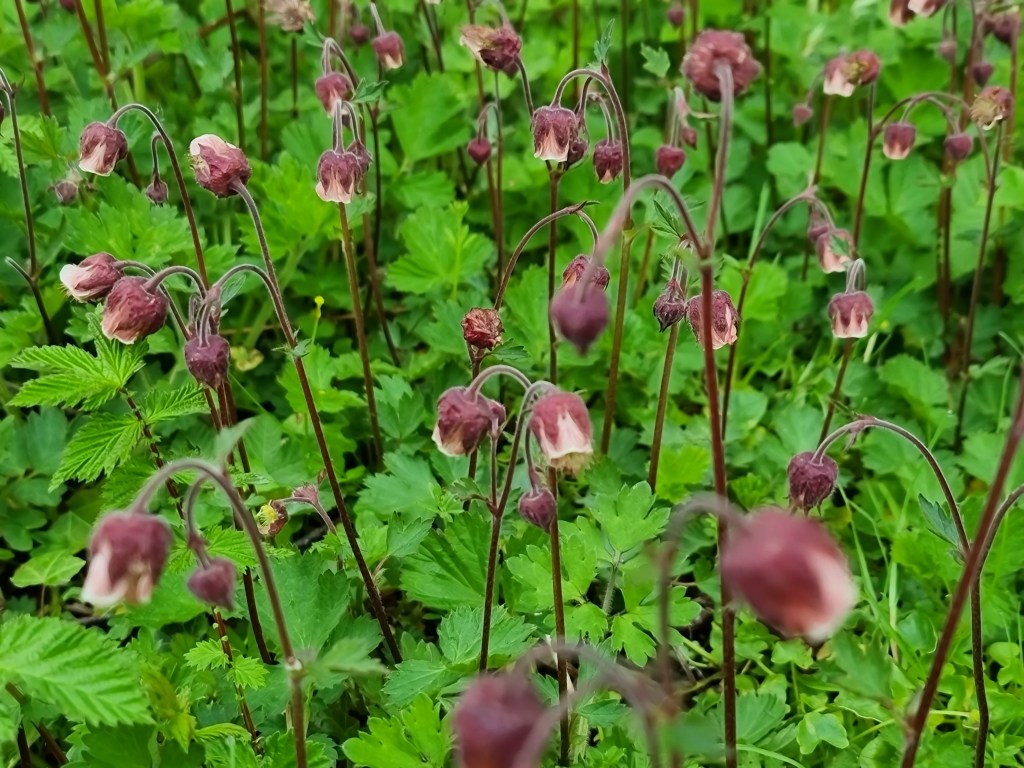
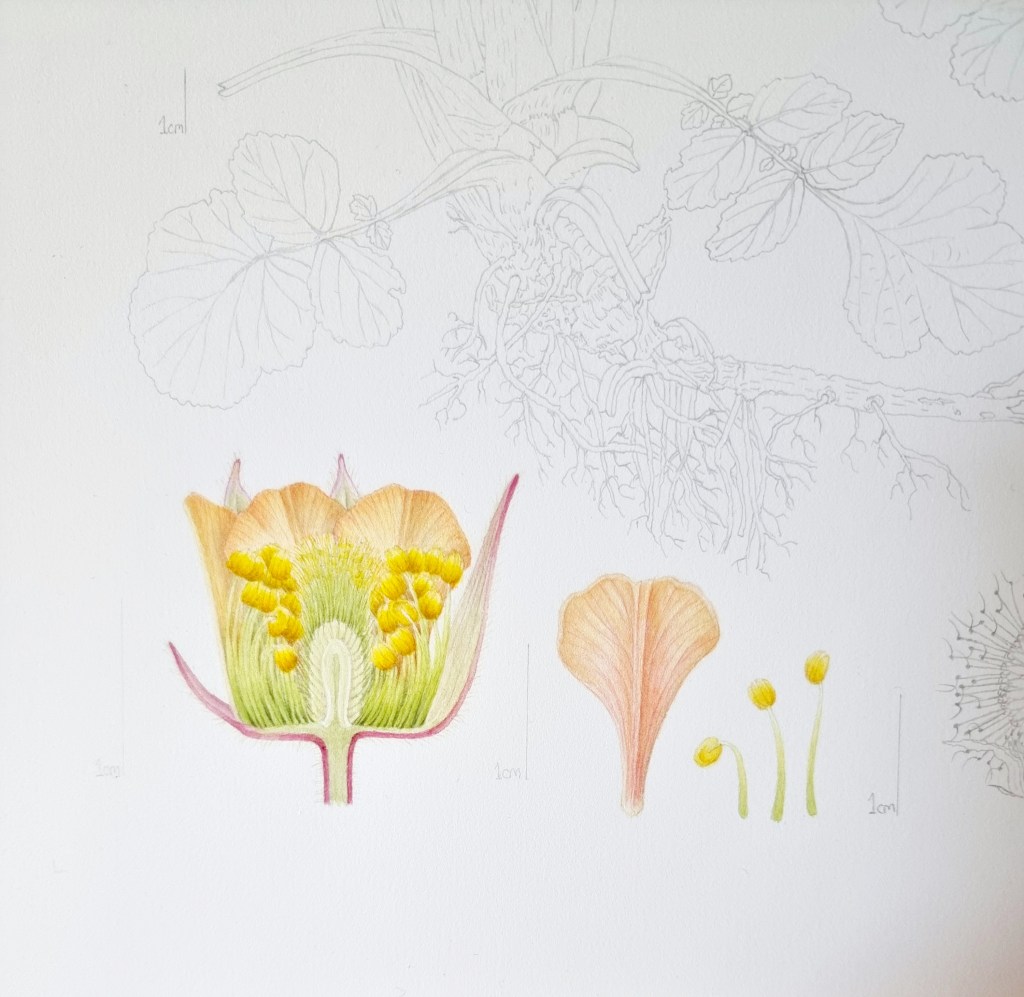
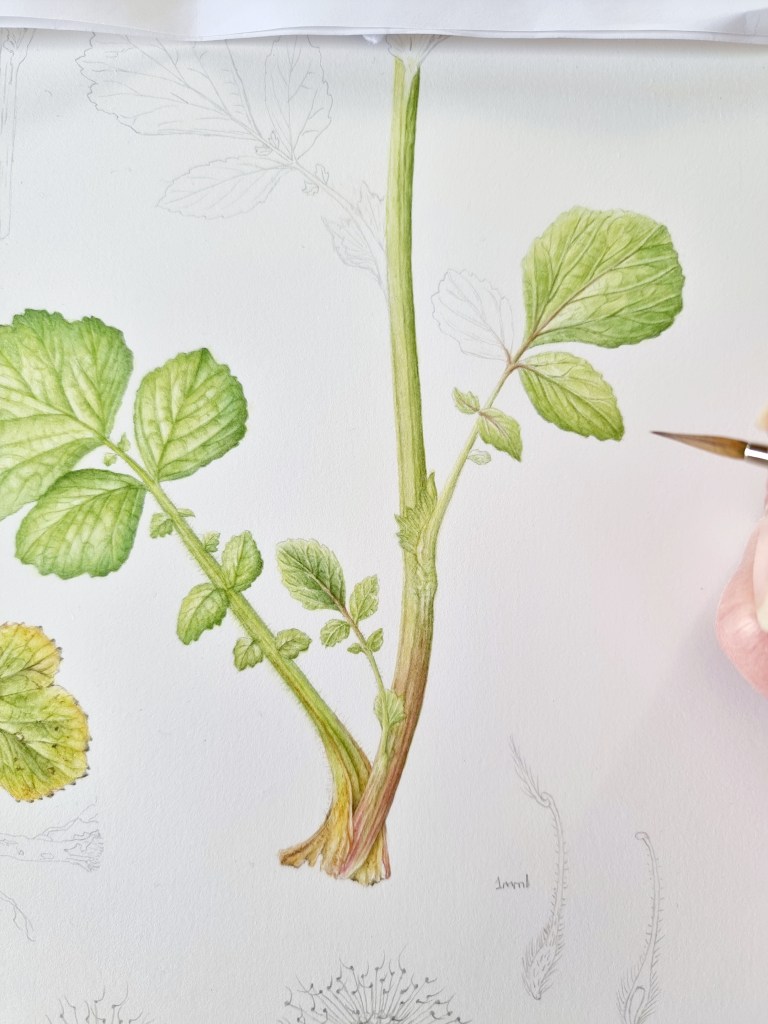
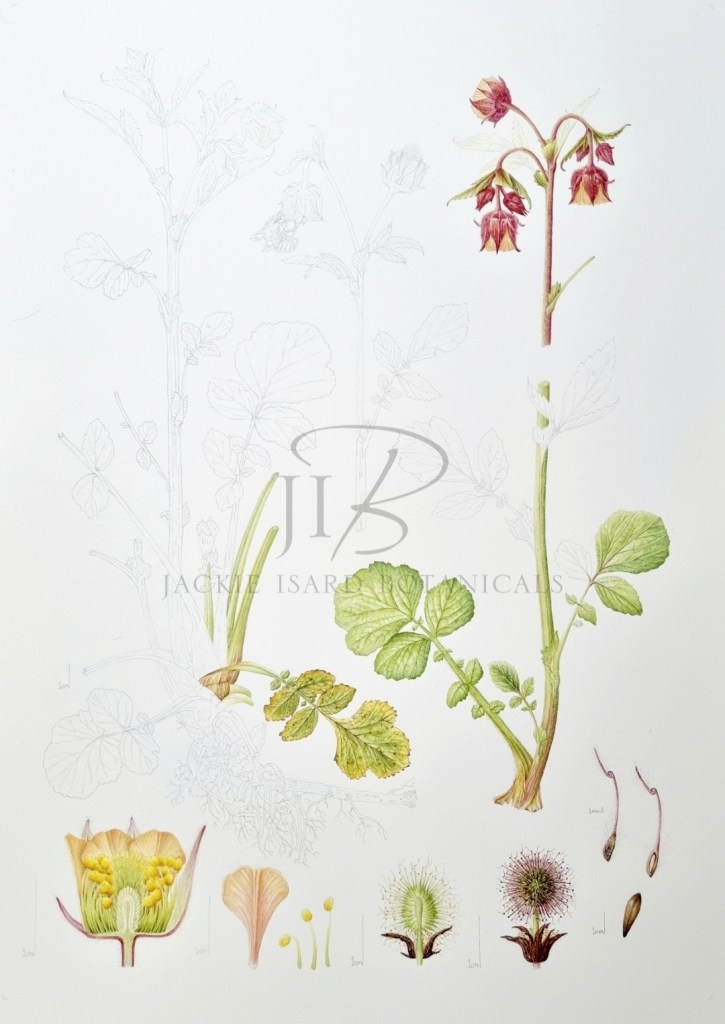
Last week I started preparing sketchbook studies and botany notes for the fourth plant, Geum rivale – Water Avens. What a gorgeous little plant! It has delicate nodding flower heads and beautifully shaped leaves. Very much overlooked I think.
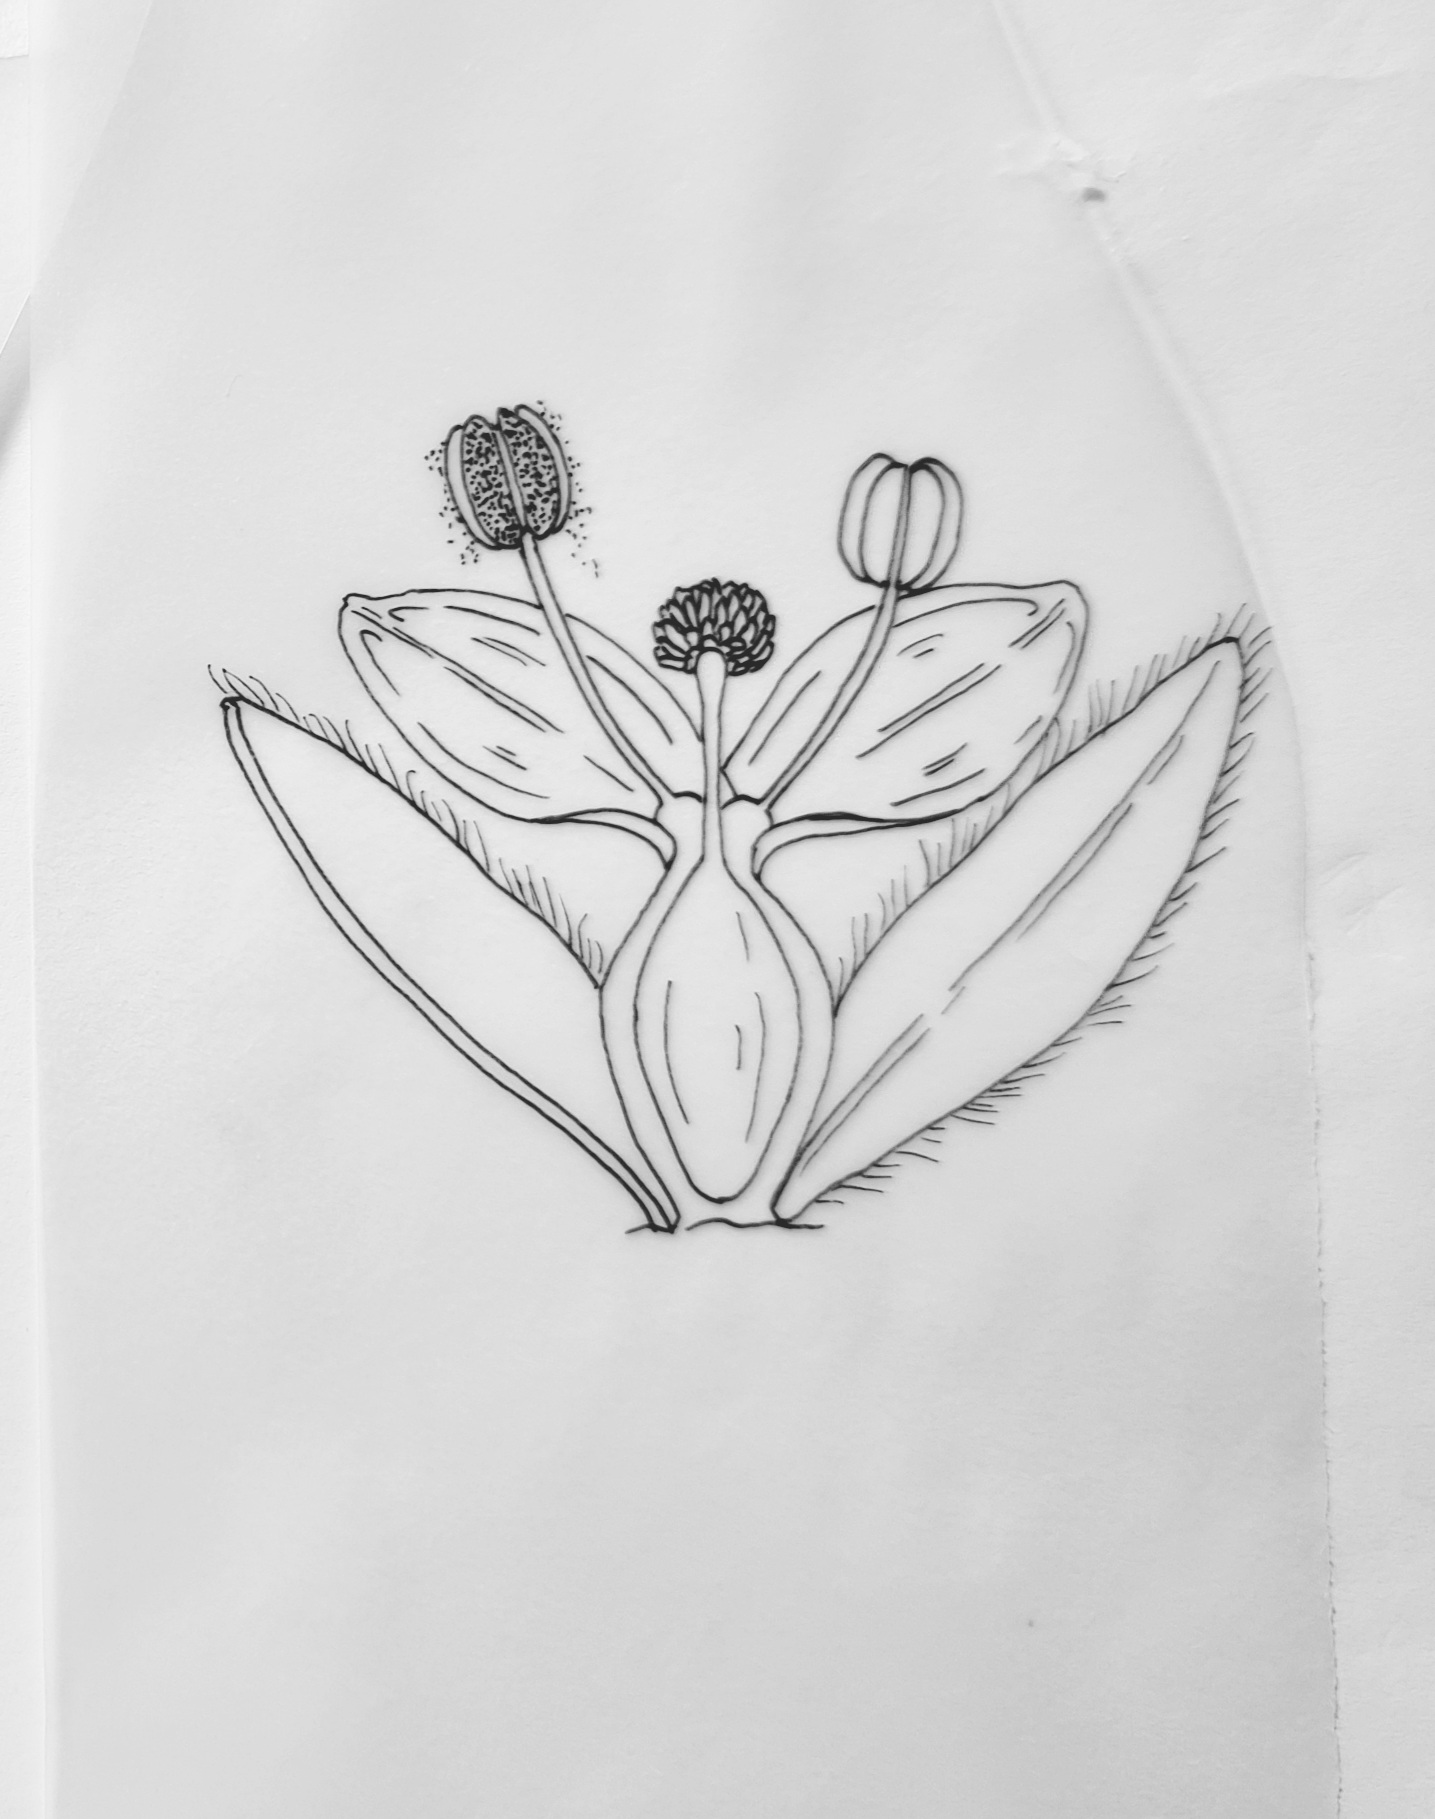
This plant has a very interesting botany. Quite different to the other plants I have studied. So much is learned about botany when dissecting and studying plants. I’ve really got into it! Like Cardamine pratensis it has different shaped basal leaves. They are more rounded at the top with leaflet pairs running down the stem. Quite attractive! It’s also very hairy in places and has hundreds of stamens all enveloped beneath 5 petals. There will be lots of fine details on this one. Here are some microscope images of the stigma (of which there are many too!), stamens and hairy buds…
So far I’ve dissected a young flower head, drawn up a budded branch, a flowering branch and one of the basal leaves. This is my drawing to date. I love the shape of those leaves! This will be a tough one to draw accurately. So much botany going on!
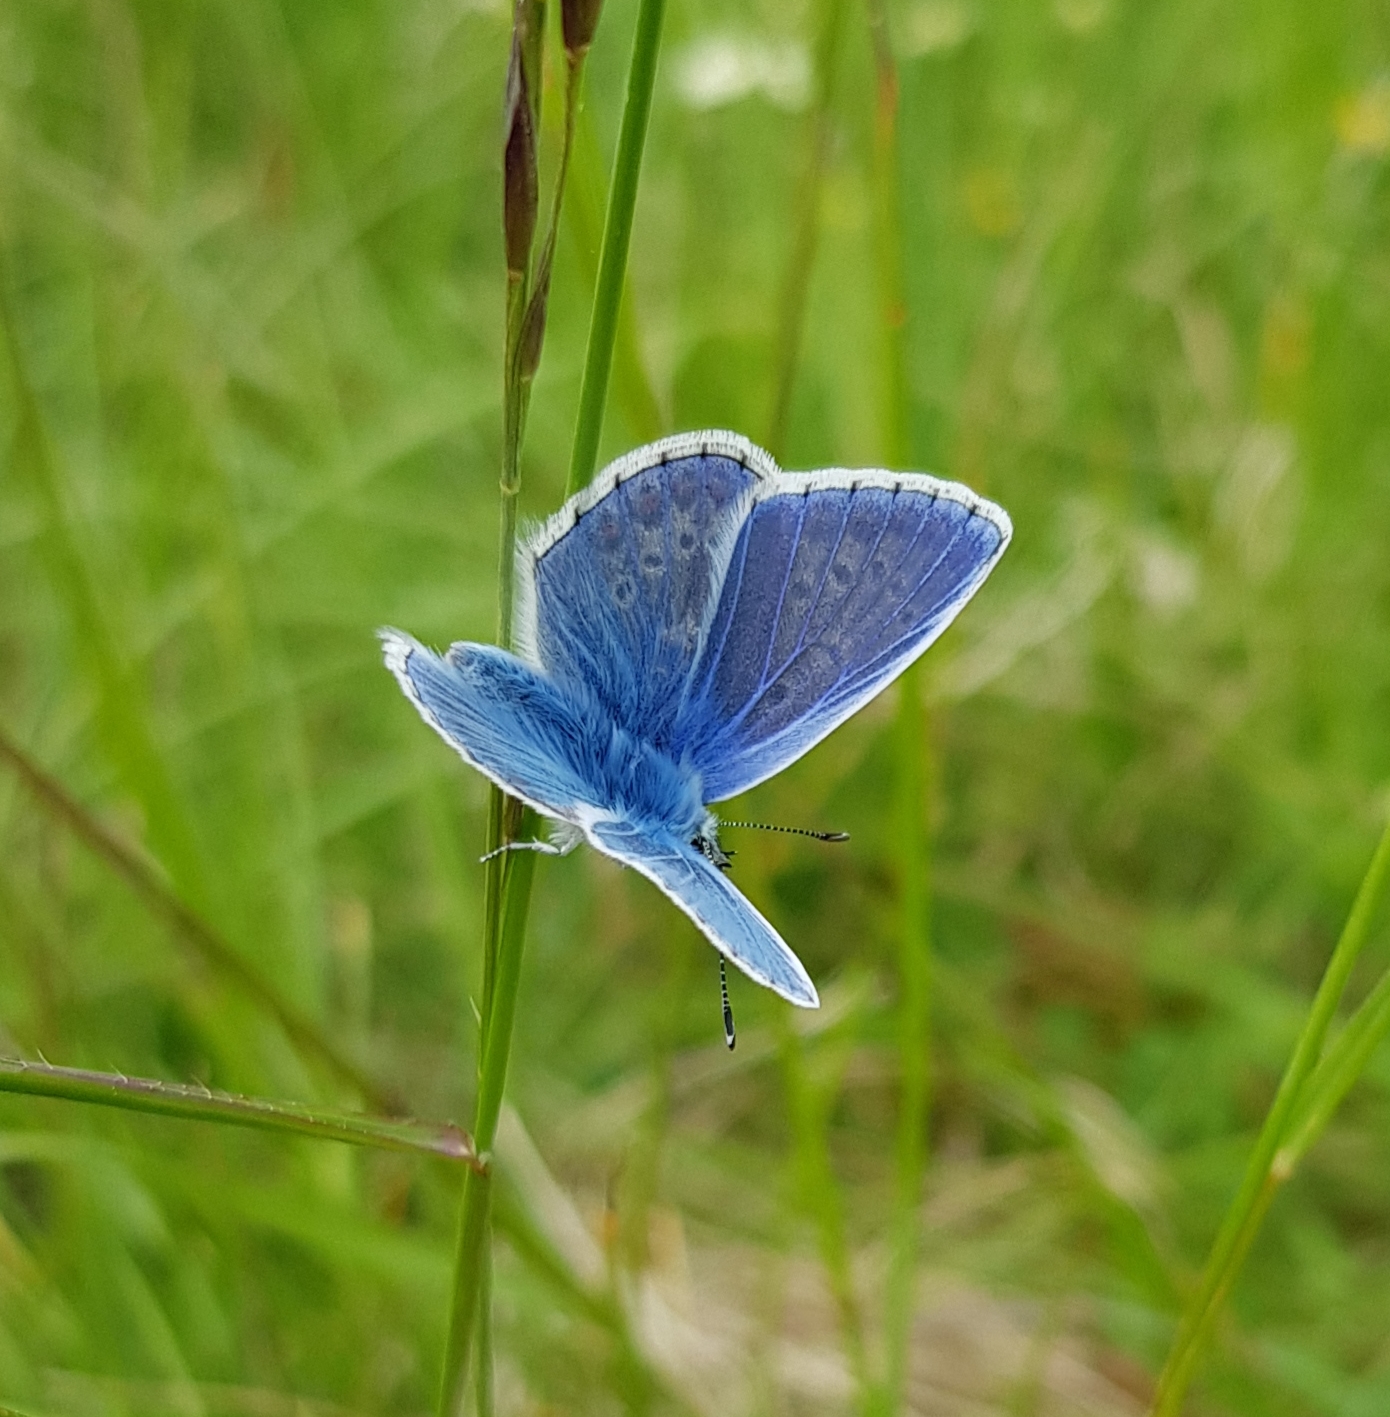
I have chosen to include pollinators in my work and a lot of research has gone into finding suitable insects for each plant in my series. It is important for me to make the insects to be relevant to the plants. You won’t believe how long this research takes! Below is a photo of a Common Blue which I took in Alveston, beautiful!
For my final 6 plant choices I have included two options for the last one. This is because it’s always good to have a back up. I have chosen 5 butterflies, a bee and a hover fly. They all use one of my chosen plants as either a larval food plant or for feeding. The butterflies are the Orange Tip, Marsh Fritillary, Wood White Common Blue and a large Scarce Blue.
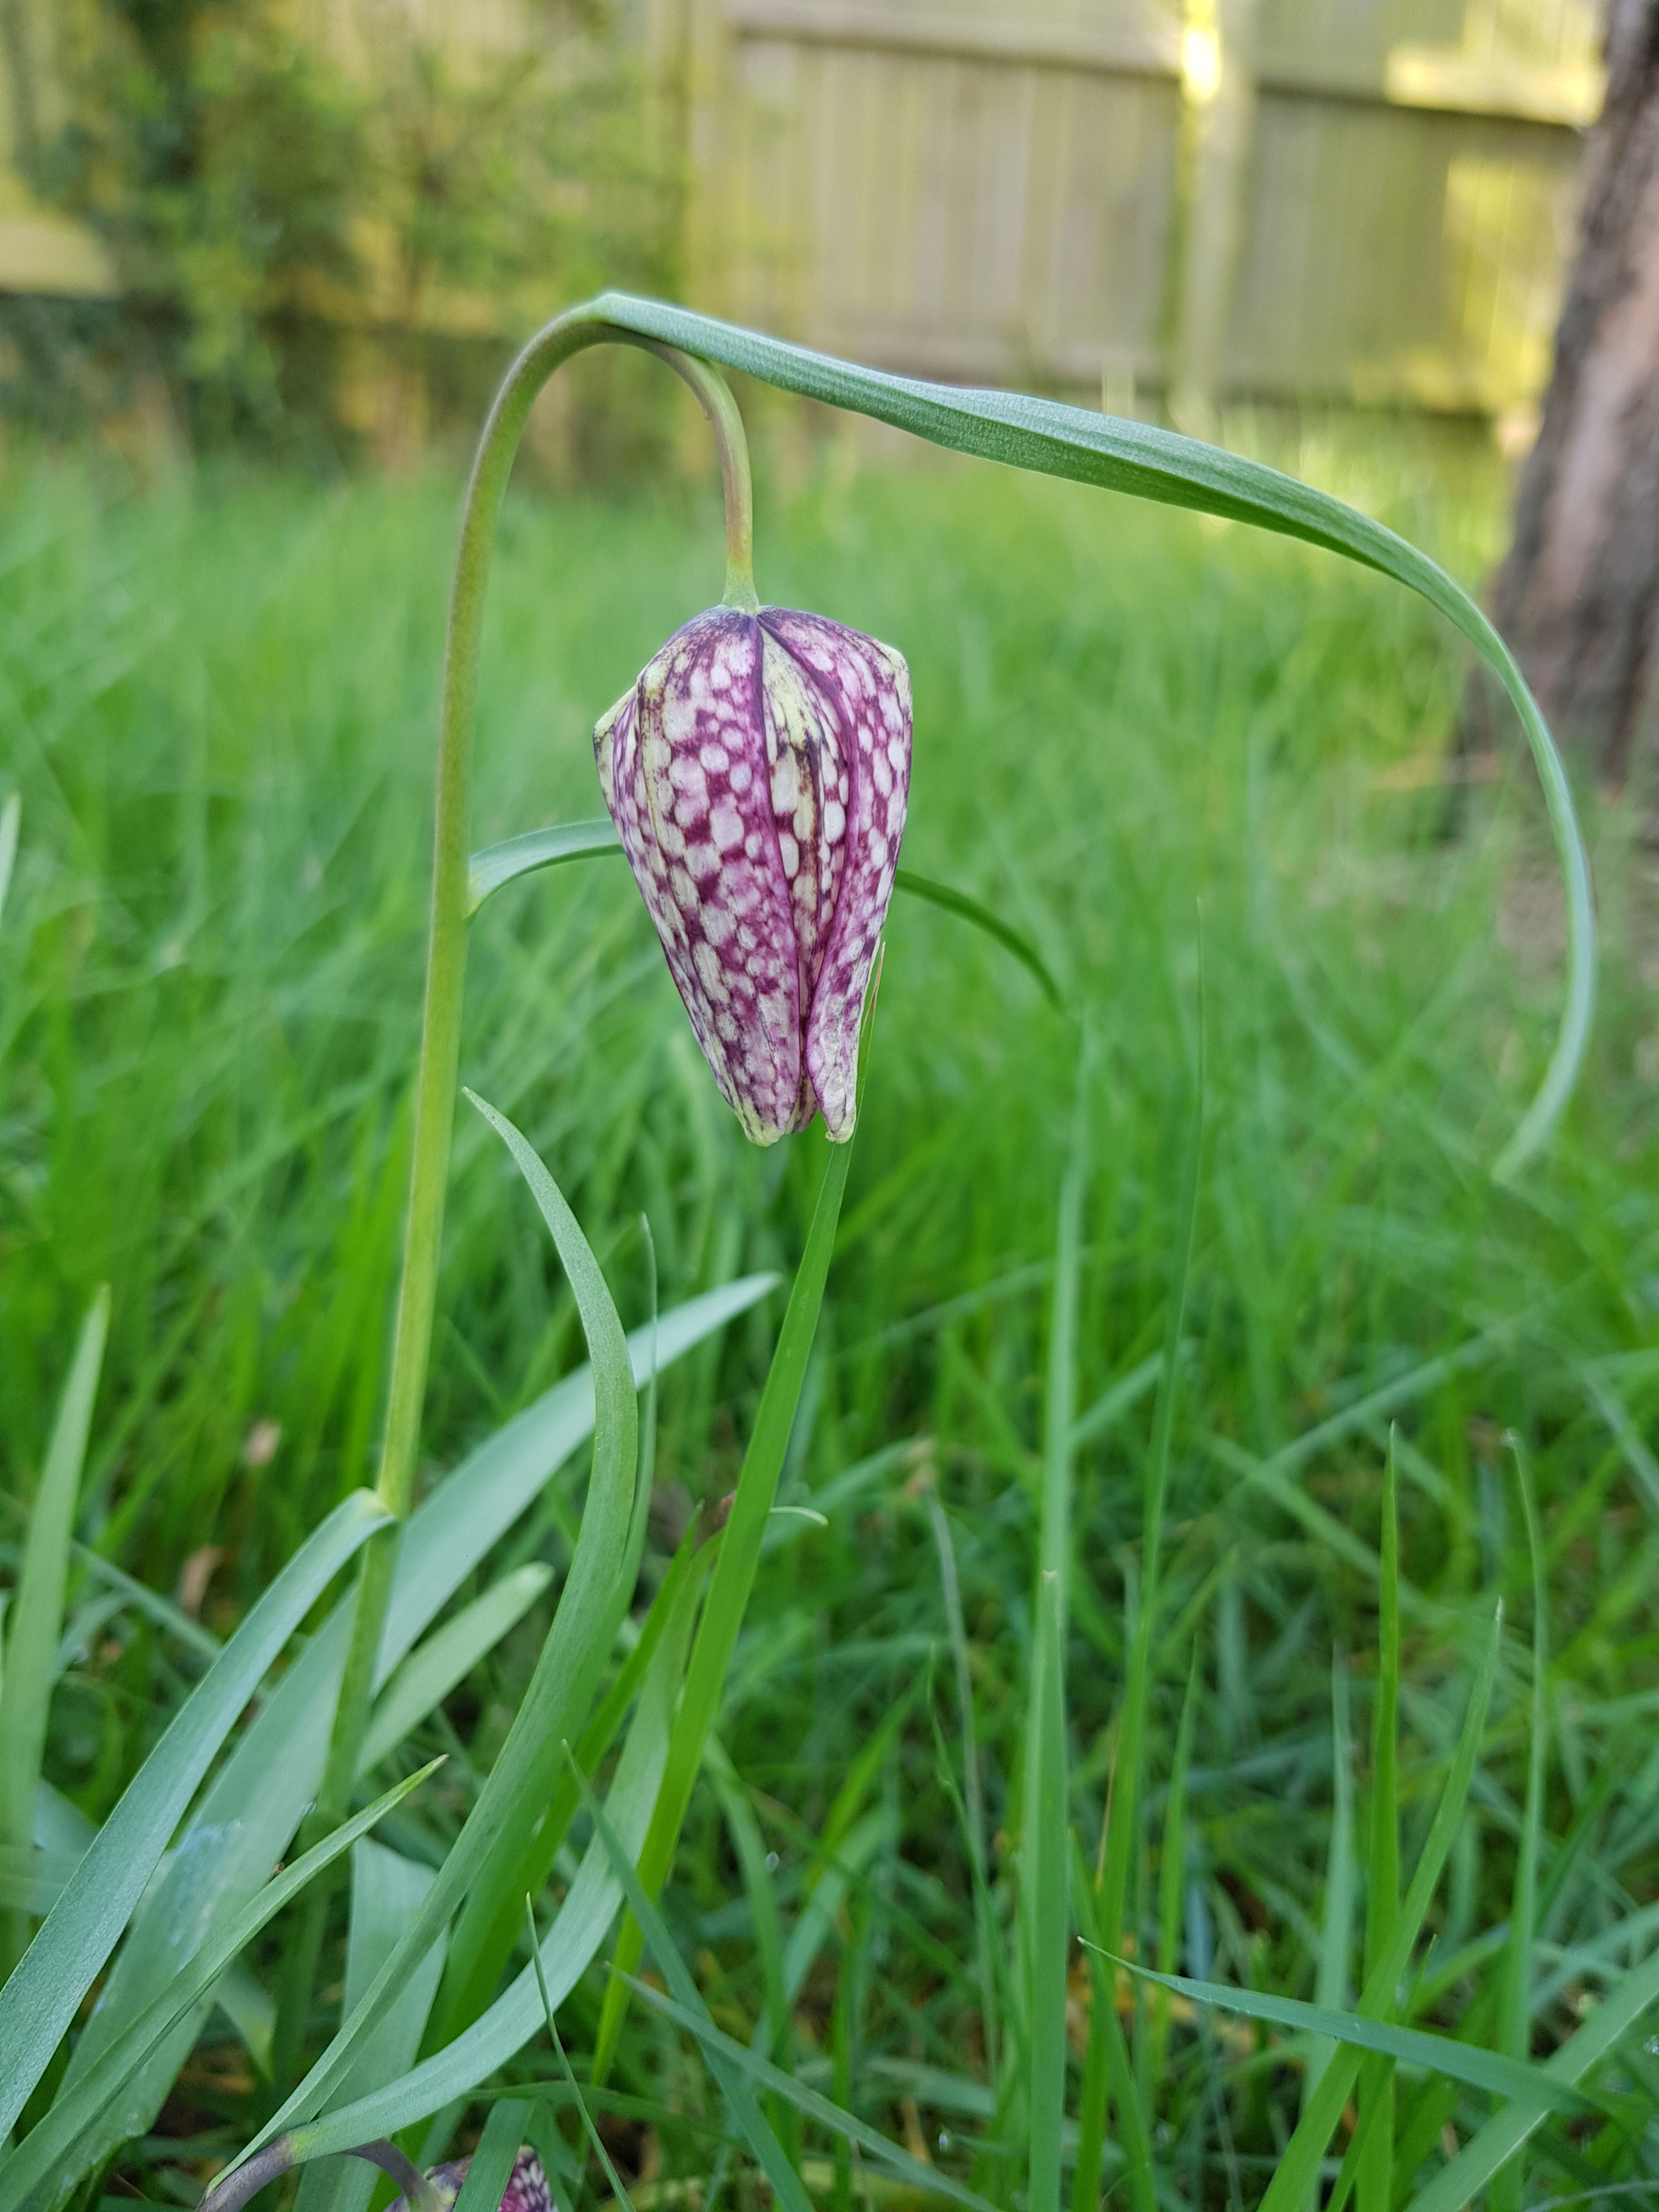
This weekend I was taken on a surprise trip to a Nature Reserve by my son. I’ve been wanting to visit this place since I discovered it late last year. It is a farm in Cricklade called Lower Moor Farm. There are many fields of meadow flowers and wet meadow plants too! Although too early in the season to see the meadows in full swing, I did see evidence of plants beginning to peep through. My heart sings when I visit these places which really helps with the intense work I’ve had to carry out. I hope to view some of my chosen plants in another natural habitat later in the year when I visit again. I also wanted to see the Snake’s-Head Fritillary which are growing wild at North Meadow Cricklade not far from Lower Moor Farm. The fields of North Meadow are protected as this species is now very rare in the wild. Unfortunately, we were a little premature as they were only just starting to grow. Another visit is planned for Easter weekend to see it in its full glory.
This plant is actually not a British native species otherwise I may have chosen it as one of my Wet Meadow species. It’s a shame because it is a much loved flower to paint by Botanical artists! I have planted some in my garden wild areas which are flowering already …perhaps because the weather is milder in Bristol than North Meadow.
So, from here I must carry on with my Water Avens studies and composition ready to begin painting soon. Three of my plants will be flowering between April and June so time will be short! I’ll be back later in the Summer with more news and to show you how I’m getting on, plus some more meadow visit photos.
Until then Easter is just around the corner, so enjoy all that chocolate!
Jackie Isard Botanicals – Mixing Colour Accurately for Watercolour for Botanical
A course for those who struggle to mix accurately with watercolour! Learn how to mix watercolour accurately using primaries. You’ll be amazed at what can be achieved with practice and you won’t need to buy so many pigments!
THIS IS A COURSE YOU CAN JOIN AT ANY TIME! Private message me on Facebook or email me to Register, please – jackieisard@googlemail.com.
This course is for Beginners and Intermediate students. The course contains a lot of exercises, detailed course notes, pre-recorded video tutorials and a dedicated Secret Facebook Group, all designed and created by your tutor Jackie Isard. It concentrates on mixing with primaries and aims to help you ‘see‘ colour more easily whilst building your confidence in colour mixing. It’s definitely not another course with endless colour charts!
Details of the course:
• A course designed to help you ‘see’ colour more easily and build your confidence with colour selection and application
• No endless charts!
• A listed palette of pigments to buy (Winsor & Newton professional watercolours). A very versatile palette of pigments!
• Learn how pigments work
• Many exercises that teach you how to mix accurately.
• Detailed notes and pre-recorded video tutorials
• Develop a structured way to test colours and mixing possibilities
• Understand which pigments to choose for vibrant mixes and subdued tones
• Practical tasks for a better understanding of colours and what they do
• Patient online appraisal at every stage throughout the course
• A dedicated student group page to share and learn
• A final appraisal letter and certificate
The course exercises can be done in your own time. We will cover pigment qualities, warm and cool pigments, those difficult greens, botanical greys (we touch on this, there is more detail in my book ‘Watercolour Mixing Techniques for Botanical Artists’), mixing purely with primaries and neutral beige/brown tones for those beautiful Autumn colours. Learn from the pre-recorded video tutorials and there are a couple specifically for beginners. You will be added to a hidden Facebook Group where the video tutorials are held. In this group you can view other students work, find useful tips and post your work for appraisal if you choose to (personal appraisal is always done via private messenger, not publically). One-to-one tuition and help is always on hand and you will never have to wait long for a response. It is important to me that every student is given the attention and help they need to ensure they have a successful and rewarding journey throughout the course.
Exercises include making a few small reference charts, matching swatch colours, mixing with cool and warm primaries and many other useful tips/exercises from which you will learn how to ‘see‘ and mix colour more accurately.
I am always available on Facebook Private Messenger or Email (unless I’m asleep!) to answer any questions you have during the course. Please bear in mind the time difference if you are overseas! I appraise your work as you complete each of the Lesson exercises and give you a personalised final appraisal at the end of the course. You will also receive a graded certificate for your efforts!
Lantana montevidensis colour matching by student Raashmi
Some student reviews:
“I wanted to learn from Jackie the day I first saw a pic of her painting on FB. Her painting was highly detailed and showed a certain sensitivity to colour. Fortunately for me, Jackie announced an online course a few days later. I paid up for the ‘Mixing colour accurately course’ but was a bit skeptical of learning online. Having completed the course, my doubts stand dispelled. The course content, the exercises and the patient online appraisal of the exercises by Jackie, all made for good learning. I recommend the course to anyone on a tight budget. It has taught me a structured way to test a colour and it’s mixing possibilities.” Raashmi
“Mixing colour accurately is exactly what this course has taught me and a most enjoyable process too. Very much a novice, the notes were clear and easy to follow. The feedback was prompt and very helpful. All in all – Brilliant, Thanks Jackie” Sylvia
“At last! I now approach colour mixing in a more organised and knowledgeable way. I now search for ‘many’ colours within a plant and have gained the confidence to closely match them. This course should be compulsory for all Botanical artists. Jackie is a knowledgeable and encouraging tutor who responds quickly to your questions and posts on the dedicated group page.” Christine
“Thank you for the very clear instructions, I read them all and watch all the videos, they are all very useful and easy to follow. Jackie Isard you are great artist and a great teacher too!” Mari
“I am very pleased with this course! After all the exercises and tasks, I finally began to see colour and understand how to mix it. I liked the fact that I had not only charts of colours but even in the end practical tasks for a better understanding of colour on real leaves and flowers. Separately it will highlight the fact that Jackie responded very quickly to questions and supported me throughout the course. I highly recommend this course to anyone who wants to learn how to mix watercolour accurately for botanical” Svitlana
“The course material for this colour mixing course is structured, interesting and clear. The exercises explained well and the extra videos and Facebook group tips are a bonus. I have learned to look further than ‘first sight’ when looking at a plant. A green leaf is not just green but a myriad of green tones and hues. What I most appreciated was Jackie’s personal support and the speedy replies with appraisal. It is an important motivator when working online.” Hilde
Payment can be made via PayPal, details will be sent on Registration. The fee is £105 UK and Internationals. If you do not have PayPal, it’s really simple to set up online. Just visit www.paypal.com. Bank transfer is only available using a UK bank account.
Please contact me by email or Facebook private messenger for Registration details!
Great news received March 2021!
My first published book has arrived in the UK! So exciting! More details below.
Watercolour Mixing Techniques for Botanical Artists
A practical guide to accurate watercolour mixing with primaries for botanical artists
Colour mixing is a key skill for the botanical artist. In this practical guide, Jackie Isard explains how to observe and use colour accurately. She shows artists how to make informed choices when selecting pigments, as well as how to learn about colour mixing and its application. • Gives detailed instruction and advice on understanding colour and pigments • Explains how to ‘see’ colour and tricky mixes, from greens and reds to the difficult botanical greys • Includes advanced colour application techniques – colour enhancement, shadow colours and colour temperature transition • Step-by-step guides illustrate how to paint with layers, how to use underlaying colours to enhance, and colour and fine detailing
Order online via major book shops or Amazon. Published by The Crowood Press Ltd
Arriving 22nd March 2021, USA arrival October 2021. E-books are also be available worldwide.
Then do look out for my New online course coming in January 2019!
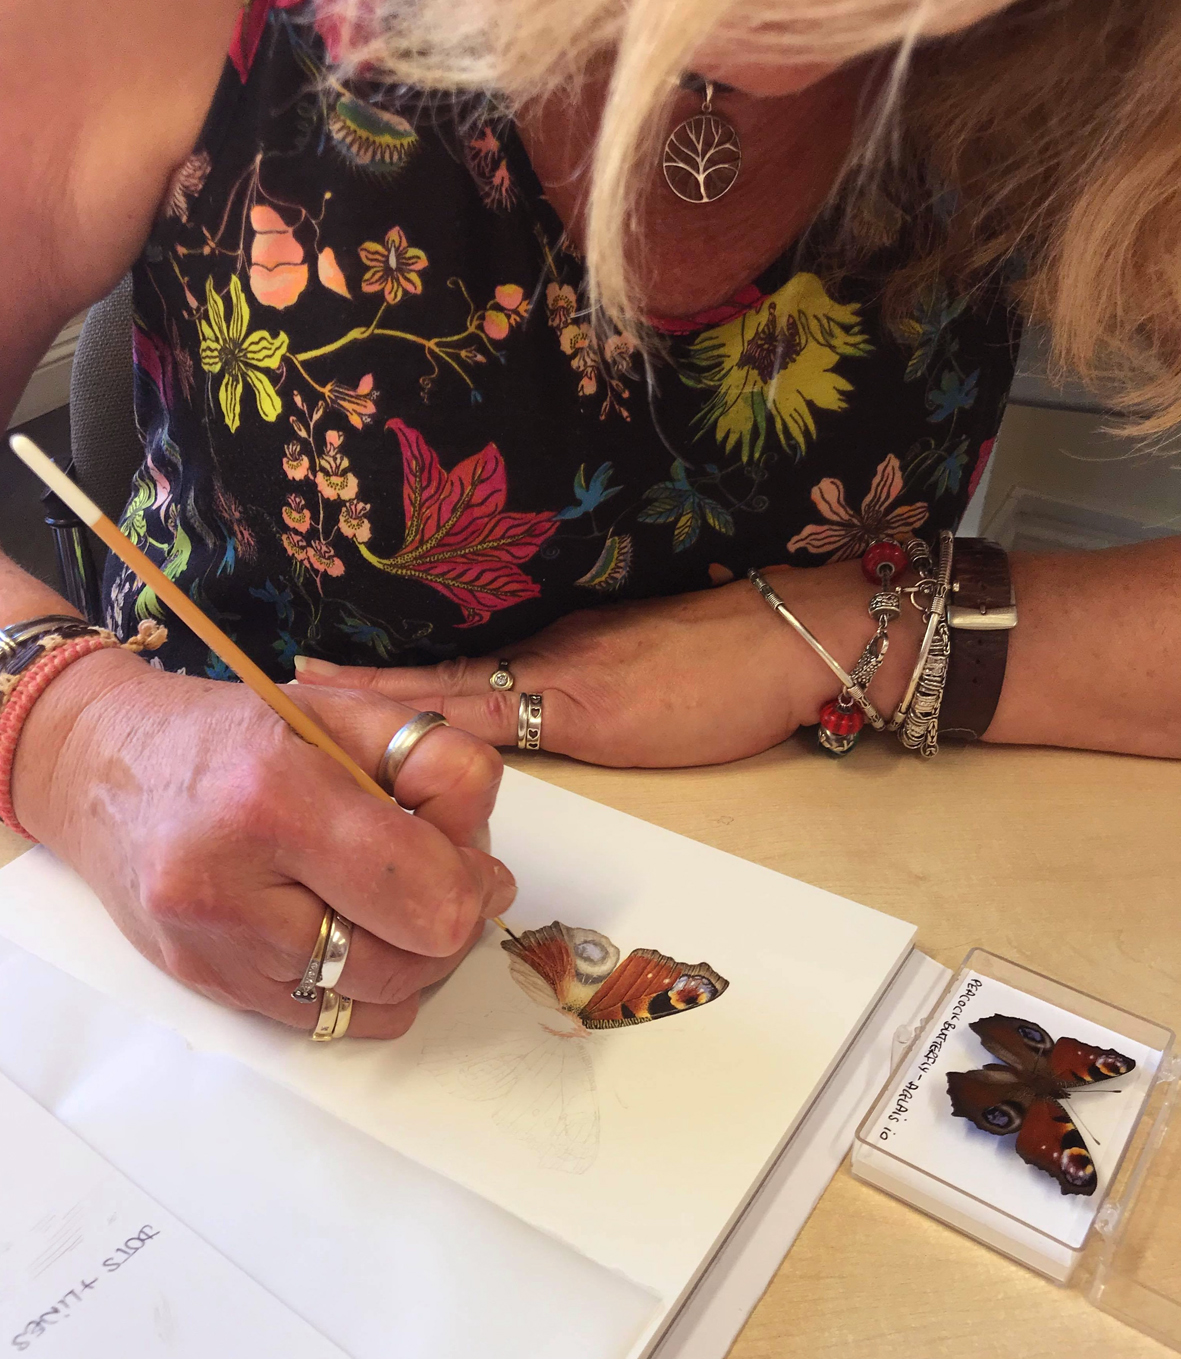
The Peacock is one of my favourite butterflies. The patterns and colours are just so stunning. We’ve seen a lot of butterflies this year as there’s been so much sunshine. Come and learn to paint one of the UK’s most beautiful pollinators with me, yes they are pollinators!
I will take you through the stages and teach you the techniques to create your very own Peacock Butterfly watercolour painting. You will learn how to mix the vibrant colours needed and how to add those incredibly fine details. There will be instructive videos to help you throughout the course. Watercolour painting skills essential please. Not for absolute beginners.
Pop over to my Jackie Isard Botanicals page to see the Event date then private message me if you would like to join. Payment can be made through PayPal. The course fee is £75 UK and £85 Internationals. The difference is purely due to postage cost. For more details on how to register Private Message me on Facebook or email me.